Table of Contents
Advertisement
Available languages
Available languages
KD-R731BT
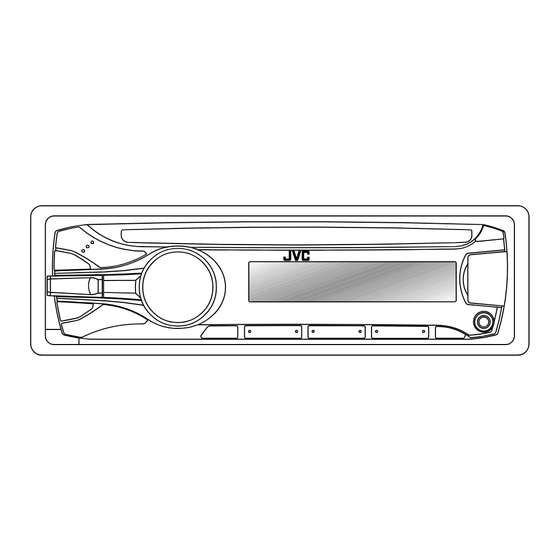
CD RECEIVER / RÉCEPTEUR CD
For canceling the display demonstration, see page 4. /
Pour annuler la démonstration des affichages, référez-vous à la page 4.
For installation and connections, refer to the separate manual.
Pour l'installation et les raccordements, se référer au manuel séparé.
INSTRUCTIONS
MANUEL D'INSTRUCTIONS
ENGLISH
FRANÇAIS
GET0779-003A
[E/EN/EU]
Advertisement
Chapters
Table of Contents

Subscribe to Our Youtube Channel
Related Manuals for JVC KD731BT


Summary of Contents for JVC KD731BT
- Page 1 ENGLISH FRANÇAIS KD-R731BT CD RECEIVER / RÉCEPTEUR CD For canceling the display demonstration, see page 4. / Pour annuler la démonstration des affichages, référez-vous à la page 4. For installation and connections, refer to the separate manual. Pour l’installation et les raccordements, se référer au manuel séparé. INSTRUCTIONS MANUEL D’INSTRUCTIONS GET0779-003A...
- Page 2 Thank you for purchasing a JVC product. Please read all instructions carefully before operation, to ensure your complete understanding and to obtain the best possible performance from the unit. IMPORTANT FOR LASER PRODUCTS 1. CLASS 1 LASER PRODUCT 2. CAUTION: Do not open the top cover. There are no user serviceable parts inside the unit;...
-
Page 3: Table Of Contents
How to attach/detach the Contents control panel Preparation ............4 Canceling the display demonstration Setting the clock Basic operations ........... 4 Radio ................ 6 CD/USB ..............8 How to reset your unit iPod/iPhone ............. 9 Your preset adjustments will Quick Search ............10 also be erased. -
Page 4: Preparation
Preparation Preparation Canceling the display Setting the clock demonstration (Hold) The display demonstration is always turned on unless you cancel it. 2 Select <CLOCK>. (Hold) 3 Select <CLOCK SET>. (Initial setting) 3 Select <DEMO OFF>. 4 Adjust the hour. 4 Press MENU to exit. (Initial setting) 5 Adjust the minute. - Page 5 Basic operations Control panel Remote controller Control dial Display window Loading slot Ejects the disc Detaches the panel AUX input jack USB input terminal Remote sensor Aim the remote controller directly at the sensor. DO NOT expose to bright sunlight. When you press or hold the following button(s)...
-
Page 6: Radio
Radio Radio Searching for a station Select <FM> or <AM>. Auto search. (Press) Manual search. (Hold) “M” flashes, then press the button repeatedly. “ST” lights up when receiving an FM stereo broadcast with sufficient signal strength. Storing stations in memory Selecting a preset station Manual presetting You can preset up to 18 stations for FM and 6... -
Page 7: Tracking The Same Programme
Radio NEWS Standby Reception The following features are available only for FM Radio Data System stations. (Hold) Searching for your favorite <TUNER> Programmes—Programme <NEWS-STBY> Type (PTY) Search <NEWS ON> The unit will temporarily switch to News (Hold) Programme if available. If the volume is adjusted during reception of Traffic Announcement or News, the adjusted 2 Select a PTY code. -
Page 8: Cd/Usb
CD/USB CD/USB Playing a CD/USB device USB input terminal Label side USB 2.0 cable (not supplied) USB cable from the rear of the unit The source changes to “CD” and playback starts. The source changes to “USB” and playback starts. This unit can play MP3/WMA files stored in CD-R, CD-RW, and MP3/WMA/WAV files in USB mass storage device (such as a USB memory and Digital Audio Player). -
Page 9: Ipod/Iphone
“ALBUM RND” is not applicable for some iPod/ Applicable under <HEAD MODE> only. iPhone. iPod/iPhone application You can operate JVC original application with this 2 Select the desired list. unit in <APP MODE>. For more details, visit JVC website: <http://www3.jvckenwood.com/ english/car/index.html> (English website only). PLAYLISTS ARTISTS ALBUMS... -
Page 10: Quick Search
Quick Search Quick Search If you have many folders/tracks/contacts, you can search through them quickly according to the first character (A to Z, 0 to 9 and OTHERS). 1 Enter list menu or “Hands-Free” menu. CD (MP3/WMA)/ iPod/iPhone Bluetooth phonebook USB (MP3/WMA/WAV) Select <PHONEBOOK>. -
Page 11: Bluetooth Connection
(supplied) USB cable from the rear of the unit 2 Search and select “JVC Unit” on the Bluetooth device. “BT PAIRING” flashes on the display. For some Bluetooth devices, you may need to enter the Personal Identification Number (PIN) code immediately after searching. -
Page 12: Connecting/Disconnecting Registered Device Manually
Bluetooth connection 3 Perform (A) or (B) depending on what scrolls on the display. For some Bluetooth devices, pairing sequence may vary from the steps described below (A) If “[Device Name]” “XXXXXX” (B) If “[Device Name]” “VOL – YES” “BACK – NO” scrolls on the display, “VOL –... -
Page 13: Bluetooth Mobile Phone
Connecting to JVC original Deleting a registered device application (Hold) JVC original application is designed to view JVC car receiver status and perform simple control operations on Android smart phones. 2 Select <DELETE YES>. For JVC original application operations, visit JVC <BLUETOOTH>... - Page 14 Bluetooth mobile phone Adjustments during a call Text message notification Phone volume (00 — 50) When a text message is received, the unit rings [VOLUME 15]: Volume and “RCV MESSAGE” “[Device name]” appears. adjustments made during a call <MSG NOTICE> must be set to <ON>. will not affect the other page 16) sources.
-
Page 15: Using Voice Recognition
Bluetooth mobile phone Making a call from memory If two phones are connected, Select the desired phone Enter “phone list” You can store up to 6 contacts in the memory of (Hold) this unit for speed dialing. To store contacts in memory 1 Enter the “Hands-Free”... -
Page 16: Using The Settings Menu
Bluetooth mobile phone Using the SETTINGS menu 3 Repeat this step to perform the necessary 1 Enter the “Hands-Free” menu. settings. 2 Select <SETTINGS>. To return to the previous menu, press To exit from the menu, press MENU. The following settings are applicable to the paired device. If another device is paired, perform the settings again. -
Page 17: Bluetooth Audio Player
Bluetooth audio player Bluetooth audio player Playing a Bluetooth audio player Select <BT REAR> or <BT FRONT> depending on the location of the USB Bluetooth adapter KS-UBT1. Operate the Bluetooth audio player to start playback. Operations and display indications may differ according to their availability on the connected device. Basic operations Selecting the playback modes Starts or resumes playback. -
Page 18: Illumination Color Adjustments
Illumination color adjustments Button zone Display zone All zone: Includes both Button zone and Display zone. All zone Selecting the preset color Storing your own adjustments You can select a preset color for <BUTTON You can store your own day and night colors for ZONE>, <DISP ZONE>, and <ALL ZONE>... -
Page 19: Brightness Adjustments
Brightness adjustments Brightness adjustments You can select your preferred brightness for <BUTTON ZONE>, <DISP ZONE> separately. (Hold) <DIMMER> BUTTON ZONE BUTTON 00 to 31 <BRIGHTNESS> DISP ZONE DISP 00 to 31 <DAY>/<NIGHT> 4 Press MENU to exit. Sound adjustments This unit memorizes sound settings adjusted for each individual source. Selecting the preset sound Pro Equalizer You can select a preset sound mode, for each... -
Page 20: Menu Operations
Menu operations Menu operations 3 Repeat step 2 if necessary. (Hold) To return to the previous menu, press To exit from the menu, press DISP or MENU. If no operation is done for about 60 seconds, the operation will be canceled. Menu item Selectable setting (Initial: [XX]) DEMO... - Page 21 Menu operations Menu item Selectable setting (Initial: [XX]) VOL ADJUST -05 — +05 [00]: Presets the volume adjustment level of each source, (Volume adjust) compared to the FM volume level. Before adjustment, select the source you want to adjust. (“VOL ADJ FIX” appears if “FM” is selected.) L/O MODE Select if the REAR/SW terminals are used for connecting the speakers or (Line output...
- Page 22 INFORMATION PH CNNT DEV/AU CNNT DEV/APP CNT DEV *14: Displays connected phone/audio/application device name. MY BT NAME: Displays the unit name (JVC Unit). MY ADDRESS: Shows address of USB Bluetooth Adapter. AM *15 [ON]/OFF: Enables or disables “AM” in source selection.
-
Page 23: Remote Controller
Remote controller Remote controller Warning: Preparing Do not install any battery other than CR2025 or When you use the remote controller for the first its equivalent. time, pull out the insulation sheet. Do not leave the remote controller in places (such as dashboards) exposed to direct sunlight for a long time. -
Page 24: About Usb Device
Additional information About audio files About USB device Playable files When connecting a USB cable, use the USB 2.0 cable. File extensions: MP3(.mp3), WMA(.wma), You cannot connect a computer or portable WAV(.wav) HDD to the USB input terminal of the unit. For MP3/WMA discs: Connect only one USB device to the unit at a Bit rate:... -
Page 25: About Bluetooth
“Made for iPod” and “Made for iPhone” mean operations may not be performed correctly or that an electronic accessory has been designed as intended. In this case, visit the following JVC to connect specifically to iPod, or iPhone, website: respectively, and has been certified by the <http://www3.jvckenwood.com/english/car/... -
Page 26: Troubleshooting
RESET UNIT”/“WARNING CHK with tape before resetting the unit. ( page 3) WIRING THEN RESET UNIT” If the message does not disappear, consult your JVC car audio appears on the display and no dealer or kits supplying company. operations can be done. - Page 27 “HW ERROR” appears on the Reset the unit and try the operation again. If “HW ERROR” display. appears again, consult your nearest JVC car audio dealer. “BT DEVICE NOT FOUND” The unit failed to search for the registered Bluetooth devices appears on the display.
-
Page 28: Specifications
Specifications Specifications AUDIO AMPLIFIER SECTION Maximum Power Output 50 W per channel Continuous Power Output (RMS) 20 W per channel into 4Ω, 40 Hz to 20 000 Hz at less than 1% total harmonic distortion. Load Impedance 4Ω (4Ω to 8Ω allowance) Frequency Response 40 Hz to 20 000 Hz Signal-to-Noise Ratio... - Page 29 Specifications GENERAL Power Requirement (Operating Voltage) DC 14.4 V (11 V to 16 V allowance) Grounding System Negative ground Allowable Operating Temperature 0°C to +40°C Dimensions Installation Size approx. 182 mm × 52 mm × 158 mm (W × H × D) Panel Size approx.
- Page 30 Merci pour avoir acheté un produit JVC. Veuillez lire attentivement toutes les instructions avant d’utiliser l’appareil afin de bien comprendre son fonctionnement et d’obtenir les meilleures performances possibles. IMPORTANT POUR PRODUITS LASER 1. PRODUIT LASER CLASSE 1 2. ATTENTION : N’ouvrez pas le couvercle supérieur. Il n’y a aucune pièce réparable par l’utilisateur à...
- Page 31 Comment attacher/détacher le Table des matières panneau de commande Préparation ............4 Annulation des démonstrations des affichages Réglage de l’horloge Opérations de base ..........4 Radio ................ 6 Comment réinitialiser votre appareil CD/USB ..............8 Vos ajustements préréglés iPod/iPhone ............9 sont aussi effacés.
-
Page 32: Préparation
Préparation Préparation Annulation des démonstrations Réglage de l’horloge des affichages (Maintenez Les démonstrations d’affichage sont toujours pressée) activées sauf si vous les annulez. 2 Choisissez <CLOCK>. (Maintenez pressée) 3 Choisissez <CLOCK SET>. (Réglage initial) 3 Choisissez <DEMO OFF>. 4 Ajustez les heures. 4 Appuyez sur MENU pour quitter. - Page 33 Opérations de base Panneau de commande Télécommande Molette de commande Fenêtre d’affichage Fente d’insertion Éjection d’un disque Retrait du panneau Prise d’entrée AUX Prise d’entrée USB Capteur de télécommande Visez la télécommande directement en direction du capteur. N’EXPOSEZ PAS à la lumière directe du soleil. Quand vous appuyez ou maintenez pressées les touches suivantes...
-
Page 34: Radio
Radio Radio Recherche d’une station Choisissez <FM> ou <AM>. Recherche automatique. (Appuyez sur la touche) Recherche manuelle. (Maintenez pressée) “M” clignote, puis appuyez sur la touche répétitivement. “ST” s’allume lors de la réception d’une émission FM stéréo avec un signal suffisamment fort. Sélection d’une station préréglée Mémorisation de stations Préréglage manuel... - Page 35 Radio Attente de réception Les fonctionnalités suivantes sont d’informations accessibles uniquement pour les stations FM Radio Data System. (Maintenez pressée) Recherche de vos programmes <TUNER> préférés—Recherche par type <NEWS-STBY> <NEWS ON> de programme (PTY) L’appareil sera temporairement commuté sur le programme d’informations, si disponible.
-
Page 36: Cd/Usb
CD/USB CD/USB Lecture d’un CD/périphérique USB Prise d’entrée USB Face de l’étiquette Câble USB 2.0 (non fourni) Câble USB à partir de l’arrière de l’appareil La source change en “CD” et la lecture démarre. La source change en “USB” et la lecture démarre. Cet appareil peut reproduire les fichiers MP3/WMA contenus dans un CD-R, un CD-RW et des fichiers MP3/WMA/WAV contenus dans un périphérique USB à... -
Page 37: Ipod/Iphone
“ALBUM RND” n’est pas applicable à certains iPod/iPhone. 2 Choisissez la liste souhaitée. Application iPod/iPhone Vous pouvez exécuter une application originale de JVC avec cet appareil dans <APP MODE>. Pour plus de détails, veuillez vous rendre sur le site Web de PLAYLISTS ARTISTS ALBUMS SONGS JVC : <http://www3.jvckenwood.com/english/car/... -
Page 38: Recherche Rapide
Recherche rapide Recherche rapide Si vous avez beaucoup de dossiers/plages/contacts, vous pouvez les parcourir rapidement en saisissant le caractère initial (A à Z, 0 à 9 et OTHERS). 1 Accédez au menu de la liste ou au menu “Mains libres”. CD (MP3/WMA)/ iPod/iPhone Répertoire d’adresses... -
Page 39: Connexion Bluetooth
(fourni) Câble USB à partir de l’arrière de l’appareil 2 Cherchez et sélectionnez “JVC Unit” sur le périphérique Bluetooth. “BT PAIRING” clignote sur l’affichage. Pour certains périphériques Bluetooth, il se peut que vous ayez besoin d’entrer le code du Numéro d’Identification Personnelle (PIN) juste après la recherche. - Page 40 Connexion Bluetooth 3 Suivez les instructions (A) ou (B) en fonction de ce qui apparaît à l’affichage. Pour les périphériques Bluetooth, la séquence de pairage peut différer des étapes décrites ci-dessous. (A) Si “[Nom du périphérique]” “XXXXXX” (B) Si “[Nom du périphérique]” “VOL – YES” “VOL –...
-
Page 41: Téléphone Portable Bluetooth
(Maintenez pressée) des opérations simples de contrôle sur les téléphones intelligents Android. Pour le fonctionnement de l’application 2 Choisissez <DELETE YES>. originale de JVC, consultez le site Web de JVC : <BLUETOOTH> <http://www3.jvckenwood.com/english/car/ <DELETE PAIR> index.html> (Site web en anglais uniquement). - Page 42 Téléphone portable Bluetooth Réglages pendant un appel Notification de message textuel Volume du téléphone Lorsqu’un message textuel est reçu, l’appareil (00 — 50) [VOLUME 15] : les sonne et “RCV MESSAGE” “[Nom du ajustements de volume réalisés périphérique]” s’affiche. pendant un appel n’auront pas d’incidence sur les autres <MSG NOTICE>...
- Page 43 Téléphone portable Bluetooth Comment faire un appel depuis Si deux téléphones sont connectés, Accédez à la “liste Choisissez le la mémoire du téléphone” téléphone souhaité. Vous pouvez mettre en mémoire jusqu’à 6 contacts (Maintenez dans cet appareil pour la composition abrégée. pressée) Pour mettre en mémoire des contacts 1 Accédez au menu “Mains libres”.
- Page 44 Téléphone portable Bluetooth Utilisation du menu SETTINGS 3 Répétez cette étape pour effectuer les 1 Accédez au menu “Mains libres”. réglages nécessaires. 2 Choisissez <SETTINGS>. Pour revenir au menu précédent, appuyez sur Pour quitter le menu, appuyez sur MENU. Les réglages suivants sont applicables aux périphériques appariés. Si un autre périphérique est apparié, réalisez de nouveau les réglages.
-
Page 45: Lecteur Audio Bluetooth
Lecteur audio Bluetooth Lecteur audio Bluetooth Reproduction d’un lecteur audio Bluetooth Sélectionnez <BT REAR> ou <BT FRONT> en fonction de l’emplacement de l’adaptateur USB Bluetooth KS-UBT1. Utilisez le lecteur audio Bluetooth pour démarrer la lecture. Les opérations et les indications de l’affichage peuvent différer en fonction de leur disponibilité sur le périphérique connecté. -
Page 46: Réglages De La Couleur D'éclairage
Réglages de la couleur d’éclairage Zone des touches Zone d’affichage Toutes les zones : inclut la zone Touches et la zone Affichage. Toutes les zones Sélection de la couleur Mémorisation de vos réglages préréglée Vous pouvez mémoriser vos propres couleurs de jour et de nuit pour <BUTTON ZONE>... -
Page 47: Réglages De La Luminosité
Réglages de la luminosité Réglages de la luminosité Vous pouvez sélectionner la luminosité de votre choix pour <BUTTON ZONE>, <DISP ZONE> séparément. (Maintenez pressée) <DIMMER> BUTTON ZONE BUTTON 00 à 31 <BRIGHTNESS> DISP ZONE DISP 00 à 31 <DAY>/<NIGHT> 4 Appuyez sur MENU pour quitter. Réglages du son Cet appareil met en mémoire les réglages de son effectués pour chaque source. -
Page 48: Utilisation Des Menus
Utilisation des menus Utilisation des menus 3 Répéter l’étape 2 si nécessaire. (Maintenez pressée) Pour revenir au menu précédent, appuyez sur Si aucune opération n’est effectuée pendant Pour quitter le menu, appuyez sur DISP ou environ 60 secondes, l’opération est annulée. MENU. - Page 49 Utilisation des menus Article de menu Réglages pouvant être choisis (Réglage initial : [XX]) VOL ADJUST -05 — +05 [00] : prérègle le niveau d’ajustement du volume de chaque (Réglage du source, en comparaison avec le niveau de volume FM. Avant un ajustement, volume) choisissez la source que vous souhaitez ajuster.
- Page 50 INFORMATION PH CNNT DEV/AU CNNT DEV/APP CNT DEV *14 : affiche le nom du périphérique (téléphone/audio/application) connecté. MY BT NAME : affiche le nom de l’appareil (JVC Unit). MY ADDRESS : montre l’adresse de l’adaptateur USB Bluetooth. AM *15 [ON]/OFF : met en ou hors service “AM” dans la sélection de la source.
-
Page 51: Télécommande
Télécommande Télécommande Avertissement : Préparation N’installez pas une autre pile qu’une CR2025 ou Lorsque vous utilisez la télécommande pour la son équivalent. première fois, retirez la feuille d’isolation. Ne laissez pas la télécommande dans un endroit (tel que le tableau de bord) exposé à la lumière directe du soleil pendant longtemps. - Page 52 Informations complémentaires À propos des fichiers audio À propos du périphérique USB Lors de la connexion avec un câble USB, utilisez Fichiers compatibles un câble USB 2.0. Extensions de fichiers : MP3(.mp3), Vous ne pouvez pas connecter un ordinateur WMA(.wma), WAV(.wav) ou un disque dur portable à...
- Page 53 - iPod nano (5e Génération) Pour plus d’informations sur Bluetooth, veuillez - iPod nano (4e Génération) vous rendre sur le site Web de JVC : - iPod nano (3e Génération) <http://www3.jvckenwood.com/english/car/ - iPod nano (2e Génération) index.html>...
-
Page 54: Guide De Dépannage
3) apparaît sur l’affichage et aucune Si le message ne disparaît pas, consultez votre revendeur opération ne peut être réalisée. d’autoradio JVC ou la société qui fabrique les kits. Cet appareil ne fonctionne pas Réinitialisez l’appareil. ( page 3) du tout. - Page 55 3) “HW ERROR” apparaît sur Réinitialisez l’appareil et essayez de nouveau l’opération. Si “HW ERROR” l’affichage. apparaît de nouveau, consultez votre revendeur d’autoradio JVC. “BT DEVICE NOT FOUND” L’appareil n’a pas réussi à chercher les périphériques apparaît sur l’affichage.
-
Page 56: Spécifications
Spécifications Spécifications SECTION DE L’AMPLIFICATEUR AUDIO Puissance de sortie maximum 50 W par canal Puissance de sortie en mode continu (RMS) 20 W par canal pour 4Ω, 40 Hz à 20 000 Hz avec moins de 1% de distorsion harmonique totale. Impédance de charge 4Ω... - Page 57 Spécifications GÉNÉRALITÉS Alimentation (tension de fonctionnement) CC 14,4 V (11 V à 16 V admissibles) Système de mise à la masse Masse négative Températures de fonctionnement admissibles 0°C à +40°C Dimensions Taille d’installation environ 182 mm × 52 mm × 158 mm (L ×...
- Page 58 Having TROUBLE with operation? Please reset your unit Refer to page of How to reset your unit Vous avez des PROBLÈMES de fonctionnement? Réinitialisez votre appareil Référez-vous à la page intitulée Comment réinitialiser votre appareil EN, FR 1211DTSSANJEIN © 2011 JVC KENWOOD Corporation...
Need help?
Do you have a question about the KD731BT and is the answer not in the manual?
Questions and answers