
Related Manuals for Lindy Mini NAS Enclosure SATA & IDE 42808


Summary of Contents for Lindy Mini NAS Enclosure SATA & IDE 42808
- Page 1 Mini NAS Enclosure SATA & IDE User Manual English LINDY No. 42808 www.lindy.com © LINDY ELECTRONICS LIMITED & LINDY-ELEKTRONIK GMBH - FIRST EDITION (August 2008)
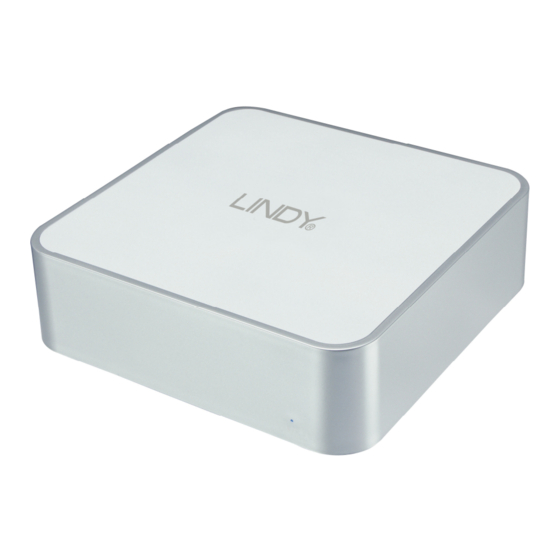
- Page 3 User Manual Introduction Thank you for purchasing the LINDY Mini NAS Enclosure. This enclosure has been designed to add extra storage to your Mac Mini and your network, whilst complimenting the design of your Mac Mini. The small footprint design allows it to be seated underneath a Mac Mini, but with its Network and USB 2.0 interface, it can also be used with other suitably equipped Macs and PCs.
- Page 4 User Manual Hardware Assembly Before starting the assembly make sure the jumper(s) on your hard drive are set to the Master setting. Consult your hard disk manual or the manufacturer’s website for the correct jumper setting. 1. Ensure that disconnected from the mains, before removing the 4 screws from the bottom of the case 2.
- Page 5 User Manual 7. Disconnect the SATA Data cable from the bridgeboard. Hold the base of the drive enclosure and pull the bridgeboard up to disconnect it. 8. Unscrew the four screws holding the drive tray in place and remove the drive tray.
- Page 6 User Manual 12. Use the supplied screws to secure both sides of the drive 13. Carefully assemble the top and bottom of the case. If the upper case does not fit properly, adjust the hard disk position and try again 14.
- Page 7 User Manual Configuring the NAS Enclosure 1. Peer to peer configuration (Direct connection to a PC or Mac) Connect the NAS Enclosure to the LAN port of your PC or Mac using an Ethernet cable. Open your web browser and key in the IP address 169.254.0.1 Type “admin” for both the user name and password.
- Page 8 User Manual 3. Password Change In the Administration mode, you can choose your own password for entering the setup mode. Now you are ready to connect the NAS Enclosure to your Network. Please Note: After changing the password you will be logged off and then be prompted to log in using your new password.
- Page 9 User Manual 5. How to find the NAS Enclosure through IP Finder software. Before you install the IP finder software, your computer must have “Java Runtime Environment” TM installed. If you do not already have the Java Runtime Environment installed on your PC or Mac you can download it for free from the following website: http://www.java.com/en/download/windows_ie.jsp Insert the USB 2.0 LAN Disk CD included with your purchase in to your PC’s CD-Rom Drive.
- Page 10 User Manual English Double Click the host name to enter the NAS Enclosure Set Up page, and enter your password (default password is admin). 6. How to Map the NAS Enclosure Click Start on your Windows desktop Click Search Select Computer or people Select A computer on the network and a new window will appear.
- Page 11 User Manual 7. Date and Time set up On the Set Up page under Administration click Change next to Date/Time and you will see the page below. You can set and change the Date/Time/SNTP/Time Server and Time Zone information. Click OK to save the set up. 8.
- Page 12 User Manual 9. Disk info & Firmware On the Set Up page under the Disk Info & Firmware heading you can view your Hard Disk and product firmware information. Firmware version: Shows the NAS Enclosure’s current Firmware version Disk Info: Shows the model details of the installed HDD Free Size: Shows the available free space of the HDD Total Size: Shows the total capacity of the HDD 10.
- Page 13 User Manual 12. Maintenance setup page On the Set Up page select Maintenance to view the page below. Firmware Upload: When new firmware becomes available it can be downloaded and stored on your PC. To install new firmware click Browse and navigate to the location that you saved the firmware to.
- Page 14 User Manual 13.3 Adding folders to the Sharing list Select SMB Server. Select the folder you wish to share. Click on the (- ->) button to add the folder to the Sharing List. 13.4 Deleting folders from Folder List/Sharing List Highlight the folder name you wish delete on either the Folder List or the Sharing List, click the Delete button and then click OK when prompted.
- Page 15 User Manual English 14. FTP Server setup page 14.1 How to setup an FTP server FTP Status: Enable (Recommended) Port: Auto detected by NAS Enclosure Allow anonymous: Disable (Recommended) Read only: Allow other users to read data only Read/write: Allow other users to read/write data 14.2 Adding an account name to the FTP Server Press the Add button to add an FTP user account.
- Page 16 User Manual English 14.4 Deleting an FTP user account Highlight the FTP User’s account you wish to delete and click the Delete button then click OK to confirm. 14.5 Enable/Disable an FTP user account Highlight the FTP User’s account you wish to disable and click the “En/disable” button. The status will show in the FTP Configuration screen.
- Page 17 User Manual Using the enclosure with your Mac Mac Mini users: This enclosure is designed to sit underneath your Mac Mini. If you want to use this enclosure with both PCs and Macs, then you should use a FAT32 formatted hard drive. If you are using a brand new drive, or want to erase an older drive you will need to follow the instructions below: CAUTION! Formatting the hard drive will destroy all the data on the drive.
- Page 18 User Manual Make sure the external drive is highlighted in the left hand pane and select the Erase tab. Select your preferred Volume Format type from the drop-down menu. If you are using the drive with both Macs and PCs you should use MS-DOS File System. You can give the drive a name in the Name box.
- Page 19 User Manual Using the enclosure with your PC If you want to use this enclosure with both PCs and Macs, then you should use a FAT32 formatted hard drive. If you are using a brand new drive, or want to erase an older drive you will need to follow the instructions below: CAUTION! Formatting the hard drive will destroy all the data on the drive.
- Page 20 User Manual English 4. The New Partition Wizard will appear. Follow the on-screen instructions to format and partition the drive. Once complete, the new drive icon will show up in Windows Explorer and the drive will be accessible Safely Removing the Drive To safely remove the drive from your system, click the “Safe Removal”...
-
Page 21: Troubleshooting
Troubleshooting Q: Why can’t I access to the NAS Enclosure setup page? A: Please connect the NAS Enclosure directly to your computer via Ethernet/LAN port. Open your web browser and key in the default IP address 169.254.0.1 Then type admin for both Account name and password to enter the NAS Enclosure setup page. - Page 22 Troubleshooting 2. Create a User account and include levels of authority. 3. Assign the NAS Enclosure the static IP Address supplied by your ISP, using the instructions from Section 11 of this guide. 4. Open Microsoft Internet Explorer or any other FTP software, and enter ftp:// and then the IP Address used in step 3 in the address field.
-
Page 23: Fcc Statement
CE/FCC Information CE Statement This device complies with the European Regulations for Electromagnetic Compatibility (EMC) of the European Union and it is equipped with the CE mark. This unit has to be used with high quality shielded connection cables. Only if these high quality shielded cables are used it can be sure that the EMC compatibility is not adversely influenced. -
Page 24: Recycling Information
Ogni stato membro dell’ EU ha tramutato le direttive WEEE in leggi statali in varie misure. Fare riferimento alle leggi del proprio Stato quando si dispone di un apparecchio elettrico o elettronico. Per ulteriori dettagli fare riferimento alla direttiva WEEE sul riciclaggio del proprio Stato. müssen den lokalen LINDY No. 42808 Edition August 2008 www.lindy.com...
Need help?
Do you have a question about the Mini NAS Enclosure SATA & IDE 42808 and is the answer not in the manual?
Questions and answers