Bosch HMV 8051 U Use And Care Manual
Hide thumbs
Also See for HMV 8051 U:
- Use and care manual (92 pages) ,
- Use & care manual (88 pages) ,
- Installation instructions manual (60 pages)

Related Manuals for Bosch HMV 8051 U


Summary of Contents for Bosch HMV 8051 U
-
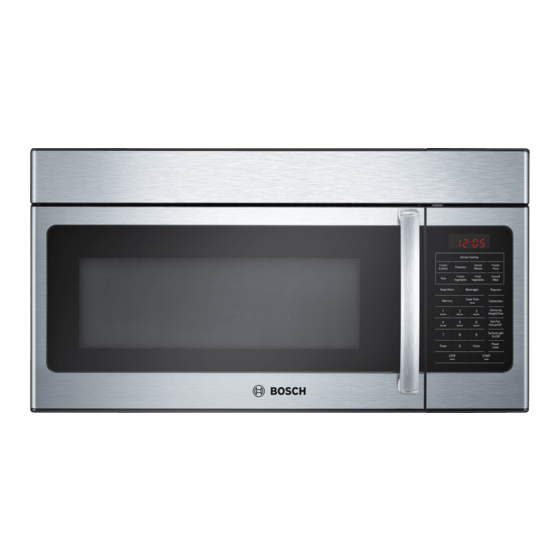
Page 1: Microwave Oven
Use and Care Manual 3 43 Manual de uso y cuidado 44 88 Microwave oven Model: HMV 8051 U... -
Page 3: Table Of Contents
Table of Contents Safety ........Important Safety Instructions . - Page 4 Sensor Cooking ........... Frozen Entrees .
-
Page 5: Safety
Safety Important Safety Instructions READ AND SAVE THESE INSTRUCTIONS State of California Proposition 65 Warnings WARNING: This product contains one or more chemicals known to the State of California to cause cancer. WARNING: This product contains one or more chemicals known to the State of California to cause birth defects or other reproductive harm. - Page 6 Important Safety Instructions READ AND SAVE THESE INSTRUCTIONS Do not store this appliance outdoors. Do not use this product near water - for example, near a kitchen sink, in a wet basement, near a swimming pool, or similar locations. Do not immerse cord or plug in water. Keep cord away from heated surfaces.
- Page 7 Important Safety Instructions READ AND SAVE THESE INSTRUCTIONS TV / Radio Interference This appliance generates and uses ISM frequency energy. If not installed and used properly, in strict accordance with the manufacturer's instructions, it may cause interference to radio and television reception. It has been type tested and found to comply with limits for ISM equipment persuant to Part 18 of FCC rules, which are designed to provide reasonable protection against such interference in a residential installation.
- Page 8 Important Safety Instructions READ AND SAVE THESE INSTRUCTIONS Cooking Safety CAUTION: To avoid personal injury or property damage, observe the following: Do not leave oven unattended while in use. Do not store flammable materials next to or in the oven. When flaming foods under the microwave, always turn the fan on.
- Page 9 Important Safety Instructions READ AND SAVE THESE INSTRUCTIONS Popcorn Use only popcorn in packages designed and labeled for microwave use, or pop it in a microwave oven corn popper. Follow popcorn manufacturers' directions and use a brand suitable for the wattage of your oven. Do not continue to heat after popping has stopped.
- Page 10 Important Safety Instructions READ AND SAVE THESE INSTRUCTIONS The glass tray and the metal racks (if used) will get hot during cooking. The cooking container and the glass tray can be hot even if the oven is cool. Never use paper, plastic, or other combustible materials that are not intended for cooking.
- Page 11 Important Safety Instructions READ AND SAVE THESE INSTRUCTIONS Fan Motor Operation After using the oven the fan motor can rotate to cool the electric components. This is perfectly normal, and you can take out the food from the oven while the fan operates.
-
Page 12: Microwave Utensil Guide
Microwave utensil guide Do not use Oven proof glass (specifically treated for high Metal utensils: intensity heat): Metal shields the food from microwave energy and produces uneven Utility dishes, loaf dishes, pie plates, cake plates, cooking. Also, avoid metal skewers, thermometers or foil trays. Metal liquid measuring cups casseroles and bowls liquid measuring cups, casseroles and bowls utensils can cause arcing which can damage your microwave oven... -
Page 13: Getting Started
Getting started Microwave overview Front view Front vent grill Control panel Window Door handle Bottom view Surface lights Ventilation filters... -
Page 14: Oven Specifications
Oven specifications Power Supply 120 V AC, 60 Hz Input Power 1.500 W Microwave Output Power 900 W Microwave Frequency 2.450 MHz Convection Power 1.450 W Cavity Volume 1.5 cubic ft. (43 L) Net Weight 64 lbs. (29 kg) Accessories Metal Rack Convection Rack... -
Page 15: Control Panel
Control Panel Display Sensor Cooking pads Numeric pads (0 through 9) -
Page 16: Operation
Operation Manual operation Using the metal rack The metal rack gives you extra space when cooking in more than one container at the same time. To use the metal rack: 1. Place rack securely in the four plastic supports. Note: Rack must not touch metal walls or back of microwave. 2. -
Page 17: Using The Convection Rack
Using the convection rack The convection rack gives you best cooking results for convection baking. Note: Never use the convection rack for microwave cooking or heating. To use the convection rack: 1. Place convection rack securely on the center of the glass turntable. 2. -
Page 18: Control Lock
Control Lock You may lock the control panel to prevent the microwave from being accidentally started or used by children. The control lock feature is very useful when cleaning the control panel. The lock will prevent accidental programming when wiping the control panel clean. Example: to set the control lock ON: Touch and hold the Stop/Cancel pad for more than 3 seconds. -
Page 19: Heating With High Power Level
Example: to cook food at 60% power and then to brown at 425 ºF: 1. Press Cook Time pad. 2. Use the number pads to enter heating time for the 1st stage (cook time may be set up to 99 minutes and 99 seconds). 3. -
Page 20: Adding Cook Time (Cook Time +30 Sec.)
Adding cook time (Cook Time +30 Sec.) This time saving feature will let you quickly add 30 seconds to any cook time already set when cooking. This feature may only be used while cooking and with cook time remaining. Each press of this pad will add 30 seconds to the cook time. Example: to add 1 minute of cook time during cooking with power level 10 (100 %): Press Cook Time +30 Sec. -
Page 21: Defrosting Tips
Defrosting tips When using the defrost weight feature, the weight entered should always be pounds (valid entries are from 0.1 to 6.0 pounds). Use both defrost weight and defrost time features for raw food items only. Defrosting gives best results when food to be thawed is a minimum of 0 ºF (taken directly from a true freezer). -
Page 22: Suggestions For Getting The Best Results
Suggestions for getting the best results To help you achieve the best possible results from your microwave oven, read the following suggestions below: Storage temperature Foods taken from the freezer or refrigerator take longer to cook than the same foods would at room temperature. Size Small pieces of food cook faster than large ones. - Page 23 Power level Microwave Use to prepare when: output 100% Boiling water High Cooking ground beef Making candy Cooking fresh fruits & vegetables Cooking fish & poultry Preheating browning dish Reheating beverages Cooking bacon slices Reheating meat slices quickly Saute onions, celery & green peppers All reheating Cooking scrambled eggs.
-
Page 24: Convection
Convection Convection cooking circulates hot air through the oven cavity with a fan. The constantly moving air surrounds the food to heat the outer portion quickly, creating even browning and sealed in flavor by the constant motion of hot air over the food surfaces. -
Page 25: Convection Cooking Suggestions
Note: During convection cooking, the vent fan can automatically turn on at the lowest speed setting to cool the oven components. Example: to bake for 20 minutes at 150 ºF without preheating: Place convection rack and food in the oven and close door. 1. -
Page 26: Sensor Cooking
Sensor Cooking Sensor Cooking allows you to cook most of your favorite foods without selecting cooking times and power levels. The microwave oven automatically determines required cooking time for each food item. The display will indicate †’ together with the program number during the sensing time. When the internal sensor detects a certain amount of humidity coming from the food, it will tell the oven how much longer to heat. -
Page 27: Sensor Reheat
Sensor Reheat The reheat feature lets you reheat food (8 12 Oz.) for your cooking convenience. Example: to reheat 12 ounces of food. 1. Press Sensor Reheat pad. 2. Press START pad. Sensing starts. When sensing time is over, you will hear a beep and the remaining cooking time will display. -
Page 28: Rice
Rice The rice feature lets you cook rice (4 16 Oz.) automatically. Example: to cook 16 ounces of rice: Place rice on a microwave safe big bowl as casserole dish, add 4 cups of cool water, salt and oil and cover with lid. 1. -
Page 29: Ground Meat
Ground meat The ground meat feature lets you heat ground meat (8 24 Oz.) automatically. Example: to heat 16 ounces of ground meat: 1. Press Ground Meat sensor pad. 2. Press START pad. Sensing starts. When sensing time is over, you will hear a beep and the remaining cooking time will display. -
Page 30: Popcorn
Heating with lower power level Heating with multiple cooking stages Keep Warm Convection (without preheating) Popcorn CAUTION: Do not leave microwave oven unattended while popping corn. The popcorn feature lets you pop 3 different commercially packaged microwave popcorn sized bags. Use the table below to determine the setting to use. Amount Press popcorn pad 3.5 oz. -
Page 31: Convenience Cooking Suggestions
Convenience cooking suggestions Convenience category Amount Suggestions Popcorn 1.75,3.0, 3.5 oz. Cook a single microwave only" bag of popcorn at a time. Use 1 pkg. caution when removing and opening the hot popcorn bag from the oven. Let microwave oven cool down at least 5 minutes before using again. -
Page 32: Cooking Poultry In Your Microwave
Cooking poultry in your microwave Be sure to place poultry on a microwave safe roasting rack in a microwave-safe dish. Cover poultry with wax paper to prevent splattering. Use narrow strips of aluminum foil to shield any bone tips or thin meat areas, or areas that start to overcook. -
Page 33: Cooking Seafood In Your Microwave
Cooking seafood in your microwave Place fish on a microwave safe roasting rack in a microwave safe dish. Be sure to always cook fish until it flakes easily with a fork. Use a tight cover to steam fish; a lighter cover of wax paper or paper towel provides less steaming. And be sure not to overcook fish;... -
Page 34: Cleaning And Maintenance
Cleaning and Maintenance Cleaning Cleaning suggestions For best performance and for safety reasons, keep the oven clean inside and outside. Take special care to keep the inner door panel and oven fron frame free of food and grease build up. Never use rough scouring powder or pads on the microwave. -
Page 35: Cleaning The Exhaust Filters
Cleaning the exhaust filters The oven ventilation exhaust filters should be removed and cleaned often; generally at least once every month. CAUTION: To avoid risk of personal injury or property damage, do not operate oven hood without filters properly in place. 1. -
Page 36: Maintenance
Maintenance Surface light replacement CAUTION: To avoid risk of personal injury or property damage, wear gloves when replacing the light bulbs. 1. Unplug the microwave oven or turn off power at the main circuit breaker. 2. Remove the bulb cover mounting screws at both light positions under the microwave. -
Page 37: Oven Light Replacement
Oven light replacement 1. To replace light bulb, first disconnect power to the microwave oven at the circuit breaker panel or by unplugging. 2. Remove the vent grill mounting screws. 3. Pull the vent grill away from the unit. 4. Remove the charcoal filter by pushing it inwards, then turn and pull it away from the unit. - Page 38 5. Open light cover located behind filter mounting by carefully pulling up on the front edge. 6. Remove old light bulb and replace only with equivalent 30 watt bulb available from parts distributor. Bulbs are also available at most hardware stores or lighting centers.
-
Page 39: Charcoal Filter Replacement
Charcoal filter replacement The charcoal Filter, which was enclosed with your microwave oven, is used for nonvented, recirculated installation (Room Venting). The filter should be changed every 6 to 12 months depending on use. 1. Disconnect power to the microwave oven at the circuit breaker panel or by unplugging. -
Page 40: Service
Service Troubleshooting Before you call a repair person for your microwave, check the list below for possible easy solutions to some common problems. Neither the microwave's display or Properly insert the plug into a grounded power outlet. oven operates If the outlet is controlled by a wall switch, make sure the wall switch is turned on. Remove the plug from the outlet, wait 10 seconds, then plug the microwave in again. -
Page 41: Customer Service
Please make sure to return your registration card; while not necessary to effectuate warranty coverage, it is the best way for Bosch to notify you in the unlikely event of a safety notice or product recall. - Page 42 Bosch would still pay for labor and parts and ship the parts to the nearest authorized service provider, but you would still be fully liable and responsible for any travel time or other special charges by the service company, assuming they agree to make the service call.
- Page 43 God. In no event shall Bosch have any liability or responsibility whatsoever for damage to surrounding property, including cabinetry, floors, ceilings, and other structures or objects around the Product.
- Page 44 Contenido Seguridad ........Instrucciones de seguridad importantes .
- Page 45 Función Sensor Cooking (Cocción por sensor) ..... . . Frozen Entrees (Platillos congelados) ........Función Potatoes (Papas) .
-
Page 46: Seguridad
Seguridad Instrucciones de seguridad importantes LEA Y GUARDE ESTAS INSTRUCCIONES Advertencias en virtud de la Proposición 65 del estado de California ADVERTENCIA: Este producto contiene una o más sustancias químicas que el estado de California sabe que provocan cáncer. ADVERTENCIA: Este producto contiene una o más sustancias químicas que el estado de California sabe que provocan defectos congénitos u otro daño reproductivo. - Page 47 Instrucciones de seguridad importantes LEA Y GUARDE ESTAS INSTRUCCIONES Este electrodoméstico debe recibir servicio técnico únicamente por parte de personal de servicio técnico calificado. Comuníquese con el centro de servicio técnico autorizado más cercano para solicitar que lo examinen, reparen o ajusten. No cubra ni bloquee ninguna ventilación o abertura del electrodoméstico.
- Page 48 Instrucciones de seguridad importantes LEA Y GUARDE ESTAS INSTRUCCIONES Instrucciones para la conexión a tierra Este electrodoméstico debe estar conectado a tierra. La conexión a tierra reduce el riesgo de descarga eléctrica proporcionando un cable de escape para la corriente eléctrica si se produce un cortocircuito eléctrico.
- Page 49 Instrucciones de seguridad importantes LEA Y GUARDE ESTAS INSTRUCCIONES No use la cavidad del horno para guardar cosas. No deje productos de papel, utensilios de cocina ni alimentos dentro de la cavidad del horno cuando no esté en uso. No haga funcionar el horno cuando la humedad ambiente sea excesiva. Este horno es apto para usar tanto sobre equipos de cocina a gas como eléctricos de 36"...
- Page 50 Instrucciones de seguridad importantes LEA Y GUARDE ESTAS INSTRUCCIONES En caso de incendio Si los materiales dentro del horno se prenden fuego: 1. Mantenga la puerta cerrada. 2. Apague el electrodoméstico. 3. Desenchufe el electrodoméstico o corte la alimentación eléctrica desde el panel de fusibles o el disyuntor.
- Page 51 Instrucciones de seguridad importantes LEA Y GUARDE ESTAS INSTRUCCIONES Fórmula para bebés/alimento para No caliente biberones ni alimentos para bebés en el horno de microondas. El bebés recipiente de vidrio o la superficie de los alimentos pueden parecer tibios, mientras que el interior puede quemar la boca y el esófago del niño.
- Page 52 Instrucciones de seguridad importantes LEA Y GUARDE ESTAS INSTRUCCIONES No caliente recipientes sellados con calor ni bolsas de plástico en el horno. Los alimentos o el líquido podrían expandirse rápidamente y hacer que el recipiente o la bolsa se rompa. Perfore o abra el recipiente o la bolsa antes de cocinar. Recipientes para dorar/bolsas para Los recipientes o parrillas para dorar en horno de microondas están diseñados para cocinar en horno...
- Page 53 Instrucciones de seguridad importantes LEA Y GUARDE ESTAS INSTRUCCIONES Funcionamiento del motor del Luego de usar el horno, el motor del ventilador puede girar para enfriar los ventilador componentes eléctricos. Esto es perfectamente normal, y se pueden retirar los alimentos del horno mientras el ventilador está funcionando. El filtro de carbón vegetal, que se incluyó...
-
Page 54: Guía De Utensilios Para Horno De Microondas
Guía de utensilios para horno de microondas No use Vidrio apto para uso en hornos (tratado Utensilios de metal: específicamente para soportar altas El metal protege los alimentos de la energía de microondas y produce una temperaturas): cocción irregular. Asimismo, evite usar brochetas de metal, termómetros o Recipientes para usos múltiples, recipientes Recipientes para usos múltiples, recipientes charolas de papel de aluminio. -
Page 55: Cómo Comenzar
Cómo comenzar Descripción general del horno de microondas Vista frontal Rejilla de ventilación delantera Panel de control Ventana Manija de la puerta Vista inferior Focos de superficie Filtros de ventilación... -
Page 56: Especificaciones Del Horno
Especificaciones del horno Alimentación eléctrica 120 V AC, 60 Hz Potencia de entrada 1.500 W Potencia de salida de microondas 900 W Frecuencia de microondas 2.450 MHz Potencia de convección 1.450 W Volumen de la cavidad 1.5 pies cúbicos (43 l) Peso neto 64 lb (29 kg) Accesorios... -
Page 57: Panel De Control
Panel de control Pantalla Botones de cocción por sensor Botones numéricos (0 a 9) -
Page 58: Operación
Operación Operación manual Cómo usar la rejilla de metal La rejilla de metal le brinda espacio adicional al cocinar en más de un recipiente al mismo tiempo. Para usar la rejilla de metal: 1. Coloque la rejilla firmemente en los cuatro soportes de plástico. Nota: La rejilla no debe tocar las paredes de metal ni la parte posterior del horno de microondas. -
Page 59: Cómo Usar La Rejilla De Convección
Cómo usar la rejilla de convección La rejilla para convección le brinda mejores resultados de cocción para el horneado por convección. Nota: Nunca use la rejilla para convección para cocinar o calentar por microondas. Para usar la rejilla para convección: 1. -
Page 60: Surface Light On/Off (Luz De Superficie Encendida/Apagada)
Surface Light On/Off (Luz de superficie encendida/apagada) Presione el botón Surface Light/On/Off (Luz de superficie encendida/apagada) una vez para encender la superficie de cocción. Presione el botón nuevamente para apagar la luz. Control Lock (Bloquear control) Puede bloquear el panel de control para evitar que los niños enciendan accidentalmente el horno de microondas o lo utilicen. -
Page 61: Calentar Con Nivel De Potencia Alto
Cuando el tiempo de calentamiento haya finalizado, escuchará 5 bips. Presione el botón STOP (DETENER) o abra la puerta. Ejemplo: para cocinar alimentos al 60% de potencia y, luego, para dorarlos a 425 ºF: 1. Presione el botón Cook Time (Tiempo de cocción). 2. -
Page 62: Uso De La Tecla Pause (Pausa)
Uso de la tecla Pause (Pausa) Si en algún momento su receta para cocinar con horno de microondas requiere dar vuelta los alimentos o detener el horno de microondas durante el proceso de cocción, puede hacerlo después de iniciar la cocción en el horno de microondas con el botón START/Pause (INICIAR/Pausa). - Page 63 Después de presionar la tecla START/Pause (INICIAR/Pausa), la pantalla hará una cuenta regresiva del tiempo de descongelamiento restante. El horno emitirá un bip dos veces durante el ciclo de descongelamiento. En este momento, abra la puerta y dé vuelta los alimentos, si es necesario, y retire cualquier parte que ya se haya descongelado.
-
Page 64: Consejos Para Descongelar
Consejos para descongelar Al usar la función de descongelamiento por peso, el peso ingresado debe estar siempre en libras (las entradas válidas son de entre 0.1 y 6.0 libras). Use tanto la función de descongelamiento por peso como la de descongelamiento por tiempo para alimentos crudos únicamente. -
Page 65: Niveles De Potencia Sugeridos Para Cocinar
Niveles de potencia sugeridos para cocinar Los 10 niveles de potencia disponibles en este horno de microondas le ayudarán a elegir la potencia que mejor se adapte al tipo de alimento que esté preparando. Al igual que con la preparación de cualquier alimento en el horno de microondas, lo ideal es seguir las instrucciones para horno de microondas impresas en el envase del alimento. - Page 66 Nivel de Salida de Usar para: potencia microondas 100% Hervir agua Alta Cocinar carne de res molida Preparar dulces Cocinar frutas y verduras frescas Cocinar carne de pescado y ave Precalentar recipientes para dorar Recalentar bebidas Cocinar rebanadas de tocino Recalentar rebanadas de carne rápidamente Saltar cebollas, apio y pimientos verdes Recalentar en general...
-
Page 67: Convección
Convección La cocción por convección hace circular aire caliente a través de la cavidad del horno con un ventilador. El movimiento de aire constante rodea los alimentos para calentar la parte externa rápidamente, lo permite un dorado parejo y un sabor sellado debido al movimiento constante de aire caliente sobre las superficies de los alimentos. -
Page 68: Sugerencias Para Cocción Por Convección
6. Presione el botón START (Comenzar). Cuando el horneado por convección haya terminado, escuchará 5 bips. Presione el botón STOP (Detener) o abra la puerta. Nota: Durante la cocción por convección, el ventilador puede encenderse automáticamente en la configuración de velocidad más baja para enfriar los componentes del horno. -
Page 69: Función Sensor Cooking (Cocción Por Sensor)
Función Sensor Cooking (Cocción por sensor) La función Sensor Cooking (Cocción por sensor) le permite cocinar la mayoría de sus alimentos favoritos sin seleccionar tiempos de cocción ni niveles de potencia. El horno de microondas determina automáticamente el tiempo de cocción requerido para cada alimento. -
Page 70: Sensor Reheat (Recalentamiento Por Sensor)
Presione el botón STOP (DETENER) o abra la puerta. Nota: No coloque la papa en el centro del vidrio. La papa debe estar a temperatura ambiente. Después de cocinar, deje reposar las papas durante 5 minutos. Sensor Reheat (Recalentamiento por sensor) La función de recalentamiento le permite recalentar los alimentos (8 a 12 oz) para su comodidad al cocinar. -
Page 71: Función Frozen Pizza (Pizza Congelada)
Función Frozen Pizza (Pizza congelada) La función Frozen Pizza (Pizza congelada) le permite calentar varias porciones de pizza (6 a 12 oz) sin seleccionar el tiempo de cocción ni el nivel de potencia. Ejemplo: para calentar 12 onzas de pizza. 1. -
Page 72: Función Fresh Vegetables (Verduras Frescas)
Función Fresh Vegetables (Verduras frescas) La función Fresh Vegetables (Verduras frescas) le permite calentar varias verduras congeladas (4 a 16 oz) automáticamente. Ejemplo: para calentar 16 onzas de verduras frescas: Agregue 60 g de agua (15 g por 4 oz). 1. -
Page 73: Funcionamiento Práctico
Funcionamiento práctico Función Keep Warm (Mantener caliente) Puede mantener calientes alimentos cocidos en su horno de microondas durante un máximo de 99 minutos y 99 segundos Ejemplo: para usar la función Keep Warm (Mantener caliente) durante 30 minutos: 1. Presione el botón Keep Warm (Mantener caliente) una vez. 2. -
Page 74: Popcorn (Palomitas De Maíz)
Popcorn (Palomitas de maíz) ATTENCION: No deje el horno de microondas sin supervisión mientras prepara palomitas de maíz. ATTENCION: La función Popcorn (Palomitas de maíz) le permite preparar 3 tamaños distintos de bolsas de palomitas de maíz envasadas comercialmente para microondas. Use la siguiente tabla para determinar la programación que utilizará. -
Page 75: Sugerencias Para La Cocción Práctica
Sugerencias para la cocción práctica Categoría de Cantidad Sugerencias practicidad Palomitas de maíz 1 paq. de 1.75, 3.0, 3.5 oz Cocine una sola bolsa de palomitas de maíz "aptas para horno de microondas" por vez. Tenga cuidado al retirar y abrir la bolsa de palomitas de maíz caliente del horno. -
Page 76: Cocción De Carne De Ave En Su Horno De Microondas
Carne Nivel de Retire del horno Después de reposar cocción (10 15 min) Carne de Término 150 ºF 160 ºF medio Bien 160 ºF 170 ºF cocida Cerdo Término 150 ºF 160 ºF medio Bien 160 ºF 170 ºF cocida Carne de Carne oscura 170 ºF... -
Page 77: Cocción De Verduras En Su Horno De Microondas
Cocción de verduras en su horno de microondas Las verduras deben lavarse justo antes de cocinarse. Por lo general, no es necesario agregar agua. Si quiere cocinar verduras densas como papas, zanahorias y verduras, agregue aproximadamente ¼ taza de agua. Las verduras pequeñas (zanahorias rebanadas, chícharos, pallares, etc.) se cocinan más rápido que las verduras más grandes. -
Page 78: Limpieza Y Mantenimiento
Limpieza y mantenimiento Limpieza Sugerencias para la limpieza Para un mejor rendimiento y por motivos de seguridad, mantenga limpios el interior y el exterior del horno. Tenga especial cuidado para mantener el panel interior de la puerta y el marco delantero del horno libre de acumulación de alimentos y grasa. Nunca use detergente en polvo ni almohadillas abrasivos en el horno de microondas. -
Page 79: Limpieza De Los Filtros De Escape
Si se acumula vapor dentro o fuera de la puerta del horno, limpie con un paño suave. El vapor se puede acumular al operar el horno en condiciones de alta humedad; esto no significa que haya fugas en el horno de microondas. Nunca opere el horno sin alimentos en su cavidad;... -
Page 80: Mantenimiento
Mantenimiento Cambio del foco de superficie ATTENCION: Para evitar riesgos de lesiones personales o daños materiales, use guantes al cambiar los focos. 1. Desenchufe el horno de microondas o apague la alimentación eléctrica desde el disyuntor principal. 2. Retire los tornillos de montaje de la tapa del foco en ambas posiciones de la luz debajo del horno de microondas. -
Page 81: Cambio Del Foco Del Horno
Cambio del foco del horno 1. Para cambiar el foco, primero desconecte la alimentación eléctrica del horno de microondas desde el panel del disyuntor o desenchufando el electrodoméstico. 2. Retire los tornillos de montaje de la rejilla de ventilación. 3. Jale la rejilla de ventilación hacia afuera de la unidad. 4. - Page 82 5. Abra la tapa del foco ubicado detrás del montaje del filtro jalándola con cuidado hacia arriba en el borde delantero. 6. Retire el foco usado y reemplácelo sólo por un foco de 30 vatios equivalente disponible a través del distribuidor de piezas. Los focos también se encuentran disponibles en la mayoría de las ferreterías o centros de iluminación.
-
Page 83: Cambio Del Filtro De Carbón
Cambio del filtro de carbón El filtro de carbón, que se incluye con su horno de microondas, está diseñado para una instalación sin ventilación ni recirculación (ventilación de ambiente). El filtro debe cambiarse cada 6 a 12 meses, según su uso. 1. -
Page 84: Servicio Técnico
Servicio técnico Resolución de problemas Antes de llevar su horno de microondas a un técnico en reparación, verifique en la lista que aparece a continuación posibles soluciones fáciles a algunos de los problemas más frecuentes. La pantalla del horno de microondas Conecte correctamente el enchufe en una toma de corriente conectada a tierra. -
Page 85: Servicio Al Cliente
Se observan chispas o arcos Retire utensilios metálicos, recipientes para cocinar o cierres de metal de la eléctricos cavidad del horno. Si usa papel de aluminio, use únicamente tiras angostas y deje, al menos, una pulgada entre el papel y las paredes interiores del horno. La bandeja giratoria hace ruido o Limpie la bandeja giratoria, el anillo giratorio y la base de la cavidad del horno. -
Page 86: Declaración De Garantía Limitada Del Producto
Asegúrese de devolver su tarjeta de registro; si bien no es necesario para hacer efectiva la cobertura de la garantía, es la mejor manera para que Bosch le notifique en el caso poco probable de que se emita un aviso de seguridad o se retire del mercado un producto. - Page 87 Producto fuera de garantía Bosch no tiene obligación alguna, en virtud de la ley o por otro motivo, de otorgarle ninguna concesión, incluidos reparaciones, prorrateos o reemplazo del Producto, con posterioridad al vencimiento de la garantía.
- Page 88 Para obtener el servicio técnico de la garantía de su Producto, debe comunicarse de la garantía con el centro de servicio autorizado de Bosch más cercano. BSH Home Appliances 1901 Main Street, Suite 600, Irvine, CA 92614 USA 1 800 944 2904...
- Page 92 9000569682S B930402 1901 Main Street, Suite 600, Irvine, CA 92614 S1 800 944 2904 www.boschappliances.comE BSH Home Appliances Corporation 2008...
Need help?
Do you have a question about the HMV 8051 U and is the answer not in the manual?
Questions and answers