Table of Contents
Advertisement
Advertisement
Table of Contents

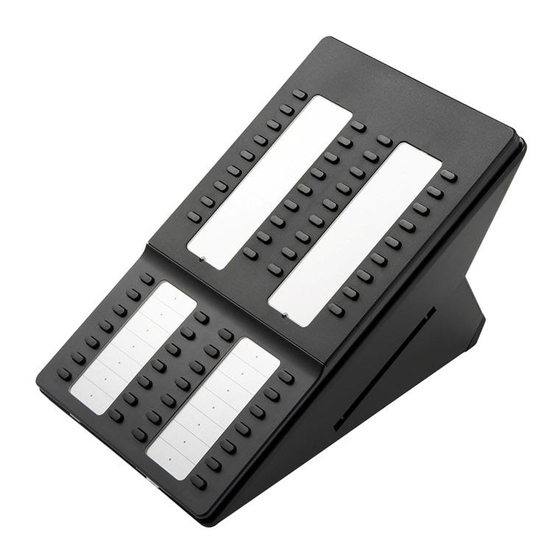
Summary of Contents for Samsung SMT-i5264
- Page 1 ITP-5112L IP 전화기 사용설명서 IP AOM Network Setting Guide SMT-i5264...
-
Page 2: Safety Concerns
Symbols & Conventions Caution Indication of a general caution Restriction Indication for prohibiting an action for a product Instruction Indication for commanding a specifically required action. Note Indicates additional information for reference. © SAMSUNG Electronics Co., Ltd. - Page 3 Failure to do so may cause fire materials or water is not removed or electric shock. even after brushing. Failure to do so may cause fire or electric shock. © SAMSUNG Electronics Co., Ltd.
- Page 4 Failure to do so may cause Failure to do so may cause product damage and product Failure to do so may interrupt the product damage. does not operate properly. upgrades by stopping the operation of the telephone. © SAMSUNG Electronics Co., Ltd.
-
Page 5: Table Of Contents
LED status during S/W upgrade ..........18 ANNEX ..........19 PECI FI CATI ON Removal of Stand ............... 20 IP AOM Ports ................21 Connection with IP Phone ............22 Connection with Switch ............. 23 © SAMSUNG Electronics Co., Ltd. -
Page 6: Ip Aom Synopsis
In this case, IP Phone must be connected with a power adaptor. 2) Several IP AOMs must be connected to switch separately. It doesn’t supply direct connection to each other. ☎ port of IP AOM doesn’t supply the connection with PC. © SAMSUNG Electronics Co., Ltd. -
Page 7: Network Setting
- After rebooting, press Key 5 until LED 8 and LED 12 blink for config mode. - Press Key 12. - Waiting for completion of setting from IP phone. ※ Configure only one IP AOM at a time. © SAMSUNG Electronics Co., Ltd. - Page 8 Configuration is initialized if key 8 is pressed. . mode : DHCP (PnP mode not DHCP mode. Page15) . IP address : 10.0.0.3 Configuration is changed to default if key 12 is pressed. . mode : STATIC . IP address : 10.0.0.3 © SAMSUNG Electronics Co., Ltd.
- Page 9 - Input correct value at each step. - Do not need IP, Subnet and Gateway when using DHCP mode. IP AOM Setup 1. Manual IP 2. DHCP IP AOM Setup - Manual IP 192.168.0.99 © SAMSUNG Electronics Co., Ltd.
- Page 10 IP AOM Setup - Server IP Server IP Address 192.168.0.2 IP AOM Setup - ID Phone ID 1001 IP AOM Setup - Password Password **** → Do not need Phone ID and Password on SCM. They are for OfficeServ. © SAMSUNG Electronics Co., Ltd.
- Page 11 - When completion (AOM_INFO_SET_OK receive), IP AOM reboots and tries to apply settings. Setup Success !!! Press Enter to Return !! - When no response, IP phone shows error message bellow. AOM No Answer !!! Press Enter to Return !! AOM Setup Fail !!! © SAMSUNG Electronics Co., Ltd.
- Page 12 Press Enter to Return !! © SAMSUNG Electronics Co., Ltd.
-
Page 13: Using Web Management Page (Http)
- Connect to Web management page of IP AOM (default IP is 10.0.0.3) to set network. - If IP AOM is working it can be connected to current IP address. Screen for connect to HTTP - http://10.0.0.3:8080 (port number is 8080) - Initial ID : admin, password : samsung © SAMSUNG Electronics Co., Ltd. - Page 14 - Reboot after changing the value to need. IP AOM IP Address, Subnet Mask, Default Gateway Server IP Address, ID / Password VLAN, 802.1x Image Upgrade © SAMSUNG Electronics Co., Ltd.
-
Page 15: Auto Registration Using Pnp(Plug And Play)
- Use below DHCP options to prevent to get IP address from other DHCP server. ※ DHCP Server config. (DHCP server option config. option config is different for every DHCP server.) → DHCP_Server_Name(66): "SEC_ITP" → DHCP_Server_IP(128): OfficeServ IP © SAMSUNG Electronics Co., Ltd. - Page 16 System MMC Settings - Pre-setting IP AOMs MAC address for user ID on MMC840. (A~F are capitalized for MAC address) [3001]USER ID [3002]USER ID 001632C57B84 001632C53729 - After completion make IP AOM factory reset. © SAMSUNG Electronics Co., Ltd.
-
Page 17: Error Check With Led Status
AOM could not get IP - check DHCP server are On address from DHCP server at DHCP mode LED61 ~ LED64 IP conflict - check AOM’s IP are blink address or other IP devices nearby. © SAMSUNG Electronics Co., Ltd. -
Page 18: Led Status During S/W Upgrade
TFTP server and write it on flash memory. Complete write LED13 ~ LED24 are image. LED13 LED24 Fail to upgrade s/w. - check TFTP server are blink. settings - check connecting LAN port or cable retrying after reboot © SAMSUNG Electronics Co., Ltd. -
Page 19: Annex
Power DC 5 V ; 3 A Output Voltage Ten Pao Co. PN:S018EU0500300 Adaptor DC 48V ; 0.2A POE Input Voltage IEEE 802.3af standard (CLASS 3) POE Spec. 0~45 Temperature(℃) 10~90 Humidity(%) Number of Buttons © SAMSUNG Electronics Co., Ltd. -
Page 20: Removal Of Stand
Removal of Stand 받침대의 각도 70 도일 경우에도 동일한 방법으로 분리합니다. -
Page 21: Ip Aom Ports
IP AOM Ports The rear side of the IP AOM port Function DC 5 V DC Jack to power adaptor ☎ RJ-45 to IP Phone RJ-45 to Switch... -
Page 22: Connection With Ip Phone
Connection with IP Phone The front side The rear side ☎ - Connect UTP cable between port and LAN port of the IP Phone. -
Page 23: Connection With Switch
Connection with Switch - Connect UTP cable between LAN port and a port of the Switch - The display when equipped with stands...


Need help?
Do you have a question about the SMT-i5264 and is the answer not in the manual?
Questions and answers