Table of Contents
Advertisement
Quick Links
Advertisement
Table of Contents

Subscribe to Our Youtube Channel
Related Manuals for AerialBox T2200

Summary of Contents for AerialBox T2200
-
Page 1: User Manual
T2200 User Manual... - Page 3 Welcome Thank you for choosing the Dish TV aerialBox T2200 MyFreeviewPlus ® PVR. You will be able to receive all Freeview High Definition and Standard Definition digital channels, as well as the new MyFreeviewPlus bringing ® the most popular shows from On Demand and Live TV together all free from subscriptions.
-
Page 4: Table Of Contents
Contents About your Set Top Box................Main Features ..................What’s in the Box?................. Product Overview..................Front and Back View ................Remote Control..................Connecting Up..................9 Getting Started..................10 Main Features....................Changing the Channel ................Information Banner.................. Service and Carrier Details..............Quick Selection..................Audio Descriptions.................. - Page 5 Main Menu....................Installation....................Factory Reset..................Country Setup..................Version/System Info................Settings....................Language....................OSD On Screen Display................Audio....................... Video...................... Wakeup Timer..................Parental Controls..................Time Settings..................Admin....................PVR Settings..................Channel Organiser................Network Setup................... Media Manager..................USB..................... Media Info.................... Booked List..................File Transfer..................Firmware...................... Upgrading via USB ................
-
Page 6: About Your Set Top Box
About your Set Top Box Main Features • MyFreeview, record two channels while watching another. • New channels added automatically. • Watch TV One, TV2 and TV3 in High Definition. • MHEG-5 Freeview 8 Day EPG, book recordings from the guide •... -
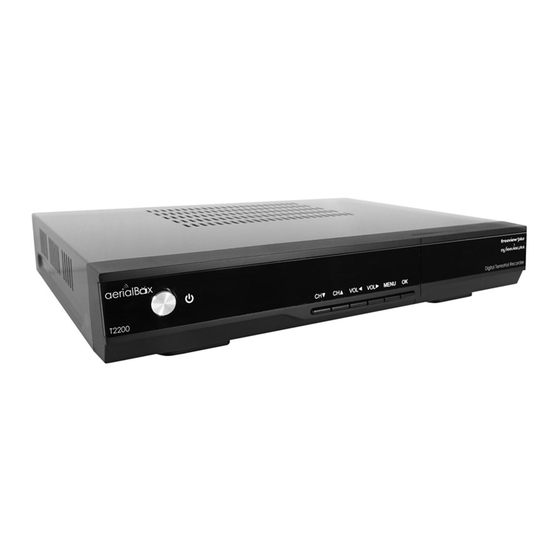
Page 7: Product Overview
Product Overview Front View Standby Button Signal/Power/Standby Indicator Switches on/off the receiver Orange: Signal Lock LED Display Green: Power Displays channel number, menu. Red: Standby Menu buttons Access Menu, volume, channel. Back View RF IN For Wired Internet connection. Input for UHF Aerial DC 12V IN RF OUT Connect power supply. -
Page 8: Remote Control
Remote Control Power Key Mute Key Subtitle Key Subtitle Key MUTE Audio Key Favourite Key AUDIO TV/R Numeric Keys Info Key Record List Key LIST INFO SCHEDULE Colour Keys MENU EXIT Menu Key Record List Key OK/Select Key Navigation Keys Library List Key Record List Key Portal Key... -
Page 9: Connecting Up
Connecting Up Connecting to the Aerial Connect the cable from your aerial to the RF IN socket in the back of your receiver. Connecting to your TV Connecting using a HDMI Cable HD Ready TV Connect one end of the HDMI cable into the HDMI socket on the back of the receiver, then connect the other end to the HDMI input sockets on your HD Ready TV. -
Page 10: Getting Started
Getting Started Step Install batteries in the remote control Open the battery cover of the remote control and put two AAA size batteries so the ‘+’ and ‘-’ marks on the batteries match the ‘+’ and ‘-’ marks inside the remote control. Replace the battery cover. - Page 11 Select your Country By Default, this is set to New Zealand so you don’t have to do anything. Press the ▶ key to continue Select your Region Select your region, this will ensure you receive the correct channels and that advertisements are tailored to your part of New Zealand.
-
Page 12: Main Features
LIST Main Features INFO SCHEDULE Your receiver comes packed full of great features which you can use right away, this section MENU EXIT will tell you the basic functions of the receiver so that you can get used to it. MUTE AUDIO TV/R... -
Page 13: Quick Selection
Quick Select This will allow you to select other channels or view its schedule while allowing you to view the current channel. Press OK on your remote. Use the ▼▲ keys to select a channel. Press OK to view that channel. Quick Select - Programme Guide You can also view a 7 Day schedule of any channel without interrupting the current... -
Page 14: Audio Descriptions
Audio Descriptions Audio Descriptions are helpful for those who are visually impaired, Audio Descriptions narrate the programme so that you can understand what is happening in a scene. Please Note: Audio Descriptions are only available on TV One and TV2 and with selected programmes only with the icon in the Freeview EPG (Page ) -
Page 15: Freeviewplus
FreeviewPlus ™ THE SMARTEST WAY TO ENJOY TV, bringing the most popular shows from On Demand and Live TV together. The T2100 Set Top Box has access to the following features: More information about FreeviewPlus can be found on the Freeview Website at www.freeviewplus.co.nz We also have a range of videos about how to use FreeviewPlus on our website. -
Page 16: Freeview Epg
Freeview EPG The Freeview EPG allows you to view detailed programme information on your favorite channels for up to 8 Days. You can also view what’s on now/next and switch to another channel. Launching the Freeview EPG Press the EPG (Guide) Wait for the guide to load. -
Page 17: Recording
Recording MyFreeview allows you to watch your favorite TV Shows when you want, record a whole series so you can watch them back to back in the future, Pause and rewind live TV and heaps more! You have a built-in 1TB hard-drive so you can record just over 200 Hours of your favorite TV programs for free! Instant Recording Press the... -
Page 18: Recording Via The Freeview Epg
Recording via the Freeview EPG Press the EPG (Guide) button. Browse for a programme you wish to schedule for recording, and then press the RED button. The EPG will mark the programme to record. If the programme has more than one episodes then the EPG will ask if you wish to record the series (YELLOW) or only just the one episode (BLUE). -
Page 19: Pause Live Tv
Pause Live TV (Time shifting) If you are interrupted while you are watching a live TV programme such as a telephone call or have to leave the room, then you can pause the TV and pick up where you left off. Press Pause on your remote. -
Page 20: Delete Recordings
Delete Recordings To delete a recording in the Library, highlight your selected program and then press the RED button to delete, confirm and your show is now erased from the HDD If you want to delete multiple recordings at the same time, simply press the GREEN button to mark each program (You will notice a small blue tick appearing beside the channel name) then press RED to delete. -
Page 21: Editing Recordings
Editing Recordings You can edit out certain parts of a program which is handy if you want to create a seamless viewing. Once you have selected your program and accessed the Recording Edit from the options menu the program will play in its real-time. -
Page 22: Bookmarking Recordings
Main Menu Factory Reset If you experience any issues with your PLEASE NOTE: receiver and can’t get channels or things are A Factory Reset will loose all your not right you can do a factory reset which recorded programs! will refresh the unit and reset all the internal components. -
Page 23: Language
Language The language settings allow you to adjust the native language for the unit. There are several adjustments you can make which includes: • OSD (On Screen Display) • First Preferred Audio • Second Preferred Audio • First Preferred Subtitle •... -
Page 24: Audio
Audio If you have a home theatre system that you are using to get digital audio from the receiver then you can adjust the settings according to your setup. • SPDIF Delay Adjust the delay time for the audio to come through. -
Page 25: Wakeup Timer
Wakeup Timer You can set a service to be recorded at a specific time. Even if the digital receiver is in standby mode, it will start recording at a specified time. When the recording comes to the end the unit will stay in standby until you press the standby button. -
Page 26: Parental Controls
Parental Controls Time Settings Adjust how you want to retrieve the Time and Parental controls are handy if you have Date via any of the following methods: young children. You can lock programs that • Air (Optus D1) have a G, PGR or AO rating. •... -
Page 27: Channel Organiser
Channel Organiser The Channel organiser is a great way to sort through the channels and organise them into favorites, lock, rename and skip them. The Organiser displays the list of channels which you can use the ▲/▼ keys to scroll through, select a channel by pressing the OK button to do any of the following: Press the following number to:... -
Page 28: Network Setup
Network Setup To access Internet Services you will need to connect the receiver to the Internet. You can connect using two methods: Ethernet Cable (LAN) Connect an Ethernet cable from your router into the back of the receiver to connect to the Internet., Configuration will be done automatically . -
Page 29: Usb
You can open up photo, music and video files from a USB drive that you can playback on the receiver. Navigate through the menu to select and playback your content. Media Info This displays the current USB Media interfaces that are connected to the receiver. You will be able see their total space and free space and can format the drive to work on the receiver. -
Page 30: File Transfer
File Transfer You can move recorded content from either the built in memory (SATA) or a plugged in USB drive to another, very handy if you wish to view content on the go or on your PC. Transfer from SATA to USB Select a program you wish to move or copy to USB, you can also mark several programs by pressing the YELLOW button. -
Page 31: Firmware
Firmware Overtime, software updates may become available to this receiver either through the USB, Internet or over the Freeview platform. To update the receiver go to Menu>Software Update then follow any of these steps to update Upgrading via USB Download firmware from dishtv.co.nz ensure you download the correct firmware and follow the instructions on the website. -
Page 32: Frequently Asked Questions
If you are getting unusual issues with your unit such as freezing on menus please • Factory Reset the unit, • Check that software is up to date. (Page 31) • The built in iManual features more information and up to date topics about the aerialBox T2200 PVR... -
Page 33: Technical Specifications
Technical Specifications Item Specification Tuner Frequency Range 174MHz to 858MHz Signal Input Level -90 ~ -20dBm IF Bandwidth 7, 8 MHz Interface HDMI Output RCA Composite (CVBS) video/audio output S/PDIF audio via RCA Coaxial RJ-45 Ethernet 10/100Mbps 2x USB 2.0 Connectors 1x front 1x rear IR extension socket 12v DC jack input 5.5mm x 2.1mm Wi-Fi 802.11N... -
Page 34: Troubleshooting
Troubleshooting Problem Possible Causes What to do Main Lead unplugged/switched off Check that the adapter is Power Indicator on front plugged in and switched on. panel not lit. Your TV isn’t able to display the current Check to see if your TV is set to No picture on TV output format the current source. -
Page 35: Support Information
Support Information We provide free technical assistance to all our products during our normal business hours. We try our best to get the issues sorted either over the phone or via email. Contact us through either of these methods Method Contact Details Phone 0800 DISH TV (0800 347 488) or 07 929 4123... -
Page 36: Warranty Information
Warranty Information Please keep your receipt as proof of purchase. This product is warranted for any defect in materials or workmanship for one year after the original date of purchase. This product is for normal domestic use only. This warranty does not cover damage from misuse or neglect, accidental damage, vermin infestation, excessive voltages such as lightening or power surges or any modification that affects the reliability of the product. - Page 39 www.dishtv.co.nz 0800 347 488 support@dishtv.co.nz...
Need help?
Do you have a question about the T2200 and is the answer not in the manual?
Questions and answers