Table of Contents
Advertisement
Quick Links
Download this manual
See also:
Basic Owner's Manual
Please read these instructions carefully before using this product, and
save this manual for future use.
More detailed instructions on the operation
of this camera are contained in "Operating
Instructions for advanced features (PDF
format)" in the supplied CD-ROM. Install it on your PC to
read it.
GH
Basic Operating Instructions
Model No.
Digital Camera/
DMC-GM1K
Lens Kit
VQT5D62
F1013WT0
Advertisement
Table of Contents

Related Manuals for Panasonic Lumix DMC-GM1K


Summary of Contents for Panasonic Lumix DMC-GM1K
-
Page 1: Basic Operating Instructions
Basic Operating Instructions Digital Camera/ Lens Kit DMC-GM1K Model No. Please read these instructions carefully before using this product, and save this manual for future use. More detailed instructions on the operation of this camera are contained in “Operating Instructions for advanced features (PDF format)”... -
Page 2: Information For Your Safety
Dear Customer, We would like to take this opportunity to thank you for purchasing this Panasonic Digital Camera. Please read these Operating Instructions carefully and keep them handy for future reference. Please note that the actual controls and components, menu items, etc. of your Digital Camera may look somewhat different from those shown in the illustrations in these Operating Instructions. - Page 3 ∫ About the battery pack CAUTION • Danger of explosion if battery is incorrectly replaced. Replace only with the type recommended by the manufacturer. • When disposing of the batteries, please contact your local authorities or dealer and ask for the correct method of disposal.
- Page 4 ∫ How to replace the Fuse The location of the fuse differ according to the type of AC cable (figures A and B). Confirm the AC cable fitted and follow the instructions below. Illustrations may differ from actual AC cable. Open the fuse cover with a Figure A Figure B...
-
Page 5: Cautions For Use
Cautions for Use • Do not use any other USB connection cables except the supplied one or a genuine Panasonic USB connection cable (DMW-USBC1: optional). • Use a “High Speed HDMI micro cable” with the HDMI logo. Cables that do not comply with the HDMI standards will not work. -
Page 6: Table Of Contents
Contents Recording Information for Your Safety....2 Taking Pictures using the Automatic • Cautions for Use ......5 Function (Intelligent Auto Mode) ..24 Taking Pictures with Preparation Manual Focus ........26 Reading the Operating Instructions Wi-Fi (PDF format) ......... 7 Care of the camera ...... -
Page 7: Preparation
You can download and install a version of Adobe Reader that you can use with your OS from the following Web Site. http://get.adobe.com/reader/otherversions ∫ To uninstall the Operating Instructions (PDF format) Delete the PDF file from the “Program Files\Panasonic\Lumix\” folder. ∫ For Mac Turn the PC on and insert the CD-ROM containing the Operating Instructions (supplied). -
Page 8: Care Of The Camera
Preparation Care of the camera Do not subject to strong vibration, shock, or pressure. • The lens, monitor, or external case may be damaged if used in the following conditions. It may also malfunction or image may not be recorded if you: –... -
Page 9: Standard Accessories
When storing the battery for a long period of time, we recommend charging it once a year. Remove the battery from the camera and store it again after it has completely discharged. • Consult the dealer or Panasonic if you lose the supplied accessories. (You can purchase the accessories separately.) (ENG) VQT5D62... - Page 10 Preparation DMC-GM1K H-FS12032 VYF3562 DMW-BLH7E DE-A98B K2CT3YY00034 K1HY08YY0031 VFF1245 VFC5071 VQT5D62 (ENG)
-
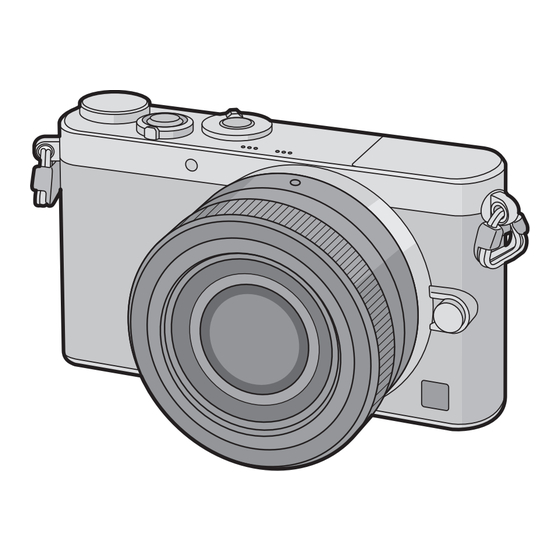
Page 11: Names And Functions Of Components
Preparation Names and Functions of Components ∫ Camera body Self-timer indicator/ AF Assist Lamp Sensor Flash Lens fitting mark (P14) Mount Lens lock pin Lens release button (P14) Flash open lever 10 11 • The flash opens, and recording with the flash becomes possible. - Page 12 Panasonic DC coupler (DMW-DCC15: optional) and AC adaptor (DMW-AC8G: optional) are used. • Always use a genuine Panasonic AC adaptor (DMW-AC8G: optional). • When using an AC adaptor, use the AC cable supplied with the AC adaptor. • It is recommended to use a fully charged battery or AC adaptor when recording motion pictures.
- Page 13 Preparation ∫ Lens H-FS12032 Lens surface Tele Zoom ring Wide Contact point Lens fitting mark • The interchangeable lens (H-FS12032) does not have a focus ring, but you can use manual focus by operating the camera. Refer to P26 for details. Touch screen (capacitive) Operate the touch screen directly with your finger.
-
Page 14: Preparation
Preparation Preparation • Check that the camera is turned off. Changing the Lens • When attaching or detaching the interchangeable lens (H-FS12032), retract the lens barrel. • Change lenses where there is not a lot of dirt or dust. • Do not press the lens release button A when you attach a lens. -
Page 15: Charging The Battery
Preparation Charging the Battery The battery that can be used with this unit is DMW-BLH7E. • The battery is not charged when the camera is shipped. Charge the battery before use. Attach the battery paying attention to the direction of the battery. Connect the AC cable. -
Page 16: Inserting/Removing The Battery
Preparation Inserting/Removing the Battery • Always use genuine Panasonic batteries (DMW-BLH7E). • If you use other batteries, we cannot guarantee the quality of this product. • Being careful about the battery orientation, insert all the way until you hear a locking sound and then check that it is locked by lever A. -
Page 17: Formatting The Card (Initialisation)
Preparation Formatting the card (initialisation) Format the card before recording a picture with this unit. Since data cannot be recovered after formatting, make sure to back up necessary data in advance. Select the menu. (P18) [MENU] > [Setup] > [Format] •... -
Page 18: Setting The Menu
Preparation Setting the Menu Setting menu items Press [MENU/SET]. Press 3/4 of the cursor button to select the menu item and press [MENU/SET]. Press 3/4 of the cursor button to select the setting and press [MENU/SET]. • Depending on the menu item, its setting may not appear or it may be displayed in a different way. -
Page 19: Calling Frequently-Used Menus Instantly (Quick Menu)
Preparation Calling frequently-used menus instantly (Quick Menu) By using the Quick Menu, some of the menu settings can be easily found. • The features that can be adjusted using Quick Menu are determined by the mode or a display style the camera is in. Press [ ] to display the Quick Menu. -
Page 20: Basic
Basic Taking a Still picture • When the interchangeable lens (H-FS12032) is attached, extend the lens barrel before use. • Set the drive mode to [ ] (single) by pressing 4( Select the Recording Mode. (P21) Press the shutter button halfway to focus. A Aperture value B Shutter speed •... -
Page 21: Selecting The Recording Mode
Basic Selecting the Recording Mode Select the mode by rotating the mode dial. • Rotate the mode dial slowly to select the desired mode. Intelligent Auto Mode The subjects are recorded using settings automatically selected by the camera. Intelligent Auto Plus Mode Allows you to adjust the brightness and colour hue when in Intelligent Auto Mode. -
Page 22: Playing Back Pictures/Motion Pictures
Basic Playing Back Pictures/Motion Pictures Playing Back Pictures Press [(]. Press 2/1. 1/98 1/98 1/98 1/98 2: Play back the previous picture 1: Play back the next picture Playing Back Motion Pictures This unit was designed to play motion pictures using the AVCHD, MP4 and QuickTime Motion JPEG formats. -
Page 23: Deleting Pictures
Basic Deleting Pictures Once deleted, pictures cannot be recovered. To delete a single picture In Playback Mode, select the picture to delete and then press [ ]. • The same operation can be performed by touching [ Press 3 to select [Delete Single] and then press [MENU/SET]. -
Page 24: Recording
Recording Taking Pictures using the Automatic Function (Intelligent Auto Mode) Recording Mode: In this mode, the camera makes the optimal settings for the subject and scene, so we recommend it when you wish to leave the settings to the camera and record without thinking about them. - Page 25 Recording ∫ Combining pictures into a single picture with rich gradation ([iHDR]) When [iHDR] is set to [ON] and there is, for example, strong contrast between the background and the subject, multiple still pictures are recorded with differing exposures and combined to create a single still picture rich in gradation. [iHDR] works automatically as needed.
-
Page 26: Taking Pictures With Manual Focus
Recording Taking Pictures with Manual Focus Applicable modes: Use this function when you want to fix the focus or when the distance between the lens and the subject is determined and you do not want to activate Auto Focus. The operations to focus manually differ depending on the lens used. When using an interchangeable lens (H-FS12032) with no focus ring Set the focus mode lever to [MF]. -
Page 27: Wi-Fi
Controlling with a Smartphone/Tablet Using a smartphone/tablet, you can record images on the camera and save them. You need to install “Panasonic Image App” (referred to as “Image App” from this point on) on your smartphone/tablet. ∫ About the [Wi-Fi] button At the time of purchase, [Wi-Fi] is set to [Fn1]. -
Page 28: Connecting To A Smartphone/Tablet
Wi-Fi Connecting to a smartphone/tablet By pressing and holding [Wi-Fi], you can easily establish a connection. Preparations: • Install the “Image App” in advance. (P27) Press and hold [Wi-Fi]. • The information (SSID and password) required for directly connecting your smartphone/tablet to this unit is displayed. •... -
Page 29: About The Supplied Software
About the supplied software About the supplied software The supplied CD-ROM includes the following software. Install the software on to your computer before use. • PHOTOfunSTUDIO 9.2 AE (Windows XP/Vista/7/8) • SILKYPIX Developer Studio (Windows XP/Vista/7/8, Mac OS X v10.5/v10.6/v10.7/v10.8) For details on how to use the SILKYPIX Developer Studio, refer to the “Help”... -
Page 30: Others
Others Monitor Display In recording HDR/iHDR Multi exposure Digital Zoom Electronic shutter Picture Mode (Still picture priorities) 98 98 98 60 60 Overheat indicator Recording Mode Quality A › C 2 - 1 EXPS EXPS Focus Mode AFS AFF AFC Custom settings AF Mode... - Page 31 Others Dial operation guide White Balance Bracket White Balance Fine Adjustment 98 98 98 60 60 VÐîÑ White Balance Colour Number of recordable AF area pictures ¢6 Spot metering target m30s ¢1, 6 Available recording time Self-timer ¢5 Touch tab Mic level display...
- Page 32 Others In recording Touch zoom Brightness Touch Shutter Type of defocus ([Miniature Effect]) Touch AE One point colour Position of the light source Peaking Creative control adjustment Fn2 (Function button) Aperture value Fn3 (Function button) Shutter speed Fn4 (Function button) ISO sensitivity Fn5 (Function button) Microphone level adjustment...
- Page 33 Others In playback 1/98 1/98 1/98 Clear Retouch completed icon Currently retrieving information icon Playback (Motion Pictures) F3.5 F3.5 F3.5 60 60 60 Number of days that have passed since the departure date Burst Picture Group Display Playback Mode [Time Lapse Shot] Picture Protected picture...
-
Page 34: Histogram Display
Others In playback Detailed information display F3.5 STD. STD. STD. 100-0001 Recording information Recorded date and time/World Time Intelligent Dynamic Range Control ¢1 Picture size/Aspect Ratio ¢2 /iHDR ¢2 Quality A › Intelligent Resolution ¢2 Colour space Shading Compensation ¢2 100-0001... -
Page 35: Menu List
Others Menu list [Rec] • If any of the settings common to both the [Rec] and [Motion Picture] menus have been changed, the corresponding setting in the other menu will also be changed. You can select effects to match the type of image you wish to record. [Photo Style] You can adjust the colour and image quality of the effects. -
Page 36: [Motion Picture]
Others When the ISO sensitivity is set to [AUTO] or [ ], an optimal ISO [ISO Limit Set] sensitivity is set with the selected value as an upper limit. [ISO Increments] The ISO sensitivity settings values changes in steps of 1/3 EV or 1 EV. [Extended ISO] ISO sensitivity can be set up to minimum [ISO125]. -
Page 37: [Custom]
Others [Custom] [Cust.Set Mem.] Registers the current camera settings as custom set. [Silent Mode] Disables operational sounds and output of light at once. [AF/AE Lock] Sets the fixed content for focusing and exposure when the AF/AE lock is on. [Half Press Release] The shutter will immediately fire when the shutter button is pressed halfway. -
Page 38: [Setup]
Others [Q.MENU] Switch the setting method of Quick Menu. [Video Button] Enables/disables the motion picture button. Sets the screen display and lens operations when using an interchangeable [Power Zoom Lens] lens that is compatible with power zoom (electrically operated zoom). [Lens w/o Focus Ring] Sets the control dial operation for MF Assist. -
Page 39: [Playback]
Others [Self Timer Auto Off] Sets whether or not to cancel the self-timer when this unit is turned off. [No.Reset] Returns the image file number to 0001. [Reset] The recording or setup/custom settings are reset to the default. Reset all settings in the [Wi-Fi] menu to factory default settings. [Reset Wi-Fi Settings] (Excluding [LUMIX CLUB]) [Pixel Refresh]... -
Page 40: Troubleshooting
Others Troubleshooting First, try out the following procedures. If the problem is not resolved, it may be improved by selecting [Reset] on the [Setup] menu. The camera cannot be operated even when it is turned on. The camera turns off immediately after it is turned on. •... - Page 41 Others The brightness or the hue of the recorded picture is different from the actual scene. • When recording under fluorescent or LED lighting fixture, etc., increasing the shutter speed may introduce slight changes to brightness and colour. These are a result of the characteristics of the light source and do not indicate a malfunction.
- Page 42 Others [Thumbnail is displayed] appears on the screen. • Is it a picture that has been recorded with other equipment? In such cases, these pictures may be displayed with a deteriorated picture quality. Motion pictures recorded with this model cannot be played back on other equipment.
- Page 43 Others Transmission of the image fails midway. Some images cannot be transmitted. • Image cannot be transmitted when the battery indicator is flashing red. • Is the size of the image too large? > Reduce the image size at [Size], and then send. >...
-
Page 44: Specifications
Others Specifications Specifications are subject to change without notice. Digital Camera Body (DMC-GM1): Information for your safety Power Source: DC 8.4 V Power Consumption: 2.3 W (When recording) [When the Interchangeable lens (H-FS12032) is used] 1.5 W (When playing back) [When the Interchangeable lens (H-FS12032) is used] Camera effective 16,000,000 pixels... - Page 45 Others Burst recording Burst speed Mechanical shutter: 5 pictures/second (High speed), 4 pictures/second (Middle speed), 2 pictures/second (Low speed) Electronic shutter: 40 pictures/second (Super high speed), 10 pictures/second (High speed), 4 pictures/second (Middle speed), 2 pictures/second (Low speed) Number of Max.
- Page 46 Others Flash Built-in pop up flash GN 5.6 equivalent (ISO200· m) [GN 4.0 equivalent (ISO100 · m)] Flash range: Approx. 90 cm to 4.5 m [When the Interchangeable lens (H-FS12032) is mounted, WIDE, [ISO AUTO] is set] AUTO, AUTO/Red-Eye Reduction, Forced ON, Forced ON/ Red-Eye Reduction, Slow Sync., Slow Sync./Red-Eye Reduction, Forced OFF Flash synchronisation...
- Page 47 Others Recording quality Motion pictures [AVCHD] 1920k1080/50i (Sensor output is 50 frames/sec.) (17 Mbps)/ 1920k1080/50i (Sensor output is 25 frames/sec.) (24 Mbps)/ 1920k1080/24p (Sensor output is 24 frames/sec.) (24 Mbps)/ 1280k720/50p (Sensor output is 50 frames/sec.) (17 Mbps) [MP4] 1920k1080/25p (Sensor output is 25 frames/sec.) (20 Mbps)/ 1280k720/25p (Sensor output is 25 frames/sec.) (10 Mbps)/ 640k480/25p (Sensor output is 25 frames/sec.) (4 Mbps) Quality...
- Page 48 Infrastructure mode Battery Charger (Panasonic DE-A98B): Information for your safety Input: 110 V to 240 V, 50/60 Hz, 0.15 A Output: 8.4 V, 0.43 A Battery Pack (lithium-ion) (Panasonic DMW-BLH7E): Information for your safety Voltage/capacity: 7.2 V/680 mAh VQT5D62 (ENG)
- Page 49 Others Interchangeable Lens H-FS12032 “LUMIX G VARIO 12– 32 mm/F3.5 –5.6 ASPH./MEGA O.I.S.” Focal length f=12 mm to 32 mm (35 mm film camera equivalent: 24 mm to 64 mm) Aperture type 7 diaphragm blades/circular aperture diaphragm Aperture range F3.5 (Wide) to F5.6 (Tele) Minimum aperture value Lens construction...
-
Page 50: Digital Camera Accessory System
Mount Adaptor DMW-MA1, DMW-MA2M, DMW-MA3R ¢1 The AC Adaptor (optional) can only be used with the designated Panasonic DC Coupler (optional). The AC adaptor (optional) cannot be used by itself. ¢2 Use if the attached lens is in contact with the tripod pedestal. - Page 51 This product incorporates the following software: (1) the software developed independently by or for Panasonic Corporation, (2) the software owned by third party and licensed to Panasonic Corporation, and/or (3) open source software The software categorised as (3) is distributed in the hope that it will be useful, but WITHOUT ANY WARRANTY, without even the implied warranty of MERCHANTABILITY or FITNESS FOR A PARTICULAR PURPOSE.
- Page 52 AVC Video. No license is granted or shall be implied for any other use. Additional information may be obtained from MPEG LA, LLC. See http://www.mpegla.com . Panasonic Corporation Web Site: http://panasonic.net Panasonic Corporation 2013...
Need help?
Do you have a question about the Lumix DMC-GM1K and is the answer not in the manual?
Questions and answers