Table of Contents
Advertisement
Advertisement
Table of Contents

Related Manuals for KTM 2012 250 SX-F


Summary of Contents for KTM 2012 250 SX-F
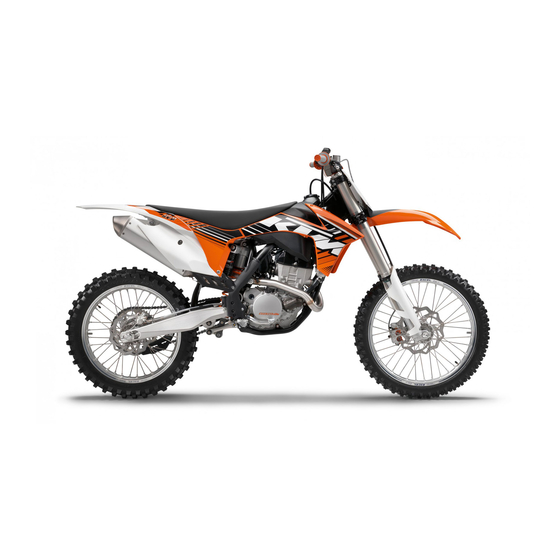
- Page 1 In-Depth Engine and Fuel System Maintenance and Repair Manual 2012 KTM 250 SX-F...
- Page 3 Jeremy Jonas December 2, 2013 Denton, TX...
-
Page 4: Table Of Contents
Table of Contents Table of Contents ..........ii Introduction ............1 Troubleshooting ..........3 Fuel System ............ 3 Engine ............4 Common Maintenance and Repairs: Fuel System ..5 Replacing the Fuel Filter ........5 Changing the Fuel Injector ........ 7 Replacing the ECU...........8 Testing the Fuel Pump…………………………………………10 Common Maintenance and Repairs: Engine .. -
Page 5: Introduction
Introduction Congratulations on your purchase of the 2012 KTM 250 SX-F. The purpose of this manual is to assist you in completing important maintenance and repairs for your KTM motorcycle. Through following the original KTM Owners’ Manual and this additional reference, you will be able to more independently work your motorcycle. -
Page 9: Troubleshooting
Test fuel pump (pg.10) ECU Issue Replace ECU (pg.8) Take existing ECU to KTM dealership for re-mapping Engine Bad fuel pump Check fuel cranks but hoses for loose does not... -
Page 10: Engine
Troubleshooting: Engine Problem Possible Cause Solutions Engine Improper Valve Adjust Rattling Clearance Valves(pg.11) Engine timing off Adjust Timing(pg.23) Excess Piston Replace piston Wear and rings(pg.13) Excess Rod Check crank rod Bearing Wear bearings(pg.21) Loss of Excess Piston ... -
Page 11: Common Maintenance And Repairs: Fuel System
Common Maintenance and Repairs: Fuel System Replacing the Fuel Filter Tools needed: 8mm T-handle or socket Phillips screwdriver 10mm T-handle or socket Parts needed: Fuel Filter Part #81207090000 Step 1: Remove the Seat Using your 8-mm T-handle or socket remove the bolt under the rear fender as shown in Picture 1, then remove seat. - Page 12 disconnect the fuel cable as in picture 1.2. You can now remove the fuel tank. Picture 1.1 (Dirt Rider) Picture 1.2 (Ntl World)
-
Page 13: Changing The Fuel Injector
Common Maintenance and Repairs: Fuel System Step 3: Replace the Fuel Filter Locate the clamp at the end of the main fuel line (shown in picture 1.3). Part Part A Part C Picture 1.3 (Enduro 360) Using your Phillips screwdriver, remove part B. Locate the fuel filter (Part A), and remove it from the plastic fitting (Part C). -
Page 14: Replacing The Ecu
Step 1: Remove Seat and Fuel Tank (pg.5) Step 2: Remove fuel injector Using your Phillips screwdriver, remove the two screws (shown in picture 1.3) holding the fuel injector in place. Picture 1.3 (ebay) After removing the bolts, gently un-plug the injector and Replace it with the new one. - Page 15 Common Maintenance and Repairs: Fuel System Step 1: Remove the seat (pg. 5) Step 2: Remove the ECU Locate the ECU (picture 1.4) located behind the fuel tank. Gently unplug the Main connection and replace the ECU. Picture 1.4 (Rubber Side Up)
-
Page 16: Testing The Fuel Pump
Testing the Fuel Pump Step 1: Remove Seat (pg. 5) Step 2: Test Pump To test the fuel pump, tap the electric start once and you will hear the pump turning for 3 seconds or more. If the pump turns for less than 3 seconds, then it needs to be replaced. -
Page 17: Common Maintenance And Repairs: Engine
Common Maintenance and Repairs: Engine Checking Valve Clearance Tools needed 8mm T-handle or socket 10mm T-handle or socket Feeler Gauge Parts Needed Valve Shim Kit Step 1: Remove the Valve Cover Using your 10mm socket, remove the three bolts holding the valve cover in place as shown in picture 1.5. - Page 18 Slide your feeler gauge into the gap between the valve shim and the rocker arm. The proper valve clearance for a 2012 KTM 250 SX-F is 18-23 thousands of an inch. If you cannot fit the 18 into the gap, then you need to put the next size smaller shim in.
-
Page 19: Changing The Piston
15mm deep socket 27mm deep socket Flathead screwdriver Parts Needed 2012 KTM 250sx-f Piston Kit (aftermarket or OEM) Cylinder Head Gasket Kit (aftermarket or OEM) Step 1: Remove the Valve Cover (pg. 11) Step 2: Put the motor on top dead center (TDC) The first thing you need to do is remove the large Screw in the center of the stator cover (Picture 1.7). - Page 20 The easiest way to do this is to locate the two gold marks on the KTM timing gears. When these marks are facing each other (Picture 1.8), the Motor is on TDC.
- Page 21 Common Maintenance and Repairs: Engine Step 3: Release Timing Chain Tensioner Using a 27mm deep socket, remove the timing chain tensioner from the front of the motor. Timing Chain Tensioner After removing the tensioner, the timing chain will now be loose. Proceed to step four. Step 4: Replacing the Piston Now that the motor is locked on TDC, we can begin the disassembly.
- Page 22 bolts, and the cylinder head bolts. Gently remove everything and be careful to not drop anything down into the bottom end. Once you get the cylinder head off, you will see the cylinder and the piston. Take off the cylinder very gently so that you don’t scratch the cylinder walls.
- Page 23 Common Maintenance and Repairs: Engine Step 5: Re-assembling the Top End Begin by bolting the cylinder head and rocker box back into place. Then set the camshafts into their appropriate grooves as shown in picture 2. Picture 2 (Motorcyclists Online) It is also crucial to make sure that all four valve shims are in place.
-
Page 24: Checking The Cylinder For Wear And Damage
Checking the Cylinder for Wear and Damage Tools needed: 8mm T-handle or socket 10mm T-handle or socket 30mm deep socket 13mm hex key 15mm deep socket 27mm deep socket Flathead screwdriver Dial-Bore Gauge Step 1: Removing the Cylinder Follow steps one and two for replacing a piston on pg. - Page 25 Common Maintenance and Repairs: Engine Step 2: Checking for Wear Using your Dial-Bore Gauge measure the cylinder diameter from top to bottom as shown in picture 2.2. Picture 2.2 (Diesel Power) The diameter should be no more than 10 thousands of an inch difference from top to bottom.
-
Page 26: Checking The Crank Rod Bearings For Wear
Checking the Crank Rod Bearings for Wear Tools Needed 8mm T-handle or socket 10mm T-handle or socket 30mm deep socket 13mm hex key 15mm deep socket Flathead screwdriver Step 1: Remove the Piston Follow all of the steps on pages 13-16 to remove the piston. -
Page 27: Checking The Main Crank Bearings For Wear
Common Maintenance and Repairs: Engine any slack, then the bearing is bad. The rod should be held in place and should rotate freely side to side, but should not move up or down at all. Checking the Main Crank Bearings for Wear Tools Needed ... -
Page 28: Checking The Timing
Step 6: Reset the Timing Chain Tensioner The 2012 KTM Tensioner is oil fed, but can be reset so that the timing doesn’t instantly slip. Screw the tensioner back into the engine, and then reach into the motor and squeeze it with your hand. -
Page 29: Engine Tightening Torques
Technical Data: Engine Tightening Torques Picture 2.4 (KTM 87) - Page 30 Picture 2.5 (KTM 87)
-
Page 31: Bibliography
<http://www.allthingsmoto.com/forums/f- 21/250sxf-prone-seize-38618/>. Digital image. Diesel Power. Source Interlink Media. <http://www.dieselpowermag.com/tech/ford/1109dp _rebuilding_a_ford_diesel_engine_on_a_budget/>. Digital image. Dirt Rider. <http://www.dirtrider.com/features/protips/141_110 4_things_to_check_on_your_new_ktm/>. Digital Image. <http://i.ebayimg.com/t/KTM250SXF-KTM250-SXF- KTM-250SX-F-250SXF-THROTTLE-BODY-NEEDS- FUEL-INJECTOR-TPS-5-/00/s.JPG>. Digital image. Enduro 360. Baja Parts, n.d. Web Digital image. <http://homepage.ntlworld.com/p.dezeeuw/ktm_ Digital image. <http://img.photobucket.com/albums/v280/KevInYo rks/250FtensionerTDC.jpg>.950sm_maintenance.ht m> Digital image. - Page 32 Digital image. <http://www.rubbersideup.com/servlet/the- 30313/KTM-690-SMC-2008/Detail>. Digital image. <http://www.supermotojunkie.com/showthread.php ?76471-690-SMC-valve-check-adjust-(pics- questions)>. Digital image. Paochow. Simple Machines, n.d. Web. KTM. 2012 250 SX-F Owner's Manual. Brochure. Mattighofen, Austria: Author, 2012.
-
Page 33: Index
Index Document, 3, 4, 5, 6, 28, 29, 30, 31, 32, 7, 8, 9, 10, 15, 16, 33, 34 17, 18, 19, 20, 21, Type, 3, 4, 5, 6, 7, 8, 22, 27, 28, 29, 30, 9, 10, 15, 16, 17, 18, 31, 32, 33, 34 19, 20, 21, 22, 27, Easier, 3, 4, 5, 6, 7, 8,...