Advertisement
Quick Links
A30
™
owners manual
Read this manual KEEP INSTRUCTIONS FOR FUTURE USE.
Even if using this infant restraint seems easy to figure out on
your own, it is very important to READ, UNDERSTAND
AND FOLLOW THE OWNER'S MANUAL.
Failure to properly use this infant restraint increases the risk of
serious injury or death in a sudden stop or crash.
PD164820A / 5.11
Advertisement

Subscribe to Our Youtube Channel
Related Manuals for Aprica A30


Summary of Contents for Aprica A30
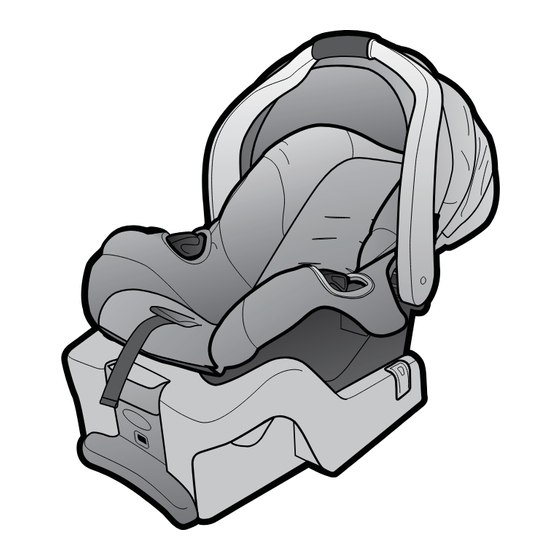
- Page 1 ™ owners manual Read this manual KEEP INSTRUCTIONS FOR FUTURE USE. Even if using this infant restraint seems easy to figure out on your own, it is very important to READ, UNDERSTAND AND FOLLOW THE OWNER’S MANUAL. Failure to properly use this infant restraint increases the risk of serious injury or death in a sudden stop or crash.
- Page 18 4.4 Canopy Mesh (on certain models)
- Page 24 Slot...
-
Page 31: Safe Vehicle Belt Systems
6.2.2 SAFE Vehicle Belt Systems THE FOLLOwING BELT SYSTEmS CAN BE uSED wITH YOuR INFANT RESTRAINT, IF the seat location meets all other requirements of these instructions and those in your vehicle owner's manual. LATCH can be used in place of the vehicle belt system. Please refer to vehicle owner’s manual for LATCH locations. - Page 32 Lap Belts with Automatic The automatic locking retractor • Locking Retractor (ALR) will not permit the lap belt to lengthen once it is buckled. Tighten the belt by feeding the belt back into the retractor while pushing down hard on the infant restraint.
- Page 33 Infant Restraint To Install Locking Clip with Infant Restraint or Base: inch 1. Tighten the buckled belt by (1 cm) pushing down hard on the infant restraint and pulling hard on the shoulder belt. 2. While pushing down on infant restraint, pinch the two straps ...
-
Page 34: Latch Locations
6.3 LATCH Locations Newer vehicles may have one or more seating positions with LATCH anchorage systems. If vehicle is equipped with LATCH, the vehicle lower anchor points may be visible at the vehicle seat crease. If not visible, they may be marked with the symbol See your vehicle owner’s manual for exact locations, anchor identification, and requirements for use with an infant restraint. -
Page 35: Installing The Infant Restraint Without Base Using Vehicle Belt
You must carefully follow the instructions provided by your vehicle manufacturer, in addition to the information in this manual. Before proceeding be sure you have read and understood section 6, “Choosing an Appropriate Vehicle Seat Location” on pages 28-34. Refer to your vehicle owner’s manual and the instructions in “6.2.2 SAFE Vehicle Belt Systems”, page 31-34, on tightening your vehicle belt when using the infant restraint without base. -
Page 36: Installing The Infant Restraint And Base Using Vehicle Belt
4. Tighten the vehicle seat belt. To create a secure installation, push down hard with your free hand on the infant restraint and pull and tighten the vehicle belt. 5. Check carseat is level: Red level line on the warning label muST ... - Page 37 2. Thread the vehicle belt through the holes on either side of the base. Lap/Shoulder Lap Belt Belt 3. Buckle the vehicle belt. To create a secure installation, while pushing down on the base, pull the free end of the lap belt or the shoulder portion of the lap/shoulder belt to tighten ...
- Page 38 7. Push the infant restraint down into the base and make sure that you hear a “click” . Pull up on the infant restraint to be sure it is latched securely into the base. If the infant restraint does not securely latch into the base, the infant restraint provides NO protection for your child.
- Page 39 If it does not stay tight, try another seating position or contact Aprica at 1-888-9-APRICA / 1-888-927-7422. 10. To remove LATCH, push button while pulling on the LATCH belt as shown . 11. Press and hold LATCH release hinge. .
-
Page 40: Reclining Infant Restraint/Base
7.4 Reclining Infant Restraint/Base Failure to properly recline the infant restraint on the vehicle seat increases the risk of serious injury or death. If the infant restraint is too upright, a child’s head may drop forward and cause breathing problems. If the infant restraint is too reclined, a crash could put too much force on a child’s neck and shoulders. - Page 49 ™ manual del propietario Lea este manual GUARDE ESTAS INSTRUCCIONES PARA USO FUTURO. A pesar de que el uso de este sistema de seguridad para bebés parezca fácil de descifrar, es muy importante LEER, ENTENDER Y SEGUIR EL MANUAL DEL DUEÑO. No usar debidamente este sistema de seguridad para bebés aumenta el riesgo de lesiones serias o muerte en una parada repentina o accidente.
- Page 66 4.4 Malla de la capota (en ciertos modelos)
- Page 70 4.4 Malla de la capota (en ciertos modelos)
- Page 76 Ranura...
- Page 91 11. Oprima y sujete la bisagra LATCH 12. Empuje el conector hacia dentro, levante el conector y jálelo (en el sentido opuesto al punto de anclaje) 13. Repita los pasos 10 y 11 para el otro conector.
- Page 92 correct correcto incorrect incorrecto...
- Page 95 4. Repita el paso 3 para el conector con el cinturón de ajuste. Después de ajustarlo sobre la barra de almacenamiento, tire el cinturón de ajuste para asegurarse que el esté debidamente ajustado.
- Page 97 LA HEBILLA DEBERÁ SUJETARSE HACIENDO UN "SONIDO", caso contrario, enjuague la hebilla con agua tibia.
Need help?
Do you have a question about the A30 and is the answer not in the manual?
Questions and answers