Table of Contents
Advertisement
Advertisement
Table of Contents

Related Manuals for Furrion NV2200

Summary of Contents for Furrion NV2200
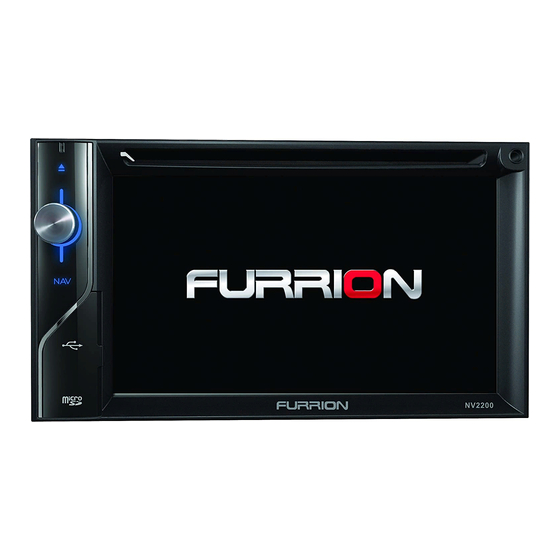
- Page 1 NV2200 NAVIGATION SYSTEM OWNER’S MANUAL...
-
Page 2: Table Of Contents
Contents 1. PRECAUTIONS ........................3 2. FEATURES ......................... 4 Disc (DVD/CD/VCD) ......................4 Radio (AM/FM) ........................4 Bluetooth ..........................4 USB ............................. 5 CHASSIS ..........................5 GENERAL ..........................5 NAVIGATION ........................5 CAMERA ..........................6 INSTALLATION AND USAGE REQUIREMENTS ..............6 3. - Page 3 Bluetooth Telephone Settings ..................27 Registering Your Cellular Phone (Pairing) ................. 28 Select the Cellular Phone ....................28 Obtain Phone Book Data ....................28 Telephone Operations ...................... 28 14. RADIO OPERATIONS ....................30 15. AUX ..........................32 16. CAMERA INPUT OPERATIONS ................... 32 17.
-
Page 4: Precautions
1. PRECAUTIONS 1. Read these instructions entirely. 2. Keep these instructions. Whoever uses the unit should have access to this manual. 3. Heed all warnings. Follow all instructions. 4. This unit is designed to be used in a vehicle with 12V DC battery and negative ground. 5. -
Page 5: Features
2. FEATURES Disc (DVD/CD/VCD) • 12 cm disc type supported: DVD-Video, DVD±R/RW, CD-DA, CD-R, and CD-RW. • Support audio format: MP3, Kodak Photo CD, AAC, WMA, M4A. • ID3 tag compatible. • 16Mbit electronic shockproof: 3 seconds DVD video / 10 seconds CD audio. •... -
Page 6: Usb
• Pre Amplifier Control. NAVIGATION • Only insert the Furrion map SD to use navigation function. For more information or to purchase maps, please visit: www.furrion.com/maps. • Latest map guarantee (limited time only – within 30 days of initial activation). -
Page 7: Camera
CAMERA • When camera and signal wire is connected and operated properly, CAMERA mode will be activated automatically when there is signal. • Image Display of Automatic Car Reversing Function in Shutdown Mode. INSTALLATION AND USAGE REQUIREMENTS • Operation temperature: -20 to +70 degree Celsius. •... -
Page 8: Operational Panel
3.OPERATIONAL PANEL [MICROPHONE] [AUX IN] [POWER/VOL] [NAVI] [IR] [RESET] [USB] [Cover] [MICRO SD SLOT] FUNCTIONS OF BUTTONS [MICROPHONE] • This is used for Bluetooth phone. [IR] SENSOR •Receiver for the remote control unit. EJECT • Press to eject disc from the unit. [MICRO SD SLOT] •... -
Page 9: Remote Control
4. REMOTE CONTROL REMOTE CONTROL FUNCTIONS 1- [POWER] Button • Press this button to switch between sources. • Press this button to power on when the unit is power 5- [0 - 9] Buttons off. • Use in the key pad screen to select the radio. •... - Page 10 7- [VOL-] Button • Press to select the next lower chapter number in DVD video mode. • Decrease volume. • Press to select the next lower track in CD, USB 8- [OSD] Button Video, USB Audio mode. • Touch button on DVD Player mode screen, playback 21- [ ] Button status is displayed on screen.
-
Page 11: Wheel Key Study
5. WHEEL KEY STUDY 1 - Restudy 1.Touch the [Setup] button on the Main Menu. 2 - Mode 1 2.Touch the [Others] button. The below menu is 3 - Mode 2 displayed. 4 - Source 5 - Previous 6 - Volume + 7 - End a call 8 - Mute 9 - Next... -
Page 12: Main Menu
6.MAIN MENU 1 - Radio --- Touch the button to display the Radio mode. 2 - AUX1 --- Touch the button to display the AUX1 mode. 3 - USB Audio --- Touch the button to display the USB Audio mode. 4 - Disc Audio --- Touch the button to display the Disc Audio mode. -
Page 13: Disc Video Player Operations
7. DISC VIDEO PLAYER OPERATIONS DVD SYSTEM SETUP 1 - Previous Chapter / Fast Backward button Note: If the setup operation is made in the middle of DVD 2 - Play / Pause video play, the disc will re-start from the beginning. 3 - Next Chapter / Fast Forward button 4 - Subtitle switching button WATCH A DISC... -
Page 14: Title Menu
Search 1. In the DVD Video menu, touch [ ] button during playback. 1. In the DVD Video menu, touch [ ] button. The keypad screen appears with the chapter/title • Depending on the disc, the title menu may not be number input mode. -
Page 15: Video Files Playback
5 - Switch next available subtitle When the power is turned on and when the disc is changed to a new one, the subtitle set as factory 6 - Repeat button default is selected. If that subtitle has not been 7 - Direct chapter or title searching button recorded on disc, the subtitle is on the... - Page 16 • Each time you touch the button, you can switch among audio languages. • It may take time to switch among audios. Depending on the video switching may be impossible. Subtitle Switch • For video with two or more subtitles, you can switch among the subtitles during playback.
-
Page 17: Disc Audio Player Operation
8. DISC AUDIO PLAYER OPERATION 16 - Direct searching button WATCH A DISC / EJECT A DISC 17 - Close option menu button Please refer to DISC VIDEO PLAYER OPERATIONS WATCH A DISC and EJECT A DISC. CD PLAYER MENU OPERATION CD PLAYER MODE SCREEN You can select the button displayed in the CD Player menu by direct touching it. - Page 18 1. Always add a extension “.MP3” or “.mp3” to • [ ] button will switch to [ ] button. an MP3 and “.WMA” or “.wma” to a WMA • The function will scan all tracks orderly in current using single byte letters. If you add a extension folder once.
-
Page 19: Mp3 / Wma Playback Menu
MP3 / WMA Playback Menu 1. Repeat Playback While playing MP3 / WMA touch [ ] button can switch between Repeat Folder, Repeat All and Repeat Track. 2. Folder Touch the title of folder, play list will show folders in the selected folder. 3. -
Page 20: Audio Setup
9. AUDIO SETUP 1. Touch [Setup] button on the Main Menu screen. 4 - Treble: Choose the desired treble from -14 to 14 The Setup Menu screen will be displayed. (only in User mode). 2. Touch [Audio] button. 5 - Middle: Choose the desired middle from -14 to 14 (only in User mode). -
Page 21: Usb Audio Operations
10. USB AUDIO OPERATIONS Notes on Using USB Memory Device 12 11 10 General notes • When no support list display nothing. Notes on the Audio files • This system can play the MP3 / WMA stored in the USB memory. •... -
Page 22: Repeat Playback
3. Touch the desired track title button. The Touch [ ] button again to resume playback. corresponding track is started playback. Previous / Next File Switch Scan the Tracks Touch [ ] or [ ] button during playback to play 1. -
Page 23: Usb Video Operations
11. USB VIDEO OPERATIONS This system can play USB video (MP4, 3GP etc.) stored in an USB memory which is recognized as “USB Mass Storage Class device”. You can use your USB memory as an video device by simply copying desired video into it. -
Page 24: Play Picture Files In Usb Memory
• Touch [ ] button to starts playback from the beginning of the next track. 12 11 10 • Touch [ ] button to starts playback from the beginning of the current track; when this button is touched again within about 5 seconds, playback starts from the beginning of previous track. - Page 25 PLAY PICTURE FILES IN USB MEMORY Magnify / Minify Picture Touch [ ] or [ ] button during playback to magnify In USB Video mode touch the folder with picture or minify current picture. for example [ ] in below case. •...
-
Page 26: Bluetooth Audio Player Operations
12. BLUETOOTH AUDIO PLAYER OPERATIONS Some Bluetooth cellular phones have audio features, and some portable audio players support the Bluetooth feature. These devices will be called as “Bluetooth audio players” in this manual. This system can play audio data stored in a Bluetooth audio player. Note: •... -
Page 27: Selecting The Bluetooth Audio Player
2. Touch the [ ] button to delete. Selecting Bluetooth Audio Player To change the current Bluetooth audio player to the other device which is already registered, perform the following operation. 1.Touch the device button to [ ] display the Device Select screen. -
Page 28: Bluetooth Telephone Operations
13. BLUETOOTH TELEPHONE OPERATIONS When the connection with your Bluetooth-enabled 3. When you the Bluetooth cellular phone is established, the following functions information, touch the [ ] button to return to the are available on this system. previous screen. • Listen to your telephone calls on the car speakers. •... -
Page 29: Registering Your Cellular Phone (Pairing)
Registering Your Cellular Phone When the pairing operation completes, the registered cellular phone is set as the current (Pairing) telephone, and the display returns to the Telephone screen. You can register up to 5 cellular phones. The registering method is as same as “Register The •... - Page 30 • When the call is touch the [ ] button to hang up. Making a Call Using the History The system will memorize the Dialed/Received calls record data in the memory. You can it and use it to make a call from this system. 1.Touch the [ ] or [ ] or [...
-
Page 31: Radio Operations
14. RADIO OPERATIONS Listen to the Radio 1. Band button 2. Current Channel indicator 1.Touch the [Radio] button on the Main Menu display. The Radio mode screen is displayed. 3. DX/Local indicator 4. System time 5. Signal Strength indicator 6. Option button 7. -
Page 32: Auto Store
Auto Store The Auto Store is a function for storing up to 6 stations that are automatically searched in sequentially. If the number of receivable stations cannot reach to 6, the previous stored station remains. 1.Touch the [FM1 / FM2 / FM3 / AM1 / AM2] button to select the desired band (AM or FM). -
Page 33: Aux
Note: If the reverse cable is connected correctly to the vehicle or Furrion Multiplexer, the system goes to camera mode automatically when the reverse signal or left/right signal (only for Furrion Multiplexer) is turned on. -
Page 34: Setup Operations
17. SETUP OPERATIONS Touch the [Setup] button on the Main Menu screen. Brightness: Set Brightness value from 0 to 20. The Setup menu screen will be displayed. Color: Set Color value from 0 to 20. Contrast: Set Contrast value from 0 to 20. General Setup Menu Saturation: Set Saturation value from 0 to 20. - Page 35 Change Language: Set the Language for Menu. Wheel Key Study: Refer to “Wheel Key Study” section. Calibration: Select the screen calibration Yes or No. Factory Default: Select to load factory default or not.
-
Page 36: Replace Remote Control Batteries
18. REPLACE REMOTE CONTROL BATTERIES 1. Press the retention tab and pull out the battery tray and remove the old battery. 2. Insert the new CR2025 battery and slide the battery tray back in the remote control the same direction that you removed it. -
Page 37: Troubleshooting Guide
19. TROUBLESHOOTING GUIDE GENERAL Problem Cause Solution Unit will not power on. Radio fuse blown. Install new fuse with correct rating. Car battery fuse blown Install new fuse with correct rating Illegal operation. Press the RESET button. No/Low audio output. Improper audio output Check wiring and connect. -
Page 38: Tuner
TUNER Problem Cause Solution Weak station searching. Auto antenna not properly Connect the auto antenna connected. cable properly. REG function is activated. The adapter with antenna Connect the antenna power power supply is not connected supply adapter properly. The AF function is not Activate the AF function. -
Page 39: Specifications
Distortion: 0.3% and design are subject to change without Video System: NTSC/PAL notice for further improvement. Audio/Video Input FCC ID: 2ABH3-NV2200 Audio Input Voltage: 650mv<= V RMS Changes or not expressly approved by the party responsible for compliance could void the Video Input Voltage: 1.0V p-p@75 Ohm... - Page 40 Furrion Ltd. NV2200 Model: NV2200 Rating: DC12V Manufacturer: Furrion Ltd. Address: Units 1603-05, 16/F., Plaza, 410 Des Voeux Road West, Sai Wan, Hong Kong This product complies with US DHHS Standard 21CFR 1040.10 and 1040.11 except for deviations pursuant to Laser Notice No.50, dated June 24, 2007 as a Class I Laser Product.
-
Page 41: Wire Connection Guide
21. WIRE CONNECTION GUIDE Note: • Before installing, be sure to disconnect the negative cable of the car battery. Refer to page 41 CAMERA AUDIO USB-4P FEMALE GPS Antenna LINE-OUTL LINE-OUTR VIDEO... - Page 42 BLUE AUTO ANTENNA IGNITION SWITCH BLUE/WHITE AMPLIFIER TURN-ON CORD ORANGE ILLUMINATION PURPLE/BLACK REAR RIGHT - SPEAKER BROWN/BLACK WHEEL KEY 1 PURPLE REAR RIGHT + SPEAKER BROWN WHEEL KEY 2 / TEL MUTE GREY/BLACK FRONT RIGHT - SPEAKER YELLOW MEMORY B+ GREY FRONT RIGHT + SPEAKER BLACK...
Need help?
Do you have a question about the NV2200 and is the answer not in the manual?
Questions and answers