ELECRAFT KAT500 Owner's Manual
Automatic antenna
Hide thumbs
Also See for KAT500:
- Owner's manual (40 pages) ,
- Command reference manual (23 pages) ,
- Manual (2 pages)

Related Manuals for ELECRAFT KAT500


Summary of Contents for ELECRAFT KAT500
- Page 1 LECRAFT KAT500 A UTOMATIC NTENNA UNER ’ WNER ANUAL Revision C5, March 31, 2015 Copyright © 2015, Elecraft, Inc. All Rights Reserved...
-
Page 2: Table Of Contents
Repair / Alignment Service ..........................1 Specifications ............................2 Setup ................................. 3 Elecraft K3 Transceiver and KPA500 Amplifier ....................3 Placement ................................ 3 Firmware ................................. 3 Cabling ................................3 Icom Transceivers with AH-4 ATU Interface ..................... 8 Cabling ................................8 ... - Page 3 Miscellaneous Bag E850562 ......................... 44 Ant 1 SO-239 Assembly E850553 ........................ 46 Ant 2 SO-239 Assembly E850560 ........................ 46 Ant 3 SO-239 Assembly E850559 ........................ 46 XMTR SO-239 Assembly E850554 ......................47 Elecraft manuals with color images may be downloaded from www.elecraft.com.
-
Page 4: Introduction
If you purchased your KAT500 as a kit, turn to page 23 for assembly instructions. Quick Start To quickly set up and get started with your KAT500 Automatic Antenna Tuner, turn to page 3 to hook up the unit and page 14 for operating instructions. -
Page 5: Specifications
Elecraft products transferred by the purchaser to a third party, either by sale, gift, or other method, who is not disclosed to Elecraft at the time of original order, are not covered by this warranty. If the Elecraft product is being bought indirectly for a third party, the third party’s name and address must be provided at time... -
Page 6: Setup
KAT500 to your station. The following cabling diagrams show how to use the KAT500 with any transceiver and amplifier in the 20 to 1,000 watt output range. Choose the one that fits your station needs: ... - Page 7 K3 and KPA500, so you may need one additional cable. This is the same cable included in the KPAK3AUX cable set. You can purchase the cable from Elecraft (order E850463) or, you can construct your own cable using male and female DB-15 connectors wired as follows.
- Page 8 Figure 1. Cabling Diagram: Elecraft K3, KPA500 and KAT500 Using E850463 Aux Interface Cables.
- Page 9 Figure 2. Cabling Diagram: Elecraft K3, KPA500 and KAT500 Using E850463 Aux Interface Cables with Separate Key Line.
- Page 10 E850463 Aux cable will bypass the external cable and the external equipment will not be able o inhibit the amplifier. If you purchased the Elecraft Aux cable as part of the KPAK3AUX cable set, you received with it a small device called the Key Line Interrupter that opens the key line.
-
Page 11: Icom Transceivers With Ah-4 Atu Interface
Icom transceivers equipped with the interface connector for the Icom AH-4 ATU can operate the KAT500 through the AH-4 interface. Icom transceivers not equipped with the AH-4 interface can use the KAT500 as described under Other Transceiver and Amplifier or Stand-Alone Transceiver on page 11. - Page 12 The key line between the KPA500 and the KAT500 consists of a two conductor (center wire and shield) cable and connects to the Elecraft equipment using RCA-type male connectors.
- Page 13 Figure 3. Cabling Diagram: Icom Transceiver with AH-4 Tuner Interface.
-
Page 14: Other Transceiver And Amplifier Or Stand-Alone Transceiver
1,000 watts output (see Specifications, page 2). If you have an Elecraft K3 transceiver and KPA500 amplifier you can connect them to the KAT500 as shown here. However, for best integration of the K3 equipment, we recommend that you use the E850463 Aux interface cable as shown on page 3 and Figure 1. - Page 15 Figure 4. General Cabling for Transceiver and Amplifier.
- Page 16 Figure 5. General Cabling Requirements - Stand-Alone Transmitter or Transceiver.
-
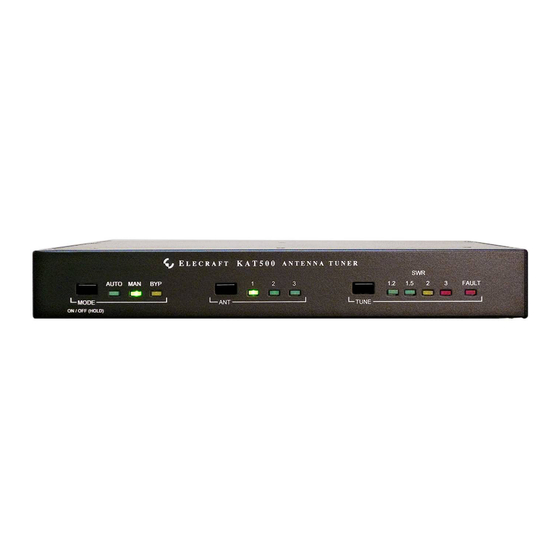
Page 17: Operation
Operation The KAT500 turns on automatically when power is applied. You can turn the KAT500 off from the front panel by holding the switch. A brief tap on the switch will turn the KAT500 on again. MODE MODE IMPORTANT! ... -
Page 18: Key Line Hot Switching
RF power, but many other amplifiers may be damaged doing that. To protect those amplifiers, the KAT500 is supplied configured so that the key line will not be switched if 30 watts or more of RF power is present. This value may be changed to match the key line switching capability of... -
Page 19: Tune Operation And Memories
RF power must be below the key line hot switching limit (see Key Line Hot Switching, above) so the KAT500 can disable the amplifier. The KAT500 will not respond to less than 7 watts of drive and over 100 watts will cause a fault condition (see Fault Conditions on page 18) Relays in the KAT500 operate to search for values of inductance (L) and capacitance (C) that match the impedance of the antenna to 50 ohms non-reactive for the transceiver. -
Page 20: Bandswitching
Switch the amplifier to the new band. Apply RF power between 7 and 30 watts (see note 1 below). This will cause the KAT500 to change bands, switch to the last used antenna on that band (see note 2 below), switch to the tuning values for that frequency stored in memory or perform a tune cycle, if in mode. -
Page 21: Operating Tips
If you use different antennas on different bands without the E850463 Aux cable interface, we recommend that you first set up the KAT500 for the antenna you want to use on each band as follows. Optionally you can assign antenna ports using the Utility Program (see page 20). -
Page 22: Fault Conditions
In some installations a 28004.5 MHz signal may be heard from an oscillator in the KAT500. If this is an issue, you can cause the KAT500 oscillator to shut down when it is not needed with a setting in the Utility program. -
Page 23: Utility Program
At any setting up to 1499, the KAT500 will open the key line immediately as long as the RF power is below that level, and then close the key line when transmit power drops to zero. The Elecraft KPA500 amplifier is designed to both open and close the key line at full power without damage. -
Page 24: Antennas
Auto Fine Tune Selects bands on which the KAT500 will always do a fine tune operation. This is helpful when you use a an antenna with a high-Q (narrow SWR bandwidth) on certain bands to avoid needing to press the MODE switch a second time whenever the KAT500 does a tune operation. -
Page 25: Forcing A Firmware Load
2. Download the new file from the Elecraft web site manually and place it in a local folder, then click on to locate the folder on your computer. This is the way to access the latest Beta Browse… firmware available from Elecraft. -
Page 26: Kit Assembly Procedure
Use a grounded anti-static mat on your work bench. If you choose to use a soldering iron to work on your KAT500 for any reason, be sure your iron has an ESD-safe grounded tip tied to the same common ground used by your mat or wrist strap. -
Page 27: Assembly Procedure
Appendix A, to familiarize yourself with all of the parts and to ensure the kit is complete. If any parts are missing contact Elecraft for a replacement (see Customer Service and Support, page 1). Taking ESD precautions remove the printed circuit board from its ESD-safe envelope and install six 2-D fasteners as shown in Figure 7. - Page 28 Install a cable tie to secure each of the four large toroidal inductors to the pc board as shown below. Note how the locking heads are positioned below the pc board. If a toroid is far enough out of position to obstruct a hole in the pc board, gently reposition it as needed.
- Page 29 Install the three pairs of standoffs on the pc board shown in Figure 9. Do not use lock washers. The standoffs alone establish the right height. Do not over-tighten or you may twist the threaded section off of the standoff. Figure 9.
- Page 30 Locate the outline marked LB1 on the pc board. It is on the connector edge of the board next to the power connector (see Figure 10). Figure 10. Angle Bracket LB1 Mounting Location Mount the angle bracket at LB1 on the pc board as shown in Figure 11. Note that it has a long and short side.
- Page 31 Figure 12. Preparing Bottom Cover for Installation. Turn the bottom cover over and place the four self-stick feet on the cover in the locations shown in Figure 13. Do not cover any of the holes in the bottom cover with the feet. The screw hole indicated will be used in the next step.
- Page 32 Figure 14. Installing Hardware on Bottom Cover. Place the circuit board component side down on your work table and attach the thermal pad to resistor R6 as shown in Figure 15. Figure 15. Placing Thermal Pad on R6.
- Page 33 Once you have done that and finished assembling your KAT500, you can remove and replace individual cabinet sections easily without further adjustments.
- Page 34 Locate the rear panel and the four SO-239 connector assemblies. Leave the SO-239 connector assemblies in their packages until needed and do not bend or move the wire attached to each connector. The wires have been carefully pre-formed to fit in the KAT500.
- Page 35 Inspect the inside surface of the rear panel and remove any tape or residue to provide a clean metal surface where shown in Figure 18. Figure 18. Preparing the Rear Panel. Remove the protective backing from the serial number label and press it onto the rear panel as shown in Figure 19.
- Page 36 Install the XMTR SO-239 connector in the rear panel opening marked XMTR as shown in Figure 20. Take care not to bend the wire or move the solder lug. Place the flange of the connector inside the rear panel, and orient the connector so the lug on the wire points toward the ANT1 connector opening as shown.
- Page 37 Mount the ground terminal at the end of the rear panel next to the ANT 3 connector as shown in Figure 22. Install the screw, lock washer and nut first and secure the nut so the screw cannot turn. Then add the two flat washers and the wing nut.
- Page 38 Position the rear panel on the pc board/bottom cover assembly you assembled earlier as shown in Figure 24. Be sure the tab at the center of the rear panel fits inside the bottom cover as shown. Figure 24. Positioning the Rear Cover on the PC Board and Bottom Cover Assembly. Begin securing the rear panel to the pc board assembly with four jack screw nuts on the XCVR and AMP connectors as shown in Figure 25.
- Page 39 Install the two pan head screws shown in Figure 26. Stop turning the screw indicated when the head reaches the rear panel. It threads into plastic and the threads will easily strip. Figure 26. Installing Rear Panel Pan Head Screws. Attach the wires leading to each of the SO-239 connectors to the screw posts on the pc board as shown in Figure 27.
- Page 40 Turn the assembly over and secure the bottom lip of the rear panel to the 2D fasteners as shown in Figure 28. Figure 28. Installing Screws in Rear Panel Bottom Lip. Install the four standoffs shown in Figure 29. The standoffs pass through large holes in the pc board and mount on the bottom cover as shown.
- Page 41 Figure 31. Preparing the Front Panel for Installation. Turn the KAT500 upside down on your table and mount the front panel as shown in Figure 32. Be sure that all of the LEDs and switches pass through the openings in the front panel and that the tab at the center of the front panel fits under the bottom cover, just as on the rear panel.
- Page 42 Set the KAT500 on its feet and confirm that all three switches operate smoothly and that all of the LEDs are in the front panel cutouts. The LEDs should protrude slightly so you can feel them by running your finger across the panel.
- Page 43 In the following steps you will prepare and install the top cover. But before you do, check to ensure the screws inside the KAT500 are tight without over-tightening them: The 11 screws along the sides of the pc board (Figure 7, page 24).
- Page 44 Place the top cover on the KAT500 and secure it as shown in Figure 36. The cover sits on top of the tabs at the center of the front and rear panels. If all of the screw holes do not line up, rotate it a half turn. It only fits one way.
-
Page 45: Appendix A Parts List
Appendix A Parts List KAT500 Cable Set The following cables are supplied with both factory-built and kit KAT500s. ELECRAFT ILLUSTRATION DESCRIPTION QTY. PART NO. KXUSB Data Cable Assembly: Either RS232 or (USB) USB, chosen at the time order is placed. -
Page 46: Kat500 Core Assembly - E850561
Serial Number Envelope E850549 ELECRAFT ILLUSTRATION DESCRIPTION QTY. PART NO. Serial Number Label E980236 KAT500 Core Assembly – E850561 Wrapped Covers E850565 ELECRAFT ILLUSTRATION DESCRIPTION QTY. PART NO. Bottom Cover E100437 Top Cover E100438 Wrapped Panels E850564 ELECRAFT ILLUSTRATION DESCRIPTION QTY. -
Page 47: Miscellaneous Bag E850562
Miscellaneous Bag E850562 ELECRAFT ILLUSTRATION DESCRIPTION QTY. PART NO. Lock Washer, #6, Interior Tooth E700095 4-40 Nut, Hex, Zinc E700011 8-32 Nut, Hex, Zinc E700202 4-40 Nut with Captive Star Washer E700191 Wing Nut, 8-32, Stainless Steel E700193 2-D Fastener... - Page 48 ELECRAFT ILLUSTRATION DESCRIPTION QTY. PART NO. Keycap, Rectangular E980000 Thermal Pad E700002 4-40 F-F Standoff, 1.375” (34.92 mm) E700275 4-40 F-F Standoff, 1/4” (6.4 mm) E700026 (Typical) 4-40 M-F Standoff, 1-1/16” (27 mm) E700276 Cable Tie, Plastic, 4” (10.2 cm)
-
Page 49: Ant 1 So-239 Assembly E850553
IMPORTANT: The following SO-239 Assemblies have wires pre-formed to fit in your KAT500. Each connector is different. Do not mix them up. Do not bend or reshape the wires. Ant 1 SO-239 Assembly E850553 ELECRAFT ILLUSTRATION DESCRIPTION QTY. -
Page 50: Xmtr So-239 Assembly E850554
XMTR SO-239 Assembly E850554 ELECRAFT ILLUSTRATION DESCRIPTION QTY. PART NO. XMTR SO-239 Assembly E850554 4-40 Screw, 1/4” (6.4 mm) Black Pan Head E700174 4-40 Nut with Captive Star Washer E700191...
Need help?
Do you have a question about the KAT500 and is the answer not in the manual?
Questions and answers