Table of Contents
Advertisement
Quick Links
E
L E C R A F T
Revision F, August 3, 2012. Copyright © 2012, Elecraft; All Rights Reserved
Introduction
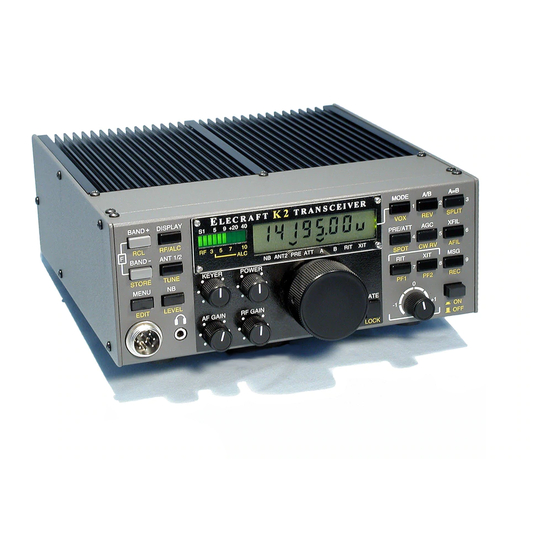
The KAT2 internal automatic antenna tuner (ATU) allows nearly any antenna to be connected directly to
the K2 and used on most if not all bands. The L-network configuration provides a wide impedance-
matching range, and can be used directly with coax-fed or end-fed wire antennas, or with balanced
feedlines via a balun. Unlike some internal auto-tuners, the KAT2 functions on receive as well as transmit.
This provides an increase in receive sensitivity and improves rejection of out-of-band signals.
The KAT2 uses latching relays to reduce current drain to nearly zero except when actually tuning. These
relays select appropriate combinations of inductance and capacitance, as well as either a capacitor-in or
capacitor-out L-network configuration. Tune-up is controlled by the KAT2's microprocessor, which also
supplies SWR or power information to be displayed on the K2's LCD. Once a match has been found, the L,
C, and other matching network data are stored in EEPROM so that the settings can be recalled immediately
on any band change. ATU parameters (L, C, SWR, etc.) can also be viewed using the menu.
Two antenna jacks are provided on the ATU, with the matching network data for both antennas stored on a
per-band basis. Once an initial match has been obtained for both antennas on a particular band, the operator
can tap the
button on the front panel to switch between them. Since the relays take only a small
AN T 1 / 2
fraction of a second to switch, it becomes practical to quickly try both antennas anytime the distant station
is weak, an advantage during contest operation.
Specifications
L - C Ranges
Network Type
SWR Range Matched
Tuning time
SWR Display
Power Display
Current Drain
Size
Elecraft
KAT2
A U T O M A T I C A N T E N N A T U N E R
Assembly and Operating Instructions
L: approx. 0-20 µH in 256 steps; C: approx. 0-2400 pF in 256 steps
L-network (series L, shunt C); C switchable to transceiver or antenna side
Up to 10:1 typ. (varies with band; smaller range on lowest/highest bands)
1 to 5 seconds typical for initial tune-up; < 1/2 sec. to recall stored settings
1.0:1 to 9.9:1
0-20 watts (approx.); forward and reflected power shown in 0.1-w increments
Approx. 10-30 mA during TUNE; < 5 mA at all other times
4.2" (L) x 1.6" (D) x 1.5" (H) (10.7 x 4.0 x 3.8 cm)
•
www.elecraft.com
•
831-763-4211
Advertisement
Table of Contents

Related Manuals for ELECRAFT KAT2


Summary of Contents for ELECRAFT KAT2
- Page 1 Unlike some internal auto-tuners, the KAT2 functions on receive as well as transmit. This provides an increase in receive sensitivity and improves rejection of out-of-band signals.
-
Page 2: Parts Inventory
Parts Inventory The table below lists all parts in the kit. If you have trouble identifying any of these items, consult the K2 Owner's manual, which has photographs of similar parts. Components on KAT2 Module Ref. Description Qty. Capacitor, 10 pF, 500 V NPO disc... - Page 3 (refer to our web page for details). To check your main processor firmware revision, hold any button when powering up the K2. The number shown at the left end of the display is the revision number. If you have an older version, contact Elecraft.
- Page 4 ATU Control Board Assembly A fine-point, temperature-controlled soldering iron (700-800 degrees F) is required to assemble this kit, due to the high density of the PC board layout. A high-wattage iron or one with a wide tip may damage components, pads, or traces. Use a minimum amount of solder to avoid ground shorts.
- Page 5 Install BNC jacks J1 and J2. These connectors must be seated flat on the PC board and aligned with the board's edge to allow for proper installation in the top cover. Solder one of the alignment pins first, then re-heat the connection while pressing down on the jack. Once you're sure the connector is seated correctly, solder the other pins.
- Page 6 Cut a 1-1/8" (2.9 cm) length of insulated, solid-conductor hookup wire. Remove exactly 1/4" (6 mm) of insulation from each end. This jumper will form the 1-turn link winding of T1. Insert one end of this wire through the center of T1 and into the pad labeled 5. Bend the wire down to the right and insert the other end into the pad labeled 6.
- Page 7 Refer to the drawing below during the following steps. This left end view shows how the L-C and Control boards will appear when connected together. Relays K1 and K2 can be seen on the bottom of the L-C board, along with 16-pin male connector P4. On the control board, J2 (BNC), R5, and R6 are visible, as well as 16-pin female connector J4.
- Page 8 Refer to the drawing below during the following steps. The top view shows the approximate location of the windings and pads for each inductor. The side view shows how capacitors C1-C8 and inductors L1-L8 must be mounted, including round rubber insulators for L3-L8. BLUE CORE Install C4 (82 pF) as shown above.
- Page 9 Position L1 and its winding so that you can insert the leads into the indicated square pads. Before soldering, make sure that the insulated wire is positioned away from relay leads. Note: The toroid core may remain somewhat loose within the winding after installation. This will not affect performance. Cut a 2-7/8"...
-
Page 10: Cable Assemblies
Cable Assemblies The drawing below shows the two cable assemblies that connect the ATU to the K2. A four-conductor shielded cable is used for control signals (J3 to J8), and an RG-174 coax cable is used for RF (J7). J8 will be connected to the K2's Control board. - Page 11 J8 as shown. Check continuity of all connections between J8 (10-pin housing) and J3 (KAT2 control board end). Cut the RG-174 coaxial cable in half to obtain two approx. 6" (15 cm) lengths. (Save one as a spare.) Remove 3/4"...
- Page 12 The K2’s AUX RF connector (RF-P6) is the same type used for the internal battery connector (RF- P3). To avoid damage to the ATU or to the K2, add some type of unique marking to RF-P6 and to its mating ATU connector (J7). Use model paint, nail polish, or some other permanent medium. Before handling the microprocessor in the following step, touch an unpainted, grounded surface or put on a grounded wrist-strap.
-
Page 13: Preliminary Tests
If you have the KIO2 serial interface option installed, you should disconnect it from the K2 control board until KAT2 testing is complete. The KAT2 and KIO2 can then both be connected to the control board using the small junction board supplied with the KIO2. - Page 14 Disconnect the ATU control cable (J8) from the K2 Control board. ATU Module Installation The ATU is installed in the top cover as shown below. Refer to this drawing during the following steps. R2 (REFL) R1 (FWD)
- Page 15 RF board. If any of the plastic hardware or the thermal insulators appears to be melted or damaged, you should order the K2 PA Hardware Kit from Elecraft. Note: Do not bend the PA transistors upwards any farther than necessary, as this may weaken their leads.
- Page 16 Route the ATU control cable approximately as shown in the drawing. If you will not be installing the battery option at this time, leave a loop of the cable in the indicated position. Secure the ATU control cable to the speaker and/or battery wiring using at least three of the supplied nylon cable ties. Thread the binding post into the ground connector, E1 on the ATU control board, through the top cover's GND hole.
- Page 17 Set up your DMM to read DC volts (20 or 30 volt scale). On the bottom of the KAT2 control board, locate a pad labeled "B". Just to the left of this pad you'll see the round pad for pin 1 of U4 (LM358). (You'll know you have the right round pad if it's part of a group of 8 pads, 7 of which are square.) Touch your DMM's (+) probe to this pad.
-
Page 18: Final Assembly
K2 chassis, key, or microphone, see Antenna Considerations. Basic ATU Operation (AUTO Mode) To get started with the KAT2: • Use the K2 menu to select ATU A UTO mode, then exit the menu. • Connect one or two antennas to the ATU's antenna jacks. - Page 19 SWR (x.x-1 Mode) Displaying To display SWR following any auto-tune: • Use the menu to change the AT U mode from A UTO to X.X-1 (the most recent SWR reading). Example: 1 . 5 - 1 is the same as 1.5:1. The antenna tuner’s L and C settings will not change. •...
-
Page 20: Antenna Considerations
No. This is a common misconception. For example, if the SWR is 2:1, the loss in transmitted signal strength will be around 0.5 dB. Of course the KAT2 always tries to hit 1:1, and with most antennas it will find an SWR below 1.5:1 on most bands. But even if the SWR ends up at 3:1, the difference in on-air signals will often be undetectable. - Page 21 0-199 = error (see Troubleshooting) AUTO Normal auto-tune mode INIT Turning power off/on resets all data Alternate auto-tune mode Fx.xx KAT2 firmware revision, e.g. F1.00 POUT Forward/Reverse power display Power L0-L8 Individual inductor selection x.x-1 SWR from most recent tune-up...
-
Page 22: Troubleshooting
If a particular tune-up that you believe should work fails repeatedly, write down the ATU parameters after the TUNE attempt, including SWR, L, C, NET, Exxx, Txxx, and the ATU firmware revision. Send this data to Elecraft for analysis. Also try AT U I N I T . - Page 23 Circuit Details, KAT2 L-C Board The L-C board provides eight series inductors and eight parallel capacitors, configured as an L-network. The capacitance can be placed at the transmitter or antenna end of the network via a relay on the Control board (see next page).
- Page 24 Circuit Details, KAT2 Control Board T1, D1, D2 (etc.) form a directional coupler for SWR and power measurements. This type of bridge is much more accurate than the K2's standard RF detector (D9) in the presence of non-50-ohm loads. The bridge output is buffered by op-amp U4 and routed to the K2 control board, overriding the signal from D9.
Need help?
Do you have a question about the KAT2 and is the answer not in the manual?
Questions and answers