Advertisement
Table of Contents
- 1 Table of Contents
- 2 Important Safety Information
- 3 Before You Begin
- 4 Assembly
- 5 Stride Adjustment
- 6 Console Overview
- 7 Console Operation
- 8 Monitoring Your Heart Rate
- 9 Chest Strap Operation
- 10 Cool down
- 11 Stretching & Flexibility
- 12 Warm-Up/Cool down Exercises
- 13 Maintenance
- 14 Troubleshooting Guide
- Download this manual
Advertisement
Table of Contents

Related Manuals for Orbit Fitness Raptor CDX

Summary of Contents for Orbit Fitness Raptor CDX
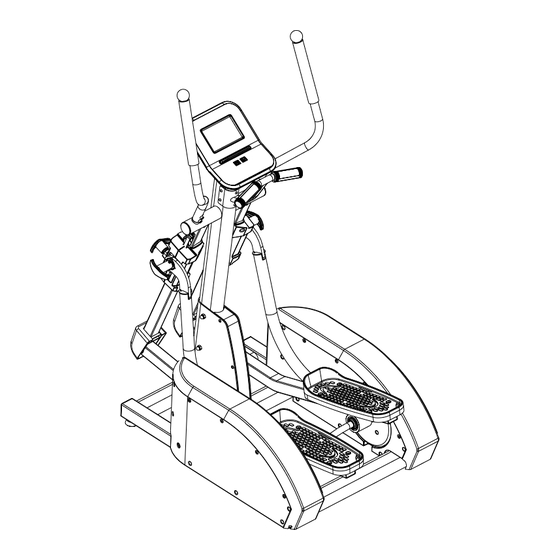
- Page 1 Raptor CDX Raptor CDX Elliptical User Manual...
-
Page 2: Table Of Contents
Table of Contents Table of Contents......................... Important Safety Information.................... Before You Begin.......................... Assembly............................5 - 24 Stride Adjustment........................25 - 26 Console Overview........................27 - 28 Console Operation........................29 - 34 Monitoring Your Heart Rate....................Chest Strap Operation......................Stretching & Flexibility......................Warm-Up/Cool Down Exercises.................. -
Page 3: Important Safety Information
Important Safety Information Save this Owner’s Manual! Before beginning any fitness program, you should obtain a complete physical examination from your physician. When using exercise equipment, you must always take basic precautions, including the following: Read all instructions before using. These instructions are written to ensure your safety and to protect the unit. -
Page 4: Before You Begin
Before You Begin The Raptor CDX is carefully tested and inspected before shipment. We have shipped the unit in several pieces that require assembly. Carefully unpack the unit in a clear area and lay the pieces on the floor near the area where you plan to use the equipment. - Page 7 Step 2 Insert Mainframe Cover (K) into Mainframe (A) and secure using: Six 63 (M5x12 phillips pan head bolt) NOTE: The Mainframe Cover (K) is in a small unmarked box.
- Page 9 Step 3 Insert Right Stride Adjustment Frame (S) and Left Stride Adjustment Frame (J) onto Upright (F). Secure Right Stride Adjustment Frame (S) to Upright (F) using: One 78 (M10x20 hex head bolt) One 90 (M10 spring washer) One 84 (M10 washer) Insert End Cap (122) into Right Stride Adjustment Frame (S).
- Page 11 Step 4 Remove the Hex Nut (B) and Busing (A) step by step. Assemble the linkage (D), the Adjust Knob (E) sequentially, and tighten the Philip Head Screw (F) on the Adjust Knob (E).
- Page 13 Step 5 Lift and place Right Junction Frame (B) onto Shaft Sleeve (163) and secure using: Four 54 (M8x12 allen head) Four 86 (M8 flat washer) Lift and place Left Junction Frame (B) onto Shaft Sleeve (163) and secure using: Four 54 (M8x12 allen head) Four 86 (M8 flat washer)
- Page 15 Step 6 Connect Leg (L) to Right Stride Frame (R) using: One 81 (M10x81.5 hex head bolt) One 98 (M10 nut) NOTE: It is recommended that two adults align and secure the Legs to the Stride Frame. Connect Leg (M) to Left Stride Frame (N) using: One 81 (M10x81.5 hex head bolt) One 98 (M10 nut) NOTE:...
- Page 17 Step 7 Connect Bracket Cover (30) to Right Stride Adjustment Frame (S) using: One 66 (M5x12 phillips head pan screw) NOTE: Do not overtighten screw, this will damage Bracket Cover (30). Connect Bracket Cover (30) to Left Stride Adjustment Frame (J) using: One 66 (M5x12 phillips head pan screw) NOTE:...
- Page 19 Step 8 Insert Right Arm (G) into Right Stride Adjustment Frame (S) and secure using: Three 77 (M8x16 allen head bolt) Insert Left Arm (I) into Left Stride Adjustment Frame (J) and secure using: Three 77 (M8x16 allen head bolt)
- Page 21 Step 9 Connect Upper Console Wire and Heart Rate Wires to the back of Console (15). NOTE: The single Heart Rate ground spade connector is connected to the left of the red console harness. Ensure that all wires are secure inside console.
- Page 23 Step 10 Connect the harness on Handle Bar (E) to the harness on Upright (F) as shown. Connect Handle Bar (E) to Upright (F) using: NOTE: Ensure that all wires are secure inside Handle Bar (E) and Upright (F). Be careful not to pinch wires.
-
Page 25: Stride Adjustment
Stride Adjustment To adjust the stride, loosen Knob (1) in the direction shown on the knob’s sticker. Loosen Knob (2) in the direction shown on the knob. Pull knob (2) and adjust the stride by moving it up or down. Secure Knob (1) and (2) by tightening the knobs. - Page 26 Stride Adjustment...
-
Page 28: Console Overview
Console Overview 2. DISPLAYS A. LCD display a. Dot matrix profile window : Displays program profile during program setting and executing. The program profile will be different according to which program is selected. For Classic and Interval programs, the dot matrix represents a resistance profile. -
Page 29: Console Operation
Console Operation c. Program category indicators: These indicators will light up to indicate which program category you are selecting. There are 3 program categories for this console : Classic program, HR programs & Interval programs. There are multiple programs under each program category, refer to program section for details. User 1234 d. - Page 30 Console Operation B. Level & HR% display windows a. Level Same as level display on the LCD screen. It will display the actual resistance level. When its adjusting key is pressed, the resistance level will be adjusted accordingly. b. HR% During program execution, the console will take actual heart rate and calculate into HR% using entered age and display here.
- Page 31 Console Operation information such as age, weight, time, program profile... will be saved permanently. If there is saved data before, it will be overwritten the 2 time the key is pressed & held. Press User # key once will recall your saved program and ready for you to start your workout immediately.
- Page 32 Console Operation PROGRAMS During idle mode, the message display will show “SELECT A PROGRAM”; at this time, press Quick Start key to jump start the manual program right away or press a program category key to select a program. When you press a program key the 1 st time, the message display will show its 1 program’s name and the dot matrix will display its profile.
- Page 33 Console Operation estimated as 220 minus your age. It is most effective to train at your target heart rate between 60% and 85% of your maximum heart rate. In order to get the most accurate reading, it is recommended to enter your age before your workout. Heart rate control programs are designed to keep you training at your chosen heart rate level.
- Page 34 Console Operation English and Metric setting The factory default setting is English units. If you wish to change it to Metric setting, press & hold “USER1” & “USER2” keys at the same time for a couple of seconds during idle mode. The message display will show a message “UNITS = ENGLISH”;...
-
Page 35: Monitoring Your Heart Rate
Monitoring Your Heart Rate In order to obtain the greatest cardiovascular benefits from your exercise workout, it is important to work within your target heart rate zone. The American Heart Association defines this target as 60% - 75% percent of your maximum heart rate. Your maximum heart rate may be roughly calculated by subtracting your age from 220. -
Page 37: Stretching & Flexibility
Stretching & Flexibility Flexibility is an important component of physical fitness and needs to be addressed in a resistance training program. The two main purposes for stretching are injury preven- tion and a faster rate of recovery from exercise. Stretching should be performed in both the warm up and cool down phases of a training session. -
Page 38: Warm-Up/Cool Down Exercises
Warm Up/Cool Down Exercises UPPER BACK Cross Arm in Front of Chest MUSCLE(S) AFFECTED: latissimus dorsi and teres major Stand or sit with the right arm slightly flexed (15° to 30°) and adducted across the chest. Grasp the upper arm just above the elbow, placing the left hand on the posterior side of the upper arm. - Page 39 Warm Up/Cool Down Exercises LOWER BACK Semi-Leg Straddle MUSCLE(S) AFFECTED: spinal erectors Sitting, knees flexed 30 to 50 degrees, let the legs totally relax. Point the knees outward; the lateral side of the knees may or may not touch the floor. Lean forward from waist and reach forward with extended arms;...
- Page 40 Warm Up/Cool Down Exercises CHEST/SHOULDER Straight Arms Behind Back MUSCLE(S) AFFECTED: deltoids and pectoralis major Standing, place both arms behind back. Interlock fingers with palms facing each other. Straighten arms fully. Slowly raise the straight arms; hold for 10 to 15 seconds. Keep head upright and neck relaxed.
- Page 41 Warm Up/Cool Down Exercises ANTERIOR OF THIGH AND HIP FLEXOR Side Quadricep Stretch MUSCLE(S) AFFECTED: quadriceps and iliopsoas Lie on left side with both legs straight. Place left forearm flat on floor and upper arm perpendicular to floor. Place left forearm at 45° angle with torso. Stretching the quadriceps Flex right leg with heel of right foot moving toward buttocks.
- Page 43 Warm Up/Cool Down Exercises GROIN Butterfly MUSCLE(S) AFFECTED: adductors and sartorius Sitting with the upper body nearly vertical and legs straight, flex both knees as the soles of the feet come together. Pull feet toward body. Place hands on feet and elbows on legs. Pull torso slightly forward as elbows push legs down;...
- Page 44 Warm Up/Cool Down Exercises HIPS Forward Lunge (Fencer) MUSCLE(S) AFFECTED: iliopsoas, rectus femoris 1. Standing, take a long step forward (as with the lunge) with the right leg and flex the right knee until it is directly over the right foot. Keep right foot flat on floor.
-
Page 46: Troubleshooting Guide
Plug DC adapter into wall outlet. into wall outlet? Console has no power. DC adapter is not plugged into Plug DC adapter into the Raptor CDX power socket. Raptor CDX? Console cable is not connected? Verify that the console cable is connected properly. - Page 47 CS PARTS BOM LIST ORDER ONLY BY MODEL NUMBER AND PART NUMBER ID CODE PART # DESCRIPTION 3A33 10E23A33 RIGHT PEDAL TUBE ASS’Y 3A34 10E23A34 RIGHT PEDAL TUBE ASS’Y 3A36 10E23A36 HANDRIAL,RIGHT UPPER ASS’Y 3A35 10E23A35 LEFT LEVER ARM. GRAPHITE 3A3U 10E23A3U HANDLE BAR ASS’Y...
- Page 48 Schematic MODEL : RAPTOR CDX...
Need help?
Do you have a question about the Raptor CDX and is the answer not in the manual?
Questions and answers