Table of Contents
Advertisement
Quick Links
PIAGGIO WOULD LIKE TO THANK YOU
for choosing one of its products. We have prepared this booklet to help you to get the very best from your scooter. Please read it carefully before riding
the scooter for the first time. It contains information, tips and precautions for using your scooter. It also describes features, details and devices to assure
you that you have made the right choice. We believe that if you follow our suggestions, you will soon get to know your new vehicle and it will serve you
well for a long time to come. This booklet forms an integral part of the scooter; should the scooter be sold, it must be transferred to the new owner.
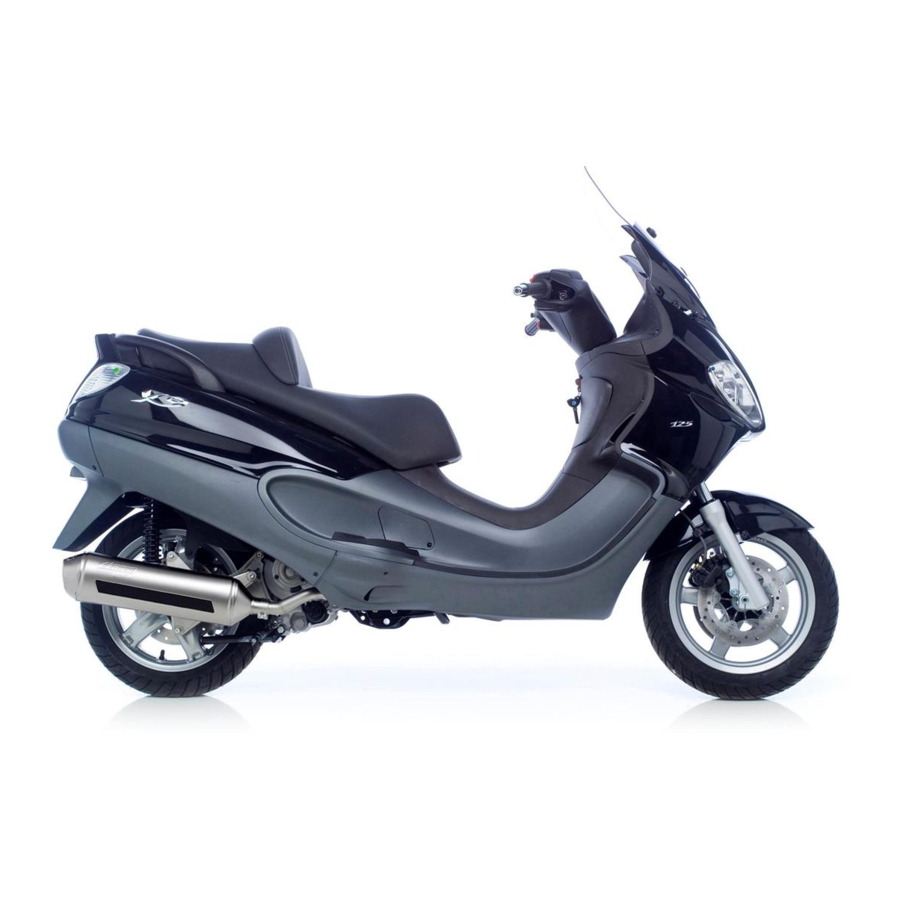
X9 Evolution 125 - 250
Advertisement
Table of Contents

Related Manuals for PIAGGIO X9 Evolution 125


Summary of Contents for PIAGGIO X9 Evolution 125
- Page 1 PIAGGIO WOULD LIKE TO THANK YOU for choosing one of its products. We have prepared this booklet to help you to get the very best from your scooter. Please read it carefully before riding the scooter for the first time. It contains information, tips and precautions for using your scooter. It also describes features, details and devices to assure you that you have made the right choice.
- Page 2 The instructions given in this manual are intended to provide a clear, simple guide to using your scooter; this booklet also details routine maintenance procedures and regular checks that should be carried out on the vehicle at an authorised Dealer or Service Centre. The booklet also contains instructions for simple repairs.
- Page 3 Personal safety Failure to completely observe these instructions will result in serious risk of personal injury. Safeguarding the environment Sections marked with this symbol indicate the correct use of the vehicle to prevent dam- aging the environment. Vehicle intactness The incomplete or non-observance of these regulations leads to the risk of serious damage to the vehicle and sometimes even the invalidity of the guarantee.
-
Page 5: Table Of Contents
INDEX VEHICLE..................Checks..................28 Dashboard................Refuelling.................. 28 Analogue instrument panel............Shock absorbers adjustment............ 29 Instruments................Running in................. 30 Digital lcd display..............10 Starting up the engine............... 31 Maintenance icons..............11 Precautions................32 Setting the total and trip odometers........11 Difficult start up................. 33 Setting the outside temperature display........ - Page 6 Headlight adjustment............. 64 Front direction indicators............64 Rear optical unit................ 65 Number plate light..............66 Helmet compartment lighting bulb..........66 Brake light................. 66 Rear-view mirrors..............67 Idle adjustment................67 Front and rear disc brake............68 Puncture..................69 Periods of inactivity..............70 Cleaning the vehicle..............
-
Page 7: Vehicle
X9 Evolution 125 - 250 Chap. 01 Vehicle... -
Page 8: Dashboard
Dashboard (01_01, 01_02, 01_03) A = Key switch B = Start-up button C = Accelerator control D = Front brake control E = Saddle electric opening button F = Digital instrument panel 01_01 G = Direction indicator switch H = Light switch I = Combined braking control (front and rear) L = Horn button M = Engine lock RUN-OFF switch... -
Page 9: Analogue Instrument Panel
Analogue instrument panel (01_04) A = Tachometer B = Fuel level indicator C = Rpm counter D = Cooling fluid temperature indicator U = Alarm led 01_04 Instruments (01_05) A = RH direction indicator B = LH direction indicator C = Emergency flashing light indicator (4 direction indicators) D = RUN-OFF (engine stop)/side stand open indicator E = Fuel reverse indicator F = Light indicator... -
Page 10: Digital Lcd Display
P = "Trip" button Q = "Clock" button R = "Set" button Digital lcd display (01_06) 1 = Maintenance icon «OIL»; 2 = Maintenance icon «SERVICE»; 3 = Maintenance icon «BELT»; 4 = Trip odometer display symbols «T1» or «T2»; 5 = Five-digit display for kilometres/miles covered;... -
Page 11: Maintenance Icons
Maintenance icons (01_07) The icons warn the user when the scheduled maintenance interventions are required. The «OIL» icon flashes when 1,000 Km are reached, after that every 3,000 Km. The «SERVICE» icon flashes the first time at 1,000 Km or after 1 year, after that every 6,000 Km or after 1 year. -
Page 12: Kilometres/Miles Covered In Reserve Symbol
«M» pressed for more than 3 seconds to reset the selected function, except the tem- perature. WARNING WARNING THE FLASHING FUNCTION WHEN A TEMPERATURE OF +3 °C AND LESS IS REACHED HAS PRIORITY ON THE MEAN AND MAX SPEED INDICATION, SO IT IS AUTOMATICALLY DISPLAYED. -
Page 13: Clock/Date Display
Clock/date display (01_12) Press «CLOCK» to display the date (day/month). Press «CLOCK» to display the chronometer. Press «CLOCK» to return to the clock display «12». 01_12 Setting the hour/minutes function (01_13) Press «CLOCK» for more than 3 seconds and set the time by button «S». Wait until the minutes begin flashing and set by button «S». -
Page 14: Setting The Chronometer Function
Setting the chronometer function (01_15) Press «S» to enable and stop the chronometer. Press «CLOCK» and «S» together to reset the chronometer. CAUTION IT IS STRONGLY ADVISED NOT TO USE THE FUNCTIONS OF THE DIGITAL DISPLAY PANEL WHILE THE VEHICLE IS MOVING. 01_15 Key switch (01_16) LOCK= Ignition barred, key can be removed, mechanical antitheft device activated. -
Page 15: Releasing The Steering Wheel
CAUTION DO NOT TURN THE KEY TO «LOCK» OR «OFF» WHILE RIDING. Releasing the steering wheel (01_17) Reinsert the key and turn it to «OFF». CAUTION DO NOT TURN THE KEY TO «LOCK» OR «OFF» WHILE RIDING. 01_17 Switch direction indicators (01_18) Lever to «S»... -
Page 16: Horn Button
Horn button (01_19) Push the «C» button to sound the horn. 01_19 Light switch (01_20) 0 = Low-beam light 1 = High beam light 2 = Passing (flashing) 01_20... -
Page 17: Emergency Flashing Light Button
Emergency flashing light button (01_21) It starts the 4 direction indicators at the same time. The control «H» can only be en- abled with key set to «ON», but once it has been enabled it remains on with key set to «OFF»... -
Page 18: Engine Stop Button
01_23 The immobilizer system In order to enhance theft protection, the scooter is equipped with a «PIAGGIO IM- MOBILIZER » electronic engine locking device that is activated automatically when the starter key is removed. Upon start-up, the «PIAGGIO IMMOBILIZER» system checks the starter key, and only if this key is recognised will the immobilizer system allow the scooter to be started. -
Page 19: Immobilizerdevice Enabled Indicator Led
To prevent discharging the battery, the led automatically turns off after about 48 hours of continuous operation. In the event of system failure, the indicator led informs the Authorised Piaggio Serv- ice Centre of the nature of the failure, based on the type of flashes emitted. -
Page 20: Operation
Take the key with the red grip and all the black keys supplied to an Authorised Piaggio Service Centre. The codes of keys not submitted for the new storage procedure are deleted from the memory. - Page 21 Procedure start - red key Insert the red-handgrip key in the switch key (in "OFF" position) and turn it to "ON". After 1 - 3 seconds, turn the key to "OFF" again and pull it out. Intermediate step - black key After pulling out the red key, insert the black key within 10 seconds and promptly turn it to "ON".
-
Page 22: Accessing The Fuel Tank
Accessing the fuel tank (01_28, 01_29) Insert the key into the switch and press down until the glove box opens. In the event that the key switch is in «LOCK», turn the key to «OFF» or «ON» before pressing down. Press lever «B» and open the cover over the fuel tank cap «C». 01_28 01_29 Power supply socket (01_30) -
Page 23: The Saddle
CAUTION PROLONGED USE OF THE PLUG SOCKET MAY RESULT IN PARTIAL DIS- CHARGE OF THE BATTERY Electric characteristic Plug socket 12 V - 180 W MAX Maximum power 180 W The saddle (01_31, 01_32, 01_33, 01_34, 01_35) The saddle is provided with a back that can be moved forward or backward for your comfort. - Page 24 01_32 01_33 01_34...
-
Page 25: Opening The Saddle
01_35 Opening the saddle (01_36, 01_37) With the key set to «OFF» or «ON», or with engine on, it is possible to electrically open the saddle by pressing button «C». If the electric opening does not work, use the emergency lever "A". When the key is set to «LOCK» the saddle cannot be opened. 01_36 01_37... -
Page 26: Identification
Identification (01_38, 01_39) The identification registration numbers consist of a prefix stamped on the chassis and engine "B" respectively, followed by a number. These numbers must always be indi- cated on spare parts requests. To read the chassis number, remove the relevant port "A"... -
Page 27: Use
X9 Evolution 125 - 250 Chap. 02... -
Page 28: Checks
Checks Before using the vehicle, check: 1. That the fuel tank is full. 2. Front and rear brake fluid level 3. That the tyres are properly inflated. 4. The functioning of the tail lights, the headlight, and the turn indicators. 5. -
Page 29: Shock Absorbers Adjustment
DO NOT INHALE FUEL FUMES. DO NOT ALLOW PETROL TO COME INTO CONTACT WITH HOT ENGINE OR ANY PLASTIC PARTS. CAUTION 02_02 PETROL DAMAGES THE PLASTIC PARTS OF THE BODYWORK. Characteristic Fuel tank capacity 14,5 l (approx.) Reserve 2.5 l Shock absorbers adjustment (02_03) The preloading of the springs can be adjusted to 4 positions using the ring nut located in the lower part of the shock absorbers and the specific spanner supplied. -
Page 30: Running In
CAUTION RIDING THE VEHICLE WITH THE SPRING PRELOADING NOT CORRECTLY SET FOR THE RIDER AND POSSIBLE PASSENGER, COULD REDUCE THE COM- FORT OF THE RIDE AND THE PRECISION OF THE STEERING. WARNING WE RECOMMEND WEARING GLOVES WHILE CARRYING OUT THIS OPERA- TION IN ORDER TO AVOID INJURIES. -
Page 31: Starting Up The Engine
Starting up the engine (02_05, 02_06, 02_07) The vehicle is provided with an ignition exclusion system controlled by the side stand. The engine cannot be started if the side stand is not raised. If the engine is on, it stops when the side stand is lowered. -
Page 32: Precautions
CAUTION DO NOT START-UP THE ENGINE IN CLOSED AREAS BECAUSE EXHAUST GASES ARE TOXIC. Precautions CAUTION NEVER STRESS THE ENGINE AT LOW TEMPERATURES IN ORDER TO AVOID POSSIBLE DAMAGE. BE CAREFUL NEVER TO EXCEED THE MAXIMUM SPEED WHILE RUNNING DOWNHILL, IN ORDER TO AVOID DAMAGING THE ENGINE. IN ANY CASE, IN ORDER TO PRESERVE THE ENGINE FROM PROLONGED EX- CESSIVE REVOLUTIONS, THE REVOLUTION LIMITER WILL BE ACTIVATED IF THE ENGINE SPEED EXCEEDS THE ESTABLISHED THRESHOLD. -
Page 33: Difficult Start Up
However, once the engine has been started, it will be necessary to turn to an Au- thorized Piaggio Service Centre in order to check the causes and restore the correct function. A new start-up system interlocked with an automatic valve lifter has allowed improving the working conditions of the electric starter motor. -
Page 34: Stand
EXHAUST DOES NOT COME INTO CONTACT WITH FLAMMABLE MATERIALS, TO AVOID SERIOUS BURNS. CAUTION DO NOT SWITCH OFF THE ENGINE WHILE THE VEHICLE IS MOVING. UN- BURNED FUEL COULD ENTER THE CATALYTIC CONVERTER AND BURN, CAUSING IT TO OVERHEAT AND POSSIBLY DESTROYING IT. WARNING TO START AFTER A LONG STATIONARY PERIOD, OR IN SEVERE WEATHER CONDITIONS, FULLY TWIST THE THROTTLE 2÷3 TIMES BEFORE PRESSING... -
Page 35: Automatic Transmission
SIDE Push with your foot on the fork of the stand "L" to bring it into the open position while lifting the scooter at the same time. CAUTION TAMPERING MAY CAUSE SERIOUS ENGINE MALFUNCTION. 02_10 WARNING THE SIDE STAND CAUSES THE ENGINE TO CUT OUT EVERY TIME THAT IT IS LOWERED;... -
Page 36: Safe Driving
2. Let the clutch cool down with the engine at idle speed for a few minutes. Safe driving (02_12) Some simple tips are provided below that will enable you to use your scooter on a daily basis in greater safety and peace of mind. Your skill and your mechanical knowl- edge are the basis of a safe ride. - Page 37 CAUTION ANY CHANGES TO THE VEHICLE PERFORMANCE AS WELL AS ALTERATIONS TO ORIGINAL STRUCTURAL PARTS IS STRICTLY FORBIDDEN BY LAW, AND RENDERS THE VEHICLE NO LONGER CONFORMING TO THE APPROVED TYPE AND DANGEROUS FOR RIDING. CAUTION DO NOT ADJUST THE MIRRORS WHILE RIDING. THIS COULD CAUSE YOU TO LOOSE CONTROL OF THE VEHICLE.
-
Page 39: Maintenance
X9 Evolution 125 - 250 Chap. 03 Maintenance... -
Page 40: Engine Oil Level
Engine oil level In 4T engines, the engine oil is used to lubricate the distribution elements, the bench bearings and the thermal group. An insufficient quantity of oil can cause serious damage to the engine. In all four-stroke engines, a loss of efficiency in oil perform- ance and consumption should be considered normal. -
Page 41: Warning Light (Insufficient Oil Pressure) (03_02
The oil and cartridge filter «C» should be replaced every 6,000 km (125 cc) or 12,000 Km (250 cc) at an Authorized Piaggio Service Centre. The engine should be emp- tied by draining the oil from the filter drainage tap «B» on the flywheel side. In order to facilitate the oil drainage, loosen the cap/bar. - Page 42 VEHICLE MALFUNCTION. CAUTION USED OILS CONTAIN SUBSTANCES HARMFUL TO THE ENVIRONMENT. FOR 03_04 OIL CHANGE, CONTACT AN AUTHORISED PIAGGIO SERVICE CENTRE, AS THEY ARE EQUIPPED TO DISPOSE OF USED OILS IN AN ENVIRONMENTALLY FRIENDLY AND LEGAL WAY. CAUTION USING OILS OTHER THAN THOSE RECOMMENDED CAN SHORTEN THE LIFE OF THE ENGINE.
-
Page 43: Hub Oil Level
Hub oil level (03_05, 03_06) Check that there is oil in the rear hub. Proceed as follows in order to check the hub oil level: 1) Take the vehicle to a flat area and rest it on the support. 2) Unscrew the oil bar «A», dry it with a clean cloth and reinsert it, screwing it in completely. -
Page 44: Tyres
CAUTION UPON REPLACING HUB OIL, AVOID THE OIL COMING INTO CONTACT WITH THE REAR BRAKE DISC. Recommended products AGIP ROTRA 80W-90 Rear hub oil SAE 80W/90 Oil that exceeds the requirements of API GL3 specifications Characteristic Rear hub oil (125) ~ 150 cc Rear hub oil (250) ~ 250 cc... -
Page 45: Spark Plug Dismantlement
CAUTION TYRE PRESSURE SHOULD BE CHECKED WHEN TYRES ARE COLD.INCOR- RECT TYRE PRESSURE CAUSES ABNORMAL TYRE WEAR AND MAKES RID- ING DANGEROUS. TYRES MUST BE REPLACED WHEN THE TREAD REACHES THE WEAR LIMITS SET FORTH BY LAW. Characteristic Tyre pressure (front wheel) Front wheel: 2.1 bar Tyre pressure (rear wheel) Rear wheel: 2.3 bar... - Page 46 6. Carefully refit the spark-plug cap, «A». N.B. THE USE OF SPARK PLUGS OTHER THAN THE INDICATED TYPE OR OF SHIELDLESS SPARK PLUG CAPS CAN CAUSE ELECTRICAL SYSTEM FAIL- URES. WARNING THE SPARK PLUG MUST BE REMOVED WHEN THE ENGINE IS COLD. THE SPARK PLUG SHOULD BE CHECKED EVERY 6,000 KM AND CHANGED EVERY 12,000 KM.
-
Page 47: Removing The Sides
Removing the sides (03_09, 03_10, 03_11, 03_12, 03_13) Proceed as follows: 1. Loosen the two fixing screws «C» and then remove the seat lock cap; 2. Loosen the two fixing screws «D» and then remove the stop light support; 3. Undo the two upper screws «D» and the two lower unions with the side fairings. 4. -
Page 48: Removing The Air Filter
03_12 03_13 Removing the air filter (03_14) Proceed as follows: 1. Remove the LHS fairing; 2. Remove retaining screws "C" and remove the cover "D" of the air filter. 03_14... -
Page 49: Air Filter Cleaning
Air filter cleaning 1. Wash the sponge with water and neutral soap. 2. Dry it with a clean cloth and small blasts of compressed air. 3. Impregnate the sponge with a mixture of 50% petrol and 50% specified oil. 4. Gently squeeze the filter element, let it drip and then refit it. CAUTION IF THE VEHICLE IS USED ON DUSTY ROADS, IT IS NECESSARY TO SERVICE THE AIR FILTER MORE OFTEN TO AVOID DAMAGING THE ENGINE. -
Page 50: Cooling Fluid Level
In order to preserve the SAS, so to ensure its efficiency, the following maintenance procedures should be carried out by and Authorised Piaggio Service Station: 125cc Engine - For this engine, the system consists of an internal, «A» and an ex- ternal filter, «B». - Page 51 Authorised Piaggio Service Centre. The fluid inspection should be carried out every 6,000 km when the engine is cold, following the methods indicated below.
-
Page 52: Checking The Brake Oil Level
3. Check the fluid level through the respective sight glass "C". A certain lowering of the level is caused by wear on the pads. Should the level appear to be below the minimum mark, please contact your nearest PIAGGIO Dealer or Au- 03_20 thorised Service Centre in order to have a thorough inspection of the brake system carried out. -
Page 53: Braking System Fluid Top Up
Under normal climatic conditions, the brake fluid must be replaced every 20,000 km or every two years, whichever comes first. This operation must be carried out by trained technicians; please contact your nearest PIAGGIO Dealer or Authorised Service Centre. WARNING ONLY USE DOT 4 CLASS BRAKE FLUIDS. -
Page 54: Battery
HYGROSCOPIC, THAT IS, IT ABSORBS HUMIDITY FROM THE SURROUNDING AIR. IF THE HUMIDITY IN THE BRAKING FLUID EXCEEDS A CERTAIN VALUE, IT WILL LEAD TO INEFFICIENT BRAKING. NEVER USE BRAKING FLUID KEPT IN CONTAINERS THAT HAVE ALREADY BEEN OPENED, OR PARTIALLY USED. Recommended products AGIP BRAKE 4 Brake fluid... -
Page 55: Use Of A New Battery
03_24 Use of a new battery Make sure that the terminals are connected correctly. CAUTION DO NOT REVERSE THE POLARITY: RISK OF SHORT CIRCUIT AND DAMAGE TO THE ELECTRICAL SYSTEM. WARNING SPENT BATTERIES ARE HARMFUL FOR THE ENVIRONMENT. COLLECTION AND DISPOSAL SHOULD BE CARRIED OUT IN COMPLIANCE WITH CURRENT REGULATIONS. -
Page 56: Long Periods Of Inactivity
to top up the battery with water too frequently, check the scooter's electrical system because the battery is being overloaded, causing it to lose power quickly. CAUTION ELECTROLYTE CONTAINS SULPHURIC ACID: AVOID CONTACT WITH EYES, SKIN AND CLOTHES. IN THE CASE OF ACCIDENTAL CONTACT, RINSE WITH ABUNDANT OF WATER AND CONSULT A DOCTOR. -
Page 57: Fuses
WARNING DO NOT DISCONNECT THE BATTERY CABLES WITH THE ENGINE RUNNING, THIS CAN CAUSE PERMANENT DAMAGE TO THE VEHICLE ELECTRONIC CON- TROL UNIT. WARNING SPENT BATTERIES ARE HARMFUL FOR THE ENVIRONMENT. COLLECTION AND DISPOSAL SHOULD BE CARRIED OUT IN COMPLIANCE WITH CURRENT REGULATIONS. - Page 58 03_26 USES ABLE Fuse No. 1 Position on fuse holder:1 Capacity: 15A Protected circuits: 12V-180W Socket for electrical equipment - Helmet compartment light Electrical saddle opening Antitheft device pre-installation Location:helmet compartment Fuse no. 2 Position on fuse holder: 2 Rating: 15A Protected circuits: Radiator...
- Page 59 Location: Helmet compartment Fuse No. 3 Position on fuse holder: 3 Capacity: 10 A Protected circuits: High- and low- beam lights - Front and rear tail lights - License plate bulb Location:helmet compartment Fuse No. 4 Position on fuse holder: 4 Capacity: 7.5 A Protected circuits: Power for radio/intercom control unit pre-...
- Page 60 Fuse No. 7 Position on fuse holder: 7 Capacity: 10 A Protected circuits: High-beam bulb and warning light in "passing" - Horn - Power for accessories pre- installation Location: front case Fuse No. 8 Position on fuse holder: 8 Capacity: 7.5 A Protected circuits: Stop lights - Vehicle start-up enabling button - Power for radio/intercom control...
- Page 61 Quantity: 1 Front tail light bulb Type: ALL GLASS Power: 12V - 5W Quantity: 2 Instrument panel bulb Type: ALL GLASS Power: 12V - 2W Quantity: 5 Front turn indicator bulb Type: Spherical Power: 12V - 10W Quantity: 1 RHS + 1 LHS Helmet compartment light bulb Type: CYLINDRIC Power: 12V - 5W...
-
Page 62: Front Light Group
Quantity: 2 License plate light bulb Type: ALL GLASS Power: 12V - 5W Quantity: 1 Front light group (03_27, 03_28, 03_29, 03_30, 03_31) To remove the rear light assembly, proceed as follows: 1. Remove both rear-view mirrors by removing the relative caps corresponding to the screws «A»... - Page 63 03_29 03_30 03_31...
-
Page 64: Headlight Adjustment
03_32 line drawn on the screen; 4. Otherwise, adjust the headlight with the screw on the front shield, that can be reached after removing the Piaggio clip-on badge «A». 03_33 Front direction indicators (03_34) To replace a burnt out bulb remove the right and left screw «F». -
Page 65: Rear Optical Unit
Rear optical unit (03_35, 03_36, 03_37) To remove the rear light assembly, proceed as follows: 1. Open the saddle and remove the saddle lock cap by undoing the two screws «A» 2. Loosen the two fixing screws «B» and then remove the stop light support; 3. -
Page 66: Number Plate Light
Number plate light Remove the snap-on bulb holder by working from below the rear mudguard. Helmet compartment lighting bulb (03_38) Open the helmet compartment, take out the pressure mounted transparent cover "D" and replace the bulb. 03_38 Brake light (03_39) In order to slide off the whole assembly, open the helmet compartment, remove the saddle lock cap as described above and remove the 3 screws «E»... -
Page 67: Rear-View Mirrors
Rear-view mirrors (03_40, 03_41) Adjust the mirrors by applying slight pressure to the side of the mirror to move it to the desired position. The rear-view mirrors fold in when hit for enhanced safety. To set the mirror back to its position, operate manually as indicated. 03_40 03_41 Idle adjustment (03_42, 03_43) -
Page 68: Front And Rear Disc Brake
If you have problems with the adjustment, refer to an Authorized Piaggio Service Centre for C.M. adjustment at idling speed. WARNING IDLE SPEED MUST BE ADJUSTED WHEN THE ENGINE IS VERY HOT. BEFORE THIS OPERATION, MAKE SURE THAT THE THROTTLE GRIP HAS THE RECOM- MENDED BACKLASH. -
Page 69: Puncture
IN THE EVENT OF NOISES COMING FROM THE FRONT AND/OR REAR BRAKE SYSTEM DURING OPERATION, IT IS ADVISABLE TO HAVE THE BRAKE SYS- TEM CHECKED BY A PIAGGIO DEALER OR AUTHORISED SERVICE CENTRE. AFTER REPLACING THE BRAKE PADS, DO NOT USE THE SCOOTER BEFORE... -
Page 70: Periods Of Inactivity
CAUTION TO USE THE "INFLATE AND REPAIR" SPRAY PROPERLY FOLLOW THE IN- STRUCTIONS ON THE PACKAGING. WARNING THE WHEELS FITTED WITH TYRES SHOULD ALWAYS BE BALANCED. RIDING THE VEHICLE WITH VERY LOW TYRE PRESSURE OR WITH INCORRECTLY BALANCED TYRES CAN LEAD TO DANGEROUS STEERING VIBRATIONS. Periods of inactivity (03_45) We recommend carrying out the following operations: 1. -
Page 71: Cleaning The Vehicle
Oil for 4-stroke engines Cleaning the vehicle Use a low pressure jet of water to soften the caked dirt and mud deposited on the painted surfaces. Once softened, sponge off mud and dirt using a car body sponge soaked in a car body shampoo and water solution (2-4% of car shampoo in water). Then rinse abundantly with water, and dry with a shammy cloth. - Page 72 ON THIS MATTER, CONTACT AN AUTHORISED SERVICE CENTRE . IFFICULT STARTING No fuel in tank Refuelling Filters, carburettor jets dirty or Contact an Authorised Piaggio clogged, fuel filter, fuel pipes Service Centre clogged, fuel pump damaged Battery flat Recharge the battery.
- Page 73 IGNITION PROBLEM No spark from spark plug. Due to Contact an Authorised Piaggio the presence of high voltage, this Service Centre element should only be checked by an expert. ACK OF COMPRESSION Spark plug loose. Loose cylinder Screw the spark plug.
- Page 74 Air in the front and rear brake Contact an Authorised Piaggio circuits Service Centre INEFFICIENT SUSPENSIONS Inefficient shock absorbers, oil Contact an Authorised Service leakage, deteriorated end of stroke Centre buffers. IRREGULAR AUTOMATIC TRANSMISSION Deteriorated variable speed rollers Contact an Authorised Service...
-
Page 75: Technical Data
X9 Evolution 125 - 250 Chap. 04 Technical data... - Page 76 04_01 DATA 125 Version Engine single-cylinder, four-stroke Bore x stroke 57 x 48.6 mm Cubic capacity 124 cm³ Compression ratio 12 :1 ignition advance (before TDC) 10° at 2000 rpm - 34° at 6000 rpm Walbro carburettor WVF 7G* Ø 29 Carburettor Keihin CVEK-30 Spark plug...
- Page 77 * The identification letter can vary every time the carburettor is up- dated. DATA 250 Version Engine Single-cylinder, four-stroke Bore x stroke 72 x 60 mm Cubic capacity 244.29 cm³ Compression ratio 10.5 - 11.5 : 1 ignition advance (before TDC) 10°...
- Page 78 X9 125 250 ECHNICAL DATA Overall width 910 mm Overall length 2130 mm Overall height 1450 mm Wheelbase 1500 mm Saddle height 790 mm Fuel supply with unleaded petrol; carburettor and vacuum pump. Exhaust muffler absorption-type exhaust muffler with catalytic converter. Electronic ignition capacitative, with variable timing and separate HV coil...
- Page 79 Combined brake With dual disc brake, Ø 240 (front LH and rear) with hydraulic command activated from handlebars with left-hand lever. The system is interlocked with a pressure distribution valve. Front wheel alloy rim: 14'' x 3.50 Rear wheel alloy rim: 14'' x 3.50 Front tyre Without inner tube: 120/70-14"...
-
Page 80: Kit Equipment
Kit equipment One box spanner; one lever for box spanner; one twin screwdriver; one hexagonal wrench (mm 6); one special wrench for adjusting the rear shock absorbers. The tools are stored in the helmet compartment. -
Page 81: Spare Parts And Accessories
X9 Evolution 125 - 250 Chap. 05 Spare parts and accessories... -
Page 82: Warnings
FITTED WITH ACCESSORIES OR WITH UNUSUAL LOADS. WARNING 05_01 IT IS ALSO RECOMMENDED THAT "ORIGINAL PIAGGIO SPARE PARTS" BE USED, AS THESE ARE THE ONLY ONES OFFERING YOU THE SAME QUALITY GUARANTEE AS THOSE INITIALLY FITTED ON THE SCOOTER. THE USE OF NON-ORIGINAL SPARE PARTS RENDERS THE WARRANTY VOID. - Page 83 THE SCOOTER CAN BE RIDDEN AT A HIGHER SPEED WITHOUT THE ACCES- SORIES MENTIONED BEFORE WITHIN THE LIMITS ESTABLISHED BY LAW. IF THERE SHOULD BE NON-PIAGGIO ACCESSORIES INSTALLED, OR AN AB- NORMAL LOAD, OR IF THE SCOOTER IS NOT IN A GENERALLY GOOD CON- DITION, OR WHENEVER WEATHER CONDITIONS DEMAND IT, SPEED SHOULD BE REDUCED FURTHER.
-
Page 85: Programmed Maintenance
X9 Evolution 125 - 250 Chap. 06 Programmed maintenance... -
Page 86: Scheduled Maintenance Table
Scheduled maintenance table Adequate maintenance is fundamental to ensuring long-lasting, optimum operation and performance of your vehicle. To this end, a series of checks and maintenance operations (at the owner's expense) have been suggested, which are included in the summary table on the following page. Any minor faults should be reported without delay to an Authorised Service Centre or Dealer without waiting until the next scheduled service to solve it. - Page 87 AT 1000 KM OR 4 MONTHS Engine oil - replacement Hub oil - change Engine oil - change Idle speed (*) - adjustment Throttle lever - adjustment Steering - adjustment Brake control levers - greasing Brake pads - check condition and wear Brake fluid level - check Safety locks - check Electrical system and battery - check...
- Page 88 Air filter - clean oil filter - change(125) valve clearance 125 - check Sliding blocks / variable speed rollers - check Driving belt - checking Coolant level - check Brake pads - check condition and wear Brake fluid level - check Electrical system and battery - check Tyre pressure and wear - check Vehicle and brake test - road test...
- Page 89 Coolant level - check Steering - adjustment Brake control levers - greasing Brake pads - check condition and wear Brake fluid level - check Transmission elements - lubrication Safety locks - check Suspensions - check Electrical system and battery - check Headlight - adjustment Tyre pressure and wear - check Vehicle and brake test - road test...
- Page 90 oil filter - change(125) valve clearance 125 - check 250 cc Valve Play - Check Sliding blocks / variable speed rollers - check Coolant level - check Radiator - external cleaning/ check Brake pads - check condition and wear Brake fluid level - check Electrical system and battery - check Tyre pressure and wear - check Vehicle and brake test - road test...
- Page 91 Idle speed (*) - adjustment Sliding block / variable speed rollers - change Throttle lever - adjustment Coolant level - check Steering - adjustment Brake control levers - greasing Brake pads - check condition and wear Brake fluid level - check Transmission elements - lubrication Safety locks - check Suspensions - check...
- Page 92 Spark plug/ electrode gap - check Air filter - clean Variable speed rollers - check or replacement Driving belt - checking Coolant level - check Brake pads - check condition and wear Brake fluid level - check Electrical system and battery - check Tyre pressure and wear - check Vehicle and brake test - road test engine oil- change(125)
- Page 93 Idle speed (*) - adjustment Sliding block / variable speed rollers - change Throttle lever - adjustment Driving belt - replacement Coolant level - check Radiator - external cleaning/ check Steering - adjustment Brake control levers - greasing Brake pads - check condition and wear Brake fluid hoses - replacement Brake fluid level - check Transmission elements - lubrication...
- Page 94 AT 72000 KM Engine oil - replacement Hub oil - change Spark plug / electrode gap - check / replacement Air filter - clean Engine oil - change valve clearance 125 - check 250 cc Valve Play - Check Idle speed (*) - adjustment Sliding block / variable speed rollers - change Throttle lever - adjustment Driving belt - replacement...
- Page 95 Electrical system and battery - check Headlight - adjustment Tyre pressure and wear - check Secondary air filter (250) - Cleaning Vehicle and brake test - road test (*) See rules in the «Adjusting the engine idle» section RECOMMENDED PRODUCTS TABLE Product Description Specifications...
- Page 97 TABLE OF CONTENTS Mirrors: 67 Air filter: 48, 49 Headlight: 64 Horn: 16 Hub oil: 43 Saddle: 23, 25 Scheduled maintenance: 86 Battery: 54, 55 Shock absorbers: 29 Brake: 52, 66, 68 Spark plug: 45 Identification: 26 Stand: 34 Immobilizer: 18, 20 Start-up: 17 Instrument panel: 9 Disc brake: 68...
- Page 98 Not all versions/models shown in this publication are available in all countries. The availability of single versions should be checked at the official Piaggio sales network. "© Copyright 2007 - PIAGGIO & C. S.p.A. Pontedera. All rights reserved. Reproduction of this publication in whole or in part is prohibited."...
Need help?
Do you have a question about the X9 Evolution 125 and is the answer not in the manual?
Questions and answers