Advertisement
Table of Contents
- 1 Warranty
- 2 Machine Starting
- 3 Package Opening
- 4 Warning Signs
- 5 Safety Warnings
- 6 Engine Start-Up
- 7 Engine Stop
- 8 Gear Shift Lever
- 9 Handlebar Adjustment
- 10 Wheel Adjustment
- 11 Belt Adjustment
- 12 Maintenance
- 13 Assembly and Disassembly
- 14 Tiller Assembly
- 15 Technical Features
- 16 Equipment and Accessories
- Download this manual
GB
RL 7
READ THIS MANUAL CAREFULLY
All right reserved
This manual cannot be either reproduced or released without the
manufacturer's prior written consent.
PRINTED IN ITALY
1 - FOREWORD
This symbol is used to highlight an important safety information. If
this information is ignored, people are in danger either of possible
injures – even serious ones – or death.
IMPORTANT
This term highlights special precautions to be taken in order not to
damage the machine.
Always mention the machine serial number when calling our technical service or when ordering spare parts.
The CE mark is on the engine support right side.
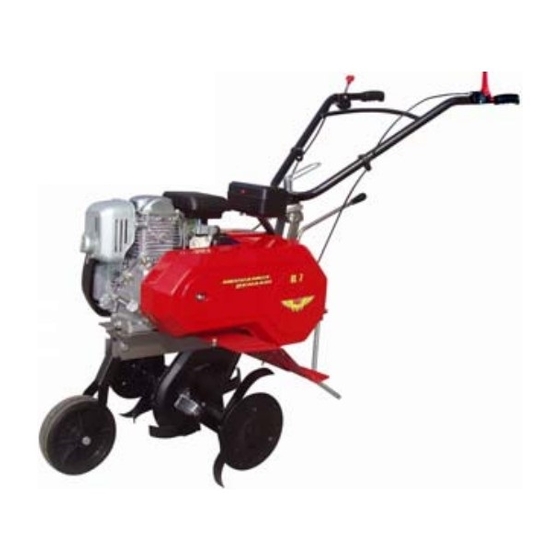
MOTORHOE
USER'S MANUAL
- RL 7
2+1
2 – IDENTIFICATION AND MARKING
IMPORTANT NOTE
Monospeed
USER'S MANUAL
1.
FOREWORD
2.
IDENTIFICATION AND MARKING
3.
CONDITIONS AND USE
4.
WARRANTY
5.
MACHINE STARTING
6.
PACKAGE OPENING
7.
WARNING SIGNS
8.
CONTROL SIGNS
9.
SAFETY WARNINGS
10. ENGINE START UP – ENGINE STOP
11. CONTROLS UTILIZATION
12. ADJUSTMENTS
13. MAINTENANCE
14. ASSEMBLY AND DISASSEMBLY
15. TRANSPORT
16. TECHNICAL FEATURES
17. EQUIPMENT AND ACCESSORIES
18. WARNINGS – CONFORMITY DECLARATION
Use and maintenance instructions of the engine are
mentioned in the relevant manual, copy of which is always
supplied with every machine.
MARKING
Marking example.
05/05
ENGINE
Pag. 0
Pag. 0
Pag. 1
Pag. 1
Pag. 2
Pag. 2
Pag. 2
Pag .3
Pag. 3-4
Pag. 5
Pag. 6
Pag. 7-8
Pag. 9
Pag. 10
Pag. 11
Pag. 11
Pag. 11
Pag. 12
Advertisement
Table of Contents

Related Manuals for Meccanica Benassi RL 7 2+1


Summary of Contents for Meccanica Benassi RL 7 2+1
- Page 1 05/05 MOTORHOE USER’S MANUAL RL 7 - RL 7 Monospeed USER’S MANUAL FOREWORD Pag. 0 IDENTIFICATION AND MARKING Pag. 0 CONDITIONS AND USE Pag. 1 WARRANTY Pag. 1 MACHINE STARTING Pag. 2 READ THIS MANUAL CAREFULLY PACKAGE OPENING Pag. 2 All right reserved WARNING SIGNS Pag.
-
Page 2: Warranty
Descriptions, figures and technical features mentioned herein are non-binding for the Manufacturer. These are mentioned as mere information. The Manufacturer reserves the right to make any change at any time without being bound to update this publication. Copyright of MECCANICA BENASSI S.P.A.” - 1 -... -
Page 3: Machine Starting
5 – MACHINE STARTING READ CAREFULLY THE WHOLE MANUAL BEFORE MOTORHOE STARTING. NOTES: The manufacturer aims improving both design and quality of his products. As a consequence, even though this manual includes latest and most up-dated information available when printed, there might be small differences between your machine and the information of this manual. -
Page 4: Safety Warnings
TRANSMISSION FITTING THROTTLE LEVER SPEEDS SELECTOR ONLY RL 7 2+1 9- SAFETY WARNINGS 1) This machine has been designed and manufactured for being used by one operator only, and is driven by means of the appropriate handlebars. Any other use is not permitted.! ) Before the machine is operating, read the Use and Maintenance manual thoroughly, so that you are fully aware of all the operating controls and safety aspects of the machine. - Page 5 9- SAFETY WARNINGS 20) Engage the clutch gradually; sudden engagement could cause the machine to rear up. 21) The area next to the engine exhaust will most likely reach temperatures above 80°. Attention! Danger of scalding. 22) Always wear close fitting clothes and anti-slip shoes or boots. For safety reasons avoid using loose clothing. 23) Make regular checks that all bolts and nuts are well tightened.
-
Page 6: Engine Start-Up
- Hold the clutch control lever lifted (pic. 2 ); - Make sure that the gear shift lever is in the “ F – NEUTRAL” position (pic. 4 part.. A) – only RL 7 2+1-; - Turn the accelerator lever of 1/4 to the idling speed position (pic. -
Page 7: Gear Shift Lever
1. Hold the clutch lever UP (part. 1); Move the gear shift lever in the required position (part. 2). See plate pic. 4 part. A page 5 – RL 7 2+1-; Accelerate by the lever (part. 3), pull down the clutch lever slowly (part. -
Page 8: Handlebar Adjustment
12 - ADJUSTMENTS HANDLEBAR ADJUSTMENT IMPORTANT! Handlebar is adjustable in height and on the side ways, with the possibility to block it in the wished position; do this by the nut “1”. After blocking the handlebar, check that teeth of the blocking device are well connected. -
Page 9: Belt Adjustment
BELT ADJUSTMENT Remove the guard casing (Pic. 1 Part. A) unscrewing part.B-pic 1. Verify that belt is well pulled with clutch lever down (Pic. 2 Part. C) while with the same lever up, belt is free to move inside pulleys (Pic. 3 Part. E). On the contrary it is necessary put the engine in its right position a little bit unscrewing its screws (Pic. -
Page 10: Maintenance
13 - MAINTENANCE GEAR BOX (only RL 7 IMPORTANT! Change oil after the first working hours (running in) . Oil has to be change when the engine is hot to facilitate its draining . - Remove the breather cap (pic. 1 part. 1). - Remove the drain plug (pic. -
Page 11: Assembly And Disassembly
14 – ASSEMBLY AND DISASSEMBLY TILLER The tiller is fixed to the transmission shaft by screws “A” . TILLER ASSEMBLY The tool-holder shaft has got a cylinder profile so that the tiller may be quickly fitted. - Clean tiller-hubs and the tool-holder shaft . Lubricate this in order to make easy its assembly and disassembly. -
Page 12: Technical Features
10. Transport wheel RL 7 TECHNICAL DATA Recoilstarter Transmission by chain with an opening guard-hood RL 7 2+1: Gear box in oil bath with 2 forward speeds and 1 reverse. Belt clutch with stretcher Dry air filter or in oil bath... - Page 13 CE – DECLARATION OF CONFORMITY In compliance with CEE 89/392 regulations and subsequent changes - CERTIFICATE OF ORIGIN - MECCANICA BENASSI S.p.A , I-44040 DOSSO (FE) via Statale, 325 DECLARES, under is own responsability, that the item called MOTORHOE Model: From series-no.:...
- Page 14 Le descrizioni, le illustrazioni e le caratteristiche tecniche qui riportate, non sono vincolanti per la Casa Costruttrice che le comunica a semplice titolo illustrativo, riservandosi la facoltà di modifiche in qualsiasi momento allo scopo di migliorare costantemente i propri prodotti, senza l’obbligo di aggiornarle in questa pubblicazione. Proprietà letteraria e artistica della Meccanica Benassi SpA.
Need help?
Do you have a question about the RL 7 2+1 and is the answer not in the manual?
Questions and answers