
Related Manuals for Vailant ecoTEC plus 937


Summary of Contents for Vailant ecoTEC plus 937
-
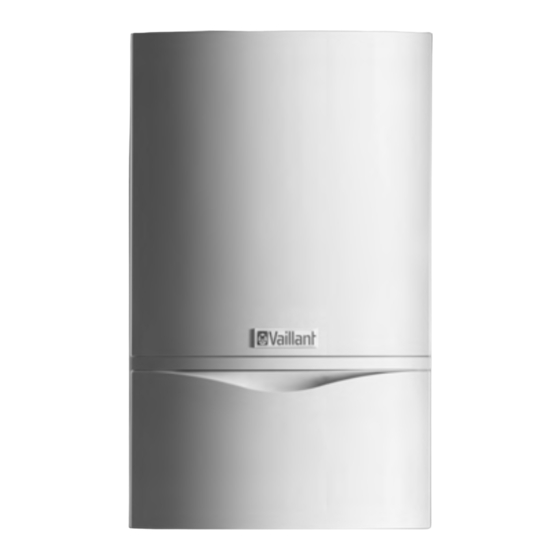
Page 1: Ecotec Plus
For the heating engineer Installation and maintenance instructions ecoTEC plus 937 GB; IE... -
Page 2: Table Of Contents
Filling and bleeding the heating system .....39 6.4.1 Checking the fill pressure in the heating system .................39 6.4.2 Filling device for ecoTEC plus 937 ...... 40 6.4.3 Filling the heating system for the first time ..40 Installation and maintenance instructions ecoTEC plus 937 0020031552_06... - Page 3 Logical fault finding procedure ......58 9.1.1 Status codes ............. 58 9.1.2 Diagnostic codes ............59 9.1.3 Error codes ..............62 9.1.4 Fault memory ............62 Test programmes ............ 65 Resetting the parameters to factory settings . 65 Installation and maintenance instructions ecoTEC plus 937 0020031552_06...
-
Page 4: Notes On The Documentation
Identification plates tural parts and components of the system when installing the ecoTEC plus 937. These installation The identification plate of the ecoTEC plus 937 is instructions are enclosed with the various system located on the underside of the unit. -
Page 5: Benchmark
Benchmark dimensions General notes The ecoTEC plus 937 is designed for use in a closed cen- tral heating system and is comprehensively tested in the Vaillant Ltd. supports the Benchmark Initia- factory. The ecoTEC plus 937 is supplied fitted with a tive. -
Page 6: Technical Data
Main PCB fuse (slow-blow) for main power supply Electr. Power consumption Standby power consumption Layered storage tank capacity Installation weight, just storage tank Installation weight, just combi unit Operating weight (with water) Table 2.1 Technical Data ecoTEC plus 937 Installation and maintenance instructions ecoTEC plus 937 0020031552_06... -
Page 7: Dimensions
9 Flue duct connection 10 Connection for condensate drain pipe, Ø 19 mm 11 Heating system pressure relief valve connection, 15 mm 12 Layered storage tank pressure relief connection (flexible hose supplied) Installation and maintenance instructions ecoTEC plus 937 0020031552_06... - Page 8 3 Gas connection Ø 22 mm 4 Hot water connection, Ø 15 mm 5 Heating flow pipe, Ø 22 mm 6 Hanging bracket 7 Shift load storage tank pressure relief connection (flexible hose supplied) 8 Cover Installation and maintenance instructions ecoTEC plus 937 0020031552_06...
-
Page 9: Structure And Functional Elements
6 Diverter valve with built in automatic adjustable bypass 7 pump 8 Electronics box 9 Hot water heat exchanger 10 Gas valve 11 Pressure sensor 12 Heat exchanger 13 Connection flue duct Installation and maintenance instructions ecoTEC plus 937 0020031552_06... -
Page 10: Functional Description
9 Pump 10 Pressure relief valve NTC sensors shift load storage tank 11 Diverter valve a Storage tank sensor 12 Gas valve b Infeed sensor SWT 13 Fan c Storage tank charging sensor Installation and maintenance instructions ecoTEC plus 937 0020031552_06... -
Page 11: Safety 3
Warning! Risk of slight personal injury The ecoTEC plus 937 is be supplied for natural gas and can be converted for propane gas with a conversion kit. Caution! Risk of material or environmental damage 3.1.2... -
Page 12: General Safety Instructions
Use a telephone outside the building to inform the ous hot water supply. emergency service department of the gas supply The use of the ecoTEC plus 937 in vehicles, such as company. mobile homes and caravans, is not classed as intended use. -
Page 13: General Requirements
IGE/UP10 Installation of gas appliances in industrial and commercial premises. BS. 6644: Installation of gas fired hot water boilers of rated inputs between 60 kW and 2 MW (2nd and 3rd family gases). Installation and maintenance instructions ecoTEC plus 937 0020031552_06... -
Page 14: General Requirements
Detailed instructions for this can be found in BS 5546 and in BS 6798. The ecoTEC plus 937 must be mounted on a flat, verti- cal wall which is sufficiently strong to hold the weight of the shift load storage tank and the combi boiler. -
Page 15: Gas Supply
Extensions are available to increase this length to a maximum of 5.5 m. 87° elbows and 45° bends are also available to increase the flexibility during installation. Installation and maintenance instructions ecoTEC plus 937 0020031552_06... -
Page 16: Optional 125 Mm Flue Pipe
The flue pipe must be fitted, or shielded, in such a way that ignition or damage to sections of the building are avoided. Fig. 4.4 Item No. 303 209 Fig. 4.5 Item No. 303 200 (80/125) Installation and maintenance instructions ecoTEC plus 937 0020031552_06... -
Page 17: Air Supply
BS 1363. Alternatively, a 3 A fused double pole switch with 3 mm contact separa- tion on both poles may be used. Installation and maintenance instructions ecoTEC plus 937 0020031552_06... -
Page 18: System Requirements
Jenaqua 200 – Jenaqua 300 – Jenaqua 400 – Sentinel X 300 – Sentinel X 400 Additives intended to remain permanently in the sys- – Fernox F1 – Fernox F2 – Jenaqua 100 Installation and maintenance instructions ecoTEC plus 937 0020031552_06... -
Page 19: Pressure Relief Valve
4.4 (softening, desalination, hardness stabilisation and desludging). Table 4.3 Guidelines for the heating water: Water hardness Installation and maintenance instructions ecoTEC plus 937 0020031552_06... -
Page 20: Shift Load Storage Tank Expansion Vessel
The boiler is fitted with a condensate siphon incorporat- 4.8.6 Shift load storage tank expansion vessel ing a water seal of 145 mm. The shift load storage tank is fitted with a 1 litre expan- sion vessel. Installation and maintenance instructions ecoTEC plus 937 0020031552_06... -
Page 21: Sequence Of Operations During Installation 5
Always keep working area clear. > straight – bend using legs. Recommend straps and open carton flaps, then > Do not twist – reposition feet instead. remove items from the top including the polystyrene Installation and maintenance instructions ecoTEC plus 937 0020031552_06... - Page 22 > Always use assistance if required. priate measures taken. > Recommend wear suitable cut resistant gloves with good grip to protect against sharp edges and ensure good grip when handling appliance. Installation and maintenance instructions ecoTEC plus 937 0020031552_06...
-
Page 23: Required Minimum Gaps/Assembly Clearances
– the flue pipe of the combi boiler can operate prop- erly i.e. the location of the terminal of the flue pipe located in accordance with these instructions and Installation and maintenance instructions ecoTEC plus 937 0020031552_06... -
Page 24: Using The Installation Template
> line the installation template up vertically and fix the template to the wall, > mark the position of the fixing holes for the hanging bracket, Installation and maintenance instructions ecoTEC plus 937 0020031552_06... -
Page 25: Fitting The Appliance Hanging Bracket
Lower the combi boiler slowly onto the hanging bracket on the shift load storage tank so that the installation carrier on the rear of the combi boiler fully engages in the hanging bracket on the shift load storage tank. Installation and maintenance instructions ecoTEC plus 937 0020031552_06... -
Page 26: Removing The Front Case
(10 l/0.75 bar). > Before connecting the unit, make sure that this vol- ume is adequate. Otherwise the installation must be fitted with an additional expansion vessel (see Sec- tion 4.8.6). Installation and maintenance instructions ecoTEC plus 937 0020031552_06... -
Page 27: Connecting The Hot And Cold Water
(4), olive (3) and fibre seals (1, 7) from the pack- aging. > Insert the fibre seal (1) and screw the cold water iso- lating valve (2) to the cold water connection of the shift load storage tank. Installation and maintenance instructions ecoTEC plus 937 0020031552_06... -
Page 28: Connecting Piping Between The Stratified Storage Tank And The Combi-Heater
Fit the formed pipe and straight pipe sections in the affected. correct sequence. Using a circulation pump increases energy The formed pipes (1) and (2) must be fitted consumption. first. Installation and maintenance instructions ecoTEC plus 937 0020031552_06... -
Page 29: Connecting The Heating Supply And Return Lines
Fig. 5.10 Diameter of the connection lines when using a low loss header Fig. 5.9 Flow and return heating connections > Remove the stop valves with union nuts, olives and fibre seals from the box of accessories for the combi boiler. Installation and maintenance instructions ecoTEC plus 937 0020031552_06... -
Page 30: Installing The Condensate Drain Line
19 mm (22 mm outside diameter for all external pipes) and which is made from an acid-resistant material (e.g. plastic overflow pipe). The accessories for the storage tank include a corrugated hose for draining the conden- sate. Installation and maintenance instructions ecoTEC plus 937 0020031552_06... -
Page 31: Connecting The Drain Pipe To The Pressure Relief Valve
Please note that the end of the discharge pipe must be visible. Installation and maintenance instructions ecoTEC plus 937 0020031552_06... -
Page 32: Electrical Connection
It should be easily accessible and be located in the proximity of the combi boiler. Use a three core flexible cable in accord- Fig. 4.15 Opening the electronics box Installation and maintenance instructions ecoTEC plus 937 0020031552_06... -
Page 33: Establishing The Power Supply
> Fix the cable (4) in the electronics box via the cable not trapped or pinched. > clamps. Lift the electronics box up and secure. Installation and maintenance instructions ecoTEC plus 937 0020031552_06... -
Page 34: Connection Diagrams
(Remove bridge when connecting) Heating pump 2 speed pump (plug with 5 pins) Fuse 2 A, slow-acting Igniter Shift load storage tank pump connection 230 V Fig. 5.19 Connection diagram electronics box Installation and maintenance instructions ecoTEC plus 937 0020031552_06... - Page 35 X 2/2 black (Earth) Plate heat exchanger X 2/6 Green (Signal) (NTC) X 2/5 violet (Signal) X 2/1 black Hot water outlet (NTC) X 20 — 230V Electronics box Fig. 5.20 Connection diagram combi boiler Installation and maintenance instructions ecoTEC plus 937 0020031552_06...
- Page 36 X 1/1 Black X 1/10 Black — + 7 8 9 3 4 5 230V X 1/11 Red X 1/9 Grey Boiler electronics box Fig. 5.21 Connection diagram shift load storage tank Installation and maintenance instructions ecoTEC plus 937 0020031552_06...
-
Page 37: Control Units
ON connec- tion of the timer and terminal 4 on the combi boiler must be broken by the contacts of the room thermostat (see circuit diagram Fig. 5.22). Installation and maintenance instructions ecoTEC plus 937 0020031552_06... -
Page 38: Optional Plug-In Timers By Vaillant
The controller pre- vents the combi boiler from switching on again within a preset time period after the last switch-off of the cen- Installation and maintenance instructions ecoTEC plus 937 0020031552_06... -
Page 39: Commissioning, Part I 6
> Open the mains water isolating valve supplying the appliance. The ecoTEC plus 937 is supplied fitted with a > Open the cold water isolating valve under the appli- pressure gauge and a digital pressure display. ance. The water then flows through the combi boiler Using the pressure gauge you can perform a and the shift load storage tank to the hot water taps. -
Page 40: Filling Device For Ecotec Plus 937
6 Commissioning, Part I 6.4.2 Filling device for ecoTEC plus 937 The ecoTEC plus 937 is fitted with a filling loop. > Push the double check (1) of the filling loop into the cold water stop valve (2) and secure the double check valve (1) with the spring clip (4). -
Page 41: Flushing The System For The First Time ("Cold")
Fill the lower section with water until about 10 mm below the upper edge. > Replace the lower section of the condensate siphon. Fig. 6.5 Setting the bypass valve > Use the adjusting screw (1) to adjust the bypass valve. Installation and maintenance instructions ecoTEC plus 937 0020031552_06... -
Page 42: Checking The Gas Setting
Check the gas inlet working pressure as detailed in section 6.9.3. > Note that you must re-measure the gas flow rate or the gas inlet working pressure, if changes were required to correct any issues found. Installation and maintenance instructions ecoTEC plus 937 0020031552_06... -
Page 43: Checking The Gas Flow Rate
Close the gas isolation valve of the boiler. Table 6.2 Gas inlet working pressures at the reference test point > Should the pressure recorded at the reference test point in the boiler be lower than indicated (Table 6.2) Installation and maintenance instructions ecoTEC plus 937 0020031552_06... -
Page 44: Assembling The Front Panel
The display reverts back to the normal sta- tus (display of current feed temperature, for example 45 °C). > To de-activate the setting mode, simultaneously push the buttons "i“ and "+“. Installation and maintenance instructions ecoTEC plus 937 0020031552_06... -
Page 45: Converting The Gas Type
As soon as there is a heat demand the display runs through status indications "S. 1" to "S. 3", until the appliance is running properly in normal operation and the display shows "S. 4". Installation and maintenance instructions ecoTEC plus 937 0020031552_06... -
Page 46: Hot Water Operation
With the storage tank charging function switched off Activate the storage tank charging by turning the hot you can set the following temperatures using the knob water temperature control knob fully clockwise. for hot water draw-off temperature: Installation and maintenance instructions ecoTEC plus 937 0020031552_06... -
Page 47: Conclusive Flushing Of The Heating System ("Hot")
1.0 bar is reached. (The ideal measured value on lead to invalidation of the guarantee (Note: Your legal the pressure gauge is 0.5 bar plus an extra amount rights remain unaffected by this.) Installation and maintenance instructions ecoTEC plus 937 0020031552_06... -
Page 48: Factory Guarantee
BS 7967, parts 1 to 4. > The flue gas analyser is set to the correct fuel set- ting. Installation and maintenance instructions ecoTEC plus 937 0020031552_06... -
Page 49: General Inspection And Maintenance Instructions
If it is necessary to keep the electricity to the boiler switched on for certain inspection and maintenance, this is indicated in the description of the maintenance task. Installation and maintenance instructions ecoTEC plus 937 0020031552_06... -
Page 50: Checking The Co Concentration
If one of the flue gas values is greater than the - or if an incorrect combustion is suspected. acceptable values in Table 8.1, then proceed as described in the following section 8.1.4. Installation and maintenance instructions ecoTEC plus 937 0020031552_06... -
Page 51: Concentration (Or The Air Ratio)
15 minutes. > The adjusting screw shall be sealed after the adjust- ment. > Re-secure the air intake pipe with the screw (2). > Put the front casing back on. Installation and maintenance instructions ecoTEC plus 937 0020031552_06... -
Page 52: Inspection And Maintenance Work Steps
(see Table 7.1). If they are outside of the tolerances of Table 7.1 make an adjustment, see section 7.1.4. Complete the gas commission checklist (benchmark book). Table 8.2 Inspection and maintenance steps Installation and maintenance instructions ecoTEC plus 937 0020031552_06... -
Page 53: Maintaining The Compact Thermal Module
Fig. 8.2 Removing the air inlet pipe > Remove the front of the of the unit by pulling the bottom edge forwards and lifting slightly. > Lower the electronic box. Installation and maintenance instructions ecoTEC plus 937 0020031552_06... -
Page 54: Cleaning The Integral Condensation Heat Exchanger
(2) on the back of the heat exchanger. Fig. 8.6 Replacing the burner door gasket > Insert a new gasket (1) in the burner door. Installation and maintenance instructions ecoTEC plus 937 0020031552_06... -
Page 55: Cleaning The Condensate Trap
> Re-connect the gas supply (3) to the gas valve. Use a Clean the siphon part by flushing it out with water. new seal and ensure it is correctly located. Use the Installation and maintenance instructions ecoTEC plus 937 0020031552_06... -
Page 56: Cleaning Strainer In Cold Water Supply
Re-fit the connector with the cleaned strainer. tem. > Fit the pipe elbows of the shift load storage tank and the cold water feed back in position. > Always use new seals. Installation and maintenance instructions ecoTEC plus 937 0020031552_06... -
Page 57: Checking Filling Pressure Of The Expansion Vessel Of The Shift Load Storage Tank
Carry out a function check of the combi boiler as described earlier. > Check the gas flow rate as described earlier. > Check for water leaks. > Re-fit the front case. Make sure that the seal is good. Installation and maintenance instructions ecoTEC plus 937 0020031552_06... -
Page 58: Logical Fault Finding Procedure
(if no external controllers are fitted, the connections 3 and 4 on the combi boiler terminal must be connected together). > Check that the burner anti-cycling time mode on the combi boiler is not active. Installation and maintenance instructions ecoTEC plus 937 0020031552_06... -
Page 59: Diagnostic Codes
Water pressure sensor test, heat demands (hot water S.97 or heating) are blocked Flow/return flow sensor test, heat demands (hot S.98 water or heating) are blocked Table 9.1 Status codes (continuation see next page) Installation and maintenance instructions ecoTEC plus 937 0020031552_06... -
Page 60: Troubleshooting
(if shift load storage tank is to be de-installed, set d.92 = 0) d.97 Activation of the second diagnostic level Password: 17 Table 9.2 Diagnostic codes of the first diagnosis level Installation and maintenance instructions ecoTEC plus 937 0020031552_06... - Page 61 1 = mid-position 2 = Permanent heating position d.71 Maximum flow temperature knob setting Adjustment range in °C 40 to 85 (Factory setting: 75) Table 9.3 Diagnostic codes in the second level Installation and maintenance instructions ecoTEC plus 937 0020031552_06...
-
Page 62: Error Codes
You can exit the error memory display as follows: > Push the button "i“under the display, or > Do not press any button for about 4 minutes. The dis- play then switches back to the display of current flow temperature. Installation and maintenance instructions ecoTEC plus 937 0020031552_06... - Page 63 Signal water pressure sensor in the wrong range Line to water pressure sensor is interrupted or has a short-cir- F.73 (too low) cuit to 0 V or water pressure sensor faulty Table 9.4 Error codes Installation and maintenance instructions ecoTEC plus 937 0020031552_06...
- Page 64 Communication fault between the display and the printed circuit No communication with the printed circuit board board in the electronics box Table 9.4 Error codes (continued) Installation and maintenance instructions ecoTEC plus 937 0020031552_06...
-
Page 65: Test Programmes
> In the second diagnostic level, under the diagnostic point "d.96" change the value to 1 (see Section 9.1.2). The parameters of all adjustable diagnosis points now correspond to the factory settings. Installation and maintenance instructions ecoTEC plus 937 0020031552_06... -
Page 66: Replacing The Burner
Pull the plug (3) out of the fan. > Unscrew the three screws (2) out of the thermo-com- pact module (1). > Remove the complete component group "gas valve/fan". Fig. 10.3 Gas valve/fan screwed joint Installation and maintenance instructions ecoTEC plus 937 0020031552_06... -
Page 67: Replacing The Expansion Vessel
If required, match the pressure to the static head of the heating system. > Fill and bleed the combi boiler. > After completion of the work check the system for gas leaks and carry out a function test (see Section 8.8). Installation and maintenance instructions ecoTEC plus 937 0020031552_06... -
Page 68: Replacing The Primary Heat Exchanger
Remove the clamps (1) and (2) and pull off the flow and return hoses from the primary heat-exchanger. > Unscrew the four screws (3) on the holder of the pri- mary heat-exchanger. Installation and maintenance instructions ecoTEC plus 937 0020031552_06... -
Page 69: Replacing The Expansion Vessel Of The Shift Load Storage Tank
Close the gas isolator valve in the gas supply pipe. > Close the stop valves in the hot water system and drain the water out of the combi boiler and the shift load storage tank. Installation and maintenance instructions ecoTEC plus 937 0020031552_06... -
Page 70: Replacing The Aqua Sensor
Turn the Aqua-Sensor slightly to the side and pull the > Filling and vent the combi boiler and the shift load Aqua-Sensor downwards out of the chassis. > storage tank. Remove the pipe elbow from the Aqua-Sensor. Installation and maintenance instructions ecoTEC plus 937 0020031552_06... -
Page 71: Replacing The Electronics On The Shift Load Storage Tank
> Re-fit the discharge pipe (1) and use new gaskets. > Filling and vent the combi boiler and the shift load The combi boiler ecoTEC plus 937 is ready for opera- storage tank. tion. > After completion of the work check the system for water leaks and carry out a function test (see Sec- tion 8.8). -
Page 72: Recycling And Disposal
Ensure that old appliances and any existing accessories are disposed of properly. Packaging The specialist company that installed the appliance is responsible for disposing of the transport packaging. Please observe the applicable national legal regulations. Installation and maintenance instructions ecoTEC plus 937 0020031552_06... -
Page 73: Ec Declaration Of Conformity
EC declaration of conformity EC declaration of conformity Installation and maintenance instructions ecoTEC plus 937 0020031552_06... - Page 74 Installation and maintenance instructions ecoTEC plus 937 0020031552_06...
-
Page 75: Service Record
Installation, Commissioning and Service Record Installation and maintenance instructions ecoTEC plus 937 0020031552_06... - Page 76 Installation and maintenance instructions ecoTEC plus 937 0020031552_06...
- Page 77 Installation and maintenance instructions ecoTEC plus 937 0020031552_06...
Need help?
Do you have a question about the ecoTEC plus 937 and is the answer not in the manual?
Questions and answers