Table of Contents
Advertisement
Quick Links
by Opus Technologies
LRC300
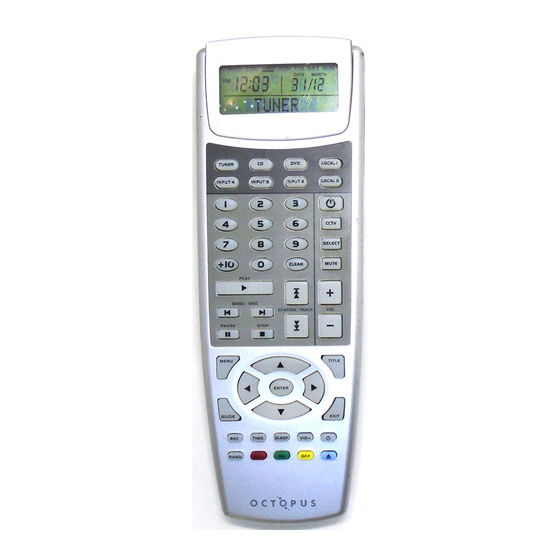
Learning Remote Control
User Guide
For use with the Octopus Multi-Room System
Editable device names
Clock and Alarm features
Backlit display and keys
Hard coded dedicated Octopus buttons
Learning storage buttons compatible
with nearly all source equipment
High power IR output for extended transmission range
Local banks for control of bedroom TV etc
Macro facility
Cloning feature
Advertisement
Table of Contents

Summary of Contents for Octopus LRC300
- Page 1 Opus Technologies LRC300 Learning Remote Control User Guide For use with the Octopus Multi-Room System Editable device names Clock and Alarm features Backlit display and keys Hard coded dedicated Octopus buttons Learning storage buttons compatible with nearly all source equipment...
- Page 2 A-BUS Ready™ outputs on receivers or amplifiers. The LRC300 has 8 device banks (Tuner, DVD etc.), 6 of which are related to the 6 inputs on the Octopus system plus 2 further Local banks which can be used to control sources local to the room in which the remote is being used.
-
Page 3: Unit Diagram
UNIT DIAGRAM BACKLIGHT BUTTON TUNER LOCAL 1 INPUT 4 INPUT 5 INPUT 6 LOCAL 2 CCTV SELECT MUTE CLEAR PLAY BAND / DISC STATION / TRACK PAUSE STOP MENU TITLE ENTER EXIT GUIDE TIME SLEEP VID+ RAND INFO... -
Page 4: Installing Batteries
INFRARED TRANSMITTER AND LEARNING EYE DISPLAY (LCD) WINDOW DEVICE BUTTONS DEDICATED OCTOPUS SYSTEM BUTTONS STORAGE BUTTONS LEARN/MACRO BUTTON EDIT BUTTON CLEAR BUTTON RESET BUTTON ALARM/TIMER ON/OFF REAR OF LRC300 ENTER INSTALLING BATTERIES Use only Alkaline type batteries. (1) Remove the battery cover. -
Page 5: Setting Up The Remote Control
SETTING UP THE REMOTE CONTROL REAL TIME CLOCK / DATE / MONTH / YEAR / WEEKDAY SETTING On the back of the remote press EDIT once (using a paperclip or similar), to enter Real Time Clock mode. Display shows "CLOCK?" flashing. -
Page 6: Timer / Alarm
TIMER / ALARM The LRC300 has a timer function which allows the user to program a time to activate the tuner (e.g. to wake up to). When the programmed time is reached the remote automatically sends out the Tuner device code, a special wake-up code and any code programmed into the "1"... -
Page 7: Learn Mode
Learn mode (using a paperclip or similar). Display shows "LEARN" flashing. Place the original source remote (CD, LRC300 DVD etc) facing the LRC300, head to HEAD TO HEAD head, about 2-3 inches (5-8 cm) apart. ABOUT 2"- 3"... - Page 8 Octopus keypads. A-BUS READY™ AND LEARNING CODES INTO DEVICE BUTTONS By default the Octopus LRC300 device buttons have been pre- coded to send the correct Octopus codes to change sources. However these buttons can be taught new codes if required.
- Page 9 Note: Learning new codes into the source/device buttons replaces the Octopus codes that have been pre-coded into them. To recover the original codes, perform a Clear Key or Clear Device on each device button in turn. This will reset its code to the dedicated Octopus source codes.
- Page 10 BUTTON LABEL EDITING When device or storage buttons are pressed, the display shows a default label. The LRC300 however also allows users to change these labels (up to 8 characters). Please see AVAILABLE CHARACTER TABLE for the available character set.
-
Page 11: Setting A Macro
SETTING A MACRO A Macro is a chain of commands actioned by a single button press. Any storage button on the LRC300 can contain a Macro of up to 20 steps. Delays of 1-99 seconds can be programmed between steps if desired. - Page 12 A Macro cannot contain as a step a button that also contains a Macro. If you do program a Macro button as a step in another macro the LRC300 will not do anything for this step, but all other steps will work as expected.
- Page 13 CLONING For ease of setup where a user may have more than one LRC300, the complete contents of a remote (IR codes, Macros, button names and clock settings) can be transferred to another LRC300 remote by a "cloning" process. One remote must be set to transmit mode whilst the other set to receive mode, while joined by a cloning cable.
-
Page 14: Clearing Stored Data
Note: Clearing a device button does not affect the device name or any button names if they have been edited, but does clear all codes and Macros, and recovers the Octopus pre-code for the device bank button. 3. To clear ALL the IR code data and Macros in the remote including all device, button and pre-code names and all button names, press the CLEAR button 3 times. -
Page 15: Operating The Remote Control
Press the RESET button to restart the LRC300. After reset, all data remains, but the real time clock and date have to be set again. Reset is used in the unlikely event that the LRC300 locks up due to static discharge or other unforeseen events. - Page 16 Opus is committed to providing the highest levels of service and support. For full details of this product see its dedicated website page at: www.opus.eu/octopus Octopus is a trademark of Opus Technologies UK LLP . All rights reserved. Opus Technologies UK LLP Gallery Court, Pilgrimage Street, London SE1 4LL England Tel: +44 (0)20 7940 2205 Email: info@opus.eu...
Need help?
Do you have a question about the LRC300 and is the answer not in the manual?
Questions and answers