
Related Manuals for Toyoset Omni 230 Type C


Summary of Contents for Toyoset Omni 230 Type C
- Page 1 Omni 230 Type C_US.qxd 14.8.1 13:15 ページ A PORTABLE KEROSENE HEATER OPERATION AND MAINTENANCE INSTRUCTIONS Omni 230 MODEL (TYPE C) IMPORTANT READ AND UNDERSTAND INSTRUCTIONS BEFORE USING HEATER.
-
Page 2: Table Of Contents
RETAIN INSTRUCTIONS FOR FUTURE REFERENCE. This heater is designed to be used at altitudes up to 1,300m above sea level. Consult with your dealer otherwise. CONTENTS SAFETY TIPS ......1 ASSEMBLY AND OPERATION . - Page 3 RISK OF EXPLOSION 1. NEVER use any fuel other than clean kerosene (paraffin). NEVER use gasoline (petrol). Use of gasoline (petrol) can lead to uncontrollable flames resulting in a destructive fire. Even kerosene (paraffin) contaminated with small amounts of gasoline (petrol), or similarly volatile materials, can be hazardous. NEVER use a can for kerosene (paraffin) that has previously been used for gasoline (petrol), paint thinner, or solvents.
-
Page 4: Fuel Guide
3. DO NOT operate heater without protective guards completely attached. 4. DO NOT use heater to heat or boil water or as a cooking appliance. DO NOT placecooking utensils, tea kettles or any other object on top of heater while in operation. 5. - Page 5 Purchase only kerosene (paraffin) in non-red cans reserved exclusively for kerosene (paraffin) and marked accordingly with the word “KEROSENE (PARAFFIN)”. Always store your kerosene (paraffin) in a separate area from where you store gasoline (petrol) for your power equipment, to avoid use of gasoline (petrol) in your heater. What to Buy...
-
Page 6: Operating Controls And Features
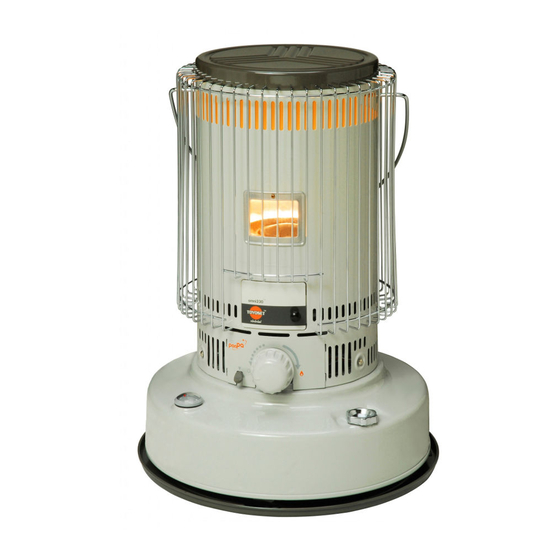
OPERATING CONTROLS AND FEATURES 1. White Clean Heat Chamber: Permits high heat output capacity without increasing unwanted combustible materials. 2. Wick Life Extender: Helps maintain good wick performance. 3. Wick Adjuster Knob: Used to raise and lower wick for heat output adjustment and to ignite. To extinguish flame, turn knob counterclockwise. - Page 7 SPECIFlCATlONS TOYOSET Portable Kerosene (paraffin) Heater Model Omni 230 Heat rating 23,000 BTU/h (5,820 kcal/h) Fuel tank capacity 7.5 L Burning time/tank* 12-16 Hours Size (W x H x D) 440 x 583 x 440 mm Weight 10.7kg Wick adjuster Wick life exteder mechanism Automatic, powered by four (4) “C”...
-
Page 8: Component Parts
COMPONENT PARTS REF# PART NAME Top plate Front guard assembly Rear guard assembly Carrying handle Screw for cover Mica window Outer cover assembly Screw for mica window Access door Heat chamber assembly Wick adjuster with pendulum assembly Wick adjuster knob Glass fiber wick Wick sleeve Rubber packing... - Page 9 1. REMOVE PACKING MATERIALS Remove all packing materials from your heater and install the guard as follows: Top plate Outer cover Packing material Fuel tank Tray CAUTION: Risk of fire. The packing materials are flammable. a) After removing the top plate, take the packing materials out of the outer cover. b) Put the top plate back on the top of the outer cover.
- Page 10 2. INSTALL DRIP TRAY NOTE: DO NOT operate your heater without the drip tray. Place the drip tray on the floor. ● Place the heater on the drip tray so the three (3) legs of the heater are next to the three (3) tabs on the tray.
- Page 11 NOTE: lf your heater is not level, change Iocations. DO NOT attempt to prop it up with books or other objects. An unlevel heater may burn with an uneven flame. 3. CHECK THE WICK LIFE EXTENDER When you first use your new heater or after replacing the wick, check if the WICK LIFE EXTENDER is on position 1.
- Page 12 Look at the flame and check its length. Flame length is not necessarily even or uniform around the circumference of the center disk. Some areas may be lower than others, but on maximum wick height, flame length should average between 10 mm (3/8 in.) to 25 mm (1 in.). lf necessary, raise or lower the wick by turning the wick adjuster knob within ADJUSTMENT RANGE to produce the proper flame condition.
-
Page 13: Care And Maintenance
Before replacing wick, be sure to move the wick life extender dial back to its 1 position. CHECK THE OPERATION OF THE AUTOMATIC EXTINGUISHER BEFORE LIGHTING YOUR HEATER. EXTINGUISHING THE FLAME 1. Turn the wick adjuster knob counterclockwise until it stops (about 3/4 turn). Withina few moments, the flame will be completely extinguished and the heater will be off. -
Page 14: Replacement Of Parts
3) Remove any residue from the wick with a small brush such as an old toothbrush. Cinders or soot in the burneraround the wick may be vacuumed away. Be careful when removing such material from the wick with a brush, to do so gently so as not to tear the top surface of the wick. 4) Remove any tar deposits on the top of wick adjuster and primary air tube using a scraper. - Page 16 Wick Adjuster at the time of replacing the wick.
- Page 17 even all around. are the same height. lf they are uneven, the flames tend to be uneven, too. 9. Tighten the four (4) wing nuts around the wick adjuster. 10. Turn the wick adjuster knob to be sure the wick moves smoothly up and down. AFTER REPLACING THE WICK, CHECK THE OPERATlON OF THE AUTOMATlC EXTINGUISHER.
-
Page 18: Storage
REPLACING THE MICA WINDOW WARNING: Before replacing the mica window, allow heater to cool completely. 1 . Remove screw from the mica window frame and lift mica window off. 2 . Align notch in mica window with hole on mica window frame. Insert tab of the mica window frame into outer cover slot. - Page 19 Smoke or odor Heat chamber tilted or Move wire handle until heat chamber is improperIy seated properly seated and moves smoothly left and right. Wick set too high Reduce wick height by turning wick adjuster knob counterclockwise. Check position of the wick life extender.
Need help?
Do you have a question about the Omni 230 Type C and is the answer not in the manual?
Questions and answers