Advertisement
Quick Links
Assembly & User Instructions
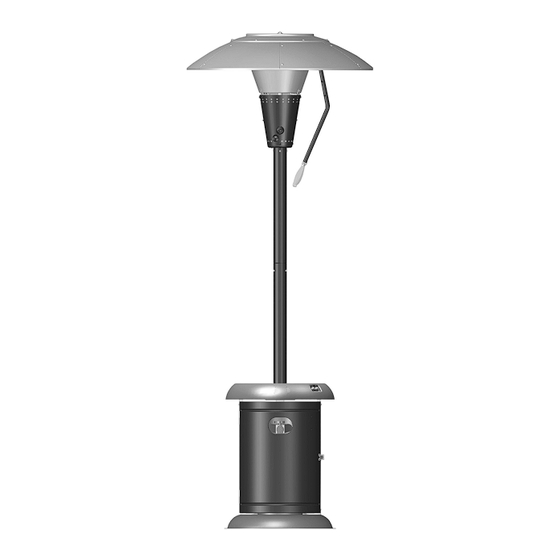
Mirage 38,200Btu
Heat Focusing Patio Heater with Speaker + Light
These instructions are for your safety. Please read them
thoroughly before use and retain them for future reference.
Patent No: US 8,176,910132
DANGER:
If you smell gas:
1. Shut off gas to the appliance.
2. Extinguish any open flame.
3. If odor continues, keep away from
the appliance and immediately call
your gas supplier or fire department.
WARNING:
Do not store or use gasoline or other
flammable vapors and liquids in the
vicinity of this or any other appliance.
An LP-cylinder not connected for use
shall not be stored in the vicinity of any
other appliance.
WARNING:
For Outdoor Use Only.
WARNING:
Improper installation, adjustment,
alteration, service or maintenance can
cause injury or property damage.
Read the installation, operating and
maintenance instructions thoroughly
before installing or servicing this
equipment.
We provide a Customer Support Service.
If you have any queries please contact us
on info@uigroup.ie or tel. (678) 534 2876
or visit our website www.uigroup.ie
Advertisement

Subscribe to Our Youtube Channel
Related Manuals for Mirage 38,200 Btu

Summary of Contents for Mirage 38,200 Btu
- Page 1 Assembly & User Instructions Mirage 38,200Btu Heat Focusing Patio Heater with Speaker + Light These instructions are for your safety. Please read them thoroughly before use and retain them for future reference. DANGER: If you smell gas: 1. Shut off gas to the appliance.
-
Page 2: Parts Supplied
Parts Supplied Description Illustration Description Illustration Base Lower Support Pole Upper Cylinder Support Chamber Pole Supports Cylinder Chamber Lantern Door Cylinder Parasol Chamber Side Wall Panels Drinks Parasol Top Table Panel Reflector Regulator Handle Page 1... - Page 3 Fixings Supplied Description Illustration Description Illustration 1/4″ Nut 1/4″ Washer 1/4″ Dome 5/16″ Head Bolt Washer 1/4″ Dome 5/16″ Bolt Hex Bolt Fixings are shown at actual size. Before You Start • Check the contents of the box and make sure you have all the parts and fittings listed. If not, contact the factory by email: info@uigroup.ie or the Helpline (678) 534 2876 •...
-
Page 4: Assembly Step
Assembly Step 1 Base Cylinder Chamber 1/4″ bolt (C) 1/4″ washer (D) Supports (A,B,C) Fix the cylinder chamber supports (A,B,C) to corresponding location on the base with 6 of the 1/4″ bolts (Ref. C) and washers (Ref. D). Finger tighten only. Cylinder chamber supports Base... - Page 5 Assembly Step 2 Lower 1/4″ Nut (A) 1/4″ 1/4″ Support Pole Dome Hex Bolt (C) Washer (D) Fix lower support pole to cylinder chamber supports as shown using 6 of the 1/4″ bolts (Ref. C) and 6 of the 1/4″ nuts (Ref. A) and washers (Ref. D). Finger tighten only. 1/4″...
- Page 6 Assembly Step 3 Cylinder 1/4″ Dome 1/4″ Nut Chamber Wall Head Bolt (B) Fit the cylinder chamber wall to the cylinder chamber supports using 6 of the 1/4″ dome head bolts (Ref. B) and 6 of the 1/4″ nuts (Ref. A). Finger tighten only. Page 5...
- Page 7 Assembly Step 4 Cylinder Chamber door Hang door on hinges. Ensure correct alignment and tighten all bolts securely. Cylinder Chamber door Hinges Page 6...
- Page 8 Assembly Step 5 Drinks Table 1/4″ Dome Hex 1/4″ Nut 1/4″ Washer (D) Bolt (C) Drinks table brackets Secure drinks table brackets to all 3 of the cylinder chamber support legs at the points circled. Page 7...
- Page 9 Assembly Step 6 1/4″ Dome Hex 1/4″ Washer (D) Bolt (C) Fit upper support pole to lower support pole using 3 of the 1/4″ dome hex bolts (Ref.C) and washers (Ref.D). Page 8...
- Page 10 Assembly Step 7 1/4″ Dome Hex 1/4″ Washer (D) Bolt (C) Feed the lantern hose down the support pole and secure lantern to support pole using 4 of the 1/4″ Dome Hex Bolts. (Ref. C) and washers (Ref. D). Lantern 1/4″...
- Page 11 Assembly Step 8 Connect securely with adjustable wrenches Screw regulator onto gas cylinder Regulator Position gas cylinder inside cylinder chamber as shown securing with chain. Connect the lantern hose to the regulator hose and secure tightly with adjustable wrenches. Then attach the regulator to the cylinder, turn clockwise to tighten it securely.
- Page 12 Assembly Step 9 Reflector handle Fitting reflector handle Using the pre-fitted R-clip and pin, secure the reflector handle to the bracket as shown. Reflector R-Clip Handle Page 11...
- Page 13 Assembly Step 10 5/16″ Bolt (F) 5/16″ Washer (E) Top Panel Side Panels 1/4″ Dome Head 1/4″ Nut (A) Bolt (B) Loosely screw parasol side panels together overlapping as shown below. Fix the top panel to the top of assembled side panels and then fully tighten all bolts. Side Panels Top Panel Fit reflector to lantern as shown using 3 of the...
- Page 14 2. Connect light and speaker USB cable to power bank. 3. Position power bank in tray. 4. Switch on lights and speaker. 5. Follow the instructions on your Bluetooth device to connect to speaker. Speaker name is Mirage Speaker. Lights + Speaker on/off Power Bank...
- Page 15 For all appliances: • The heater, when installed, must be electrically grounded in accordance with local codes or, in the absence of local codes, with the National Electrical Code, ANSI/NFPA 70, or the Canadian Electrical Code, CSA C22.1. • Certain materials or items, when stored under the heater, will be subjected to radiant heat and could be seriously damaged.
- Page 16 Leak Testing • To be performed in a well ventilated area. • Confirm all control knobs are in the off position. • Open the gas control valve on the bottle. • Check the leaks by brushing a solution of 50% water and 50% dish soap over the gas system joints, including all valve connections, hose connections and regulator connections.
- Page 17 Use Instructions Before proceeding make sure you understand the warnings section of this manual. Lighting instructions: • Fit battery to sparker. • Turn on gas supply at cylinder. • Push dial in and turn to position . • While dial is held pressed in at position , press spark button to ignite the heater. •...
- Page 18 • When using the heater after extended periods of storage, re-attach the reflector. The heater should never be operated without the reflector in place. • If the heater is to be stored indoors, the gas bottle must be disconnected and left outside. in a dry, well-ventilated area,away from any sources of heat or ignition.
- Page 19 • Ensure all packaging and plastic bags are disposed of safely. Technical Data Overall Height: 86.6’’ approx. Overall Weight: 82.6lbs Overall Width: 34’’ Heater Heat Input(·Qn): 38,200 Btu/h Heater Gas Consumption: 2.0 Lbs per hour Heater Injector Size: 0.07” Setting Pressure: 11” per W.C Regulator Outlet Pressure: 11” per W.C Standard ANSI Z83.26a-2008 •...
Need help?
Do you have a question about the 38,200 Btu and is the answer not in the manual?
Questions and answers