Table of Contents
Advertisement
Advertisement
Table of Contents

Related Manuals for TYPHOON Q500+


Summary of Contents for TYPHOON Q500+
- Page 1 Version 1.0...
-
Page 2: Table Of Contents
· Preparing The CGO2+ · Specifictations · Installing The Propellers · Battery Warnings and Usage Guidelines · Typhoon Q500+, CGO2+ and ST10+ Overview · Installing The Steadygrip Batteries · ST10+ Display · Attaching The CGO2+ to The Steadygrip · ST10+ Accessories ·... -
Page 3: Introduction
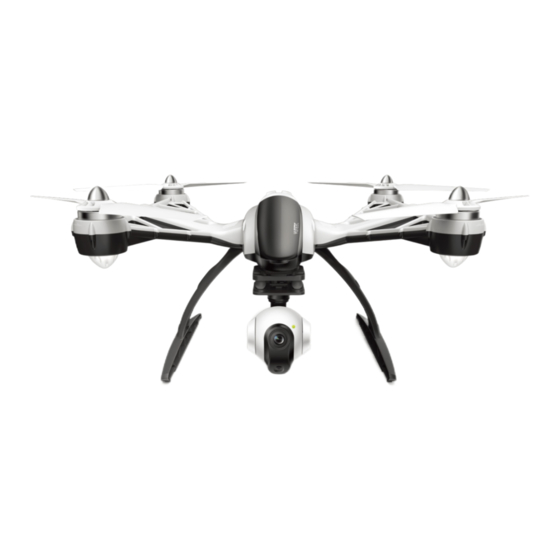
INTRODUCTION Typhoon Q500+ is a superior modular, integrated aerial and ground imaging solution. The system arrives 100% factory-assembled and test flown, including a larger ST10+ 5.5’’ Android touch screen personal ground station and a CGO2+ 3-axis gimbal camera able to take 16 megapixel still photos and excellent Full HD 60 FPS videos. -
Page 4: Notices And Warnings
Notices And Warnings IMPORTANT NOTE: All safety precautions and warnings, instructions, warranties and other collateral information is subject to change at the sole discre- tion of Yuneec. For the most up-to-date information please visit the corresponding product page at www.Yuneec.com or contact the nearest Yuneec office or authorized distributor. -
Page 5: General Safety Precautions And Warnings
General Safety Precautions And Warnings 100˚ 8000ft KEEP CLEAR OF THE DO NOT FLY NEARBY TALL THE MAXIMUM FLYING DO NOT FLY OVER DO NOT FLY NEAR DO NOT FLY IN WINDS SPINNING PROPELLERS! BUILDINGS/OBSTRUCTIONS ALTITUDE FOR THIS AIRCRAFT CROWDS! AIRPORTS! THAT EXCEED 8–12 MPH (100°... - Page 6 CAUTION: The electronic speed controls (ESCs) installed in TYPHOON are not compatible with any other product, and TYPHOON is not compatible with any other ESCs. Use of any other ESCs in TYPHOON will cause a crash, which may result in damage to the product, property and/or cause serious injury.
-
Page 7: Typhoon Q500+ Rtf Contents
TYPHOON Q500+ RTF Contents TYPHOON RTF includes everything needed to fly right out of the box. There’s nothing extra to buy or provide! 1 TYPHOON RTF Airframe w/Installed CGO2+ 6 USB to Micro USB Cable 11 DC Automobile Accessory Socket/... -
Page 8: Battery Warnings And Usage Guidelines
Battery Warnings and Usage Guidelines WARNING: Lithium Polymer (LiPo) batteries are significantly more • When charging, transporting or temporarily storing the LiPo battery the volatile than alkaline, NiCd or NiMH batteries. All instructions and temperature range should be from approximately 40–120° F (5–49° C). Do warnings must be followed exactly to prevent property damage and/or not store the battery or aircraft in a hot garage, car or direct sunlight. -
Page 9: Charging The Batteries
Charging The Batteries WARNING: Lithium Ion (LiIon) and Lithium Polymer (LiPo) batteries are significantly more volatile than alkaline, NiCd or NiMH batteries. All instructions and warnings must be followed exactly to prevent property damage and/or serious injury as the mishandling of LiIon/LiPo batteries can result in fire. -
Page 10: Preparing The Cgo2
Preparing The CGO2+ Installing The Propellers WARNING: Before installing the flight battery and powering on TYPHOON WARNING: We recommend wearing gloves and using extreme care when you MUST remove the cover/lock from the rear of the CGO2+ by carefully installing the propellers/rotor blades. -
Page 11: Typhoon Q500+, Cgo2+ And St10+ Overview
The ST10+ is equipped with an internal cooling fan and components that deliver vibrating and 23 CGO2+ Pitch Angle/Position Control Slider audible alerts. 24 SD Card Slot (located under the battery) IMPORTANT NOTE: Although the ST10+ is equipped with digital ‘trims’ (located below the control sticks) they are not active/functional when controlling TYPHOON. -
Page 12: St10+ Display
QUICK TIP: Double tap on the screen to increase the size of the video viewing area to full-screen and double tap again to return to the standard size). WARNING: NEVER attempt to fly TYPHOON via First-Person View (FPV). There’s a slight ‘lag’ in the CGO2+ streaming video downlink to the ST10+, and as a result the streaming video/FPV should only be used for aligning camera shots and not for flying! Attempting to fly via FPV can result in a crash that will... -
Page 13: St10+ Accessories
LCD screen to further improve viewing in sun light. Moving the left-hand stick to the left will turn (yaw) the nose of TYPHOON to the left about the vertical axis. And moving the stick to the right will turn Flight Controls (yaw) the nose of TYPHOON to the right. -
Page 14: Flight Controls - Smart Mode
So if you push the stick to the left TYPHOON will always move to the left, regardless of the direction the nose is pointing and even if it’s spinning. -
Page 15: Follow Me Function
FOLLOW ME FUNCTION The Follow Me function allows TYPHOON to follow the pilot, adjusting its location to the location of the ST10+. This function is enabled when ST10+ GPS positioning completes, and the TYPHOON is using shared GPS signal with ST10+. At this time, you will see on ST10+ screen, the number of connected satellites is 6 or more. - Page 16 5. Take off when you see the TYPHOON Main LED Status Indicator blinks white every 3 seconds. 6. Once the TYPHOON is above 2m and out of Smart Circle, the TYPHOON yaw direction will take the control itself. the Camera lens will always point to you as long as Flight Mode Selection Switch is in Smart Mode.
-
Page 17: Flight Controls - Angle (Pilot) Mode
*SMART CIRCLE When the Flight Mode Selection Switch is the middle position TYPHOON In most cases the Smart Circle will keep TYPHOON from coming within will be in Angle (also known as Pilot) Mode. approximately 26 feet (8 meters) of you (as long as you position yourself at least 26 feet/8 meters behind TYPHOON. -
Page 18: Flight Controls - Home Mode
TYPHOON themselves. It can also (4-8m) be helpful for pilots that lose PILOT LOCATION orientation during flight; simply B) When flying lower than 33 feet (10 meters) TYPHOON will climb to 33 activate Home Mode until feet (10 meters) while flying back to the home point, then will descend TYPHOON automatically moves vertically until it lands. -
Page 19: Led Status Indications
Home’ flight path otherwise TYPHOON may come into contact with them signal/lock. If TYPHOON loses GPS signal/lock it will switch to Angle (Pilot) and crash. And while TYPHOON is in Home Mode you will have a limited Mode automatically. This is why we strongly recommend learning to fly in amount of directional control to help avoid obstacles, however, we strongly Angle (Pilot) Mode as soon as possible. - Page 20 Second level low voltage battery warning Flashes red, green and blue continuously GPS lost Flashes purple (1 flash per second) Compass calibration required Flashes orange twice between any LED indication (when in the air) Below Motor LED Status Indicators Low voltage battery warning Flash rapidly (5 times per second) GPS disabled/lost Flash 3 times per second then off...
-
Page 21: Taking Photos And Recording Video
Taking Photos And Recording Video The slider located on the left side of the ST10+ allows you to set the pitch/tilt position of the CGO2+ from approximately straight ahead (when the slider is in the uppermost position) to approximately straight down The ST10+ seamlessly integrates control of the CGO2+ so you can easily (when the slider is in the lowermost position). -
Page 22: Installing The Flight Battery
GPS signal/lock it’s critical that the GPS antenna installing the battery. installed in the top of TYPHOON always have a clear view of the sky (100° minimum clearance required). WARNING: Do NOT attempt to fly 100˚... -
Page 23: Preparing To Fly
With a suitable GPS signal/lock it will not be possible to start the motors, takeoff or fly TYPHOON in the ‘No-Fly Zones’ within a 4 mile (6.4 kilome- Step 2) Place TYPHOON on a level and stable surface then slide the power ter) radius of most major airports. -
Page 24: Flying
START/STOP button for approxi- mately three (3) seconds to start the IMPORTANT NOTE: If at any time during flight you feel like TYPHOON is motors. Or you can lower the drifting out of/beyond your control, simply release both control sticks. -
Page 25: Disabling Gps
WARNING: Do NOT leave the ST10+ and TYPHOON powered on and do Step 2) Move the right-hand stick all the way to the right and hold it there NOT leave the flight battery installed in TYPHOON as doing so can over-dis- until step 3 is completed. -
Page 26: Compass Calibration
Compass Calibration Step 1) Do not calibrate the compass Step 2) Turn on the transmitter and Step 3) Move the Proportional Step 4) Move the left-hand stick all inside parking structures, near allow it to boot up fully before Control Rate Slider on the right side the way to the left and hold it there. - Page 27 Step 9) Rotate the aircraft 45 IMPORTANT NOTE: Steps 6 to 9 Step 10) The main LED status Step 11) If you hear an audible degrees to the left. Then slowly must be completed in less than 30 indicator should be flashing red and indication after the main LED rotate the aircraft 360 degrees seconds in order to successfully...
-
Page 28: St10+ And Receiver Binding
ST10+ and Receiver Binding Step 1) Turn on TYPHOON, and Step 5) Tap the ‘Flight after the Main LED Status Indicator Settings’ button, begins to flash blue rapidly, lift the required press ‘OK’ 2 x 45+° back end upward approximately 45°... -
Page 29: St10+ And Cgo2+ Binding
‘OK’ to bypass any ‘OK’ after the connection pop up warnings/alerts. has been established. Step 4) Turn on TYPHOON and ensure that the CGO2+ Step 7) Tap the ‘Back’ button two (2) times to return to the main screen and is powered on. -
Page 30: Specifictations
GROUND IMAGING SYSTEM Specifictations ● Never store loose Batteries together, the Batteries' terminals may contact one another causing a short circuit. ● Never expose Batteries to extreme temperatures or direct sunlight. CGO STEADYGRIP™ ● Always disconnect Batteries when not in use. Height: 223mm (8.78 in) Before the First Charge: Depth (front to back): 182mm (7.17 in) -
Page 31: Installing The Steadygrip Batteries
STEP 1) Carefully slide the top part of the CGO2+ (that also attaches below the nose STEP Remove of the Q500 Typhoon) onto the mount below the front part of the SteadyGrip™. A Battery Cover / Door from corresponding ‘click’ will be noticed once the CGO2+ has securely been installed into the bottom of the Steady- the slide-in mount on the SteadyGrip™. -
Page 32: Cgo2+ App
CGO2+ APP Using The Camera Pitch Control Wheel Download the free APP The SteadyGrip™ features a camera pitch controller that allows precise camera 17:24:12 named as CGO2 to smart angle control on the go. Simply roll the pitch control wheel forward to move the device at the APP Store camera pitch/angle downward or Google Play Store.In-... - Page 33 IMPORTANT NOTE: You can choose to record video at 48, 50 (PAL) or 60 If you have updated SteadyGrip in hand, Pitch Follow Button (NTSC) frames per second by tapping the corresponding button near the which features an extra ‘Pitch Follow’ button and 8 batteries, then please fefer to upper left-hand corner on main screen of the APP.
-
Page 34: Troubleshooting
POSSIBLE CAUSE SOLUTION TYPHOON will not initialize TYPHOON was moved during initialization. Turn TYPHOON off then back on again, and ensure it does not move during the initialization process. Flight battery will not TYPHOON flight battery needs to be replaced. - Page 35 Move TYPHOON below 8,000 feet above MSL. Incorrect motor start up procedure. Review Motor Starting/Stopping procedure in manual. TYPHOON is too close to a metal object or metal surface . Move TYPHOON away from large metal objects or surfaces. TYPHOON Flashes orange Compass needs to be calibrated .
-
Page 36: Warranty Information
WARRANTY INFORMATION Yuneec products and accessories are guaranteed against manufacturing defects for six (6) months from the original date of purchase. Yuneec’s sole obliga- tion in the event of such defects during this period is to repair or replace the defective part or product with a comparable part or product at Yuneec’s sole discretion. - Page 37 NOTE: This equipment has been tested and found to comply with the limits for a Class B digital device, pursuant to part 15 of the FCC Rules. These limits are designed to provide reasonable protection against harmful interference in a residential installation. This equipment generates, uses and can radiate radio frequency energy and, if not installed and used in accordance with the instructions, may cause harmful interference to radio communications.
Need help?
Do you have a question about the Q500+ and is the answer not in the manual?
Questions and answers