Table of Contents
Advertisement
Quick Links
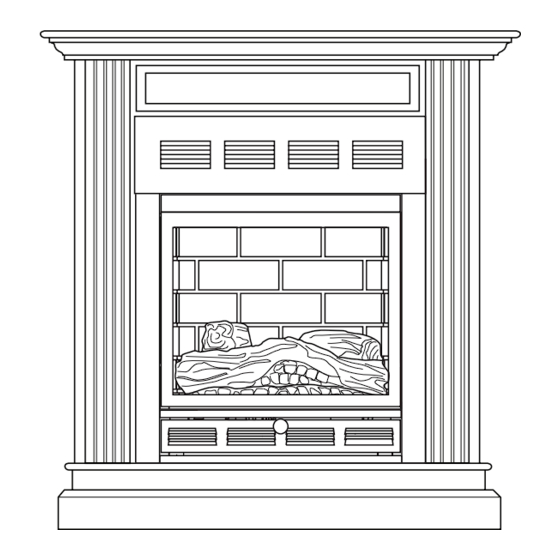
ALL-IN-ONE UNVENTED (VENT-FREE) GAS FIREpLAcE SySTEm
OWNER'S OpERATION AND INSTALLATION mANUAL
WARNING: If the information in this manual is not
followed exactly, a fire or explosion may result causing
property damage, personal injury or loss of life.
— Do not store or use gasoline or other flammable
vapors and liquids in the vicinity of this or any other
appliance.
— WHAT TO DO IF YOU SMELL GAS
• Do not try to light any appliance.
• Do not touch any electrical switch; do not use any
phone in your building.
• Immediately call your gas supplier from a neighbor's
phone. Follow the gas supplier's instructions.
• If you cannot reach your gas supplier, call the fire
department.
— Installation and service must be performed by a quali-
fied installer, service agency or the gas supplier.
INSTALLER: Leave this manual with the appliance.
CONSUMER: Retain this manual for future reference.
mODELS cFFp18NT AND cFFp18pT
For more information, visit www.desatech.com
Advertisement
Table of Contents

Related Manuals for Desa CFFP18NT


Summary of Contents for Desa CFFP18NT
- Page 1 ALL-IN-ONE UNVENTED (VENT-FREE) GAS FIREpLAcE SySTEm OWNER’S OpERATION AND INSTALLATION mANUAL mODELS cFFp18NT AND cFFp18pT WARNING: If the information in this manual is not followed exactly, a fire or explosion may result causing property damage, personal injury or loss of life.
-
Page 2: Table Of Contents
TABLE OF cONTENTS Safety ..............2 Cleaning ............18 Local Codes............4 Troubleshooting ..........19 Unpacking............5 Specifications ............ 23 Product Identification ........... 5 Service Hints ............. 23 Product Features ..........5 Technical Service..........23 Assembly ............. 6 Replacement Parts ..........23 Air for Combustion and Ventilation ...... -
Page 3: With Fireplace
SAFETy Continued Do not place clothing or other DANGER: Carbon monoxide flammable material on or near poisoning may lead to death! the appliance. Never place any objects on the heater. Carbon Monoxide Poisoning: Early signs of carbon monoxide poisoning resemble the flu, with headaches, dizziness or nausea. -
Page 4: Local Codes
SAFETy Continued 5. Do not use this fireplace as a wood-burn- 11. Keep all air openings in front and at bottom ing fireplace. Use only the logs provided of heater clear and free of debris. This will with the fireplace. insure enough air for proper combustion. -
Page 5: Unpacking
4. Check fireplace for any shipping damage. If fireplace is damaged call DESA Heat- 1. Remove fireplace and mantel from carton. ing, LLC at 1-866-672-6040 for replace- Log is wrapped and inside fireplace. Do ment parts before returning to dealer. -
Page 6: Assembly
ASSEmBLy 2. Remove all packaging from inside of WARNING: Always have unit. screen in place before operating 3. Remove bubble wrap from logs and dis- fireplace. This prevents exces- card. sive temperatures on fireplace 4. Check installation of brick liners. Brick liners are in 4 pieces: 2 sides, 1 back and surfaces. -
Page 7: Air For Combustion And Ventilation
AIR FOR cOmBUSTION AND VENTILATION The air that leaks around doors and windows WARNING: This heater shall may provide enough fresh air for combustion not be installed in a room or and ventilation. However, in buildings of un- space unless the required vol- usually tight construction, you must provide additional fresh air. - Page 8 AIR FOR cOmBUSTION AND VENTILATION Continued DETERMINING FRESH-AIR FLOW Example: 35,840 Btu/Hr (maximum the space can support) FOR FIREPLACE LOCATION 40,000 Btu/Hr (actual amount of Determining if You Have a Confined or Btu/Hr used) Unconfined Space The space in the example is a confined space Use this work sheet to determine if you have because the actual Btu/Hr used is more than the a confined or unconfined space.
-
Page 9: Installation
AIR FOR cOmBUSTION AND VENTILATION Continued and crawl spaces. Follow the National Fuel Gas Code, ANSI Z223.1/NFPA 54, Air for Combustion and Ventilation for required size 12" of ventilation grills or ducts. IMPORTANT: Do not provide openings for Ventilation Grills Into Adjoining Room, Ventilation inlet or outlet air into attic if attic has a thermo-... - Page 10 INSTALLATION Continued INSTALLATION ITEMS CAUTION: This fireplace cre- Before installing fireplace, make sure you ates warm air currents. These have the items listed below. currents move heat to wall sur- • external regulator (supplied by installer, for propane/LP units only) faces next to fireplace.
- Page 11 INSTALLATION Continued Minimum Clearances For Side Combustible NOTICE: Surface temperatures Material, Side Wall and Ceiling of adjacent walls and mantels be- A. Clearances from the side of the fireplace come hot during operation. Walls cabinet to any combustible material and wall should follow diagram in Figure 5.
- Page 12 INSTALLATION Continued 4. Attach flexible gas line to fireplace gas CAUTION: Use only new, regulator. See Connecting to Gas Supply. black iron or steel pipe. Inter- 5. Check all gas connections for leaks. See Checking Gas Connections, page 14. nally-tinned copper tubing may be used in certain areas.
- Page 13 INSTALLATION Continued We recommend that you install a sediment CONNECTING FIREPLACE TO GAS trap in supply line as shown in Figure 8. SUPPLY Locate sediment trap where it is within reach Installation Items Needed for cleaning. Install in piping system between •...
-
Page 14: Connecting To Gas Supply
INSTALLATION Continued CHECKING GAS CONNECTIONS Test Pressures Equal To or Less Than 1/2 PSIG (3.5 kPa) WARNING: Test all gas piping 1. Close equipment shutoff valve (see Fig- ure 10). and connections, internal and 2. Pressurize supply piping system by either external to unit, for leaks after opening propane/LP supply tank valve installing or servicing. - Page 15 INSTALLATION Continued INSTALLING LOG SET AND SCREEN Equipment Shutoff Valve 1. Remove log packaging material and discard packaging. Gently place log over the burner (see Figure 13). Do not allow log to contact flame. If flame contacts log, soot will be created. 2.
-
Page 16: Operation
OpERATION FOR YOUR SAFETY NOTICE: During initial opera- READ BEFORE LIGHTING tion of new fireplace, burning logs will give off a paper-burn- WARNING: If you do not fol- ing smell. Open window to vent low these instructions exactly, smell. Operate fireplace on HI a fire or explosion may result position to burn off odor. -
Page 17: Inspecting Burners
OpERATION Continued 7. Keep control knob pressed in for 30 sec- 9. To leave pilot lit and shut off burners only, onds after lighting pilot. After 30 seconds, turn control knob clockwise to the release control knob. PILOT position. Note: If pilot goes out, repeat steps 3 TO TURN OFF GAS through 7. -
Page 18: Cleaning
INSpEcTING BURNERS Continued bURNER FLAME PATTERN Figure 18 shows a correct burner flame pat- tern. Figure 19 shows an incorrect burner flame pattern. The incorrect burner flame pattern shows sporadic, irregular flame tip- ping. The flame should not be dark or have Figure 18 - Correct Burner Flame Pattern an orange/reddish tinge. -
Page 19: Troubleshooting
cLEANING Continued 5. Blow air into the primary air holes on the pilot air inlet hole about 2" from where the injector holder. pilot flame comes out of the pilot assembly (see Figure 21). With the unit off, lightly blow 6. - Page 20 TROUBLEShOOTING Continued ObSERVED PRObLEM POSSIbLE CAUSE REMEDY When ignitor button is pressed, 1. Gas supply turned off or 1. Turn on gas supply or open there is spark at ODS/pilot but equipment shutoff valve equipment shutoff valve no ignition closed 2.
- Page 21 TROUBLEShOOTING Continued ObSERVED PRObLEM POSSIbLE CAUSE REMEDY Delayed ignition of burner 1. Manifold pressure is too 1. Contact local natural or propane/LP gas company 2. Burner orifice is clogged 2. Clean burner (see Cleaning, page 18) or replace burner orifice Burner backfiring during com- 1.
- Page 22 TROUBLEShOOTING Continued WARNING: If you smell gas • Shut off gas supply. • Do not try to light any appliance. • Do not touch any electrical switch; do not use any phone in your building. • Immediately call your gas supplier from a neighbor’s phone. Fol- low the gas supplier’s instructions.
-
Page 23: Specifications
• fireplace will not produce specified heat serial numbers of your heater ready. • for propane/LP units, propane/LP gas sup- You can also visit DESA Heating, LLC’s web ply may be low site at www.desatech.com. You may feel your gas pressure is too low. If so, contact your local natural or propane/LP gas supplier. -
Page 24: Parts
FIREbOx MODELS CFFP18NT AND CFFP18PT Not shown to scale www.desatech.com 123779-01C... - Page 25 FIREbOx MODELS CFFP18NT AND CFFP18PT This list contains replaceable parts used in your fireplace. When ordering parts, follow the instructions listed under Replacement Parts on page 23 of this manual. NO. PART NO. DESCRIPTION QTY. 124043-01 Top Trim Panel 123698-01 21"...
- Page 26 BURNER MODELS CFFP18NT AND CFFP18PT www.desatech.com 123779-01C...
-
Page 27: Accessories
CLEANING KIT - CCK dealer. If they can not supply these accessories For all models. Your vent-free gas appliance call DESA Heating, LLC at 1-866-672-6040 for requires regular cleaning and maintenance to information. You can also write to the address prevent performance problems. -
Page 28: Warranty
This is DESA Heating, LLC’s exclusive warranty, and to the full extent allowed by law; this express warranty excludes any and all other warranties, express or implied, written or verbal and limits the duration of any and all implied warranties, including warranties of merchantability and fitness for a particular purpose to one (1) year on new products and 30 days on factory reconditioned products from the date of first purchase.
Need help?
Do you have a question about the CFFP18NT and is the answer not in the manual?
Questions and answers