Table of Contents
Advertisement
Quick Links
Advertisement
Table of Contents

Related Manuals for Majestic TM154


Summary of Contents for Majestic TM154
- Page 1 500-0000051027...
-
Page 4: Warnings 3~4
Warnings WARNING RISK OF ELECTRIC SHOCK DO NOT OPEN WARNING : To reduce the risk of electric shock do not remove cover (or back). No user serviceable parts inside. Refer servicing to qualified service personnel. The lightning flash with arrowhead symbol, within an equilateral triangle, is intended to alert the user to the presence of uninsulated “dangerous voltage”... -
Page 5: Warnings
Warnings Service Never remove the back cover of the TV, this can expose you to high voltage and other hazards. If the TV does not operate properly, unplug it and call your dealer. Connect the antenna cable to the connection marked Ant. (on the rear). For best reception, use an outdoor antenna. -
Page 6: Table Of Contents
Contents Before operating the set, please read this manual carefully. Warnings Contents Supplied Accessories Controls Controller of panel Remote controller Basic Operation Turning the TV On and Off Programme selection Volume adjustment Q.View Sound mute function On screen Language selection On Screen Menus and Displays Setting up TV Programme 12~14... -
Page 7: Supplied Accessories
Supplied Accessories L Make Sure the following accessories are provided with Product. 1. AC/DC adaptor 2. AC Cord 4. Batteries (type AAA) 3. Remote controller MENU TV/AV SLEEP Q.VIEW I/II LIST PC/ * ARC/ * TEXT SIZE HOLD INDEX UPDATE TIME REVEAL 6. -
Page 8: Controls
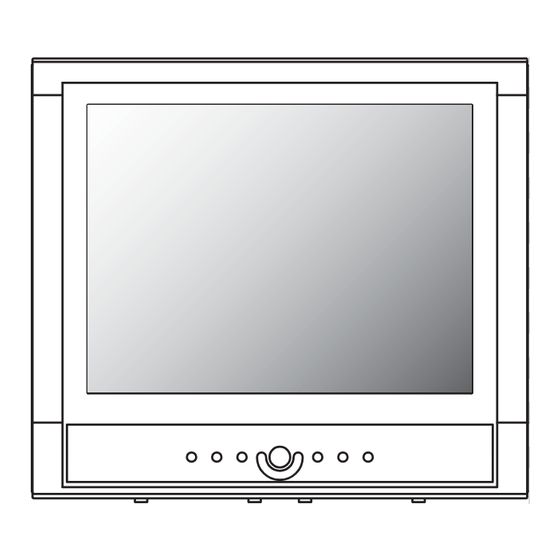
Controls Front Panel MENU TV/AV 1. MENU Displays a menu. 2. + PR - (Programme Up/Down) Selects a programme or a menu item. 3. Power Indicator Illuminates in red when the TV is in standby mode./ Illuminates in green when the TV is switched on. -
Page 9: Remote Controller
Controls All the functions can be controlled with the remote controller. Some functions can also be adjusted with the buttons on the side panel of the set. Remote controller Before you use the remote controller, please install the batteries. 1. POWER Turns the TV on from standby or off to standby mode. -
Page 10: Controls
Controls 12. VOLÏq (Volume Up/Down) Adjusts the sound level. Adjusts menu settings. 13. PC/ * Selects the PC mode. 14. PSM (Picture Status Memory) Recalls your preferred picture setting 15. SSM (Sound Status Memory) Recalls your preferred sound setting MENU TV/AV 16. -
Page 11: Basic Operation
Basic Operation Turning the TV On and Off Standby Setup: The AC-DC adapter and the AC power cord must be set up and connected to have the TV in standby mode ready to be turned on. Press the ON/OFF button on the front panel of the TV to go into standby mode. -
Page 12: On Screen Menus And Displays
On Screen Menus and Displays Equalizer 1. Press the MENU button to display Main Menu. Flat 2. Press the PRx y button to select menus-Picture, Music Sound, Special, Setup. Movie 3. Adjust each menu with the VOLÏq button. Speech User 4. -
Page 13: Setting Up Tv Programme
Setting up TV Programme Once you have preset the programmes, you will be able to Auto Programme use the PRxy or NUMBER buttons to scan the programmes you programmed. Programmes can be tuned using automatic or manual System modes. Start Auto Programme All programmes that can be received are stored by this Position :... -
Page 14: Manual Programme
Setting up TV Programme Manual Programme Manual Programme Manual Programme lets you manually tune and arrange Programme the programmes in whatever order you desire. Also you Channel can assign a programme name with 5 characters to each Table V/UHF System programme number. -
Page 15: Programme Edit
Setting up TV Programme Programme Edit Programme Edit This function enables you to delete or skip the stored P00 ----- P05 ----- P01 ----- P06 ----- programmes. P02 ----- P07 ----- Also you can move some programmes to other P03 ----- P08 ----- programme numbers or insert a blank programme data into P04 ----- P09 ----- the selected programme number. -
Page 16: Picture Control
Picture Control You can adjust picture Contrast, Brightness, Colour, Sharpness and Tint(only in NTSC mode) to the levels you prefer. Picture Manual Picture Control Contrast 1. Press the MENU button. Brightness Colour 2. Select the Picture menu. Sharpness 3. Press the PRxy button select a picture item. 4. -
Page 17: Sound Control
Sound Control You can select your preferred sound setting; Flat, Music, Sound Movie or Speech. You can also adjust the sound frequency of equalizer, balance. If you switch AVL to on, ▶ Equalizer the set automatically keeps on an equal volume level even Balance if you change programmes. -
Page 18: Sound Control
Sound Control Auto Sound Control * The sound Flat, Music, Movie and Speech are programmed for good sound reproduction at the factory and cannot be changed. SSM (Sound Status Memory) 1. Press the SSM button. 2. Press the SSM button repeatedly to select. Each press of the button changes the screen display as below. -
Page 19: Other Functions
Other functions You can control other functions; Clock, Blue Back, Auto Special Sleep, Childlock, Radio menu. ▶ Clock Blue Back Clock Auto Sleep Childlock Setting the clock is necessary in order to use the various Radio timer features of the TV. You can set automatic TV On or Output Frequency 87.9MHz Off time. -
Page 20: Blue Back
Other functions Blue Back If no signal is being received or the signal is very weak, a blue screen automatically replaces the noisy picture background. If you wish to continue viewing the poor picture, you must select the Blue Back Off.(Pressing the VOLÏq button will alternate between “On”... -
Page 21: Radio Control
Radio Control This function is possible only when the set is in Radio Radio Setup mode.(Radio mode is displayed when the Setting for Mode Auto special menu is radio On.) Frequency 87.5 MHz Programme MEM 1 Delete 1. Use TV/AV button on remote controller to select Memorize ▶... -
Page 22: Teletext
TELETEXT TEXT On/Off 1. Press TEXT button once, displays the Teletext pages. 2. Press MIX button once more, displays the Teletext pages superimposed on the TV picture. 3. Press the TEXT button to switch off Teletext once more, Text mode is off, and TV mode appears. TOP text The user guide displays four fields-red, green, yellow and MENU... -
Page 23: Special Teletext Function
TELETEXT Special TELETEXT functions MENU Functions TEXT Changes Teletext mode Selects double height text. Press this button to enlarge the top half of the page. SIZE Press this button again to enlarge the bottom half of the page. Press this button again to return to the normal display. Stops the automatic page change, which will occur if a Teletext page consists of 2 or more sub pages. -
Page 24: External Equipment Connection
External Equipment Connection You can connect additional equipment, such as VCRs, camcorders etc. to your set. Examples are shown below. Antenna connection 1. Connect RF out on the VCR to the Antenna input on the rear of the TV. 2. Connect the antenna cable to the antenna in jackon the VCR. -
Page 25: Connecting The Pc As A Monitor
Connecting the PC as a monitor This function is possible only when the set is in PC mode. Main Menu Use the TV/AV button on remote controller. ▶ Picture Picture adjustment ▶ Sound ▶ H/V Position You can adjust picture Contrast, Brightness, Temperature, Auto Clock, Phase as you prefer. -
Page 26: Sound Adjustment
Connecting the PC as a monitor Sound adjustment Sound 1. Press the MENU button. ▶ Equalizer 2. Select the Sound menu. Balance 3. Press the PRxy button to select the desired sound item; Equalizer, Balance, AVL, Surround or Surround Sound Mode Sound Mode. -
Page 27: Position Adjustment
Connecting the PC as a monitor Position Adjustment H/V Position This function is to adjust picture to left/right and up/down as you prefer. H-Position V-Position 1. Press the MENU button. 2. Select the H/V Position menu. Position : Adjust : ▲▼... - Page 28 Connecting the PC as a monitor PC INPUT COMPONENT A/V IN 1. Connect the PC IN cable (D sub jack) Pb(Cb) Pr(Cr) L(MONO) VIDEO L(MONO) DC12V PC-ANALOG PC-AUDIO IN from the monitor output socket of the PC to the PC input socket of the set. 2.
-
Page 29: Product Specification
Product Specifications Model Horizontal size 390 mm Thickness 180 mm Main body Height 350 mm Weight 4.27 kg Power requirements DC 12V/3.0A Television system PAL-BG, I, DK, / SECAM-BG, DK, L / AV NTSC Television programme VHF: 2~12 UHF :21~69 Cable : S1~S41 LCD Panel 15"... -
Page 30: Troubleshooting
Troubleshooting Problem Check item • Insert the AC power cord plug securely in AC power outlet. No picture on screen and no sound • Make sure the remote control is not in the standby from speakers mode (The POWER/Standby indicator is red.) •... - Page 31 Memo...
Need help?
Do you have a question about the TM154 and is the answer not in the manual?
Questions and answers