Table of Contents
Advertisement
Advertisement
Table of Contents

Related Manuals for Proview AI937W


Summary of Contents for Proview AI937W
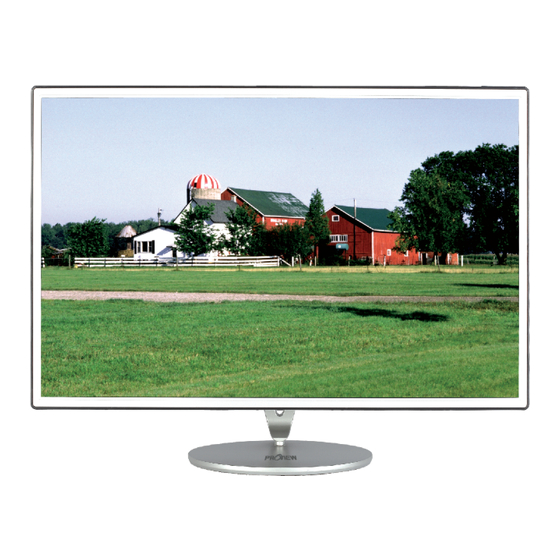
- Page 1 19’’ WIDE TFT LCD MONITOR USER’S GUIDE AI937W...
- Page 2 All Proview® product names mentioned in this publication are trademarks of Proview. Other company trademarks are also acknowledged. Changes are periodically made to this document. Changes, technical...
-
Page 3: Table Of Contents
ENGLISH Table of Contents CE Marking Declaration Of Conformity ..............4 Federal Communications Commission (FCC) Statement .........5 Important Safety Instructions ................6 Chapter 1 Introduction Features ....................9 Package Contents ................10 Front View and Controls ..............11 Chapter 2 Installation Connecting Your LCD Monitor to a Computer ........12 Method 1: Analog (D-SUB) Connection .........12 Method 2: Digital (DVI) Connection ..........13 Installing Your LCD Monitor ..............16... - Page 4 ENGLISH Recycling Place EUROPE When disposing of Proview Monitors in Europe, please contact one of the following three locations to make arrangements for recycling. Proview International (UK) Limited 30 The Avenue, Watford, Hertfordshire WD17 4AE United Kingdom Timothy Lo Tel: +44-1923-248-111 Fax: +44-923-248-222 Email: tim.lo@proview.co.uk...
-
Page 5: Ce Marking Declaration Of Conformity
ENGLISH CE Marking Declaration Of Conformity This LCD monitor complies with the requirements of the EC Directive 89/336/EEC “EMC Directive” and 73/23/EEC “Low Voltage Directive” as amended by Directive 93/68/EEC. The electro-magnetic susceptibility has been chosen at a level that gives correct operation in residential areas, business and light industrial premises and small-scale enterprises, inside as well as outside of the buildings. -
Page 6: Federal Communications Commission (Fcc) Statement
ENGLISH Federal Communications Commission (FCC) Statement This equipment has been tested and found to comply with the limits of a class B digital device, pursuant to Part 15 of the FCC Rules. These limits are designed to provide reasonable protection against harmful interference in a residential installation. -
Page 7: Important Safety Instructions
ENGLISH Important Safety Instructions To prevent any injuries, the following safety precautions should be observed in the installation, use, servicing and maintenance of this equipment. Before operating this equipment, please read this manual completely, and keep it nearby for future reference. Warnings •... - Page 8 ENGLISH • Do not attempt to service the equipment yourself. • Opening and removing the covers may expose you to dangerous voltage or other hazards and may void your warranty. Refer service to qualified personnel. • Always remove the power cord from the outlet before cleaning the equipment.
- Page 9 ENGLISH DISPOSAL OF WASTE ELECTRONIC EQUIPMENT BY PRIVATE HOUSEHOLDS WITHIN THE EUROPEAN UNION This sign indicates that this product may not be disposed of with your regular household waste. The recycling and separate collection of such products is your responsibility. Please drop off the above-mentioned waste at a designated place for recycling waste electrical and electronic equipment.
-
Page 10: Chapter 1 Introduction
• VERY HIGH RESOLUTION The 19” wide screen has the outstanding 1440x900 resolution. It can make the image displayed more precise. AI937W is excellent to be your first wide screen monitor. • HIGH CONTRAST RATIO Colors will appear vibrant and lifelike producing superior image quality. -
Page 11: Package Contents
If any items are missing, please return this product to the original place of purchase. LCD Monitor D-SUB Cable Audio Cable Power Cord* 19’’ WIDE TFT LCD MONITOR Warranty QUICK GUID AI937W Card Quick Warranty CD-ROM Guide Card** (Driver/Manual) * Power cord specification : H05 VV-F 3G 0.75mm 2 optional... -
Page 12: Front View And Controls
ITEM DESCRIPTION The LED light indicates when the LCD monitor is activated (blue light indicates power on and amber light indicates power saving). Turns the LCD monitor on and off. AUTO Press to automatically adjust the display settings to optimize performance based on the D-SUB signal. -
Page 13: Chapter 2 Installation
ENGLISH INSTALLATION Refer to the owner’s manual of the computer for connections. In the process of connecting external equipment, do not connect any AC power cords to wall outlets until all other connections are completed. Connecting Your LCD Monitor to a Computer ■... - Page 14 ENGLISH 1 x D-SUB AUDIO AUDIO AUDIO AUDIO AUDIO AUDIO AUDIO 1 x D-SUB +1 x DVI AUDIO AUDIO AUDIO AUDIO AUDIO AUDIO AUDIO AUDIO Connect to the D-SUB port Connect to the Line-in port Connect to power source NOTE: button is used for switching the LCD monitor on and off, it does not disconnect the device from the main voltage.
-
Page 15: Method 2: Digital (Dvi) Connection
ENGLISH ■ Method 2: Digital (DVI) Connection Turn off the computer and unplug the power cable. Connect the signal cable (DVI) to the DVI port on the back of the computer. Connect the audio cable to the line-in port on the back of the computer. - Page 16 ENGLISH If the screen displays “out of range”, please follow the instructions below to set up: • Press the MENU button to display the OSD. • Press the ▲ or ▼ button to highlight the (INPUT SELECT) icon, then press the MENU button. The OSD displays: DIGITAL INPUT •...
-
Page 17: Installing Your Lcd Monitor
ENGLISH Installing Your LCD Monitor Follow the instructions below to set up and install the monitor. The package contains: Display unit Stand DISPLAY UNIT STAND Cover an even stable surface with a soft cloth. Place the unit face-down on the cloth. -
Page 18: Chapter 3 On-Screen Display (Osd) Menu
On-Screen Display (OSD) Menu Using the OSD Menu To create the best picture, your AI937W has been preset at the factory with the Preset Mode Timing shown on page 21. The OSD (On Screen Display) Menu allows the user to adjust various settings and options by following the steps below. -
Page 19: The Osd Options
ENGLISH The OSD Options The OSD menu includes the following options: BRIGHTNESS BRIGHTNESS Controls the overall brightness. CONTRAST Controls the difference between the brightest and darkest regions of the picture. H. POSITION Adjusts the position of the picture left and right in the window. V. - Page 20 ENGLISH COLOR Allows selection of the general color tint: Select User Mode, WARM, or COOL. Select User Mode Allows the user to adjust red, green and blue color component levels independently. COOL Inclines colors toward the blue end of the spectrum. Fixes the red, green and blue component levels at factory settings;...
- Page 21 ENGLISH Changes the position of the OSD. H. POSITION Moves the OSD left and right in the window. V. POSITION Moves the OSD up and down in the window. EXIT Exits the OSD menu. EXIT Exits the OSD. LCD Monitor User’s Guide...
-
Page 22: Chapter 4 Technical Information
ENGLISH Technical Information Preset Mode Timing Chart The screen image has been optimized during manufacture for the display modes listed below. Video signal: (IBM PC/AT) Horizontal Vertical Dot X Line Frequency(kHz) Frequency(Hz) 720 x 400 31.47 70.00 640 x 480 31.47 60.00 37.86... -
Page 23: Dvi Connector Pin Assignment
ENGLISH DVI Connector PIN Assignment C1 C2 C3 C4 DESCRIPTION DESCRIPTION TMDS Data 2- TMDS Data 2+ Hot Plug Detect TMDS Data 2/4 shield TMDS Data 0- TMDS Data 0+ TMDS Data 0/5 shield DDC Clock DDC Data Analog Vertical Sync Clock shield TMDS Data 1- Clock +... -
Page 24: D-Sub Connector Pin Assignment
ENGLISH D-SUB Connector PIN Assignment DESCRIPTION Green Blue Ground Self Test Red Ground Green Ground Blue Ground 5 VDC Ground Ground SDA (FOR DDC) H. Sync V. Sync SCL (FOR DDC) LCD Monitor User’s Guide... -
Page 25: Plug And Play
ENGLISH Plug and Play This monitor conforms to the VESA DDC (Display Data Channel) standard, which means that when it is used with a DDC compatible video card, the monitor is easier to set up. With VESA DDC 1/2B, when the monitor is turned on, it will automatically notify a windows 9X/2000/XP host computer of its scanning frequencies, capabilities and characteristics. -
Page 26: Troubleshooting
ENGLISH Troubleshooting Before consulting service personnel, check the following chart for a possible cause and solution to the trouble you are experiencing. Monitor will not turn on • Make sure the power cord is plugged in. No picture •... -
Page 27: Specifications
Built-In Max. Resolution 1440x900 Input Connector D-SUBx1+DVIx1+PC AUDIO / D-SUBx1+PC AUDIO Power Source AC100-240V, 50-60Hz Power Consumption Dimension(W,H,D) 433x348x186mm Changes are periodically made to this specifications. Current specifications may also be obtained via the internet, www.proview.com LCD Monitor User’s Guide...
Need help?
Do you have a question about the AI937W and is the answer not in the manual?
Questions and answers