
Subscribe to Our Youtube Channel
Related Manuals for Electron LCD2622E


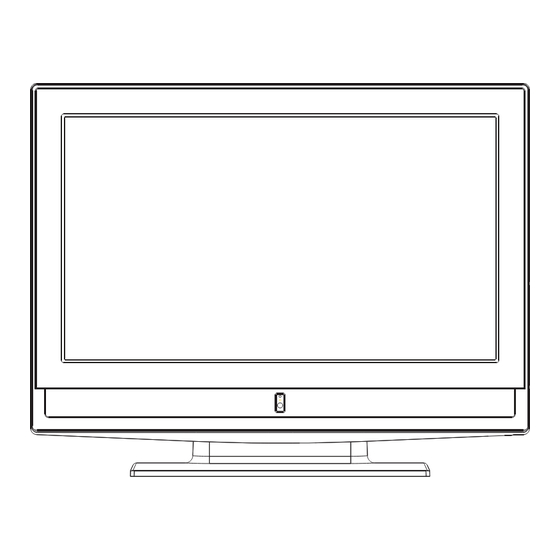
Summary of Contents for Electron LCD2622E
- Page 1 Model: LCD2622E Please read this User Manual carefully to ensure the proper use of this product and keep this manual for future reference...
-
Page 2: Table Of Contents
Contents Safety and warnings......................2-6 Introduction........................7 Installation........................8-12 Remote Control ......................13 TV Operation.........................14-15 TV Trouble shooting.......................16 7 Wall Mounting Holes Spacing and Location................8 Base Stand Disassemble Illustration.................. -
Page 3: Safety And Warnings
SAFETY AND WARNINGS IMPORTANT SAFETY INSTRUCTION 1.Read these safety instructions. 2.Keep these safety instructions. 3.Heed all warnings. 4.Follow all safety instructions. 5.Do not use this apparatus near water. 6.Clean only with dry cloth. 7.Do not block any ventilation openings. Install in accordance with the manufacturers instructions. - Page 4 SAFETY AND WARNINGS This symbol indicates that this product incorporates double insulation between hazardous mains voltage and user accessible parts. When servicing use only identical replacement parts. WARNING: To reduce the risk of fire or electric shock, do not expose this apparatus to rain or cords. Correct Disposal of this product.
- Page 5 SAFETY AND WARNINGS Warning High voltages are used in the operation of this television receiver. Do not remove the cabinet back from your set. Refer servicing to qualified service personnel. Warning To prevent fire or electrical shock hazard, do not expose the television receiver to rain or moisture.
- Page 6 SAFETY AND WARNINGS Caution Never stand on, lean on, or suddenly push the television or its stand. You should pay special attention to children. Serious injury may result if it falls. Caution Do not place your television on an unstable cart, stand, shelf or table. Serious injury to an individual , and damage to the television, may result if it falls.
-
Page 7: Installation
SAFETY AND WARNINGS Thank you very much for purchasing this TV. To enjoy your product from the very beginning, read this manual carefully and keep it handy for easy reference. INSTALLATION Locate the TV in the room where light does not strike the screen directly Total darkness or a reflection on the picture screen can cause eyestrain. -
Page 8: Introduction
INTRODUCTION Main features Accessories Used as Television, display terminal,PC display AC Power Cord......High luminance,wide viewing angle Infrared Remote Controller..Can store AIR 2-69,HRC 1-125,IRC 1-125, Battery(AAA).......2 CATV 2-125 TV programs HDMI interface User s Manual.......1 Main parameter Vie wing Picture Size(diagonal) Resolution 1366x768 Aspect Ratio... - Page 9 INSTALLATION Front panel KEYBOARD SOURCE MENU VOL+ VOL- 1 SOURCE Display the input source menu. 2 MENU To display main MENU. 3 CH+/CH- 1: Remote control sensor. In Analogue TV mode press CH+ or CH- to 2: Indicator LED: GREEN POWER ON.
- Page 10 INSTALLATION ANTENNA Note: Aerial connections:IEC(female). Input impendance:75 unbalanced.
- Page 11 INSTALLATION STEPS: Be sure both the TV and computer are Power off. 1.Connect VGA and audio cable 2.Connect power cord 3.Power on the TV, switch to PC mode 4.Power on the PC This sequence is very important. PRESET MODE V.Freq.(Hz) H.Freq.(KHz) RESOLUTION 37.88...
- Page 12 INSTALLATION AV EQUIPMENT This TV provides three groups of AV ,one S-Video,one group of YPbPr and for convenient connection to VCR,DVD or other video equipment. Please refer to the owner s manual of the equipment to be connected as well. You can use the input terminals on TV set rear as follows.
- Page 13 BATTERY INSTALLATION Insert Batteries Into the Remote Control 1. Remove the battery cover. 2. Insert the 2 AAA 1.5V batteries making sure the polarity (+ or -) of the batteries matches the polarity marks Inside the unit. 3. Mount the battery cover. Replace with new batteries when the TV set begins to show the following symptoms: Operation is unsteady or erratic.
-
Page 14: Remote Control
REMOTE CONTROL REMOTE CONTROL POWER To set the TV standby or on. VOL+/- To adjust sound level. MENU POWER ASPECT SLEEP MUTE To display TV menu. CURSOR To move within the menu. EXIT Used to return to the previous menu or exit menu. -
Page 15: Tv Operation
TV OPERATION 3.CHANNEL MENU 1. PICTURE MENU The third item of the MENU is channel menu The first item of the MENU is picture menu. (Only in TV mode).You can complete You can adjust picture here,such as contrast, channel Search and setting here. brightness,etc.press to move,press To Adjust. - Page 16 TV OPERATION PARENTAL CTRL 5.OSD MENU The sixth item of the MENU is OSD You can adjust setting below . Menu. 1.PASSWORD:you can change the current PARENTAL CTRL password. 2.PARENTAL CTRL, you can turn off or On it . 3.TV-RATING,you can enter TV rating Menu to adjust.
-
Page 17: Tv Trouble Shooting
Trouble shooting Trouble phenomenon Picture Audio Inspection antenna position, direction Snow Noise or connection antenna position, direction Ghost Normal audio or connection electronic equipment,car/ Interfere Noise motorcycle,fluorescent light Volume(inspect wether the mute function on the remote Normal Picture Mute control are started , or audio system are correct or not) Power cord is not inserted Power switch is not opened... -
Page 18: Wall Mounting Holes Spacing And Location
Wall Mounting Holes Spacing and Location 200 mm Base Stand Disassemble Illustration How to remove the stand from the TV 1.Use the screwdriver to remove the screws 1.Remove the base stand from the from the screw location. Main body. Main accessories Main body Base Stand 8 Screws...
Need help?
Do you have a question about the LCD2622E and is the answer not in the manual?
Questions and answers