Table of Contents
Advertisement
Quick Links
Advertisement
Table of Contents

Subscribe to Our Youtube Channel
Related Manuals for Canon PowerShot SXE60 HS


Summary of Contents for Canon PowerShot SXE60 HS
- Page 37 Camera User Guide • Before use, be sure to read this guide, including the safety precautions. • This guide will familiarize you with how to use the camera correctly. • Keep the guide handy for future reference. ENGLISH...
-
Page 38: Package Contents
Package Contents Before use, make sure the following items are included in the package. If anything is missing, contact your camera dealer. Camera Battery Pack NB-6L Battery Charger (with terminal cover) CB-2LY/CB-2LYE Interface Cable IFC-400PCU Wrist Strap WS-DC11 Getting Started DIGITAL CAMERA Warranty Card Solution Disk... -
Page 39: Preliminary Notes And Legal Information
• Take and review some test shots initially to make sure the images were recorded correctly. Please note that Canon Inc., its subsidiaries and affiliates, and its distributors are not liable for any consequential damages arising from any malfunction of a camera or accessory, including memory cards, that results in the failure of an image to be recorded or to be recorded in a way that is machine readable. -
Page 40: Part Names And Conventions In This Guide
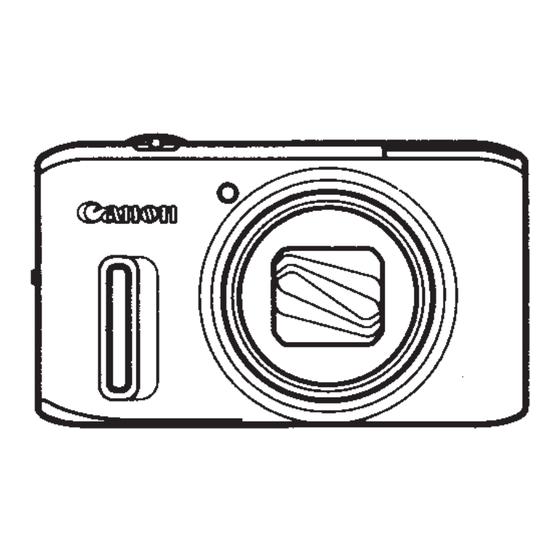
Part Names and Conventions in This Guide SX260 HS GPS antenna Lamp Lens Microphone Zoom lever Flash Shooting: i (telephoto) / j (wide Speaker angle) Tripod socket Playback: k (magnify) / g (index) DC coupler terminal cover Power button Memory card/battery cover Shutter button Strap mount •... - Page 41 Part Names and Conventions in This Guide b (Exposure compensation) / Up button Screen (LCD monitor) e (Macro) / f (Manual focus) / Left Mode dial button AV OUT (Audio/video output) / DIGITAL terminal Control dial HDMI terminal FUNC./SET button 1 (Playback) button h (Flash) / Right button n button...
-
Page 42: Table Of Contents
Contents Package Contents ......2 Smart Auto Mode .....53 Compatible Memory Cards ....2 Shooting in Smart Auto Mode ..54 Preliminary Notes and Legal Common, Convenient Features ..63 Information........3 Using Face ID ......... 69 Part Names and Conventions in This Guide ..........4 Image Customization Features .. - Page 43 Contents Playback Mode ....145 Viewing ......... 146 Browsing and Filtering Images..151 Editing Face ID Information ..154 Image Viewing Options ....156 Protecting Images ......159 Erasing Images ......163 Rotating Images......165 Image Categories......167 Editing Still Images ....... 172 Editing Movies.......
-
Page 44: Contents: Basic Operations
Contents: Basic Operations Shoot Use camera-determined settings (Auto Mode) ......54 Follow simple camera instructions (Easy Mode) ......91 Shooting people well Portraits (p. 93) Against Snow (p. 94) Smooth Skin (p. 96) Matching specific scenes Night Scenes Low Light (p. 94) Under Water Fireworks (p. - Page 45 Contents: Basic Operations View View images (Playback Mode) ........... 146 Follow simple camera instructions (Easy Mode) ......91 Automatic playback (Slideshow)..........156 On a TV ..................199 On a computer................26 Browse through images quickly..........151 Erase images................163 Shoot/View Movies Shoot movies................
-
Page 46: Safety Precautions
If liquids or foreign objects come into contact with the camera interior, immediately turn the camera off and remove the battery. If the battery charger becomes wet, unplug it from the outlet and consult your camera distributor or a Canon Customer Support Help Desk. - Page 47 Safety Precautions • Use only the recommended battery. • Do not place the battery near or in direct flame. • Unplug the power cord periodically, and using a dry cloth, wipe away any dust and dirt that has collected on the plug, the exterior of the power outlet, and the surrounding area.
- Page 48 Safety Precautions • Viewing images on the camera screen for prolonged periods may cause discomfort. • Take care not to pinch your finger when the flash lowers. This could result in injury. Caution Denotes the possibility of damage to the equipment. •...
- Page 49 Safety Precautions • When putting the camera in your bag, ensure that hard objects do not come into contact with the screen. • Do not attach any hard objects to the camera. Doing so may cause malfunctions or damage the screen.
-
Page 50: Initial Preparations
Initial Preparations Prepare for shooting as follows. Attaching the Strap Thread the end of the strap through the strap hole ( ), and then pull the other end of the strap through the loop on the threaded end Holding the Camera Place the strap around your wrist. -
Page 51: Charge The Battery
Initial Preparations Charge the battery. For CB-2LY: Flip out the plug ( ) and plug the charger into a power outlet ( For CB-2LYE: Plug the power cord into the CB-2LY charger, then plug the other end into a power outlet. -
Page 52: Insert The Memory Card
Initial Preparations Open the cover. Slide the cover ( ) and open it ( Insert the battery. While pressing the battery lock in the direction of the arrow, insert the battery facing as shown and push it in until it clicks into the locked position. -
Page 53: Removing The Battery And Memory Card
Initial Preparations Removing the Battery and Memory Card Remove the battery. Open the cover and press the battery lock in the direction of the arrow. The battery will pop up. Remove the memory card. Push the memory card in until it clicks, and then slowly release it. -
Page 54: Finish The Setup Process
Initial Preparations Set the local time zone. Press the qr buttons or turn the 5 dial to choose your local time zone. Finish the setup process. Press the m button when finished. After a confirmation message, the setting screen is no longer displayed. -
Page 55: Change The Date And Time
Initial Preparations SX260 HS Choose [Date/Time]. Move the zoom lever to choose the 3 tab. Press the op buttons or turn the 5 dial to choose [Date/Time], and then press the m button. SX240 HS Change the date and time. Follow step 2 on p. -
Page 56: Display Language
Initial Preparations Display Language The display language can be changed as needed. Enter Playback mode. Press the 1 button. Access the setting screen. Press and hold the m button, and then immediately press the n button. Set the display language. Press the opqr buttons or turn the 5 dial to choose a language, and then press the m button. -
Page 57: Trying The Camera Out
Still Images Movies Trying the Camera Out Follow these instructions to turn the camera on, shoot still images or movies, and then view them. Shooting (Smart Auto) For fully automatic selection of the optimal settings for specific scenes, simply let the camera determine the subject and shooting conditions. Turn the camera on. -
Page 58: Shooting Still Images
Trying the Camera Out Shoot. Shooting Still Images Focus. Press the shutter button lightly, halfway down. The camera beeps twice after focusing, and AF frames are displayed to indicate image areas in focus. The flash automatically rises in low-light conditions. AF Frames Shoot. - Page 59 Trying the Camera Out Black bars displayed on the top and bottom Elapsed Time edges of the screen indicate image areas not recorded. Frames displayed around any faces that are detected indicate that they are in focus. Once recording begins, you can take your finger off the movie button.
-
Page 60: Play Movies
Trying the Camera Out To access Scroll Display mode, turn the 5 dial rapidly. In this mode, turn the 5 dial to browse through images. To return to single-image display, press the m button. To browse images grouped by shooting date, press the op buttons in Scroll Display mode. -
Page 61: Included Software, Pdf Manuals
Included Software, PDF Manuals Erase the image. Press the p button. After [Erase?] is displayed, press the qr buttons or turn the 5 dial to choose [Erase], and then press the m button. The current image is now erased. To cancel erasure, press the qr buttons or turn the 5 dial to choose [Cancel], and then press the m button. -
Page 62: System Requirements
ImageBrowser EX User Guide may not be accessible from the Help function. In such cases, it will either be included on the CD-ROM bundled with your camera, or you can download the latest version from the Canon website. System Requirements The included software can be used on the following computers. - Page 63 Display 1024 x 768 resolution or higher • Check the Canon website for the latest system requirements, including supported OS versions. Installing the Software and PDF Manuals Windows 7 and Mac OS X 10.6 are used here for the sake of illustration.
- Page 64 Included Software, PDF Manuals When a message is displayed prompting you to connect the camera, connect it to a computer. With the camera turned off, open the cover ). With the smaller plug of the included interface cable (p. 2) in the orientation shown, insert the plug fully into the camera terminal ( Insert the larger plug of the interface cable in...
-
Page 65: Saving Images To A Computer
Included Software, PDF Manuals • When not connected to the Internet, there are the following limitations. The screen in step 3 will not be displayed. Some functions may not be installed. The first time you connect the camera to the computer, drivers will be installed, so it may take a few minutes until camera images are accessible. - Page 66 Included Software, PDF Manuals Choose [Downloads Images From Canon Camera using Canon CameraWindow] and then click [OK]. Double click CameraWindow Save the images to the computer. Click [Import Images from Camera], and then click [Import Untransferred Images]. Images are now saved to the Pictures folder on the computer, in separate folders named by date.
- Page 67 • To start CameraWindow in Windows Vista or XP, click [Downloads Images From Canon Camera using Canon CameraWindow] on the screen displayed when you turn the camera on in step 2. If CameraWindow is not displayed, click the [Start] menu and choose [All Programs]...
-
Page 68: Accessories
Accessories Included Accessories Battery Pack Battery Charger DIGITAL NB-6L* CB-2LY/CB-2LYE* CAMERA Wrist Strap (with terminal cover) Solution Disk WS-DC11 Interface Cable IFC-400PCU Power Memory Card Card Reader Windows/ Macintosh Cable Computer HDMI Cable HTC-100 AC Adapter Kit ACK-DC40 TV/Video System Stereo AV Cable AVC-DC400ST *1 Also available for purchase separately. - Page 69 This product is designed to achieve excellent performance when used with genuine Canon accessories. Canon shall not be liable for any damage to this product and/or accidents such as fire, etc., caused by the malfunction of non-genuine Canon accessories (e.g., a leakage and/ or explosion of a battery pack).
-
Page 71: Camera Basics
Camera Basics Basic camera operations and features... -
Page 72: On/Off
On/Off Shooting Mode Press the power button to turn the camera on and prepare for shooting. To turn the camera off, press the power button again. Playback Mode Press the 1 button to turn the camera on and view your shots. To turn the camera off, press the 1 button again. -
Page 73: Shutter Button
Shutter Button To ensure your shots are in focus, always press the shutter button lightly (halfway) initially. Once the subject is in focus, press the button all the way down to shoot. In this manual, shutter button operations are described as pressing the button halfway or all the way down. -
Page 74: Shooting Modes
Shooting Modes Use the mode dial to access each shooting mode. Live View Control Mode P, Tv, Av, and M Modes Customize image brightness or colors Take a variety of shots using when shooting (p. 90). your preferred settings (pp. 115, 139). Auto Mode Movie Mode Fully automatic shooting, with camera-... -
Page 75: Func. Menu
FUNC. Menu Configure commonly used functions through the FUNC. menu as follows. Note that menu items and options vary depending on the shooting mode (pp. 232 – 233) or playback mode (p. 239). Access the FUNC. menu. Press the m button. Choose a menu item. - Page 76 Configure a variety of camera functions through other menus as follows. Menu items are grouped by purpose on tabs, such as shooting (4), playback (1), and so on. Note that available settings vary depending on the selected shooting or playback mode (pp. 234 – 239). Access the menu.
-
Page 77: Indicator Display
Indicator Display The indicator on the back of the camera (p. 5) lights up or blinks depending on the camera status. Indicator Color Camera Status Status Connected to a computer (p. 29), or display off Green Blinking Starting up, recording/reading/transmitting images •... -
Page 79: Using Gps Function
Using GPS Function SX260 HS Basic GPS operations and features... -
Page 80: Using Gps Function
Using GPS Function Camera location information (latitude, longitude, and elevation) based on acquired GPS signals can be added to the still images and movies you shoot, or this information can be logged separately. In addition to geotagging, the camera clock can be updated automatically. Before using GPS functions, make sure the date, time, and local time zone on the camera are set correctly, as described in “Setting the Date and Time”... - Page 81 Using GPS Function Places With Poor GPS Coverage • Location information may not be recorded, or inaccurate information may be recorded where GPS signal coverage is poor, such as in the following places. Indoors underground near buildings or in valleys in tunnels or forests near high-voltage power lines or mobile phones operating on the...
- Page 82 Using GPS Function Reception Status Display (on) GPS signal received. Location can be recorded.* (blinking) Looking for GPS signal.* (on) No GPS signal. Logger function is [On] (p. 48). Tips When is Displayed • When GPS signal reception is not possible indoors or in other places away from coverage (p.
- Page 83 Using GPS Function Geotagging Images While Shooting Camera location information (latitude, longitude, and elevation) can be added as you shoot, for later reference (p. 149). This information also enables you to see the shooting location of your still images and movies on a map, when you use the included software (p.
- Page 84 Using GPS Function Logging Camera Location Data You can keep a record of where the camera was taken by using location information acquired from GPS satellite signals over a period of time. Daily location data based on acquired GPS signals is logged to a file, separate from image data.
-
Page 85: Memory Card
Using GPS Function Save the GPS log files to the memory card. When you turn off the camera, a message about the logger is displayed. The location information, date and time will be saved to the memory card. This information will not remain on the camera. - Page 86 Using GPS Function • Removing the battery after step 4 will deactivate the logger. To reactivate the logger after battery replacement, turn the camera on and then off again. • GPS log files cannot be saved when write-protected memory cards are in the camera.
- Page 87 Using GPS Function Number of Logs Acquired Check the GPS log files. Choose a date and press the m button. The recorded latitude, longitude, time, and number of logs acquired on that date are displayed. Latitude Longitude Time Automatically Updating the Date and Time You can have the date and time for the configured time zone (pp.
-
Page 89: Smart Auto Mode
Smart Auto Mode Convenient mode for easy shots with greater control over shooting... -
Page 90: Shooting In Smart Auto Mode
Still Images Movies Shooting in Smart Auto Mode For fully automatic selection at optimal settings for specific scenes, simply let the camera determine the subject and shooting conditions. Turn the camera on. Press the power button. Enter A mode. Set the mode dial to A. Aim the camera at the subject. - Page 91 Shooting in Smart Auto Mode Shoot. Shooting Still Images Focus. Press the shutter button halfway. The camera beeps twice after focusing, and AF frames are displayed to indicate image areas in focus. Several AF frames are displayed when multiple areas are in focus. The flash automatically rises in low-light conditions.
- Page 92 Shooting in Smart Auto Mode Shooting Movies Start shooting. Press the movie button. The camera beeps once as recording begins, and [ Rec] is Elapsed Time displayed with the elapsed time. Black bars displayed on the top and bottom edges of the screen indicate image areas not recorded.
-
Page 93: Still Images
Shooting in Smart Auto Mode Still Images/Movies • To activate the screen when the camera is on but the screen is blank, press the l button. • To restore camera sound if you have accidentally deactivated it (by holding the l button down while turning the camera on), press the n button and choose [Mute] on the 3 tab, and then press the qr buttons to choose [Off]. - Page 94 Shooting in Smart Auto Mode Movies • Keep your fingers away from the Microphone microphone while shooting movies. Blocking the microphone may prevent audio from being recorded or may cause the recording to sound muffled. • Avoid touching camera controls other than the movie button when shooting movies, because sounds made by the camera will be recorded.
-
Page 95: Scene Icons
Shooting in Smart Auto Mode Scene Icons In A mode, shooting scenes determined by the camera are indicated by the icon displayed, and corresponding settings are automatically selected for optimal focusing, subject brightness, and color. Depending on the scene, continuous images may be shot (p. 60). Background Night Normal... -
Page 96: Continuous Shooting Scenes
Shooting in Smart Auto Mode • The background color of , and is dark blue, and the background color of is orange. • When shooting movies, only People, Other Subjects, and At Close Range icons will be displayed. • When shooting with the self-timer, People (In Motion), Smiling, Sleeping, Babies (Smiling), Babies (Sleeping), Children, Other Subjects (In Motion) icons will not be displayed. -
Page 97: Image Stabilization Icons
Shooting in Smart Auto Mode When you want to shoot single images only, press the m button, choose • the menu, and then choose Image Stabilization Icons Optimal image stabilization for the shooting conditions is automatically applied (Intelligent IS). Additionally, the following icons are displayed in A mode. - Page 98 Shooting in Smart Auto Mode On-Screen Frames A variety of frames are displayed once the camera detects subjects you are aiming the camera at. • A white frame is displayed around the subject (or person’s face) determined by the camera to be the main subject, and gray frames are displayed around other detected faces.
-
Page 99: Common, Convenient Features
Common, Convenient Features Still Images Movies Zooming In Closer on Subjects (Digital Zoom) When distant subjects are too far away to enlarge using the optical zoom, use digital zoom for up to about 80x enlargement. Move the zoom lever toward i. Hold the lever until zooming stops. -
Page 100: Using The Self-Timer
Common, Convenient Features Still Images Movies Using the Self-Timer With the self-timer, you can include yourself in group photos or other timed shots. The camera will shoot about 10 seconds after you press the shutter button. Configure the setting. Press the p button, choose ] (either press the op buttons or turn the 5 dial), and then press the m button. -
Page 101: Using The Self-Timer To Avoid Camera Shake
Common, Convenient Features Using the Self-Timer to Avoid Camera Shake This option delays shutter release until about two seconds after you have pressed the shutter button. If the camera is unsteady while you are pressing the shutter button, it will not affect your shot. Configure the setting. -
Page 102: Deactivating The Flash
Common, Convenient Features • When you specify multiple shots, image brightness and white balance are determined by the first shot. More time is required between shots when the flash fires or when you have specified to take many shots. Shooting will stop automatically when the memory card becomes full. -
Page 103: Adding The Shooting Date And Time
Common, Convenient Features Still Images Adding the Shooting Date and Time The camera can add the shooting date and time to images in the lower-right corner. However, note that these cannot be removed. Confirm beforehand that the date and time are correct (p. 17). Configure the setting. -
Page 104: Choose A Subject To Focus On
Common, Convenient Features Still Images Choosing Subjects to Focus On (Tracking AF) Shoot after choosing a subject to focus on as follows. Specify Tracking AF. Press the o button. is displayed in the center of the screen. Choose a subject to focus on. Aim the camera so that is on the desired subject, and then press the shutter button... -
Page 105: Using Face Id
Still Images Using Face ID If you register a person ahead of time, the camera will detect that person’s face, and prioritize focus, brightness, and color for that person when shooting. In A mode, the camera can detect babies and children based on registered birthdays and optimize settings for them when shooting. -
Page 106: Register Face Information
Using Face ID Choose [Add to Registry], and then choose [Add a New Face]. Register face information. Aim the camera so that the face of the person you want to register is inside the gray frame at the center of the screen. A white frame on the person’s face indicates that the face is recognized. - Page 107 Using Face ID The [Edit Profile] screen is displayed. Enter a name. Press the m button. Press the opqr buttons or turn the 5 dial to choose a character, and then press the m button to enter it. Up to 10 characters can be used. and press the m button Choose to move the cursor.
- Page 108 Using Face ID Continue registering face information. To register up to 4 more points of face information (expressions or angles), repeat steps 2 – 3. Registered faces are more easily recognized if you add a variety of face information. In addition to a head-on angle, add a slight side angle, a shot when smiling, and shots inside and outside.
-
Page 109: Checking And Editing Registered Information
Using Face ID • Registered people may not be correctly detected if the captured image or scene differs drastically from the registered face information. • If a registered face is not detected, or not easily detected, overwrite registered information with new face info. Registering face info right before shooting will allow for easier detection of registered faces. - Page 110 Using Face ID Changing the Name or Birthday Access the [Edit Profile] screen. Following steps 1 – 3 on p. 73, choose [Edit Profile] and press the m button. Input changes. Press the op buttons or turn the 5 dial to choose an item, and follow steps 4 –...
-
Page 111: Overwriting And Adding Face Information
Using Face ID Overwriting and Adding Face Information You can overwrite existing face information with new face info. You should update face information regularly, especially with babies and children, as their faces change quickly as they grow. You can also add face information when all 5 face info slots have not been filled. - Page 112 Using Face ID Register face information. Follow steps 2 – 3 on p. 70 to shoot, and then register the new face information. Registered faces are more easily recognized if you add a variety of face information. In addition to a head-on angle, add a slight side angle, a shot when smiling, and shots inside and outside.
-
Page 113: Erasing Registered Information
Using Face ID Choose the face info to erase. Press the m button, press the opqr buttons or turn the 5 dial to choose the face info you want to erase, and then press the m button. After [Erase?] is displayed, press the qr buttons or turn the 5 dial to choose [OK], and then press the m button. -
Page 114: Image Customization Features
Image Customization Features Still Images Changing the Aspect Ratio Change the image aspect ratio (ratio of width to height) as follows. Configure the setting. Press the m button, choose in the menu, and choose the desired option (p. 39). Once the setting is complete, the screen aspect ratio will be updated. - Page 115 Image Customization Features Still Images Changing Image Resolution (Size) Choose from 4 levels of image resolution, as follows. For guidelines on how many shots at each resolution setting can fit on a memory card, see “Specifications” in the Getting Started guide. Configure the setting.
- Page 116 Image Customization Features Still Images Red-Eye Correction Red-eye that occurs in the flash photography can be automatically corrected as follows. Access the [Flash Settings] screen. Press the n button, choose [Flash Settings] on the 4 tab, and then press the m button (p.
-
Page 117: Correcting Greenish Image Areas From
Image Customization Features Still Images Correcting Greenish Image Areas from Mercury Lamps In shots of evening scenes with subjects illuminated by mercury lamps, the subjects or background may appear to have a greenish tinge. This greenish tinge can be corrected automatically when shooting, using Multi-area White Balance. -
Page 118: Changing Movie Image Quality
Image Customization Features Movies Changing Movie Image Quality 3 image quality settings are available. For guidelines on the maximum movie length at each level of image quality that will fit on a memory card, see “Specifications” in the Getting Started guide. Configure the setting. -
Page 119: Using The Wind Filter
Image Customization Features Movies Using the Wind Filter Distorted audio caused by recording when the wind is strong can be reduced. However, the recording may sound unnatural when this option is used when there is no wind. Configure the setting. Press the n button, choose [Wind Filter] on the 4 tab, and then choose [On] (p. -
Page 120: Helpful Shooting Features
Helpful Shooting Features Still Images Movies Displaying Grid Lines Grid lines can be displayed on the screen for vertical and horizontal reference while shooting. Configure the setting. Press the n button, choose [Grid Lines] on the 4 tab, and then choose [On] (p. 40). Once the setting is complete, grid lines are displayed on the screen. -
Page 121: Magnifying The Area In Focus
Helpful Shooting Features Still Images Magnifying the Area in Focus You can check the focus by pressing the shutter button halfway to enlarge the image area in the AF frame. Configure the setting. Press the n button, choose [AF-Point Zoom] on the 4 tab, and then choose [On] (p. -
Page 122: Checking For Closed Eyes
Helpful Shooting Features Still Images Checking for Closed Eyes is displayed when the camera detects that people may have closed their eyes. Choose Press the m button, choose in the menu, and then choose Configure the setting. Press the n button, choose [Blink Detection] on the 4 tab, and then choose [On] (p. -
Page 123: Customizing Camera Operation
Still Images Customizing Camera Operation Customize shooting functions on the 4 tab of the menu as follows. For instructions on menu functions, see “n” (p. 40). Deactivating the AF Assist Beam You can deactivate the lamp that normally lights up to help you focus when you press the shutter button halfway in low-light conditions. -
Page 124: Changing The Image Display Style After Shots
Customizing Camera Operation Changing the Image Display Period After Shots Change how long images are displayed after shots as follows. Configure the setting. Press the n button, choose [Review] on the 4 tab, and then choose the desired option (p. 40). To restore the original setting, repeat this process but choose [2 sec.]. -
Page 125: Other Shooting Modes
Other Shooting Modes Shoot more effectively in various scenes, and take shots enhanced with unique image effects or captured using special functions... -
Page 126: Brightness/Color Customization (Live View Control)
Still Images Movies Brightness/Color Customization (Live View Control) Image brightness or colors when shooting can be easily customized as follows. Enter mode. Set the mode dial to Configure the setting. Press the m button to access the setting screen. Press the op buttons to choose a setting item, and then press the qr buttons or turn the 5 dial to adjust the value as you watch the screen. -
Page 127: Easy Mode
Still Images Movies Easy Mode In Easy mode, on-screen instructions help you shoot. To prevent mistakes, all controls except the zoom lever, the movie button (p. 56), and the buttons mentioned on this page are deactivated. Even beginners can feel confident about shooting or viewing images on the camera. -
Page 128: Auto Clip Recording (Movie Digest)
Still Images Movies Auto Clip Recording (Movie Digest) You can make a short movie of a day just by shooting still images. Before each shot, the camera will automatically record a movie clip of the scene. Each clip recorded that day is combined into a single file. Enter mode. -
Page 129: Specific Scenes
Still Images Movies Specific Scenes Choose a mode matching the shooting scene, and the camera will automatically configure the settings for optimal shots. Enter K mode. Set the mode dial to K. Choose a shooting mode. Press the m button, choose I in the menu, and then choose a shooting mode (p. - Page 130 Specific Scenes Still Images Shoot under low light (Low Light) Shoot with minimal camera shake and subject blur even in low-light conditions. Still Images Movies S Shoot under water (Underwater) Natural-colored shots of sea life and underwater scenery, when you use an optional waterproof case (p.
-
Page 131: Correcting White Balance
Specific Scenes and S modes, shots may look grainy because the ISO speed (p. 118) is • increased to suit the shooting conditions. • mode resolution is (1984 x 1488) and cannot be changed. Still Images Movies Correcting White Balance White balance can be manually corrected in S mode (p. - Page 132 Specific Scenes Still Images Making Skin Look Smoother (Smooth Skin) You can apply a smoothening effect when shooting images of people. The effect level and color ([Lighter Skin Tone], [Darker Skin Tone]) can be chosen as follows. Choose Follow steps 1 – 2 on p. 93 and choose Access the setting screen.
- Page 133 Specific Scenes Still Images Auto Shooting After Face Detection (Smart Shutter) Auto Shooting After Smile Detection The camera shoots automatically after detecting a smile, even without you pressing the shutter button. Choose Follow steps 1 – 2 on p. 93 and choose and then press the l button.
- Page 134 Specific Scenes Using the Wink Self-Timer Aim the camera at a person and press the shutter button all the way down. The camera will shoot about two seconds after a wink is detected. Choose Follow steps 1 – 2 on p. 93 and choose and then press the l button.
-
Page 135: Using The Face Self-Timer
Specific Scenes Using the Face Self-Timer The camera will shoot about two seconds after detecting that the face of another person (such as the photographer) has entered the shooting area (p. 129). This is useful when including yourself in group photos or similar shots. - Page 136 Specific Scenes Join the subjects in the shooting area and look at the camera. After the camera detects a new face, the lamp blinking and self-timer sound will speed up. (When the flash fires, the lamp will remain lit.) About two seconds later, the camera will shoot.
- Page 137 Specific Scenes • Focus, image brightness, and color are determined by the first shot. • The screen is blank while you are shooting. • There may be a delay after continuous shooting before you can shoot again. Additionally, depending on the memory card, there may be a delay before you can shoot again.
-
Page 138: Shooting Stitch Assist Images
Specific Scenes Still Images Shooting Stitch Assist Images Shoot a large subject by taking multiple shots at various positions, and then use the included software to combine them into a panorama. Choose x or v. Follow steps 1 – 2 on p. 93 and choose x or Take the first shot. -
Page 139: Image Effects (Creative Filters)
Image Effects (Creative Filters) Add a variety of effects to images when shooting. Enter mode. Set the mode dial to Choose a shooting mode. Press the m button, choose in the menu, and then choose a shooting mode (p. 39). Shoot. - Page 140 Image Effects (Creative Filters) Still Images Shooting with a Fish-Eye Lens Effect (Fish-eye Effect) Shoot with the distorting effect of a fish-eye lens. Choose Follow steps 1 – 2 on p. 103 and choose Choose an effect level. Press the l button, choose an effect level (either press the qr buttons or turn the 5 dial), and then press the l button again.
- Page 141 Image Effects (Creative Filters) Choose the area to keep in focus. Press the l button. Move the zoom lever to resize the frame, and press the op buttons to move it. For movies, choose the movie playback speed. Press the n button, and then choose the speed by pressing the qr buttons or turning the 5 dial.
-
Page 142: Shooting With A Soft Focus Effect
Image Effects (Creative Filters) Still Images Shooting with a Toy Camera Effect (Toy Camera Effect) This effect makes images resemble shots from a toy camera by vignetting (darker, blurred image corners) and changing the overall color. Choose Follow steps 1 – 2 on p. 103 and choose Choose a color tone. -
Page 143: Shooting In Monochrome
Image Effects (Creative Filters) Choose an effect level. Press the l button, choose an effect level (either press the qr buttons or turn the 5 dial), and then press the l button again. A preview is shown of how your shot will look with the effect applied. - Page 144 Image Effects (Creative Filters) Still Images Movies Shooting with Color Accent Choose a single image color to keep and change other colors to black and white. Choose T. Follow steps 1 – 2 on p. 103 and choose T. Access the setting screen. Press the l button.
-
Page 145: Shooting With Color Swap
Image Effects (Creative Filters) Still Images Movies Shooting with Color Swap You can replace one image color with another before shooting. Note that only one color can be replaced. Choose Y. Follow steps 1 – 2 on p. 103 and choose Y. Access the setting screen. -
Page 146: Discreet Mode
Discreet Mode To replace only your specified color, choose a large negative value. To replace colors similar to your specified color as well, choose a large positive value. Press the l button to return to the shooting screen. • Using the flash in this mode may cause unexpected results. •... -
Page 147: Shooting Various Movies
Movies Shooting Various Movies Shooting Movies in E Mode Enter E mode. Set the mode dial to E. Configure the settings to suit the movie (pp. 230 – 237). Shoot. Press the movie button. To stop movie recording, press the movie button again. -
Page 148: Shooting Super Slow Motion Movies
Shooting Various Movies Shooting Super Slow Motion Movies You can shoot fast-moving subjects for playback later in slow motion. Note that sound is not recorded. Choose Follow steps 1 – 2 on p. 111 and choose Choose a frame rate. Press the m button, choose in the menu, and choose the desired frame rate (p. -
Page 149: Shooting Iframe Movies
Shooting Various Movies Shooting iFrame Movies Shoot movies that can be edited with iFrame-compatible software or devices. You can quickly edit, save, and manage iFrame movies using the included software. Choose Follow steps 1 – 2 on p. 111, choose , and shoot. -
Page 151: G Mode
G mode More discerning shots, in your preferred shooting style • Instructions in this chapter apply to the camera with the mode dial set to G mode. • G: Program AE; AE: Auto Exposure • Before using a function introduced in this chapter in modes other than G, make sure the function is available in that mode (pp. -
Page 152: Shooting In Program Ae Mode (G Mode)
Still Images Movies Shooting in Program AE Mode (G Mode) You can customize many function settings to suit your preferred shooting style. Enter G mode. Set the mode dial to G. Customize the settings as desired (pp. 116 – 138), and then shoot. •... -
Page 153: Changing The Metering Method
Image Brightness (Exposure Compensation) Locking Image Brightness/Exposure (AE Lock) Before shooting, you can lock the exposure, or you can specify focus and exposure separately. Lock the exposure. Aim the camera at the subject to shoot with the exposure locked. With the shutter button pressed halfway, press the o button. -
Page 154: Changing The Iso Speed
Image Brightness (Exposure Compensation) For typical shooting conditions, including backlit shots. Evaluative Automatically adjusts exposure to match the shooting conditions. Determines the average brightness of light across the entire image Center area, calculated by treating brightness in the central area as more Weighted Avg. - Page 155 Image Brightness (Exposure Compensation) Correcting Image Brightness (i-Contrast) Before shooting, excessively bright or dark image areas (such as faces or backgrounds) can be detected and automatically adjusted to the optimal brightness. Insufficient overall image contrast can also be automatically corrected before shooting to make subjects stand out better. Press the n button, choose [i-Contrast] on the 4 tab, and then choose [Auto] (p.
-
Page 156: Color And Continuous Shooting
Color and Continuous Shooting Still Images Movies Adjusting White Balance By adjusting white balance (WB), you can make image colors look more natural for the scene you are shooting. Press the m button, choose in the menu, and choose the desired option (p. 39). The option you configured is now displayed. -
Page 157: Custom White Balance
Color and Continuous Shooting Custom White Balance For image colors that look natural under the light in your shot, adjust white balance to suit the light source where you are shooting. Set the white balance under the same light source that will illuminate your shot. Follow the steps in “Adjusting White Balance”... - Page 158 Color and Continuous Shooting Still Images Movies Changing Image Color Tones (My Colors) Change image color tones as desired, such as converting images to sepia or black and white. Press the m button, choose in the menu, and choose the desired option (p. 39). The option you configured is now displayed.
-
Page 159: Custom Color
Color and Continuous Shooting • White balance (p. 120) cannot be set in modes. • With modes, colors other than people’s skin tone may be modified. These settings may not produce the expected results with some skin tones. Custom Color Choose the desired level of image contrast, sharpness, color saturation, red, green, blue, and skin tones in a range of 1 –... -
Page 160: Continuous Shooting
Color and Continuous Shooting Still Images Continuous Shooting Hold the shutter button all the way down to shoot continuously. Configure the setting. Press the m button, choose in the menu, and choose the desired option (p. 39). The option you configured is now displayed. Shoot. -
Page 161: Shooting Range And Focusing
Shooting Range and Focusing Still Images Movies Shooting Close-ups (Macro) To restrict the focus to subjects at close range, set the camera to e. For details on the focusing range, see “Specifications” in the Getting Started guide. Press the q button, choose e (either press the qr buttons or turn the 5 dial), and then press the m button. - Page 162 Shooting Range and Focusing Specify the general focal position. Referring to the on-screen MF indicator bar (which shows the distance and focal position) and the magnified display area, turn the 5 dial to specify the general focal position. Fine-tune the focus. Press the shutter button halfway to have the MF Indicator camera fine-tune the focal position (Safety...
-
Page 163: Changing The Af Frame Mode
Shooting Range and Focusing Still Images Movies Digital Tele-Converter The focal length of the lens can be increased by approximately 1.5x or 2.0x. This can reduce camera shake because the shutter speed is faster than it would be if you zoomed (including using digital zoom) in to the same zoom factor. - Page 164 Shooting Range and Focusing Still Images Movies Center One AF frame is displayed in the center. Effective for reliable focusing. • A yellow AF frame is displayed with if the camera cannot focus when you press the shutter button halfway. Note that AF-point zooming (p.
-
Page 165: Face Detect
Shooting Range and Focusing Still Images Movies Face Detect • Detects people’s faces, and then sets the focus, exposure (evaluative metering only), and white balance ( only). • After you aim the camera at the subject, a white frame is displayed around the person’s face determined by the camera to be the main subject, and up to two gray frames are displayed around other detected faces. - Page 166 Shooting Range and Focusing Still Images Choosing Subjects to Focus On (Tracking AF) Shoot after choosing a subject to focus on as follows. Choose [Tracking AF]. Follow the steps in “Changing the AF Frame Mode” (p. 127) to choose [Tracking AF]. is displayed in the center of the screen.
-
Page 167: Shooting With Servo Af
Shooting Range and Focusing • [Servo AF] (see below) is set to [On] and cannot be changed. • Tracking may not be possible when subjects are too small or move too rapidly, or when subject color or brightness matches that of the background too closely. -
Page 168: Changing The Focus Setting
Shooting Range and Focusing • Focusing may not be possible in some shooting conditions. • In low-light conditions, Servo AF may not be activated (AF frames may not turn blue) when you press the shutter button halfway. In this case, the focus and exposure are set according to the specified AF frame mode. -
Page 169: Shooting With The Af Lock
Shooting Range and Focusing Still Images Movies Shooting with the AF Lock The focus can be locked. After you lock the focus, the focal position will not change even when you release your finger from the shutter button. Lock the focus. With the shutter button pressed halfway, press the q button. -
Page 170: Flash
Still Images Flash Activating Flash You can have the flash fire for each shot. For details on the flash range, see “Flash Range” (see “Specifications” in the Getting Started guide). Configure the setting. Press the r button, choose h (either press the qr buttons or turn the 5 dial), and then press the m button. -
Page 171: Adjusting The Flash Exposure Compensation
Flash Adjusting the Flash Exposure Compensation Just as with regular exposure compensation (p. 116), you can adjust the flash exposure from –2 to +2 stops, in 1/3-stop increments. Press the m button, choose X in the menu, and adjust the setting by either pressing the op buttons or turning the 5 dial (p. -
Page 172: Shooting With The Fe Lock
Flash Shooting with the FE Lock Just as with the AE lock (p. 117), you can lock the exposure for the flash shots. Set the flash to h (p. 134). Lock the flash exposure. Aim the camera at the subject to shoot with the exposure locked. -
Page 173: Other Settings
Other Settings Still Images Movies Changing the IS Mode Settings Access the setting screen. Press the n button, choose [IS Settings] on the 4 tab, and then press the m button (p. 40). Configure the setting. Choose [IS Mode], and then choose the desired option (p. - Page 174 Other Settings Movies Deactivating Powered IS Powered IS reduces slow camera shake that may occur when recording telephoto movies. However, this option may not produce the expected results when used for the stronger camera shake that may occur when shooting while walking or when moving the camera to match subject movement.
-
Page 175: Tv, Av, And M Mode
Tv, Av, and M Mode Take smarter, more sophisticated shots • Instructions in this chapter apply to the camera as set to the respective mode. -
Page 176: Specific Shutter Speeds (Tv Mode)
Still Images Specific Shutter Speeds (Tv Mode) Set your preferred shutter speed before shooting as follows. The camera automatically adjusts the aperture value to suit your shutter speed. For details on available shutter speeds, see “Specifications” in the Getting Started guide. Enter M mode. -
Page 177: Specific Aperture Values (Av Mode)
Still Images Specific Aperture Values (Av Mode) Set your preferred aperture value before shooting as follows. The camera automatically adjusts the shutter speed to suit your aperture value. For details on available aperture values, see “Specifications” in the Getting Started guide. Enter B mode. -
Page 178: Specific Shutter Speeds And Aperture Values (M Mode)
Still Images Specific Shutter Speeds and Aperture Values (M Mode) Follow these steps before shooting to set your preferred shutter speed and aperture value to obtain the desired exposure. For details on available shutter speeds and aperture values, see “Specifications” in the Getting Started guide. Enter D mode. -
Page 179: Adjusting The Flash Output
Specific Shutter Speeds and Aperture Values (M Mode) D: Manual • • Calculation of standard exposure is based on the specified metering method (p. 117). Adjusting the Flash Output Choose from the three flash levels in D mode. Enter D mode. Set the mode dial to D. -
Page 181: Playback Mode
Playback Mode Have fun reviewing your shots, and browse or edit them in many ways • To prepare the camera for these operations, press the 1 button to enter Playback mode. • It may not be possible to play back or edit images that were renamed or already edited on a computer, or images from other cameras. -
Page 182: Viewing
Still Images Movies Viewing After shooting images or movies, you can view them on the screen as follows. Enter Playback mode. Press the 1 button. Your last shot is displayed. Browse through your images. To view the previous image, press the q button or turn the 5 dial counterclockwise. - Page 183 Viewing Play movies. To start playback, press the m button, (either press the op buttons or choose turn the 5 dial), and then press the m button again. Adjust the volume. Press the op buttons to adjust the volume. Pause playback. To pause playback, press the m button.
-
Page 184: Switching Display Modes
Viewing Still Images Checking People Detected in Face ID If you switch the camera to simple information display mode (see below), the names of up to five detected people registered in Face ID (p. 69) will be displayed. Switch to simple information display mode and check. - Page 185 Viewing Switching display modes by pressing the l button is also possible • immediately after you shoot, while your shot is displayed. However, simple information display is not available. To change the initial display mode, press the n button and choose [Review Info] on the 4 tab (p. 88). •...
-
Page 186: Checking The Focus
Viewing Still Images Checking the Focus To check the focus of your shots, you can magnify the area of the image that was in the AF frame at the time of shooting. Access Focus Check. Press the l button (p. 148). A white frame is displayed where the AF frame was when the focus was set. -
Page 187: Browsing And Filtering Images
Browsing and Filtering Images Still Images Movies Navigating Through Images in an Index By displaying multiple images in an index, you can quickly find the images you are looking for. Display images in an index. Move the zoom lever toward g to display images in an index. - Page 188 Browsing and Filtering Images Choose a search condition. Press the m button, choose in the menu, and choose a condition (p. 39). View the image search results. Choose the type of images to view by pressing the opqr buttons, and then press the m button.
-
Page 189: Viewing Individual Images In A Group
Browsing and Filtering Images Movies Viewing Movie Digest Movies Movies created in mode (p. 92) can be viewed by date. Choose a movie. Press the m button, choose in the menu, and choose the date (p. 39). Play the movie. Press the m button to start playback. -
Page 190: Editing Face Id Information
Editing Face ID Information View individual images in the group. Pressing the qr buttons or turning the 5 dial will display only images in the group. To cancel group playback, press the m button, choose in the menu, and press the m button again (p. -
Page 191: Erasing Names
Editing Face ID Information Choose an image. Follow the procedure on p. 23 to choose an image, and then press the m button. An orange frame is displayed around the selected face. When multiple names are displayed in an image, press the qr buttons or turn the 5 dial to choose the name to change, and press the m button. -
Page 192: Image Viewing Options
Image Viewing Options Still Images Magnifying Images Magnify an image. Moving the zoom lever toward k will zoom in and magnify the image. You can magnify images up to about 10x by continuing to hold the zoom lever. To zoom out, move the zoom lever toward g. -
Page 193: Changing Slideshow Settings
Image Viewing Options • The camera’s power-saving functions (p. 36) are deactivated during slideshows. • To pause or resume slideshows, press the m button. You can switch to other images during playback by pressing the qr buttons or • turning the 5 dial. For fast-forward or fast-rewind, hold the qr buttons down. •... - Page 194 Image Viewing Options Still Images Auto Playback of Similar Images (Smart Shuffle) Based on the current image, the camera offers four images similar to it that you may wish to view. After you choose to view one of those images, the camera offers four more images.
-
Page 195: Protecting Images
Still Images Movies Protecting Images Protect important images to prevent accidental erasure by the camera (p. 163). Press the m button, and then choose : in the menu (p. 39). [Protected] is displayed. To cancel protection, repeat this process and choose : again, and then press the m button. -
Page 196: Choosing Images Individually
Protecting Images • Protected images cannot be erased by the camera. To erase them, cancel protection settings first. Choosing Images Individually Choose [Select]. Following step 2 on p. 159, choose [Select] and press the m button. Choose an image. Press the qr buttons or turn the 5 dial to choose an image, and then press the m button. -
Page 197: Selecting A Range
Protecting Images Selecting a Range Choose [Select Range]. Following step 2 on p. 159, choose [Select Range] and press the m button. Choose a starting image. Press the m button. Press the qr buttons or turn the 5 dial to choose the image, and then press the m button. -
Page 198: Specifying All Images At Once
Protecting Images Protect the images. Press the p button to choose [Protect], and then press the m button. You can also choose the first or last image by turning the 5 dial when the top • screen in steps 2 and 3 is displayed. Specifying All Images at Once Choose [Select All Images]. -
Page 199: Erasing Images
Still Images Movies Erasing Images You can choose and erase unneeded images one by one. Be careful when erasing images, because they cannot be recovered. Choose an image to erase. Press the qr buttons or turn the 5 dial to choose an image. - Page 200 Erasing Images Choosing Images Individually Choose [Select]. Following step 2 on p. 163, choose [Select] and press the m button. Choose an image. Once you follow step 2 on p. 160 to choose an image, is displayed. To cancel erasure, press the m button again.
-
Page 201: Rotating Images
Rotating Images Specifying All Images at Once Choose [Select All Images]. Following step 2 on p. 163, choose [Select All Images] and press the m button. Erase the images. Press the qr buttons or turn the 5 dial to choose [OK], and then press the m button. Still Images Movies Rotating Images... -
Page 202: Using The Menu
Rotating Images Using the Menu Choose [Rotate]. Press the n button, and then choose [Rotate] on the 1 tab (p. 40). Rotate the image. Press the qr buttons or turn the 5 dial to choose an image. The image is rotated 90° each time you press the m button. -
Page 203: Image Categories
Image Categories • Images cannot be rotated (p. 165) when you set [Auto Rotate] to [Off]. Additionally, images already rotated will be displayed in the original orientation. • In Smart Shuffle (p. 158) mode, even if [Auto Rotate] is set to [Off], images shot vertically will be displayed vertically, and rotated images will be displayed in the rotated orientation. - Page 204 Image Categories Choose an image. Press the qr buttons or turn the 5 dial to choose an image, and then press the m button. is displayed. To untag the image, press the m button again. is no longer displayed. Repeat this process to choose additional images.
- Page 205 Image Categories Choose images. Press the qr buttons or turn the 5 dial to choose an image, press the op buttons to choose a category, and then press the m button. is displayed. To cancel selection, press the m button again.
- Page 206 Image Categories Choosing Images Individually Choose [Select]. Following step 2 on p. 169, choose [Select] and press the m button. Choose an image. Press the qr buttons or turn the 5 dial to choose an image. Choose a category. Press the op buttons to choose a category, and then press the m button.
- Page 207 Image Categories Selecting a Range Choose [Select Range]. Following step 2 on p. 169, choose [Select Range] and press the m button. Choose images. Follow steps 2 – 3 on p. 161 to specify images. Choose a category. Press the p button to choose the type of image, and then press the qr buttons or turn the 5 dial to choose a category.
-
Page 208: Editing Still Images
Still Images Editing Still Images • Image editing (pp. 172 – 177) is only available when the memory card has sufficient free space. Resizing Images Save a copy of images at a lower resolution. Choose [Resize]. Press the n button, and then choose [Resize] on the 1 tab (p. - Page 209 Editing Still Images • Editing is not possible for images saved as in step 3. • Images cannot be resized to a higher resolution. Cropping You can specify a portion of an image to save as a separate image file. Choose [Trimming].
- Page 210 Editing Still Images Cropping Area Adjust the cropping area. A frame is displayed around the portion of the image to be cropped. The original image is shown in the upper left, and a preview of the image as cropped is shown in the lower right.
- Page 211 Editing Still Images Changing Image Color Tones (My Colors) You can adjust image colors and then save the edited image as a separate file. For details on each option, see p. 122. Choose [My Colors]. Press the n button, and then choose [My Colors] on the 1 tab (p.
- Page 212 Editing Still Images Correcting Image Brightness (i-Contrast) Excessively dark image areas (such as faces or backgrounds) can be detected and automatically adjusted to the optimal brightness. Insufficient overall image contrast is also automatically corrected, to make subjects stand out better. Choose from four correction levels, and then save the image as a separate file.
-
Page 213: Correcting Red-Eye
Editing Still Images Correcting Red-Eye Automatically corrects images affected by red-eye. You can save the corrected image as a separate file. Choose [Red-Eye Correction]. Press the n button, and then choose [Red-Eye Correction] on the 1 tab (p. 40). Choose an image. Press the qr buttons or turn the 5 dial to choose an image. -
Page 214: Editing Movies
Movies Editing Movies You can cut movies to remove unneeded portions at the beginning or end. Choose *. Following steps 1 – 3 on p. 146, choose * and press the m button. The movie editing panel and editing bar are now displayed. -
Page 215: Save The Edited Movie
Editing Movies Save the edited movie. Press the op buttons to choose , and then press the m button. Press the opqr buttons or turn the 5 dial to choose [New File], and then press the m button. The movie is now saved as a new file. •... -
Page 217: Setting Menu
Setting Menu Customize or adjust basic camera functions for greater convenience... -
Page 218: Adjusting Basic Camera Functions
Adjusting Basic Camera Functions Functions can be configured on the 3 tab. Customize commonly used functions as desired, for greater convenience (p. 40). Silencing Camera Operations Silence camera sounds and movies as follows. Choose [Mute], and then choose [On]. Operation can also be silenced by holding down the l button as you turn •... -
Page 219: Hiding Hints And Tips
Adjusting Basic Camera Functions Customizing Sounds Customize camera operating sounds as follows. Choose [Sound Options], and then press the m button. Choose an item, and then press the qr buttons to choose an option. Preset sounds (cannot be modified) Preset sounds Can be changed by using the included software. -
Page 220: Screen Brightness
Adjusting Basic Camera Functions Screen Brightness Adjust screen brightness as follows. Choose [LCD Brightness], and then press the qr buttons to adjust the brightness. For maximum brightness, press and hold the l button for at least two • seconds when the shooting screen is displayed or when in single-image display. (This will override the [LCD Brightness] setting on the 3 tab.) To restore the original brightness, press and hold the l button again for at least two seconds or restart the camera. -
Page 221: In Playback Mode
Adjusting Basic Camera Functions Customizing the Start-up Screen Access the [Start-up Image] screen in Playback mode. Press the 1 button. Following the previous procedure, choose [2] and press the m button. Choose one of your shots. Choose an image and press the m button. After [Register?] is displayed, choose [OK] (either press the qr buttons or turn the 5 dial), and then press the m button. -
Page 222: Format The Memory Card
Adjusting Basic Camera Functions Choose [OK]. Press the qr buttons or turn the 5 dial to choose [OK], and then press the m button. Format the memory card. To begin the formatting process, press the op buttons or turn the 5 dial to choose [OK], and then press the m button. -
Page 223: File Numbering
Adjusting Basic Camera Functions • Low-level formatting takes longer than “Formatting Memory Cards” (p. 185), because data is erased from all storage regions of the memory card. • You can cancel low-level formatting in progress by choosing [Stop]. In this case, all data will be erased, but the memory card can be used normally. -
Page 224: Lens Retraction Timing
Adjusting Basic Camera Functions Date-Based Image Storage Instead of saving images in folders created each month, you can have the camera create folders each day you shoot to store shots taken that day. Choose [Create Folder], and then choose [Daily]. Images will now be saved in folders created on the shooting date. -
Page 225: World Clock
Adjusting Basic Camera Functions Power-Saving Adjustment Adjust the timing of automatic camera and screen deactivation (Auto Power Down and Display Off, respectively) as needed (p. 36). Access the [Power Saving] screen. Choose [Power Saving], and then press the m button. Configure the settings. -
Page 226: Date And Time
Adjusting Basic Camera Functions Press the m button. Switch to the destination time zone. Press the op buttons or turn the 5 dial to choose [ World], and then press the n button. is now shown on the shooting screen (p. - Page 227 Adjusting Basic Camera Functions Metric/Non-Metric Display SX260 HS Change the unit of measurement shown in the MF indicator (p. 126), zoom bar (p. 54), and GPS altitude information (p. 47) from m/cm to ft/in as needed. Choose [Units], and then choose [ft/in]. Metric/Non-Metric Display SX240 HS Change the unit of measurement shown in the MF indicator (p.
-
Page 228: Adjusting Other Settings
Adjusting Basic Camera Functions Display Language Change the display language as needed. Access the [Language] screen. Choose [Language ], and then press the m button. Configure the setting. Press the opqr buttons or turn the 5 dial to choose a language, and then press the m button. -
Page 229: Restoring Defaults
Adjusting Basic Camera Functions Restoring Defaults If you accidentally change a setting, you can restore default camera settings. Access the [Reset All] screen. Choose [Reset All], and then press the m button. Restore default settings. Press the qr buttons or turn the 5 dial to choose [OK], and then press the m button. -
Page 231: Accessories
Accessories Use included accessories effectively and enjoy the camera in more ways with optional Canon accessories and other compatible accessories sold separately... -
Page 232: Tips On Using Included Accessories
Tips on Using Included Accessories Effective Battery and Charger Use • Charge the battery on (or immediately before) the day of Charged batteries gradually lose their charge, even when they are not used. You can easily check the charge state of the battery by attaching the cover so that o is visible on a charged battery, and attaching it so that o is not visible on an uncharged battery. -
Page 233: Optional Accessories
Optional Accessories The following camera accessories are sold separately. Note that availability varies by area, and some accessories may no longer be available. Power Supplies Battery Pack NB-6L Rechargeable lithium-ion battery Battery Charger CB-2LY/CB-2LYE Charger for Battery Pack NB-6L AC Adapter Kit ACK-DC40 For powering the camera using household power. -
Page 234: Other Accessories
For connecting the camera to an HDMI input of a high-definition TV. Printers Canon PictBridge-Compatible Printers Printing images without a computer is possible by connecting the camera to a Canon PictBridge-compatible printer. For details, visit your nearest Canon dealer. SELPHY PIXMA Series Series... -
Page 235: Using Optional Accessories
Using Optional Accessories Still Images Movies Playback on a TV By connecting the camera to a TV, you can view your shots on the larger screen of the TV. For details on connection or how to switch inputs, refer to the TV manual. •... - Page 236 Using Optional Accessories Turn the camera on. Press the 1 button to turn the camera on. Images from the camera are now displayed on the TV. (Nothing is displayed on the camera screen.) When finished, turn off the camera and TV before disconnecting the cable.
-
Page 237: Display Images
Using Optional Accessories Display images. Follow steps 3 – 4 on p. 199 to display images. • It is not possible to connect the included interface cable or an optional stereo AV cable at the same time as an HDMI Cable HTC-100. Forcing the cables into the camera at the same time may damage the camera or cables. - Page 238 Using Optional Accessories Control the camera with the TV remote. Press the qr buttons on the remote to browse images. To display the camera control panel, press the OK/Select button. Select control panel items by pressing the qr buttons to choose an item, and then pressing the OK/Select button again.
-
Page 239: Powering The Camera With Household Power
Using Optional Accessories Powering the Camera with Household Power Powering the camera with AC Adapter Kit ACK-DC40 (sold separately) eliminates the need to monitor the remaining battery level. Make sure the camera is off. Insert the coupler. Follow step 2 on p. 16 to open the cover. Insert the coupler facing the direction shown, just as you would a battery (following step 3 on p. -
Page 240: Printing Images
A Canon SELPHY CP series compact photo printer is used here for the sake of illustration. Screens displayed and available functions vary by printer. Also refer to the printer manual for additional information. -
Page 241: Configuring Print Settings
When you are finished printing, turn the camera and printer off and disconnect the interface cable. • For Canon PictBridge-compatible printers (sold separately), see p. 198. Still Images Configuring Print Settings Access the printing screen. Follow steps 1 – 6 on p. 204 to access the screen at left. - Page 242 Printing Images Default Matches current printer settings. Date Prints images with the date added. File No. Prints images with the file number added. Both Prints images with both the date and file number added. — Default Matches current printer settings. —...
-
Page 243: Choosing Paper Size And Layout Before Printing
Printing Images When finished, press the m button. Print the image. Follow step 7 on p. 205 to print. • Cropping may not be possible at small image sizes, or at some aspect ratios. • Dates may not be printed correctly if you crop images shot with [Date Stamp] selected. -
Page 244: Available Layout Options
Printing Images Choose a layout. Press the op buttons or turn the 5 dial to choose an option. When choosing [N-up], press the qr buttons to specify the number of images per sheet. Press the m button. Print the image. Available Layout Options Default Matches current printer settings. -
Page 245: Printing Movie Scenes
You can also print the folder number, file number, and elapsed time for the frame by setting [Caption] to [On]. To cancel printing in progress, press the m button. • • [ID Photo] and [Sequence] are not available with Canon PictBridge-compatible printer models earlier than CP720 and CP730. - Page 246 Choose [Add] by pressing the qr buttons or turning the 5 dial, and then press the m button. • Print orders cannot be added while the camera is connected to a printer. • Index printing is not available on some Canon PictBridge-compatible printers (sold separately).
- Page 247 Printing Images Configuring Print Settings Specify the printing format, whether to add the date or file number, and other settings as follows. These settings apply to all images in the print list. Press the n button, and then choose [Print Settings] on the 2 tab. Choose and configure settings as desired (p.
-
Page 248: Setting Up Printing For Individual Images
Printing Images Setting Up Printing for Individual Images Choose [Select Images & Qty.]. Press the n button, choose [Select Images & Qty.] on the 2 tab, and then press the m button. Choose an image. Press the qr buttons or turn the 5 dial to choose an image, and then press the m button. -
Page 249: Clearing All Images From The Print List
Printing Images Configure the print settings. Press the op buttons to choose [Order], and then press the m button. Setting Up Printing for All Images Choose [Select All Images]. Following step 1 on p. 212, choose [Select All Images] and press the m button. Configure the print settings. -
Page 250: Adding Images To A Photobook
Printing Images Still Images Adding Images to a Photobook Photobooks can be set up on the camera by choosing up to 998 images on a memory card and importing them into the included software on your computer, where they are stored in their own folder. This is convenient when ordering printed photobooks online or printing photobooks with your own printer. -
Page 251: Adding All Images To A Photobook
Printing Images Choose an image. Press the qr buttons or turn the 5 dial to choose an image, and then press the m button. is displayed. To remove the image from the photobook, press the m button again. is no longer displayed. -
Page 252: Using An Eye-Fi Card
Still Images Movies Using an Eye-Fi Card Before using an Eye-Fi card, always confirm that local use is permitted (p. 3). Inserting a prepared Eye-Fi card enables automatic wireless transfer of images to a computer or uploading to a photo-sharing website. Images are transferred by the Eye-Fi card. -
Page 253: Checking Connection Information
Using an Eye-Fi Card • Power saving (p. 36) on the camera is temporarily disabled during image transfer. • Choosing mode will interrupt the Eye-Fi connection. Although the Eye-Fi connection will be restored after you choose another shooting mode or enter Playback mode, the camera may transfer any movies made in mode again. -
Page 255: Appendix
Appendix Helpful information when using the camera... -
Page 256: Troubleshooting
The battery is swollen. • Battery swelling is normal and does not pose any safety concerns. However, if battery swelling prevents the battery from fitting in the camera, contact a Canon Customer Support Help Desk. Display on a TV Camera images look distorted or not displayed on a TV (p. 200). - Page 257 Troubleshooting Full-screen display is not available while shooting (p. 78). h flashes on the screen when the shutter button is pressed, and shooting is not possible (p. 57). is displayed when the shutter button is pressed halfway (p. 66). • Set [IS mode] to [Continuous] (p.
- Page 258 Troubleshooting White dots or similar image artifacts appear in flash shots. • This is caused by light from the flash reflecting off dust or airborne particles. Shots look grainy. • Lower the ISO speed (p. 118). • High ISO speeds in some shooting modes may cause grainy images (p. 95). Subjects are affected by red-eye (p.
-
Page 259: On A Computer
Troubleshooting Subjects look distorted. • Subjects that pass in front of the camera quickly may look distorted. This is not a malfunction. Playback Playback is not possible. • Image or movie playback may not be possible if a computer is used to rename files or alter the folder structure. -
Page 260: On-Screen Messages
Memory card error (p. 186) • If the same error message is displayed even when you have inserted a formatted memory card facing the correct way, contact a Canon Customer Support Help Desk (p. 16). Insufficient space on card •... - Page 261 Switch to Playback mode to check for the image. • Frequent display of this error message may indicate camera damage. In this case, write down the error number (Exx) and contact a Canon Customer Support Help Desk. File Error •...
-
Page 262: On-Screen Information
On-Screen Information Shooting (Information Display) Battery level (p. 227) Shooting mode (p. 230), Exposure compensation Scene icon (p. 59) level (p. 116) Camera orientation Flash mode (pp. 66, 134) i-Contrast (p. 119) White balance (p. 120) AF frame (p. 127) GPS reception status My Colors (p. -
Page 263: Battery Level
On-Screen Information : Regular orientation, : Held vertically The camera detects the shooting orientation and adjusts settings for optimal shots. Orientation is also detected during playback, and in either orientation, the camera automatically rotates images as needed. However, the orientation may not be detected correctly when the camera is pointed straight up or down. - Page 264 On-Screen Information Playback (Detailed Information Display) Movies (pp. 54, 146) / Print order (p. 210) Flash (p. 134), Flash High-speed burst HQ exposure compensation Transferred via Eye-Fi (p. 100) / Switch (p. 135) (p. 216) display SX260 HS / GPS Focusing range (p.
- Page 265 On-Screen Information Summary of Movie Control Panel in “Viewing” (p. 146) Exit Play Slow Motion (To adjust the playback speed, press the qr buttons or turn the dial. No sound is played.) (To continue skipping backward, keep holding down the m Skip Backward button.) Previous Frame (For fast-rewind, keep holding down the m button.)
-
Page 266: Functions And Menu Tables
Functions and Menu Tables Functions Available in Each Shooting Mode Shooting Mode D B M G Function Exposure Compensation (p. 116) — — — Self-Timer (p. 64) ] [ $ — Delay* — Self-Timer Settings (p. 65) Shots* — — —... - Page 267 Functions and Menu Tables S P t — — — — — — — — — — — — — — — — — — — — — — — — — — — — — — — — — — — —...
- Page 268 Functions and Menu Tables FUNC. Menu Shooting Mode D B M G Function SX260 HS GPS Settings (p. 44) / Logger Settings (p. 48) — — Metering Method (p. 117) — — — My Colors (p. 122) — — — White Balance (p.
- Page 269 Functions and Menu Tables S P t — — — — — — — — — — — — — — — — — — — — — — — — — — — — — — — — — — — — — — — — —...
-
Page 270: Shooting Menu
Functions and Menu Tables 4 Shooting Menu Shooting Mode D B M G Function Center — — AF Frame (p. 127) Face Detect Tracking AF — — Normal — — AF Frame Size (p. 128) Small — — Standard — Digital Zoom (p. - Page 271 Functions and Menu Tables S P t — — — — — — — — — — — — — — — — — — — — — — — — — — — — — — — — — — — —...
- Page 272 Functions and Menu Tables Shooting Mode D B M G Function Auto — i-Contrast (p. 119) — — Hg Lamp Corr. (p. 81) On/Off — — — — — — — — — — — — — Safety Shift (p. 141) Wind Filter (p.
- Page 273 Functions and Menu Tables S P t — — — — — — — — — — — — — — — — — — — — — — — — — — — — — — — — — — — — — — — — — — — — — — — — —...
-
Page 274: Playback Menu
Functions and Menu Tables 3 Set up Menu Item Ref. Page Item Ref. Page Mute p. 182 Time Zone p. 189 Volume p. 182 Date/Time p. 18 SX260 HS Sound Options p. 183 GPS Auto Time p. 51 SX260 HS Hints &... -
Page 275: Print Menu
Functions and Menu Tables 2 Print Menu Item Ref. Page Item Ref. Page Print — Select All Images p. 213 Select Images & Qty. p. 212 Clear All Selections p. 213 Select Range p. 212 Print Settings p. 211 Playback Mode FUNC. Menu Item Ref. -
Page 276: Handling Precautions
• Use a blower brush to remove dust from the lens. If cleaning is difficult, contact a Canon Customer Support Help Desk. • To prevent condensation from forming on the camera after sudden temperature changes (when the camera is transferred from cold to warm environments), put the camera in an airtight, resealable plastic bag and let it gradually adjust to the temperature before removing it from the bag. -
Page 277: Index
Index Defaults Reset all DIGITAL CAMERA Solution Disk ....2 AC adapter kit.......... 197 Digital tele-converter........ 127 AC adapter kit for household power ..203 Digital zoom..........63 Accessories ..........197 Discreet mode (shooting mode) ....110 AE lock ............ 117 Display language ........20 AF frames ........ - Page 278 Index Servo AF........... 131 Menu Focusing range Basic operations ......... 40 Macro..........125 Table..........230 Manual focus ........125 Metering method ........117 Focus lock ..........128 Miniature effect (shooting mode)..... 104 FUNC. menu Monochrome (shooting mode) ....107 Basic operations ......... 39 Movie Digest (shooting mode)....
- Page 279 Index Self-timer ........... 64 2-second self-timer ......65 White balance (color)....... 120 Customizing the self-timer ....65 Wink self-timer (shooting mode)....98 Face self-timer (shooting mode) ..99 World clock ..........189 Wink self-timer (shooting mode) ..98 Wrist strap Strap Sepia tone images........
- Page 280 Canon U.S.A., Inc. One Canon Plaza, Lake Success, NY 11042, U.S.A. Tel No. (516) 328-5600 Canadian Radio Interference Regulations This Class B digital apparatus complies with Canadian ICES-003. To ensure proper operation of this product, use of genuine Canon accessories is recommended.
-
Page 281: Important Safety Instructions
This Category II radiocommunication device complies with Industry Canada Standard RSS-310. Operation is subject to the following two conditions: (1) this device may not cause interference, and (2) this device must accept any interference, including interference that may cause undesired operation of the device Battery Charger CB-2LY IMPORTANT SAFETY INSTRUCTIONS- SAVE THESE INSTRUCTIONS. -
Page 282: Trademark Acknowledgments
• Reprinting, transmitting, or storing in a retrieval system any part of this guide without the permission of Canon is prohibited. • Canon reserves the right to change the contents of this guide at any time without prior notice. • Illustrations and screenshots in this guide may differ slightly from the actual equipment. -
Page 283: User Guide
ImageBrowser EX User Guide CD Version CDC-E475-010... - Page 284 (accessible from the Help function in the upper right of the screen) which explains how to use the various programs, starting with ImageBrowser EX. If the ImageBrowser EX User Guide is not updated, you can download it from the Canon website.
- Page 285 Software Introduction and Instructions ImageBrowser EX Using CameraWindow and EOS Utility, you can browse and print images that have been imported to your computer. ImageBrowser EX also includes an auto update function which pro- vides quick and free updates for functions specific to your camera via an Internet connection. For details on how to use this program, access the Help function in ImageBrowser EX at the upper right of the screen.
- Page 286 1 Unauthorized reproduction of this guide in whole or part is prohibited. 2 Information in this guide is subject to change without notice. 3 Notwithstanding the preceding items, Canon cannot be held liable for any loss arising from the use of this software.
Need help?
Do you have a question about the PowerShot SXE60 HS and is the answer not in the manual?
Questions and answers