Table of Contents
Advertisement
Installation Instructions
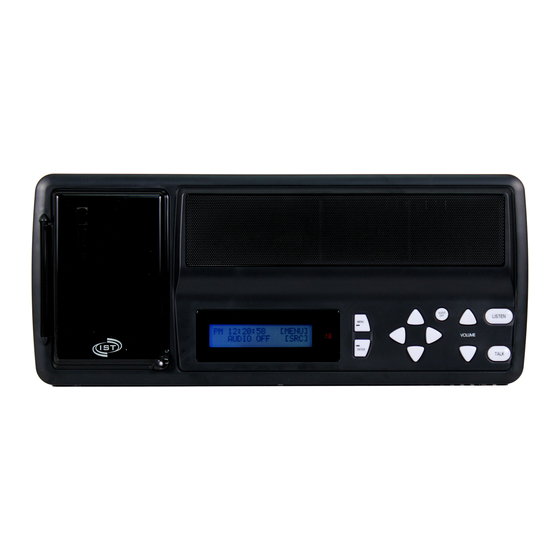
RETRO-M
Retrofit Intercom & Music Distribution System
Thank you for purchasing an Intrasonic Technology product. Our products are built
to provide you with years of high quality sound.
If you need assistance with the installation or operation of this product, please
contact our Customer Service Support team at 1-877-435-0670. You may also
get information on this and other Intrasonic Technology products on our website
at
www.intrasonictechnolgy.com
Intrasonic Technology, Inc. l 610 presidential Dr. Suite 104 l Richardson, Texas 75081 877-435-0670
Doc 0001 Rev A
Advertisement
Table of Contents

Related Manuals for IST RETRO-M

Summary of Contents for IST RETRO-M
-
Page 1: Installation Instructions
Installation Instructions RETRO-M Retrofit Intercom & Music Distribution System Thank you for purchasing an Intrasonic Technology product. Our products are built to provide you with years of high quality sound. If you need assistance with the installation or operation of this product, please contact our Customer Service Support team at 1-877-435-0670. -
Page 2: Table Of Contents
Table of Contents TOPIC Cover Page Table of Contents Safety Instructions Do’s and Don’ts Wiring Maximum Number of Stations 8 Ohm Speakers Tools Needed Getting Started Removing the Old Master Wiring in the Master Station Installing the Master 9-10 Removing the Old Room and Patio Stations Installing the New Room and Patio Stations 12-14 Removing the Old Door Station... -
Page 3: Safety Instructions
Use only Intrasonic Technology certified replace parts. NOTE: THE RETRO-M MASTER MUST BE INSTALLED IN AN EXISTING APPROVED INTERCOM HOUSING OR THE I1000H HOUSING TO MEET LOCAL ELECTRICAL CODES AND SAFETY REQUIREMENTS. -
Page 4: Wiring
Wiring The Intrasonic Technology Retro system is designed to work on the existing wiring. If the existing wiring contains 3, 4, 6 or more wires, you will need to select 3 of the wires for each room, patio and door station. Runs need to be 350 feet each or less. If the existing system is still operating, it is a good idea to test the system and all stations to make sure the existing wires are not damaged. -
Page 5: Removing The Old Master
Removing the Old Master If the existing system is still operational, run a test by playing the radio and testing the intercom functions to each room, patio and door station. If one or more of the stations do not function, this could be a sign that there is faulty wiring. If one of the stations does not function properly, try swapping the defect station with a working station. - Page 6 If you are using the original housing, you will need to install the Intrasonic Technology mounting straps. These come with Retrofit RETRO-M master. Be sure to install them with the flat side facing the chassis. As closely as possible mount them with the mounting screw hole centered between the top and bottom.
-
Page 7: Wiring In The Master Station
Wiring in the Master Station Determine how many room, patio and door stations you will be installing. Remove the appropriate number of green connectors from the rear of the master printed circuit board Strip the existing wires ¼ inch for all the stations. For each station there are connections marked “+15V”, “GND”... - Page 8 Wiring in the Master Station Prior to starting the wiring, align the plastic adapter frame to the existing rough-in box. TIP: Hold in place by placing masking tape on the corners. To wire the power you will need a licensed Electrician. The existing Romex will need to be wired to the power leads on the Retrofit master, the connections placed in the old power or transformer box and the cover replaced.
-
Page 9: Installing The Master
AUX Input If you are installing the optional auxiliary input wall plate, you need to plug the wires from the AUX wall plate into the two (red & white) phono jacks on the back of the master printed circuit board. Door Release Connection If you are connecting to an electronic door release mechanism, connectors CN5 and CN6 provide both “Normally Open”... - Page 10 Finish the master assembly by attaching the outer face plate and tightening the 3 screws on the bottom of the face plate. Important Note: On the back of the master, the green station connectors are numbered from 1 to 13. Connectors 1 through 9 are for room stations only.
-
Page 11: Removing The Old Room And Patio Stations
Removing the Old Room and Patio Stations Because there are numerous old makes and models of existing intercoms, it is impossible to describe in specific detail the process to remove the old room stations. The steps listed below are general steps that may or may not apply to the specific make and model you are replacing. -
Page 12: Installing The New Room And Patio Stations
Installing the new Room and Patio Stations There are 2 adapter plates, one for vertical mounting and one for horizontal mounting with each room station. Select the appropriate adapter plate and attach it to the existing mounting ring with screws. The view above shows the vertical adapter plate installed on the mounting ring. - Page 13 When installing the new Intrasonic Technology Retrofit master station, you selected 3 wire colors from the existing wires. Please select those same 3 color wires and attach them to the same terminals (+15V, GND, LINK) on the back of the room station. Remember it is important to use the same color wire for each of the 3 terminals at both ends of the wire.
- Page 14 The last step would be to snap the dress ring on to the room or patio station. As mentioned earlier, these steps are generic only. There are too many possible variations to be able to be specific with installation details. Because of this, from time to time there may be additional cutting, drilling or possible sheetrock work that may be required to install any retrofit system.
-
Page 15: Removing The Old Door Station
Removing the Old Door Station Remove the screws holding the old door station Carefully pull out the old door station Disconnect the wires from the old door station and set it aside Leave the existing door station mounting box installed Installing the New Door Station When installing the new Intrasonic Technology Retrofit master station, you selected 3 wire colors from the existing wires. -
Page 16: Door Station Adapter Plate
When replacing larger door stations such as a Nutone door station, it will be necessary to use an adapter plate. The Intrasonic Technology part number for this plate is RETRO- DAP. Simply screw the adapter plate to the existing door station mounting box, attach the wires as previously described and mount the Intrasonic Technology door station to the adapter plate with the screws provided. -
Page 17: Trouble Shooting Guide
Trouble Shooting Guide Problem or Question Solution Can not hear music at the room Check that radio volume in the master settings is turned up stations Check that the master is not set to audio off Can not hear room intercom Check that intercom volume in the master settings is turned up Check system wiring What happens if the power goes off? -
Page 18: Year Limited Warranty
Intrasonic Technology 2 Year Limited Warranty Intrasonic Technology warrants its products to be free of manufacturing defects for two years from the date of closing or actual installation. This warranty only applies to products purchased from authorized dealers and distributors. If proof of installation cannot be supplied, the manufacturing date code may be substituted.
Need help?
Do you have a question about the RETRO-M and is the answer not in the manual?
Questions and answers