Table of Contents
Advertisement
Advertisement
Table of Contents

Related Manuals for Phonak DECT Home Phone


Summary of Contents for Phonak DECT Home Phone
- Page 1 Phonak DECT Cordless phone User Guide...
- Page 2 Phonak DECT Home Phone Phonak DECT II Hearing aid compatibility This product uses a dedicated wireless link to Phonak hearing aids. Please ask your hearing care professional about your hearing aid‘s compatibility. The compatibility can easily be checked using the demo...
-
Page 3: Table Of Contents
Contents 1. Welcome 2. Getting to know the phone 2.1 Packaging content 2.2 How the phone works 2.3 Descriptions of the device 3. Getting started 3.1 Setting up the power supply 3.2 Connecting the base 3.3 Inserting the battery 3.4 Charging the handset 3.5 Changing the display language 3.6 Setting date and time 3.7 Setting the location... - Page 4 Contents 4. Everyday use 4.1 Making and ending a call 4.2 Muting the handset microphone 4.3 Making a call with Phonak hearing aids 4.4 Setting the volume 4.5 Setting ringtones 4.6 Switching the handset on and off 4.7 Entering a contact 4.8 Looking up contacts...
- Page 5 5.4 Other handset settings 5.5 Alarm clock function 5.6 Attaching the belt clip 5.7 Signal strength indicator 5.8 Eco-mode 5.9 Battery status display 5.10 Multiple handsets for one base 5.11 Using an existing base 5.12 Changing the battery 6. PIN-codes and resetting your settings 6.1 Changing PIN codes 6.2 Resetting your settings 6.3 Resetting the system PIN...
- Page 6 9. Service warranty 9.1 Local warranty 9.2 International warranty 9.3 Warranty limitation 10. Compliance information 11. Information and explanation of symbols 12. Important safety information...
-
Page 7: Welcome
1. Welcome The Phonak DECT cordless phone is a premium-quality product developed by Phonak, one of the world’s leading companies in the field of hearing technology. Please read this user guide thoroughly in order to be able to benefit from all the possibilities this product can offer. -
Page 8: Getting To Know The Phone
2. Getting to know the phone 2.1 Packaging content Power supply with adapters Removable belt clip US / CAN Handset Rechargeable Battery Phone cable RJ11 battery cover with adapters DECT base and charger (“Base“) -
Page 9: How The Phone Works
This telephone is used like any other cordless phone. In addition, the integrated wireless Phonak transmission technology makes using the phone with Phonak hearing aids much easier. The phone signal is sent wirelessly to both hearing aids in digital quality. -
Page 10: Descriptions Of The Device
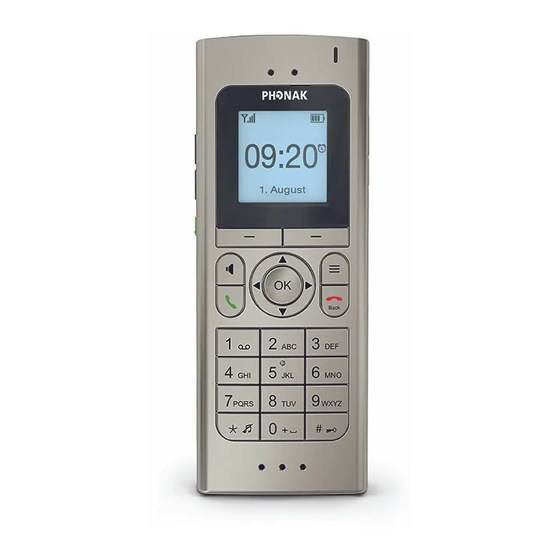
2.3 Descriptions of the devices The base The base is connected to the telephone line and also serves as the charger for the handset. Charging contacts Power supply input Paging and pairing button Analog phone line input ... - Page 11 The handset To change the display language, follow the instructions in Chapter 3.5.
- Page 12 Receiver Volume up / down Volume boost Press 2 sec. = Hearing aid connectivity test (demo mode) Hands-free on / off Talk / repeat call Press and hold 2 sec. = Dial voicemail number Press and hold 2 sec.
- Page 13 Display symbols in standby mode Time Date Alarm clock on Battery and charging state Ringtone off Keypad locked Handset name (visible if more than one handset is used with ...
- Page 14 Menu Press to enter the menu and use the arrow keys to navigate. Press to go back. Contact Calls Voice box Alarm Audio- Hearing Settings clock settings Chapter Chapter Chapter Chapter Chapter Chapter Chapter 4.12...
-
Page 15: Getting Started
3. Getting started 3.1 Setting up the power supply 1. Select your power adapter. 2. Insert the top round end of the adapter in to the round corner of the power supply. 3. Click the bottom end of the adapter in to lock it into place. -
Page 16: Connecting The Base
3.2 Connecting the base Put the base on a non-slip, flat surface. 1. Plug the mini-USB plug 110 / 220 V into the base and the power supply into a power outlet. Phone line 2. Connect the phone line input of the base with the analog phone socket using the phone cable. -
Page 17: Inserting The Battery
3.3 Inserting the battery Only use the lithium ion battery provided by Phonak, as otherwise significant personal injury and damage to property may occur. 1. Make sure the battery contacts are located as shown. 2. Insert the contacts side first. -
Page 18: Charging The Handset
3.4 Charging the handset The handset must only be charged in the base. You may place the handset into the base after each call to charge the battery. If the battery symbol shows only one bar (<25%), charge the handset as soon as possible. Initial charging The charging status display will only work properly after the first full charge followed by a full depletion of the... -
Page 19: Changing The Display Language
3.5 Changing the display language In order to function properly the language, Language country, time and date need to be set. English Deutsch When you use the handset for the first Français Italiano time, you will automatically be asked which language settings you would like: S Press to choose the language. -
Page 20: Setting Date And Time
After setting the language for the first time, you can test the phone with your hearing aids. Please follow the instructions on the display ( Chapter 3.8). 3.6 Setting date, time and time format Settings S Press the key to get to the menu. -
Page 21: Setting The Location
Date and time are always saved in the base. After any power loss, you must re-enter the date and time. 3.7 Setting the location Attention: To ensure that all functions work properly, you must enter the country where the phone is being used. -
Page 22: Testing The Connection To Your Hearing Aids
If your country is not listed, choose one with similar Other country. telephone conditions or If you select a country that uses the am / pm time format, it will automatically be changed. If you wish to change the time format later, refer to chapter 3.6. 3.8 Testing the connection to your hearing aids In standby mode, press and hold the Boost key to start the test. - Page 23 Playing demo … As soon as appears on the display, hold max. 25 cm / 10“ the handset close to your hearing aids (max. 25 cm away from both aids). Hold the phone in front of your face to check if you can hear the sound via the wireless transmission and not with the hearing aid microphone.
-
Page 24: Transferring Existing Contacts
Phonak DECT phone. To do so, the existing handset must be logged in to the Phonak base first. Refer to the user guide of your current handset and log it into the Phonak base ( Chapter 5.10). Transfer the contacts of your existing handset to the Phonak base. - Page 25 Your phone is now ready to use. What would you like to do next? Changing the display language Chapter 3.5 Making and ending a call Chapter 4.1 Setting the volume Chapter 4.4 Setting ringtones Chapter 4.5 Entering a contact Chapter 4.7 Using the ”Voice box“...
-
Page 26: Everyday Use
4. Everyday use 4.1 Making and ending a call Making a call S Enter the phone number you would like to dial on the number keypad. You can correct a wrong digit by pressing the display key Delete. S Press the talk key to make the call. - Page 27 Accepting a call In addition to the ringtone, an incoming call is signaled by the blinking indicator light and vibration (if enabled). To accept an incoming phone call, press the talk key When ringing, the phone can be muted using the display key Mute.
-
Page 28: Muting The Handset Microphone
To switch the microphone back on again, Mic mute press again. 4.3 Making a call with Phonak hearing aids Wireless transmission of the phone call is only possible with Phonak hearing aids. No configuration is needed for the hearing aids or the phone. - Page 29 If the handset is in hands-free mode or used with a headset, the wireless transmisison is disabled. If your hearing aids do not support wireless Phonak technology, you may use it with a telecoil program to improve the sound quality.
- Page 30 Holding the handset correctly The microphone openings at the bottom of the handset pick max. 25 cm / 10“ up your voice. Hold the handset close to your mouth. The handset will transfer the call wirelessly through your hearing aids and through the handset receiver simultaneously.
-
Page 31: Setting The Volume
4.4 Setting the volume Use the volume up / down keys on the side to set the volume during a conversation. The volume setting will be indicated on the display and saved automatically. The volume setting controls the acoustic and wireless signal at the same time. -
Page 32: Setting Ringtones
By pressing the Boost key again, the handset switches back to the normal volume range and the volume Boost symbol disappears. A new telephone conversation always begins in normal volume mode. Please tell other people using your phone about this setting. - Page 33 Choose your settings: Tune Choose a ringtone from the list of 1–12, that you can hear clearly without your hearing aids. Volume 1–5 Select the ringtone volume level so it is comfortable for you and your surroundings. Rising Choose for a ringtone that increases in volume while ringing.
-
Page 34: Switching The Handset On And Off
Phonak logo. Switching the handset on S Press the end call / back key or put the handset in the base. The Phonak logo will appear on the display and you will hear the Phonak start melody. -
Page 35: Entering A Contact
4.7 Entering a contact The phone has 2 contact lists. One in the base and one in the handset. Handset Contacts S Any contacts you have saved under Handset are only visible on this handset. S You can save up to 100 entries with 3 phone numbers each. - Page 36 Recommendation: If you only use one handset with Contacts Handset. If you use one base, choose different handsets with one base ( Chapter 5.10), Contacts Base. choose You may copy contacts between the contact lists later. Entering a contact Contacts S Press the key to get to the menu.
- Page 37 If you store the numbers in the handset, you may Tune Volume set the and the of the ringtone for Default this contact (the setting means that global settings will be used Chapter 4.5). S Depending on which field you are editing, save the entry or any changes directly using the display key Save Option...
-
Page 38: Looking Up Contacts
4.8 Looking up contacts Speed dial Use the number / letter keypad to go directly to the first letter of your contact’s name in the contact list by pressing and holding the corresponding letter while in standby mode. Example: Press and hold key (P, Q, R, S) to get to the contact list for the letter P. -
Page 39: Finding A Lost Handset
You may also look for a name directly, e.g. Mike, by pressing key (for ”M“). All names beginning with ”M“ will appear. Press (=G, H, I) 3 times in quick succession to see ”Mi“ displayed. S Press when you have found the name, press until it highlights the number you would like to call, press to dial the number. - Page 40 4.10 Using the caller list You can review the last 150 incoming, outgoing Calls or missed calls in the menu: Calls S Press the key to get to the menu. Press key to select Missed, Accepted, Outgoing S Use the calls.
-
Page 41: Using The Caller List
You can edit entries using the display keys: S Delete: Deletes the current entry from the caller list (the contact list will not be deleted). Option Save: Saves the current entry to the contact list. Option Delete all: Deletes all entries from the caller list (the contact list will not be deleted). -
Page 42: Using The Inbox Menu
4.12 Using the ”Voice box“ Setting up the Voice box Voice box is the voicemail on your provider’s network. You can only use the Voice box if you have requested it from your network provider. To set it up: Settings S Press the key to get to the menu,... - Page 43 Everyday use of the Voice box If there is a message waiting for you, a notification with the number of messages received will be displayed. S Press and hold the key (2 sec) to dial the Voice box number. S You can now listen to your messages. Follow the Voice box instructions from your network provider.
-
Page 44: Additional Features When Using The Phone
4.13 Additional features when using the phone Hands-free You can switch hands-free mode on or off during a call by pressing the speaker . Use the keys to adjust Mike the volume. 1:21 The conversation is not transmitted to your hearing aids wirelessly when you are in hands-free mode. -
Page 45: Handset Settings
5. Handset settings Using a headset You can make calls using a headphone or headset plugged into your handset with a 3.5 mm jack. Plug it into the side of your handset. A headset symbol will appear on the display. When using a headphone without microphone, the handset microphone will be used. -
Page 46: Locking The Keypad
5.1 Locking the keypad Key lock prevents unwanted or accidental use of the handset. To lock: Press and hold the key (2 sec) in Unlock standby mode until the display shows device with The lock symbol on the display shows the handset is locked. -
Page 47: Switching Ring Tones On / Off
5.2 Switching ring tones on / off Ring tone off: Press and hold the (2 sec) in standby mode until the display Ring tone off. shows Ring tone on: Press and hold the (2 sec) in standby mode until the display Ring tone shows The tune symbol... -
Page 48: Other Contact List Functions
5.3 Other Contact list functions Setting the contact list for speed dial Settings Contacts Speed dial with, to select which contact list (handset, base or internal) you would like to use with speed dial. Setting contact sort order Settings Contacts Sort order to sort contacts by Last name, first name... - Page 49 Option. Delete all to delete all contacts from your current contact list. If you confirm, all contacts in your current contact list will be permanently deleted! Even Phonak will not be able to retrieve them.
-
Page 50: Other Handset Settings
5.4 Other handset settings Adjust the display Settings Display: You can adjust the display using S Choose the background color you prefer via Design White or Gray. Illumination Inside base Outside base: This function specifies whether the display darkens after a minute or stays faintly lit. - Page 51 S Internal: If several handsets are logged into the base, you can call them directly. S Deactivated: This setting means the function key has no purpose assigned to it. Line selection: This function is not available with the Phonak DECT base.
- Page 52 Switching indicator tones on or off Audio settings Indicator tones to switch them on or off: S Use the key to choose the tones and switch it with the keys. S Press the display key Save. Setting up vibrate mode The handset vibrates when different events take place.
-
Page 53: Alarm Clock Function
5.5 Alarm clock function You can set up to 4 alarm times on your handset. To set an alarm Alarm clock S Select in the main menu and press S Choose one of the 4 alarms using the key, press buttons to set the alarm clock Mode: S Use the S Single: The alarm will ring once when the set time is... - Page 54 S Time: Use the number keypad to set the alarm time. Change your entries with S Name: This name will appear in the alarm list and be shown when the alarm is ringing. Add a new name Delete using the letters on the keypad. Press to make a correction.
- Page 55 Alarm symbol on the display If an alarm is active, the symbol will appear. The alarm symbol also shows how many alarms are active. In the list of alarms, active alarms are checked. If you select an alarm with Mike Info 09:10 key, the alarm time will also be Mike Test...
-
Page 56: Attaching The Belt Clip
5.6 Attaching the belt clip To attach the belt clip, you need a small Phillips-head screwdriver to attach the fixing screws. -
Page 57: Signal Strength Indicator
5.7 Signal strength indicator The bars next to the antenna symbol show the signal strength between the base and the handset. It depends on the distance and any obstacles or walls between them. In general, the maximum distance to the base inside a building is up to 50 m (160 ft) and can reach up to 300 meters (950 ft) outdoors. -
Page 58: Eco-Mode
5.8 Eco-mode Eco-mode can only be activated in Europe. The Eco-mode menu is only available when the handset is connected to the base. In Eco-mode, radio activity between the base and the handset is switched off when no call is being made. To switch the Eco-mode on and off Settings S Press the... -
Page 59: Battery Status Display
When Eco-mode is switched on, call setup is delayed by about 2 seconds. Battery use in standby mode is approx. 50% higher when Eco mode is switched on. All phones logged into the base must support Eco-mode. 5.9 Battery status display The battery symbol indicates: Battery charging 100%... -
Page 60: Multiple Handsets For One Base
The default PIN code for the base is “0000”. It is possible to log into the base with other GAP- compatible DECT handsets. Phonak only guarantees that original Phonak DECT home phone and Phonak DECT II handsets will function correctly. - Page 61 GAP (Generic Access Protocol) is a technical standard which specifies that cordless handsets and a base are compatible with one another. More than one cordless phone must be logged in to the base for the following functions! Setting the handset name As soon as more than one handset is logged into the same base, the internal name of the handset, e.g.
- Page 62 If someone accepts the internal call on handset Mike ”DECT 5“, the external caller ”Mike“ is put on hold and does not hear the conversation. DECT 5 0:10 Brokering during a call Option Brokering Use the display key DECT 5 switch between ”Mike“...
-
Page 63: Using An Existing Base
Enter the security code for this base if needed (please consult the instruction manual of the existing base). The Phonak base for the handset now works as a charger. It must be connected to the main power cable. You no longer need the telephone cable. -
Page 64: Changing The Battery
5.12 Changing the battery If battery performance decreases noticeably over time, you can change the battery. Only use the original battery (Li-Ion 3.7V, type: CE-MB 206-5C-01, 1100 mAh). Open the battery cover as described in Chapter 3.3 to replace the battery. -
Page 65: Pin-Codes And Resetting Your Settings
6. PIN-codes and resetting your settings 6.1 Changing PIN codes The default PIN code is ”0000“. If you want to change it go to: Settings Security Base PIN, enter the current PIN ”0000“ and confirm by pressing S Enter your own PIN and confirm by pressing Settings Security Handset... -
Page 66: Resetting The System Pin
S Enter the original PIN ”0000“ or the PIN you set yourself. 6.3 Resetting the system PIN If you forget the system PIN, you must do a general reset: Pair S Press and hold the button on the back of the base and reinsert the power cable into the base at the same time. -
Page 67: Troubleshooting
7. Troubleshooting Causes What to do Chapter The display is dark S Battery is not inserted S Insert battery S Battery is fully discharged S Put handset on base S Handset is not switched on S Switch handset on The display is only faintly lit S Battery almost discharged S Put handset on base S Display illumination... - Page 68 Chapter Causes What to do Volume is too loud S Boost mode is on S Press Boost key S Ringtones are too loud S Set the volume No sound from handset S Headset plugged in S Unplug headset S Volume too low S Increase volume Phone does not ring S Ringtones are switched off...
- Page 69 S Voice box service is not S Get provider to activate 4.12 activated voice box service S Voice box number is not S Program the number 4.12 programmed You can see other questions and answers (FAQs) on our website www.phonak-us.com/dect.
-
Page 70: Information On Product Safety
8. Information on product safety Protect the device connectors, plugs, charging slot and power supply from dirt and debris. Never immerse the device in water. Protect it from excessive moisture. Never use the device in the shower, bath, or swimming area, as the device contains sensitive electronic parts. - Page 71 Special medical or dental examination including radiation described below, may adversely affect the correct functioning of the device. Keep it outside the examination room / area before undergoing: Medical or dental examination with X-ray (also CT scan). Medical examination with MRI/NMRI scans, generating magnetic fields.
-
Page 72: Service Warranty
9. Service warranty 9.1 Local warranty Please ask the hearing care professional, where you purchased your Phonak DECT phone, about the terms of the local warranty. 9.2 International warranty Phonak offers a one-year limited international warranty, valid as of the date of purchase. This limited warranty covers manufacturing and material defects. -
Page 73: Warranty Limitation
9.3 Warranty limitation This warranty does not cover damage from improper handling or care, exposure to chemicals, immersion in water or undue stress. Damage caused by third parties or non-authorized service centers renders the warranty null and void. This warranty does not include any services performed by a hearing care professional in their office. -
Page 74: Compliance Information
Radio and Telecommunications Terminal Equipment Directive 1999/5/EC. The full text of the Declaration of Conformity can be obtained from the manufacturer or the local Phonak representative whose address can be taken from the list on http://www.phonak.com (Phonak worldwide locations). US and Canada: 1. - Page 75 See installation instructions for details. 3. If this equipment Phonak DECT causes harm to the telephone network, the telephone company will notify you in advance that temporary discontinuance of service may be required.
- Page 76 5. If trouble is experienced with the Phonak DECT phone, for repair or warranty information, service can be facilitated through our office at: Phonak Inc. 4520 Weaver Parkway Warrenville, IL 60555 Tel: 800-777-7333 Fax: 630-393-7400 If the equipment is causing harm to the telephone network, the telephone company may request that you disconnect the device until the problem is resolved.
- Page 77 8. If your home has specially wired alarm equipment connected to the telephone line, ensure the installation of this 1.9 GHz DECT Product for PSTN does not disable your alarm equipment. If you have questions about what will disable alarm equipment, consult your network provider or a qualified installer.
- Page 78 10. The REN is used to determine the number of devices that may be connected to a telephone line. Excessive RENs on a telephone line may result in the devices not ringing in response to an incoming call. In most but not all areas, the sum of RENs should not exceed five (5.0).
- Page 79 FCC Caution: Changes or modifications made to this device not expressly approved by Phonak may void the FCC authorization to operate this device. This device complies with Part 15 of the FCC Rules and with RSS-210 of Industry Canada. Operation is subject...
- Page 80 Note: This device has been tested and found to comply with the limits for a Class B digital device, pursuant to Part 15 of the FCC Rules. These limits are designed to provide reasonable protection against harmful interference in a residential installation.
- Page 81 Specific Absorption Rate (SAR) information SAR tests are conducted using standard operating positions accepted by the FCC with the phone transmitting at its highest certified power level in all tested frequency bands, although the SAR is determined at the highest certified power level, the actual SAR level of the phone while operating can be well below the maximum value, in general, the closer you are to a wireless base station antenna, the lower the power...
- Page 82 Non-compliance with the above restrictions may result in violation of RF exposure guidelines. Privacy of communications may not be ensured when using this telephone. IC Warning CS03: This device meets the applicable Industry Canada technical specifications. RSS (Category I Equipment): This device complies with Industry Canada license-exempt RSS standard(s).
- Page 83 Under Industry Canada regulations, this radio transmitter may only operate using an antenna of a type and maximum (or lesser) gain approved for the transmitter by Industry Canada. To reduce potential radio interference to other users, the antenna type and its gain should be so chosen that the equivalent isotropically radiated power (e.i.r.p.) is not more than that necessary for successful communication.
-
Page 84: Information And Explanation Of Symbols
11. Information and explanation of symbols The CE symbol is a confirmation by Phonak AG that this Phonak product meets the requirements of the R&TTE Directive 1999/5/EC on Radio and Telecommunication Terminal Equipment. This symbol indicates that it is important for the user to read and take into account the relevant information in these user guides. - Page 85 Operating The product is designed such that conditions it functions without problems or restrictions if used as intended, unless otherwise noted in these user guides. Keep dry. Temperature transport and storage: –20° to +60° Celsius (–4° to +140° Fahrenheit) Temperature operation: 0°...
- Page 86 Atmospheric pressure: 200 hPA to 1500 hPA. The symbol with the crossed-out garbage bin is to make you aware that this device may not be thrown away as normal household waste. Please dispose of old or unused devices, at waste disposal sites intended for electronic waste, or give it to your hearing care professional for disposal.
-
Page 87: Important Safety Information
Phonak DECT US/CAN version must NOT be used in Europe as it can interfer with the European cellular networks. Illegal use of such products are prohibited... - Page 88 Phonak DECT EU version must NOT be used in the US and Canada as it can interfer with US and Canada cellular networks, and for that reason is deemed illegal to use by the FCC and IC. The handset contains small parts that can cause choking, if swallowed by children.
- Page 89 The mini-USB port is to be used for the described purpose only. Caution: electric shock. Do not insert power adapter alone into electrical outlets. For safety reasons, only use chargers supplied by Phonak or USB certified chargers with a rating of 5VDC, min. 1000 mA.
- Page 90 This can cause severe, permanent damage to your hearing. The handset may cause buzzing noises in analog hearing aids. If you have any problems, contact your hearing care professional. Only give your Phonak DECT phone to someone else together with the instruction manual.
- Page 91 Please do not use a faulty base, or have it repaired by the Service Department, since it may disrupt other radio services. Do not use the device in explosive areas (mines or industrial areas with danger of explosions, oxygen rich environments or areas where flammable anesthetics are handled) or where electronic equip- ment is prohibited.
- Page 92 Manufacturer: Phonak LLC 4520 Weaver Parkway Warrenville, IL 60555 www.phonak-us.com...
Need help?
Do you have a question about the DECT Home Phone and is the answer not in the manual?
Questions and answers
is there a speaker on a phonak phone
My phonak phone does not ring when someone call me. I tried the "ring tone option" and put the ring tone on, but this does not work.
Your Phonak DECT Home Phone may not be ringing when you receive calls for the following reasons:
1. Ringtones are switched off – Turn the ringtones on (Section 5.2).
2. Ringtone volume is too low – Increase the volume using the volume up key in standby mode (Section 4.5).
Make sure both settings are correctly adjusted.
This answer is automatically generated
What does my Phonak Dect Phone handset say “Unlock device with #”. What so I do and how did this happen
The message "Unlock device with #" appears on your Phonak DECT Home Phone handset because the keypad is locked. Pressing the "#" key unlocks the device.
This answer is automatically generated