
Related Manuals for Acer Aspire 8730


Summary of Contents for Acer Aspire 8730
- Page 1 Aspire 8730/8730Z/8530 Series Service Guide Service guide files and updates are available on the ACER/CSD web; for more information, please refer to http://csd.acer.com.tw PRINTED IN TAIWAN...
-
Page 2: Revision History
Revision History Please refer to the table below for the updates made on Aspire 8730/8730Z/8530 Series service guide. Date Chapter Updates... - Page 3 Copyright Copyright © 2008 by Acer Incorporated. All rights reserved. No part of this publication may be reproduced, transmitted, transcribed, stored in a retrieval system, or translated into any language or computer language, in any form or by any means, electronic, mechanical, magnetic, optical, chemical, manual or otherwise, without the prior written permission of Acer Incorporated.
- Page 4 Conventions The following conventions are used in this manual: Denotes actual messages that appear SCREEN MESSAGES on screen. NOTE Gives bits and pieces of additional information related to the current topic. WARNING Alerts you to any damage that might result from doing or not doing specific actions.
- Page 5 DIFFERENT part number code to those given in the FRU list of this printed Service Guide. You MUST use the list provided by your regional Acer office to order FRU parts for repair and service of customer machines.
-
Page 7: Table Of Contents
Acer eRecovery Management ........22... - Page 8 Aspire 8730/8730Z/8530 Series ........
- Page 9 Table of Contents Test Compatible Components Microsoft® Windows® Vista Environment Test ......180 Online Support Information Index...
- Page 10 Table of Contents...
-
Page 11: System Specifications
Chapter 1 System Specifications Features Below is a brief summary of the computer’s many feature: Platform For Aspire 8730/8730Z Series Intel® Centrino® 2 processor technology, featuring: ® ™ Intel Core 2 Duo processor • ® ® Intel Pentium dual-core processor* •... -
Page 12: Storage Subsystem
S/PDIF (Sony/Philips Digital Interface) support for digital speakers • MS-Sound compatible • Built-in microphone • Communication Acer Video Conference, featuring: • Integrated Acer Crystal Eye webcam* • Optional Acer Xpress VoIP phone* • WLAN: • Intel® Wireless WiFi Link 5100/5300* • Acer InviLink™ Nplify™ 802.11b/g/Draft-N* •... - Page 13 Modem (RJ-11) port • DC-in jack for AC adapter • Environment Temperature: • Operating: 5 °C to 35 °C • Non-operating: -20 °C to 65 °C • Humidity (non-condensing): • Operating: 20% to 80% • Non-operating: 20% to 80% • NOTE: "*"...
-
Page 14: System Block Diagram
System Block Diagram For Aspire 8730/8730Z Series: Chapter 1... - Page 15 For Aspire 8530 Series: Chapter 1...
-
Page 16: Your Acer Notebook Tour
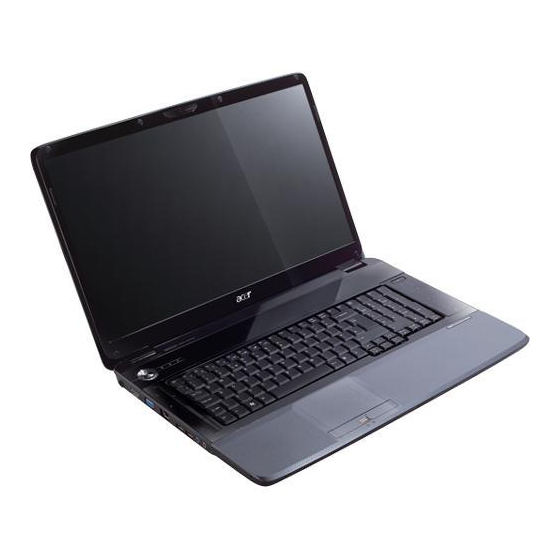
Your Acer Notebook tour After knowing your computer features, let us show you around your new computer. Front View Icon Item Description Acer Crystal Eye Web camera for video communication. webcam Microphone Internal microphone for sound recording. Display screen Also called Liquid-Crystal Display (LCD), displays computer output (Configuration may vary by models). -
Page 17: Closed Front View
Volume Up/Volume Increase system volume/decrease system volume. VOL- Down 12.2 Acer MediaTouch For use with Acer Arcade and other media playing programs. keys Empowering key Launch Acer Empowering Technology Speakers Left and right speakers deliver stereo audio output. Closed Front View... -
Page 18: Left View
Left View Icon Item Description DC-in jack Connects to an AC adapter. HDMI HDMI port Supports high definition digital video connections. External display Connects to a display device (e.g., external monitor, LCD (VGA) port projector). Ethernet (RJ-45) Connects to an Ethernet 10/100/1000-based network. port USB 2.0 port Connect to USB 2.0 devices (e.g., USB mouse, USB... -
Page 19: Right View
Right View Icon Item Description USB 2.0 port Connects to USB 2.0 devices (e.g., USB mouse, USB camera). Optical drive Internal optical drive; accepts CDs or DVDs. Optical disk access Lights up when the optical drive is active. indicator Optical drive eject Ejects the optical disk from the drive. -
Page 20: Bottom View
Bottom View Icon Item Description Battery bay Houses the computer's battery pack. Battery lock Locks the battery in position. Battery release Releases the battery for removal. latch Hard disk bay- Houses the computer's hard disk (secured with screws) Secondary (only for certain models). Subwoofer Emits low frequency sound output. -
Page 21: Indicators
The mail and Web browser buttons are pre-set to email and Internet programs, but can be reset by users. To set the Web browser, mail and programmable buttons, run the Acer Launch Manager.You can access the Launch Manager by clicking on Start, All Programs, and then Launch Manager to start the application. -
Page 22: Touchpad Basics (With Two-Click Buttons)
Touchpad basics (with two-click buttons) The following items show you how to use the touchpad with two-click buttons. Move your finger across the touchpad (1) to move the cursor. • Press the left (2) and right (3) buttons located beneath the touchpad to perform selection and execution •... -
Page 23: Using The Keyboard
Using the Keyboard The keyboard has full-sized keys and an embedded numeric keypad, separate cursor, lock, Windows, function and special keys. Lock Keys and embedded numeric keypad The keyboard has three lock keys which you can toggle on and off. Lock key Description Caps Lock... -
Page 24: Windows Keys
Windows Keys The keyboard has two keys that perform Windows-specific functions. Description Windows Pressed alone, this key has the same effect as clicking on the Windows Start button; it launches the Start menu. It can also be used with other keys to provide a variety of functions: <... -
Page 25: Hot Keys
Function Description <Fn> + <F1> Hotkey help Displays help on hotkeys. <Fn> + <F2> Acer eSettings Launches Acer eSettings in Acer Empowering Technology. <Fn> + <F3> Acer ePower Launches Acer ePower Management in Acer Management Empowering Technology. <Fn> + <F4>... -
Page 26: Special Key (Only For Certain Models)
Special Key (only for certain models) You can locate the Euro symbol and the US dollar sign at the upper-center and/or bottom-right of your keyboard. The Euro symbol Open a text editor or word processor. Either press < > at the bottom-right of the keyboard, or hold <Alt Gr> and then press the <5> key at the upper-center of the keyboard. -
Page 27: Acer Empowering Technology
The Empowering Technology toolbar makes it easy for you to access frequently used functions and manage your new Acer system. Activated by pressing the Empowering Key, it provides access to the following utilities: NOTE: The following content is for general reference only. Actual product specifications may vary. -
Page 28: Empowering Technology Password
Empowering Technology password You must set the Empowering Technology password to use the password protection feature of Acer eRecovery Management to protect your data. To set the Empowering Technology password: Launch Acer eRecovery Management. Click the Restore tab. Click Password settings. The Empowering Technology Password Center dialogue box pops up. -
Page 29: Acer Eaudio Management (Only For Certain Models)
Acer eAudio Management (only for certain models) Acer eAudio Management allows you to easily control the enhanced sound effects of Dolby Home Theater on your system. Select Movie or Game mode to experience the awesome realism of 5.1-channel audio output from the speakers fitted to your system via Dolby Surround sound technology. -
Page 30: Acer Epower Management
To access this utility, select Acer ePower Management from the Empowering Technology toolbar, run the program from the Acer Empowering Technology program group in Start menu, or right-click the Windows power icon in the system tray and select Acer ePower Management. -
Page 31: Acer Edatasecurity Management (Only For Certain Models)
Battery status The quick menu shows the remaining battery life based on current usage. You can also launch the Acer ePower Management application and refer to the Battery status panel located just below the power plans. Click the Battery tab to view remaining battery life, battery status, and remaining battery life in standby and hibernate modes. -
Page 32: Acer Erecovery Management
Acer eRecovery Management Acer eRecovery Management is a versatile backup utility. It allows you to create full or incremental backups, burn the factory default image to optical disc, and restore from previously created backups or reinstall applications and drivers. By default, user-created backups are stored to the D:\ drive. - Page 33 • Password settings • To use the password protection feature of Acer eRecovery Management to protect your data, you must first set the Empowering Technology password. To set the password, refer to the section "Empowering Technology password". For more information, please refer to"Acer eRecovery Management" on page 62 in the Acer System User's Guide.
-
Page 34: Acer Esettings Management
Acer eSettings Management Acer eSettings Management allows you to inspect hardware specifications, set BIOS passwords and modify boot options. Acer eSettings Management also: Provides a simple graphical user interface for navigation. • Prints and saves hardware specifications. • Lets you set an asset tag for your system. -
Page 35: Windows Mobility Center
Windows Mobility Center also includes Acer-specific settings like sharing folders overview/sharing service on or off, Bluetooth Add Device (if applicable), and a shortcut to the Acer user guide, drivers and utilities. To launch Windows Mobility Center: Use the shortcut key <... -
Page 36: Using The System Utilities
Apply to confirm the new settings and click OK to complete the process. Acer GridVista is a handy utility that offers four pre-defined display settings so you can view multiple windows on the same screen. To access this function, please go to Start>All Programs and click on Acer GridVista. - Page 37 NOTE: Please ensure that the resolution setting of the second monitor is set to the manufacturer's recommended value. Chapter 1...
- Page 38 Step Size (Quantity) Color Torque M2 x L4 (2) Silver 1.6 kgf-cm Remove the discrete board module from the system. Chapter 3...
-
Page 39: Removing The Expresscard Dummy Card
Removing the LCD Module See “Removing the Battery Pack” on page 54. See “Removing the SD dummy card” on page 55. See “Removing the ExpressCard dummy card” on page 56. See “Removing the Lower Cover” on page 56. See “Removing the TV Tuner Board Modules” on page 58. See “Removing the TV Tuner Board Modules”... - Page 40 10. Turn over the system and remove the mylar covering the LCD cable connector. 11. Disconnect the LCD cable connector from the main board. Chapter 3...
- Page 41 12. Carefully pull out the wireless antenna cables from the hole and release the cables from the latches. 13. Disconnect the microphone cable from MIC1 on the system and release it from the latches. Chapter 3...
-
Page 42: Separating The Upper Case From The Lower Case
14. Remove the two screws (A) from the left and right hinge of the LCD module. Step Size (Quantity) Color Torque M2.5 x L8 (2) Black 3.0 kgf-cm 15. Carefully remove the LCD module from the base unit. NOTE: When connecting the cable back to the unit, please note that the cable should be routed well. Separating the Upper Case from the Lower Case See “Removing the Battery Pack”... - Page 43 10. See “Removing the Hard Disk Drive Module 2” on page 66. 11. See “Removing the Middle Cover” on page 73. 12. See “Removing the Keyboard” on page 74. 13. See “Removing the Heatsink Module” on page 78. 14. See “Removing the CPU” on page 80. 15.
- Page 44 17. Disconnect the fingerprint cable from FP2 on the main board. 18. Disconnect the E-key cable from EKCN1 on the main board. Chapter 3...
- Page 45 19. Disconnect the Media console cable from LEDB1 on the main board. Chapter 3...
-
Page 46: Removing The Main Board
18. Remove the two screw (B) securing the modem card. Step Size (Quantity) Color Torque M2 x L4 (2) Silver 1.6 kgf-cm 19. Lift the modem board to remove it from the main board. Removing the Main Board See “Removing the Battery Pack” on page 54. See “Removing the SD dummy card”... - Page 47 11. See “Removing the Middle Cover” on page 73. 12. See “Removing the Keyboard” on page 74. 13. See “Removing the Heatsink Module” on page 78. 14. See “Removing the CPU” on page 80. 15. See “Removing the LCD Module” on page 84. 16.
-
Page 48: Removing The Speaker Module
20. Remove the one screw (B) securing the main board in place. Step Size (Quantity) Color Torque M2 x L4 (1) Silver 1.6 kgf-cm 21. Carefully remove the main board. Removing the Speaker Module See “Removing the Battery Pack” on page 54. See “Removing the SD dummy card”... - Page 49 11. See “Removing the Middle Cover” on page 73. 12. See “Removing the Keyboard” on page 74. 13. See “Removing the Heatsink Module” on page 78. 14. See “Removing the CPU” on page 80. 15. See “Removing the LCD Module” on page 84. 16.
-
Page 50: Removing The Subwoofer
21. Remove the speaker module from the upper case. Removing the Subwoofer See “Removing the Battery Pack” on page 54. See “Removing the SD dummy card” on page 55. See “Removing the ExpressCard dummy card” on page 56. See “Removing the Lower Cover” on page 56. See “Removing the DIMM”... -
Page 51: Removing The Usb Board Module
19. Remove the two screws (B) securing the subwoofer to the lower case. Step Size (Quantity) Color Torque M2 x L4 (2) Silver 1.6 kgf-cm 20. Remove the subwoofer from the lower case. Removing the USB Board Module See “Removing the Battery Pack” on page 54. See “Removing the SD dummy card”... - Page 52 11. See “Removing the Middle Cover” on page 73. 12. See “Removing the Keyboard” on page 74. 13. See “Removing the Heatsink Module” on page 78. 14. See “Removing the CPU” on page 80. 15. See “Removing the LCD Module” on page 84. 16.
- Page 53 21. Remove the USB board module from the lower case. Chapter 3...
-
Page 54: Lcd Module Disassembly Process
LCD Module Disassembly Process LCD Module Disassembly Flowchart LCD MODULE DISASSEMBLY LCD MODULE LCD BEZEL LCD ASSEMBLY LCD BACK PANEL LCD FPC LEFT LCD RIGHT LCD CABLE BRACKET BRACKET ANTENNAS CAMERA Screw List Item Screw Color Part No. M2.5 x L6 Black 86.00E33.736 M2 x L3... -
Page 55: Removing The Lcd Bezel
Removing the LCD Bezel See “Removing the Battery Pack” on page 54. See “Removing the SD dummy card” on page 55. See “Removing the ExpressCard dummy card” on page 56. See “Removing the Lower Cover” on page 56. See “Removing the TV Tuner Board Modules” on page 58. See “Removing the TV Tuner Board Modules”... -
Page 56: Removing The Lcd Panel With The Brackets
12. Carefully pry open the LCD bezel and place the bezel on top of the LCD panel. Removing the LCD panel with the Brackets See “Removing the Battery Pack” on page 54. See “Removing the SD dummy card” on page 55. See “Removing the ExpressCard dummy card”... - Page 57 11. Disconnect the cable from the web camera. 12. Remove the five screws (C) securing the LCD module. Step Size (Quantity) Color Torque M2.5 x L6 (5) Black 3.0 kgf-cm Chapter 3...
-
Page 58: Removing The Inverter Board And Fpc Cable
13. Remove the LCD with the brackets from the back cover. Removing the Inverter Board and FPC Cable See “Removing the Battery Pack” on page 54. See “Removing the SD dummy card” on page 55. See “Removing the ExpressCard dummy card” on page 56. See “Removing the Lower Cover”... - Page 59 13. Detach any adhesive tapes and any cable that is glued to the LCD panel. Chapter 3...
- Page 60 14. Disconnect the FPC cable from the LCD panel. Chapter 3...
-
Page 61: Removing The Lcd Brackets
Removing the LCD Brackets See “Removing the Battery Pack” on page 54. See “Removing the SD dummy card” on page 55. See “Removing the ExpressCard dummy card” on page 56. See “Removing the Lower Cover” on page 56. See “Removing the TV Tuner Board Modules” on page 58. See “Removing the TV Tuner Board Modules”... - Page 62 11. See “Removing the Inverter Board and FPC Cable” on page 113. 12. See “Removing the LCD panel with the Brackets” on page 111. 13. Release the antenna cables from the aluminium tapes. 14. Remove the left and right antenna cables together with the tapes holding them in place. Chapter 3...
-
Page 63: Removing The Web Camera
NOTE: There is no need to remove the antenna unless you really need to replace it. Removing the Web Camera See “Removing the Battery Pack” on page 54. See “Removing the SD dummy card” on page 55. See “Removing the ExpressCard dummy card” on page 56. See “Removing the Lower Cover”... -
Page 64: Troubleshooting
Troubleshooting Use the following procedure as a guide for computer problems. NOTE: The diagnostic tests are intended to test only Acer products. Non-Acer products, prototype cards, or modified options can give false errors and invalid system responses. Obtain the failing symptoms in as much detail as possible. -
Page 65: System Check Procedures
System Check Procedures External Diskette Drive Check Do the following to isolate the problem to a controller, driver, or diskette. A write-enabled, diagnostic diskette is required. NOTE: Make sure that the diskette does not have more than one label attached to it. Multiple labels can cause damage to the drive or cause the drive to fail. -
Page 66: Memory Check
External keyboard If any of these devices do not work, reconnect the cable connector and repeat the failing operation. Memory Check Memory errors might stop system operations, show error messages on the screen, or hang the system. Boot from the diagnostics diskette and start the diagnostic program (please refer to main board. Go to the diagnostic memory in the test items. -
Page 67: Check The Power Adapter
Check the Power Adapter Unplug the power adapter cable from the computer and measure the output voltage at the plug of the power adapter cable. See the following figure Pin 1: +19 to +20.5V Pin 2: 0V, Ground If the voltage is not correct, replace the power adapter. If the voltage is within the range, do the following: Replace the System board. -
Page 68: Check The Battery Pack
Check the Battery Pack To check the battery pack, do the following: From Software: Check out the Power Management in control Panel In Power Meter, confirm that if the parameters shown in the screen for Current Power Source and Total Battery Power Remaining are correct. -
Page 69: Power-On Self-Test (Post) Error Message
Power-On Self-Test (POST) Error Message The POST error message index lists the error message and their possible causes. The most likely cause is listed first. NOTE: Perform the FRU replacement or actions in the sequence shown in FRU/Action column, if the FRU replacement does not solve the problem, put the original part back in the computer. -
Page 70: Index Of Error Messages
Index of Error Messages Error Code List Error Codes Error Messages Equipment Configuration Error Causes: 1. CPU BIOS Update Code Mismatch 2. IDE Primary Channel Master Drive Error (THe causes will be shown before “Equipment Configuration Error”) Memory Error at xxxx:xxxx:xxxxh (R:xxxxh, W:xxxxh) Real Time Clock Error CMOS Battery Bad CMOS Checksum Error... - Page 71 Error Message List Error Messages FRU/Action in Sequence System timer error RTC battery Run BIOS Setup Utility to reconfigure system time, then reboot system. System board Real time clock error RTC battery Run BIOS Setup Utility to reconfigure system time, then reboot system.
- Page 72 Error Message List No beep Error Messages FRU/Action in Sequence No beep, power-on indicator turns off and Power source (battery pack and power adapter). See “Power LCD is blank. System Check” on page 121.. Ensure every connector is connected tightly and correctly. Reconnect the DIMM.
-
Page 73: Phoenix Bios Beep Codes
Phoenix BIOS Beep Codes Code Beeps POST Routine Description Verify Real Mode Disable Non-Maskable Interrupt (NMI) Get CPU type Initialize system hardware Initialize chipset with initial POST values Set IN POST flag Initialize CPU registers Enable CPU cache Initialize caches to initial POST values Initialize I/O component Initialize the local bus IDE Initialize Power Management... - Page 74 Code Beeps POST Routine Description Advanced configuration of chipset registers Load alternate registers with CMOS values Initialize interrupt vectors POST device initialization 2-1-2-3 Check ROM copyright notice Check video configuration against CMOS Initialize PCI bus and devices Initialize all video adapters in system QuietBoot start (optional) Shadow video BIOS ROM Display BIOS copyright notice...
- Page 75 Code Beeps POST Routine Description Detect and install external RS232 ports Configure non-MCD IDE controllers Detect and install external parallel ports Initialize PC-compatible PnP ISA devices Re-initialize onboard I/O ports Configure Motherboard Configurable Devices (optional) Initialize BIOS Area Enable Non-Maskable Interrupts (NMIs) Initialize Extended BIOS Data Area Test and initialize PS/2 mouse Initialize floppy controller...
- Page 76 Code Beeps POST Routine Description Prepare Boot Initialize DMI parameters Initialize PnP Option ROMs Clear parity checkers Display MultiBoot menu Clear screen (optional) Check virus and backup reminders Try to boot with INT 19 Initialize POST Error Manager (PEM) Initialize error logging Initialize error display function Initialize system error handler PnPnd dual CMOS (optional)
- Page 77 Code Beeps Boot to Mini DOS Clear Huge Segment Boot to Full DOS Chapter 4...
-
Page 78: Index Of Symptom-To-Fru Error Message
Index of Symptom-to-FRU Error Message LCD-Related Symptoms Symptom / Error Action in Sequence LCD backlight doesn't work Enter BIOS Utility to execute “Load Setup Default Settings”, then reboot system. LCD is too dark Reconnect the LCD connectors. LCD brightness cannot be adjusted Keyboard (if contrast and brightness function key doesn't LCD contrast cannot be adjusted work). - Page 79 Power-Related Symptoms Symptom / Error Action in Sequence The system doesn’t power-off. Power source (battery pack and power adapter). See “Power System Check” on page 121. Hold and press the power switch for more than 4 seconds. System board Battery can’t be charged See “Check the Battery Pack”...
- Page 80 Power Management-Related Symptoms Symptom / Error Action in Sequence The system doesn't resume from See “Save to Disk (S4)” on page 35. hibernation mode. Hard disk connection board Hard disk drive System board The system doesn't resume from standby See “Save to Disk (S4)” on page 35. mode after opening the LCD.
- Page 81 Modem-Related Symptoms Symptom / Error Action in Sequence Internal modem does not work correctly. Modem phone port modem combo board System board NOTE: If you cannot find a symptom or an error in this list and the problem remains, see “Undetermined Problems”...
-
Page 82: Intermittent Problems
Intermittent Problems Intermittent system hang problems can be caused by a variety of reasons that have nothing to do with a hardware defect, such as: cosmic radiation, electrostatic discharge, or software errors. FRU replacement should be considered only when a recurring problem exists. When analyzing an intermittent problem, do the following: Run the advanced diagnostic test for the system board in loop mode at least 10 times. -
Page 83: Undetermined Problems
System Check” on page 121.): Power-off the computer. Visually check them for damage. If any problems are found, replace the FRU. Remove or disconnect all of the following devices: Non-Acer devices • Printer, mouse, and other external devices • Battery pack •... -
Page 84: Jumper And Connector Locations
Chapter 5 Jumper and Connector Locations Motherboard Chapter 5... - Page 85 Chapter 5...
-
Page 86: Main
This section provide you the standard operating procedures of clearing password and BIOS recovery for Aspire 8730/8730Z Series. Aspire 8730/8730Z Series provide one Hardware Open Gap on main board for clearing password check, and one Hotkey for enabling BIOS Recovery. -
Page 87: Security
Gap name in Aspire 8530 Series is G50 Steps for Clearing BIOS Password Check If users set BIOS Password (Supervisor Password and/or User Password) for a security reason, BIOS will ask the password during systems POST or when systems enter to BIOS Setup menu. However, once it is necessary to bypass the password check, users need to short the HW Gap to clear the password by the following steps: •... -
Page 88: Bios Recovery By Crisis Disk
BIOS Recovery by Crisis Disk BIOS Recovery Boot Block: BIOS Recovery Boot Block is a special block of BIOS. It is used to boot up the system with minimum BIOS initialization. Users can enable this feature to restore the BIOS firmware to a successful one once the previous BIOS flashing process failed. - Page 89 Chapter 5...
-
Page 90: Fru (Field Replaceable Unit) List
Guide. For ACER AUTHORIZED SERVICE PROVIDERS, your Acer office may have a DIFFERENT part number code from those given in the FRU list of this printed Service Guide. You MUST use the local FRU list provided by your regional Acer office to order FRU parts for repair and service of customer machines. -
Page 91: Aspire 8730/8730Z/8530 Series Exploded Diagram
Aspire 8730/8730Z/8530 Series Exploded Diagram Chapter 6... - Page 92 Aspire 8730/8730Z/8530 Series FRU List Category Part Name and Description Acer Part No. ACCESSORY REMOTE CONTROLLER FORMOSA21 RT.22700.011 RC804V-B EN REMOTE CONTROLLER FORMOSA21 RT.22700.008 RC804V-B EU Adapter ADAPTER 90W LITEON PA-1900-24AR AP.09003.011 ADAPTER 90W DELTA ADP-90SB AP.09001.013 BBEA LF ADAPTER 90W 3PIN DELTA ADP-90SB AP.09001.014...
- Page 93 Category Part Name and Description Acer Part No. CAPACITIVE BUTTON TM-01119-001 55.AR501.005 MODEM BOARD FOXCONN DELPHI- FX.22500.022 AM5 V2H 1.5_3.3V Cables LAUNCH BOARD CABLE 50.AR501.002 MEDIA BOARD CABLE 50.AR501.005 TOUCHPAD BOARD CABLE 50.AR501.006 USB BOARD CABLE 50.AR501.003 BLUETOOTH BOARD CABLE 50.AR501.007...
- Page 94 Category Part Name and Description Acer Part No. POWER CORD 250V 10A 3PIN ISRAEL 27.01518.761 Case/Cover/Bracket/Assembly LOWER CASE W/MODEM CABLE&FAN 60.AQE01.001 BRACKET&SPEAKER FOR TV SPEAKER SUB WOFFER 23.AR501.001 SPEAKER SET 23.AR501.002 EXPRESS DUMMY CARD 42.AR501.004 NEW CARD DUMMY CARD 42.TK901.005 SD DUMMY CARD 42.TK901.006...
- Page 95 Category Part Name and Description Acer Part No. CPU INTEL CORE2DUAL P8400 PGA KC.84001.DPP 2.26G 3M 1066 25W CPU INTEL CORE2DUAL P8600 PGA KC.86001.DPP 2.4G 1066 25W 3M CPU INTEL CORE2DUAL P9500 PGA KC.95001.DPP 2.53G 6M 1066 25W CPU INTEL CORE2DUAL T9400 PGA KC.94001.DTP...
- Page 96 Category Part Name and Description Acer Part No. HDD 120GB 5400RPM SATA II HGST KH.12007.014 HTS542512K9SA00 BRONCO-B LF HDD 120GB 5400RPM SATA SEAGATE KH.12001.032 ST9120817AS LF HDD 120GB 5400RPM SATA TOSHIBA KH.12004.007 MK1246GSX LF HDD 120GB 5400RPM SATA WD KH.12008.019...
- Page 97 Category Part Name and Description Acer Part No. KEYBOARD 14_15KB-FV3 BLACK KB.INT00.455 E89KS NORWEGIAN (ASPIRE BLACK) KEYBOARD 14_15KB-FV3 BLACK KB.INT00.457 E88KS KOREAN (ASPIRE BLACK) KEYBOARD 14_15KB-FV3 BLACK KB.INT00.458 E93KS JAPANESE (ASPIRE BLACK) KEYBOARD 14_15KB-FV3 BLACK KB.INT00.459 E89KS ITALIAN (ASPIRE BLACK) KEYBOARD 14_15KB-FV3 BLACK KB.INT00.462...
- Page 98 Category Part Name and Description Acer Part No. MAINBOARD MAINBOARD AS5930G INTEL LF MB.AQ201.001 PGM45 ICH9 LF FOR MONTEVINA CPU WITH PR_ESATA MAINBOARD AS5930 INTEL LF GM45 MB.AR501.001 ICH9 LF FOR MONTEVINA CPU WITH PR_ESATA MEMORY SODIMM 1GB DDRII667 HYNIX KN.1GB0G.012...
-
Page 99: Model Definition And Configuration
Appendix A Model Definition and Configuration Aspire 8730/8730Z/8530 Series Please click the icon below for Aspire 8730/8730Z and Aspire 8530 model definition. Aspire 8730/8730Z Aspire 8530 Acer DIMM DIMM HDD 1 Wireless Blueto VOIP Model Country Part Description (GB) Phone... - Page 100 Acer DIMM DIMM HDD 1 Wireless Blueto VOIP Model Country Part Description (GB) Phone AS5730 LX.AU AS5730Z- PMDT N15.4 SO2G N160 NSM8 3rd WiFi G0X.0 322G16Mn 3200 WXGA BII6 GB5.4 1x2 BGN 322G16 VHP32ATU S1 MC UMAE 1*2G/160/ 6L/5R/ CB_bgn_H...
- Page 101 Acer DIMM DIMM HDD 1 Wireless Blueto VOIP Model Country Part Description (GB) Phone AS5730 ACLA- LX.AU AS5730Z- PMDT N15.4 SO2G N160 NSM8 3rd WiFi Portuguese G0X.0 322G16Mn 3200 WXGA BII6 GB5.4 1x2 BGN 322G16 VHP32ATX C1 MC UMAE 1*2G/160/...
- Page 102 Acer DIMM DIMM HDD 1 Wireless Blueto VOIP Model Country Part Description (GB) Phone AS5730 Canada LX.AU AS5730Z- PMDT N15.4 SO2G SO1G N250 NSM8 3rd WiFi E0X.1 323G25Mn 3200 WXGA BII6 BII6 GB5.4 1x2 BGN 323G25 VHP32ATC A2 MC UMACE...
- Page 103 Acer DIMM DIMM HDD 1 Wireless Blueto VOIP Model Country Part Description (GB) Phone AS5730 LX.AU AS5730Z- PMDT N15.4 SO2G SO1G N250 NSM8 3rd WiFi E0X.1 323G25Mn 3200 WXGA BII6 BII6 GB5.4 1x2 BGN 323G25 VHP32ATU S1 MC UMACE 2G+1G/250/ 6L/5R/ CB_bgn_0.3...
- Page 104 Acer DIMM DIMM HDD 1 Wireless Blueto VOIP Model Country Part Description (GB) Phone AS5730 ACLA- LX.AU AS5730Z- PMDT N15.4 SO2G SO1G N250 NSM8 3rd WiFi Portuguese E0X.0 323G25Mn 3200 WXGA BII6 BII6 GB5.4 1x2 BGN 323G25 VHP32ATX C2 MC...
- Page 105 Acer DIMM DIMM HDD 1 Wireless Blueto VOIP Model Country Part Description (GB) Phone AS5730 ACLA- LX.AU AS5730Z- PMDT N15.4 SO2G SO1G N250 NSM8 3rd WiFi Spanish E0X.0 323G25Mn 3200 WXGA BII6 BII6 GB5.4 1x2 BGN 323G25 VHP32ATE A1 MC...
- Page 106 Acer DIMM DIMM HDD 1 Wireless Blueto VOIP Model Country Part Description (GB) Phone AS5730 EMEA Czech LX.AU AS5730Z- PMDT N15.4 SO2G SO1G N320 NSM8 3rd WiFi E0X.0 323G32Mn 3200 WXGA BII6 BII6 GB5.4 1x2 BGN 323G32 VHP32ATC Z2 MC...
- Page 107 Acer DIMM DIMM HDD 1 Wireless Blueto VOIP Model Country Part Description (GB) Phone AS5730 Indonesia LX.AU AS5730Z- PMDT N15.4 SO2G SO1G N250 NSM8 3rd WiFi E0X.0 323G25Mn 3200 WXGA BII6 BII6 GB5.4 1x2 BGN 323G32 VHP32ATID 1 MC UMACE...
- Page 108 Acer DIMM DIMM HDD 1 Wireless Blueto VOIP Model Country Part Description (GB) Phone AS5730 EMEA Eastern LX.AU AS5730Z- PMDT N15.4 SO2G SO1G N320 NSM8 3rd WiFi Europe E0X.0 323G32Mn 3200 WXGA BII6 BII6 GB5.4 1x2 BGN 323G32 VHP32ATE U3 MC...
- Page 109 Acer DIMM DIMM HDD 1 Wireless Blueto VOIP Model Country Part Description (GB) Phone AS5730 Malaysia LX.AU AS5730Z- PMDT N15.4 SO2G SO1G N250 NSM8 3rd WiFi E0X.0 323G25Mn 3200 WXGA BII6 BII6 GB5.4 1x2 BGN 323G25 VHP32ATM Y1 MC UMACE...
- Page 110 Acer DIMM DIMM HDD 1 Wireless Blueto VOIP Model Country Part Description (GB) Phone AS5730 EMEA Greece LX.AU AS5730Z- PMDT N15.4 SO2G SO1G N320 NSM8 3rd WiFi E0X.0 323G32Mn 3200 WXGA BII6 BII6 GB5.4 1x2 BGN 323G32 VHP32ATG R1 MC...
- Page 111 Acer DIMM DIMM HDD 1 Wireless Blueto VOIP Model Country Part Description (GB) Phone AS5730 EMEA Middle LX.AU AS5730Z- PMDT N15.4 SO2G SO1G N320 NSM8 3rd WiFi East E0X.0 323G32Mn 3200 WXGA BII6 BII6 GB5.4 1x2 BGN 323G32 VHP32ATM E2 MC...
- Page 112 Acer DIMM DIMM HDD 1 Wireless Blueto VOIP Model Country Part Description (GB) Phone AS5730 EMEA Switzerland LX.AU AS5730Z- PMDT N15.4 SO2G SO1G N320 NSM8 3rd WiFi E0X.0 323G32Mn 3200 WXGA BII6 BII6 GB5.4 1x2 BGN 323G32 VHP32ATC H1 MC...
- Page 113 Acer DIMM DIMM HDD 1 Wireless Blueto VOIP Model Country Part Description (GB) Phone AS5730 EMEA Belgium LX.AU AS5730Z- PMDT N15.4 SO1G SO1G N160 NSM8 3rd WiFi E0X.0 322G16Mn 3200 WXGA BII6 BII6 GB5.4 1x2 BGN 322G16 VHP32ATB E1 MC...
- Page 114 Acer DIMM DIMM HDD 1 Wireless Blueto VOIP Model Country Part Description (GB) Phone AS5730 EMEA Eastern LX.AU AS5730Z- PMDT N15.4 SO1G SO1G N160 NSM8 3rd WiFi Europe E0X.0 322G16Mn 3200 WXGA BII6 BII6 GB5.4 1x2 BGN 322G16 VHP32ATE U7 MC...
- Page 115 Acer DIMM DIMM HDD 1 Wireless Blueto VOIP Model Country Part Description (GB) Phone AS5730 EMEA Hungary LX.AU AS5730Z- PMDT N15.4 SO1G SO1G N160 NSM8 3rd WiFi E0X.0 322G16Mn 3200 WXGA BII6 BII6 GB5.4 1x2 BGN 322G16 VHP32ATH U1 MC...
- Page 116 Acer DIMM DIMM HDD 1 Wireless Blueto VOIP Model Country Part Description (GB) Phone AS5730 EMEA Italy LX.AU AS5730Z- PMDT N15.4 SO1G SO1G N160 NSM8 3rd WiFi E0X.0 322G16Mn 3200 WXGA BII6 BII6 GB5.4 1x2 BGN 322G16 VHP32ATIT 1 MC...
- Page 117 Acer DIMM DIMM HDD 1 Wireless Blueto VOIP Model Country Part Description (GB) Phone AS5730 EMEA Middle LX.AU AS5730Z- PMDT N15.4 SO1G SO1G N160 NSM8 3rd WiFi East E0X.0 322G16Mn 3200 WXGA BII6 BII6 GB5.4 1x2 BGN 322G16 VHP32ATM E6 MC...
- Page 118 Acer DIMM DIMM HDD 1 Wireless Blueto VOIP Model Country Part Description (GB) Phone AS5330 Thailand LX.AS AS5330- CM57 N15.4 SO1G N120 NSM8 3rd WiFi J0Y.02 571G12Mn WXGA BII6 GB5.4 1x2 BGN 571G12 VHB32ATT H1 MC UMACE 1*1G/120/ 6L/5R/ CB_bgn_0.3...
- Page 119 Acer DIMM DIMM HDD 1 Wireless Blueto VOIP Model Country Part Description (GB) Phone AS5330 LX.AS AS5330- CM57 N15.4 SO1G N120 NSM8 3rd WiFi J0Y.03 571G12Mn WXGA BII6 GB5.4 1x2 BGN 571G12 VHB32ATU S1 MC UMACE 1*1G/120/ 6L/5R/ CB_bgn_0.3 D_HG_EN3...
- Page 120 Acer DIMM DIMM HDD 1 Wireless Blueto VOIP Model Country Part Description (GB) Phone AS5330 ACLA- LX.AS AS5330- CM57 N15.4 SO1G N120 NSM8 3rd WiFi Spanish J0Y.02 571G12Mn WXGA BII6 GB5.4 1x2 BGN 571G12 VHB32ATE A1 MC UMACE 1*1G/120/ 6L/5R/ CB_bgn_0.3...
- Page 121 Acer DIMM DIMM HDD 1 Wireless Blueto VOIP Model Country Part Description (GB) Phone AS5330 India LX.AS AS5330- CM57 N15.4 SO1G N120 NSM8 3rd WiFi J0Y.01 571G12Mn WXGA BII6 GB5.4 1x2 BGN 571G12 VHB32ATIN 1 MC UMACE 1*1G/120/ 6L/5R/ CB_bgn_0.3...
- Page 122 Acer DIMM DIMM HDD 1 Wireless Blueto VOIP Model Country Part Description (GB) Phone AS5330 Malaysia LX.AS AS5330- CM57 N15.4 SO1G N120 NSM8 3rd WiFi J0Y.00 571G12Mn WXGA BII6 GB5.4 1x2 BGN 571G12 VHB32ATM Y1 MC UMACE 1*1G/120/ 6L/5R/ CB_bgn_0.3...
- Page 123 Appendix A...
-
Page 124: Test Compatible Components
Appendix B Test Compatible Components This computer’s compatibility is tested and verified by Acer’s internal testing department. All of its system ® ® ® functions are tested under Windows XP Home, Windows XP Pro environment, Windows Vista. Refer to the following lists for components, adapter cards, and peripherals which have passed these tests. -
Page 125: Microsoft Windows
Specification CRT Port Test CRT Monitor Acer 211c 21”, ViewSonic G220F, ViewSonic PF790 19” LCD Monitor Acer FP751 17” TFT LCD, Acer AL1521, Acer AL1721, ViewSonic VD201b, Westinghouse W37G, HP LP2065, HP S9500 Projector Dell 3300MP USB Port Test USB Keyboard/Mouse... - Page 126 Item Specification PCMCIA Test LAN/Modem Card TDK CardBus Ethernet 10/100 32-Bit CBE-10/100BTX Storage Card Hitachi Microdrive 4G 1394 Card Buffalo 1394 Interface Cardbus (IFC-ILCB/DV) USB2.0 Card IBM EtherJet CardBus Adapter 10/100 Wireless Lan Card Cisco Wireless LAN Card 802.11a (Not recommended for wireless ready NETGEAR Wireless LAN card 802.11a model) ISDN Card...
- Page 127 Appendix B...
-
Page 128: Online Support Information
This section describes online technical support services available to help you repair your Acer Systems. If you are a distributor, dealer, ASP or TPM, please refer your technical queries to your local Acer branch office. Acer Branch Offices and Regional Business Units may access our website. However some information sources will require a user i.d. - Page 129 Appendix C...
- Page 130 Index Features Flash Utility AFLASH Utility fpc cable Antennas FRU (Field Replaceable Unit) List Audio Hard disk Battery Pack 64, 66 Hard Disk Drive Module BIOS vendor Hibernation mode Version hotkey 37–48 BIOS Utility Hot Keys Navigating Onboard Device Configuration 41, 42 Security System Security...
-
Page 131: Troubleshooting
Memory Check Undetermined Problems utility Model Definition 37–48 BIOS Modem Board Motherboard view left Notebook Manager rear hotkey right num lock on indicator Windows 2000 Environment Test Online Support Information Panel Bottom left PC Card Power System Check Battery Pack Power Adapter Processor Screw List...
Need help?
Do you have a question about the Aspire 8730 and is the answer not in the manual?
Questions and answers