Advertisement
INSTRUCTION MANUAL
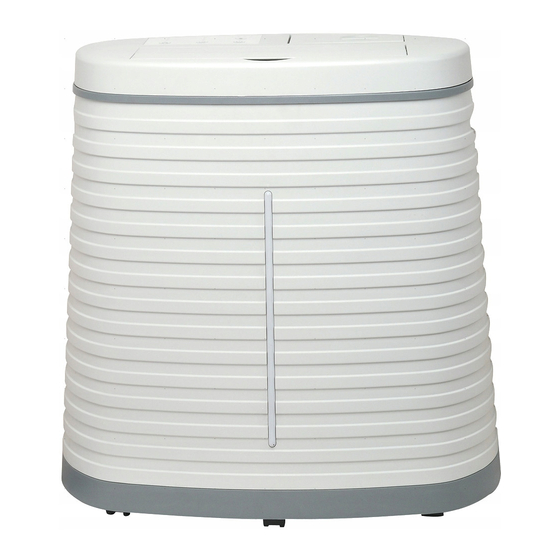
Model No. PCMH45-DW
Congratulations!
We thank you for choosing our PCMH45-DW Humidifier. This equipment
has been designed to bring you comfort with an optimum of energy
saving for a long period of time
Please read this instruction manual before operating and keep safe for
future reference
Get to know your unit.
Read this guide carefully and note all recommended safety precautions
prior to operating and to keep your humidifier in good working condition.
Retain this user guide for future reference.
Advertisement
Table of Contents

Related Manuals for AirTek PCMH45-DW

Summary of Contents for AirTek PCMH45-DW
- Page 1 INSTRUCTION MANUAL Model No. PCMH45-DW Congratulations! We thank you for choosing our PCMH45-DW Humidifier. This equipment has been designed to bring you comfort with an optimum of energy saving for a long period of time Please read this instruction manual before operating and keep safe for future reference Get to know your unit.
-
Page 2: Important Safety Instructions
IMPORTANT SAFETY INSTRUCTIONS WARNING: When using electrical appliances, basic safety precautions should always be followed: 1. a).This product is intended for indoor use ONLY and not for outdoor use.do not place the appliance too close to curtains or other object that are sensible for humid air b).Always empty the water tank before storing the appliance away 2. - Page 3 FOR THE U.K. ONLY BS PLUG WIRING Wiring Instructions: Should it be necessary to change the plug please note the wires in the mains lead are coloured in accordance with the following code: - BLUE – NEUTRAL - BROWN – LIVE - GREEN AND YELLOW - EARTH As the colours of the wires in the mains lead of this appliance may not correspond with the coloured markings identifying the terminals in your plug,...
-
Page 4: Preparation Before Use
PREPARATION BEFORE USE Unpacking your humidifier: • Unpack the unit from the packaging. • Remove the adhesive tape, unlock the top cover with a small coin and take out all the transit packaging materials from inside the unit. Completely unravel the power cord, so as not to damage it. •... -
Page 5: How It Works
HOW IT WORKS This large humidifier is designed to increase the room humidity up to a specified level. Two major systems are employed: 1.Air flow system, which uses an asynchronous motor and axial flow fan to drive the air through the evaporative pads and blow a certain amount of humid air into the room. - Page 6 2. DIRECT WATER CONNECTION INSTRUCTION Using a direct water connector is convenient for continuous supply of water to your humidifier. The tank has a built-in float and valve system to control the water supply. Before use please read these instructions carefully. Please connect the hose tightly onto the connector at the back of the tank using a 25.4mm female screw nut.
-
Page 7: Specification
SPECIFICATION Power 220-240V~50Hz Power consumption 70Watts Air Flow 500m3/h Evaporating Capacity 45 L/24h (at 21°C x 30% RH) Fan Speed 3-Speeds(Hi/Med/Lo) Tank Capacity Approvals CE&GS Product Dimensions (H*D*W) 750*440*745(mm) Shipping Dimensions(H*D*W) 780*455*795(mm) Net Weight 12.4Kg Gross Weight 17Kg WIRING DIAGRAM OPERATION &... - Page 8 4. Press the button to choose a desirable humidity setting. The indicator will show the setting you have selected. In order to keep the room at the selected level of humidity/comfort the unit will cycle ON and OFF. NOTE: L (low) the unit will keep the humidity level around the 30% RH ...
-
Page 9: Care And Cleaning
CARE AND CLEANING Frequent cleaning is necessary to maximize and extend the life of your humidifier. Always disconnect the unit from the wall socket before cleaning and maintenance. 1. Evaporative Pads The humidifier evaporative pads have several functions. They are the most important parts of your humidifier since they perform the following functions: ... - Page 10 2. Water Reservoir Open the humidifier top cap, Remove the airflow direction part, Remove the wheel, carefully Unlock and slide back the water reservoir. Clean all remaining scale with a scouring pad. Relocate water reservoir by smoothly sliding it back till the water reservoir is in the correct position and locked.
- Page 11 WARRANTY: • Do not operate the unit with a damaged cord or plug, after the unit malfunctions, has been dropped or damaged. • For your convenience, record the complete model number and product name (located on the Product Identification Plate), the date you purchased the product, and attach your purchase receipt as proof of purchase.
Need help?
Do you have a question about the PCMH45-DW and is the answer not in the manual?
Questions and answers