Table of Contents
Advertisement
Advertisement
Table of Contents

Related Manuals for ENHANCED VISION DaVinci HD OCR


Summary of Contents for ENHANCED VISION DaVinci HD OCR
- Page 1 User Manual...
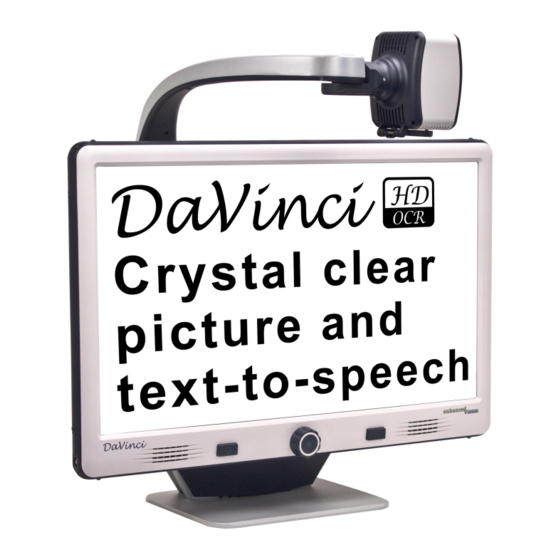
- Page 2 Congratulations on your purchase of the DaVinci HD Magnifier with OCR. Enhanced Vision products are designed to give you the highest quality and convenience available. The DaVinci product can enable people with low vision to read, write, see objects at any distance and have text read to them.
- Page 3 FCC COMPLIANCE NOTICE This device complies with Part 15 of the FCC Rules. Operation is subject to the following two conditions: (1) This device may not cause harmful interference, and (2) this device must accept any interference received, including interference that may cause undesired operation. This equipment has been tested and found to comply with the limits for a Class B digital device, pursuant to Part 15 of the FCC Rules.
-
Page 4: Table Of Contents
TABLE OF CONTENTS Important Safety Precautions ..............5 - 8 DaVinci Setup ....................DaVinci Package Contents ................10 - 11 Using DaVinci ....................12 - 30 Distance, Self, & Desktop Modes ..............12-15 Button Definition .................... Adjusting Magnification ................Changing the Viewing Mode ................ 18-20 Adjusting Brightness &... -
Page 5: Important Safety Precautions
IMPORTANT SAFETY PRECAUTIONS For your safety and to obtain the most benefit from the DaVinci, please read these safety precautions very carefully. The DaVinci is designed to enlarge and enhance images and read print aloud in order to improve the quality of life for people who are visually impaired. - Page 6 To Move the DaVinci to Another Location • Use caution if you are repositioning the DaVinci a short distance across a desk or table. Make sure you do not pull on any power cords or connector cables. Caring for the DaVinci •...
- Page 7 • Follow all warnings, cautions, and instructions marked on the product. • The attached power cord is a disconnect device for electrical equipment. The socket-outlet should be installed near the equipment and be easily accessible. • This product is equipped with a 3-wire grounding type plug as a safety feature.
- Page 8 Compliance Warnings • Electromagnetic compatibility: The use of accessories and cables other than those specified by Enhanced Vision may result in increased emissions or decreased immunity of the DaVinci. • Placement of equipment: The DaVinci should not be used adjacent to or stacked with other equipment.
-
Page 9: Davinci Setup
DAVINCI SETUP 1. Unpacking and transporting the DaVinci. During unpacking and transporting, be sure to lift the DaVinci by the built-in carrying handle. Do not attempt to lift or carry the LCD by the base or the camera arm. (See Figure 1) 2. -
Page 10: Davinci Package Contents
DAVINCI PACKAGE CONTENTS DaVinci is comprised of the following items and features 1. 24” LCD Screen: displays high quality image 2. HD Camera: rotates 340 degrees to capture and enlarge the image 3. Carrying Handle: used for lifting the DaVinci 4. - Page 11 inCi aCkage ontents...
-
Page 12: Using Davinci
USING DAVINCI The DaVinci camera is attached to a specifically designed arm that allows the camera to slide left to right or to pivot in multiple directions. The DaVinci LCD is mounted on to a bracket that allows the user to tilt the screen to adjust for the best viewing position. -
Page 13: Distance, Self, & Desktop Modes
Distance Viewing Mode The camera can rotate forward to capture people, objects and scenery. “Far” is displayed in the upper-right corner of the screen when changing to this viewing angle. Be sure to open the Close-up Lens for Distance Viewing (figure 1). This Distance mode enables magnification for objects 5 feet away. - Page 14 Self Viewing Mode The Camera can be rotated backwards to provide you with the equivalent of a full-length mirror. “Self” is displayed in the upper-right corner of the screen when changing to this viewing angle. In this position, you can use the DaVinci to help you put on make-up, shave or perform other personal hygiene.
- Page 15 Desktop Mode The Camera can be adjusted downward for reading, writing and enjoying crafts or other hobbies. This makes it ideal for classroom use. When the camera is rotated downward, “Desktop” is displayed in the upper-right corner of the screen. The DaVinci can slide freely, left or right, along the specially designed bracket mechanism.
-
Page 16: Button Definition
BUTTON DEFINITIONS utton eFinition... -
Page 17: Adjusting Magnification
Adjusting Magnification The DaVinci offers a large range of magnification capabilities. The following directions can be used with the Front Panel Controls or the DaVinci Control Console. 1. To adjust the magnification turn the zoom wheel located on the Control Console or Front Panel until you reach your desired magnification. -
Page 18: Changing The Viewing Mode
Changing the Viewing Mode The DaVinci was designed to provide optimum viewing for people with certain visual conditions by offering a range of choices in both text and background colors. Use the Mode key located on the Front Panel and Control Console to toggle between full color viewing, Black and White, Enhanced Positive, Enhanced Negative, and up to 5 of your favorite color select modes. - Page 19 VIEWING MODES Full Color Image This mode gives a true color representation of the image being magnified. Black-and-White Image This mode gives a black and white representation of the image being magnified. Enhanced-Positive Image Crisp, Clear Text This mode provides a white background with black text.
- Page 20 Changing Favorite Color Modes The DaVinci provides 28 selectable Color Select Modes and allows selecting up to 5 favorites for use. The following directions can be used to change the favorite color modes on your DaVinci. 1. Press the “Mode” and “Find”...
-
Page 21: Adjusting Brightness & White Balance
Adjusting the Brightness 1. Press the “Mode” and “Find” button located on the Front Panel or Control Console of the DaVinci to enter the Menu. 2. The “Brightness” should already be highlighted. Press the “Find” button to select the brightness adjustment option. 3. -
Page 22: Using & Adjusting Markers
Using Line Markers, Windowing, & Column Markers Line Markers and Windowing Line Markers can be used as a reading guide by providing horizontal lines across the screen. Windowing can be used as a reading guide by only displaying a portion of the screen. Turning Markers On/Off: Pressing the “Marker”... - Page 23 To adjust the size between the Line Markers or size of the Windowing: 1. Press the “Mode” and “Find” button located on the Front Panel or Control Console of the DaVinci to enter the Menu. 2. Turn the zoom wheel until “Marker Size” is selected. Then press the “Find”...
-
Page 24: Volume Adjustment & Vga Toggle
Adjusting the Volume of your Davinci in CCTV mode On the Davinci’s Control Console you can press the Volume buttons to increase or decrease the volume. A message on the top right corner of the screen will display the volume level when adjusting the volume. The Davinci provides up to 10 volume levels. -
Page 25: Ocr/Text-To Speech Mode
OCR/TEXT-TO SPEECH MODE Using the OCR The Davinci provides users with the ability to scan a document placed underneath the camera and read it aloud. OCR/Text-to- Speech is only available in Desktop Mode and when the DaVinci Control Console is plugged in. While in Desktop Mode, place the document under the DaVinci camera as straight as possible. - Page 26 Adjusting Volume • To increase/decrease the volume, Press the on the Control Console. *Note: CCTV and OCR mode volume levels are inde- pendent from each other. Adjusting Reading Speed • To increase/decrease the speed that the OCR will read the document aloud, press the on the Control Console.
- Page 27 OCR Menu Settings Male Voice/Female Voice • Set the DaVinci to read aloud or prompt in a Male or Female Voice. Deskew • When on, the DaVinci will automatically adjust a document when not set straight under the camera. Progress Bar •...
-
Page 28: Saving, Recalling, & Deleting Images
Saving and Recalling Images The DaVinci has the ability to save images from CCTV or OCR modes. This will allow the user to take a snapshot of a document, save it, and view it at a later time. Saving an Image See Page 23 to turn on the Save &... - Page 29 4. Pressing the Find button on the highlighted file will display the image in full screen and begin to read aloud if saved in OCR mode. To exit the Recall Menu back to CCTV mode, press the Capture Button on the DaVinci Control Console.
-
Page 30: Screen Saver
DaVinci Screen Saver When the Screen Saver feature is turned on, the DaVinci will display the date and time on the entire screen if there is no activity for 10 minutes. Any movement under the camera, changing the camera position, or pressing any button on the DaVinci or DaVinci Control Console will revert the DaVinci back to its previous state. -
Page 31: Language Settings
Language Setting The DaVinci supports multiple languages that can be set in the Primary Language menu. Setting the Primary Language The primary language that is set will be the main language for the DaVinci. The prompts that will be displayed on the DaVinci will be in the language that the user selects in this menu. - Page 32 3. Press the “Find” button to turn the “Auto Language” ON or OFF. Turning the “Auto Language” ON will display a list of languages the user can select from.To select an option, turn the zoom wheel to highlight the desired language. Press the “Find” button to select that option. A black box next to that option indicates that that option is ON.
-
Page 33: Troubleshooting
TROUBLESHOOTING The DaVinci is taking a long time to process the document for Text-to-speech. - Disabling the “Deskew” and “Auto Language” in the menu will increase the processing speed. By disabling “Deskew”, the document must be placed under the DaVinci camera as straight as possible. -
Page 34: Davinci Specifications
DAVINCI SPECIFICATIONS Product - Dimensions: • 24” LCD: 22.25” H x 22.75” W x 19.75” D (65.1cm H X 57.8cm W x 50.2cm D) - Product Weight: • 24” LCD: 21.4 lbs (9.7 Kg) Display - Type: 24” Standard Diagonal LCD - Average lifetime: 40,000 hours - Resolution: 1920 x 1080 (24”... - Page 35 Equipment Classification (IEC 601-1) - Type of Protection: Class 1 - Degree of Protection: Type B - Mode of Operation: Continuous - Operating temperature range: 0-40°C / 32-104°F - Storage/transport temperature range: 0-60°C / 32-140°F Warranty: 2 years *Product specifications subject to change without notice peCiFiCations...
-
Page 36: Warranty Information
Enhanced Vision warrants the DaVinci against defects in material and workmanship under normal use for two years from the date of original purchase. Enhanced Vision, at its option, will at no charge either repair the product or replace it during the warranty period. There are no other expressed or implied warranties accompanying this product. -
Page 37: Other Enhanced Vision Products
OTHER ENHANCED VISION PRODUCTS Pebble The Pebble is a handheld electronic video magnifier that you can take anywhere. Weighing less than 8 ounces, Pebble features a uniquely-designed fold- ing handle and includes both near-viewing and table reading modes. Small enough to fit in your pocket or purse, the Pebble is the ideal companion to provide magnification, on the go. - Page 38 Transformer Transformer is the most flexible and portable solution for reading, writing and viewing magnified images at any distance. Compatible with popular magnification software and the latest Windows operating systems. Transformer’s unique design is perfect for work, home or school. Weighs less than 3 pounds. Battery operated up to 4 hours.
-
Page 39: Contact Information
Acrobat LCD With your choice of a built-in 19”,22” or 24” LCD, the Acrobat is a 3-in-1 video magnifier ideal for near, distance and self viewing. By rotating the camera, you can read, write, groom, and magnify images at any distance. The Acrobat LCD offers a complete system for those at work, school or home. - Page 40 +44 (0) 115 9442317 (UK Office) Tel. + (49) (0) 6078 911772 (DE Office) Fax + (49) (0) 6078 911774 (DE Office) Part # MAN-1500-00 X1 Nov, 2012 Copyright © 2009 by Enhanced Vision. All rights reserved. Product specifications subject to change without prior notice.
Need help?
Do you have a question about the DaVinci HD OCR and is the answer not in the manual?
Questions and answers