Table of Contents
Advertisement
Quick Links
Advertisement
Table of Contents

Related Manuals for Atag WIZE


Summary of Contents for Atag WIZE
- Page 1 U s e r m a n u a l ATAG WiZe programmable modulating room thermostat GB / I / TR...
-
Page 3: Table Of Contents
Contents Page Key functions ..............4 Specifications ..............6 Mounting and initial operation ...........9 Mounting ..............9 Initial operation ............11 Manual mode ..............12 Activating manual mode .........12 Manual thermostat mode ........12 Clock program central heating ........14 Activating central heating’s clock program .....14 Set the three required room temperatures .....15 Select a pre-programmed weekly program ....17 Amend the weekly program ........18... -
Page 4: Key Functions
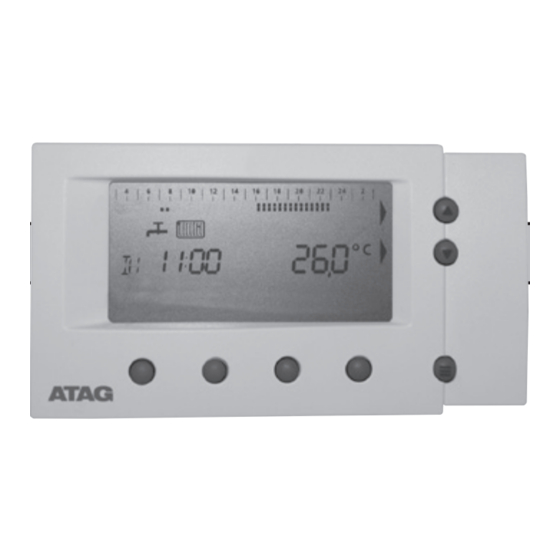
Key functions 1 Time bar (24 hours) of the clock program (from 03.00 to 03.00 hours). The bar displays the day program set. 2 Tap symbol for tap water Comfort/Economy setting. • Symbol visible: Comfort setting always on or switching on/ off automatically. • Symbol not visible: Economy setting. 3 Radiator symbol for central heating operation. • Symbol visible = central heating operation possible. - Page 5 10 Current room temperature (measured). A flashing °C sym- bol indicates that switch-on optimization is active. 11 Menu key . Pressing this key displays the user menu (chapter 5.1 refers). The standard display will reappear when pressing this key again or when no key is being pres- sed for 2 minutes. 12 The arrow symbols become visible when the correspon- ding key has a function.
-
Page 6: Specifications
1. Specifications This chapter explains how the clock thermostat and some of its functions work. • No batteries. • Loss of voltage • Manual mode • Central heating’s clock program. • Self-learning switch-on optimization: Comfortably warm on time. • Additional savings in Economy setting. • On-screen device information. • Modulating central heating control. • Weather dependent control. • Timer function. No batteries For its functioning the clock thermostat receives its energy from the connected boiler. No batteries required. - Page 7 ‘has learned how to work’. Additional savings in Economy setting (Does not apply to ATAG Q-Series) Using the thermostat it is possible to switch any available Com- fort settings for hot water mode on or off. In the Comfort setting the boiler’s hot water input is set to retain its temperature for...
- Page 8 Modulating central heating control The WiZe clock thermostat measures the room temperature and uses it to determine the area’s heat demand. Depending on room temperature the thermostat determines the water temperature required by the boiler. As a result the boiler also determines the capacity required resulting in optimum heat input to the house combined with the lowest energy consump- tion possible.
-
Page 9: Mounting And Initial Operation
2. Mounting and initial operation 2.1 Mounting 2.2 Initial operation 2.1 Mounting A .Choose a suitable location for mounting the thermostat. Suitable mounting location: At a height of approx. 1.5 m, away from windows and doors; on an internal wall without obstacles around the room ther- mostat. - Page 10 B. Remove the rear panel C. Mount the rear panel on the wall (A refers) Use the rear panel as a template to mark the holes! Seal the hole where the wiring originates to prevent likely draught. Use the screws and plugs supplied. D.
-
Page 11: Initial Operation
2.2 Initial operation Plug the boiler’s plug into the socket. When voltage has been supplied to the thermostat for the first time, you will see this screen. Select language (Dutch is default) German and French are also possible, select using arrow keys. Press (OK). You have now set the language. Setting day and time Press (DAY) and the day indicator starts flashing; Set the correct day using the arrow keys;... -
Page 12: Manual Mode
3. Manual mode 3.1 Activating manual mode 3.2 Manual thermostat mode 3.1 Activating manual mode You can also use this thermostat without the clock program being switched on. No clock bar = manual mode If you do not see a clock bar on the screen, then proceed to chapter 3.2. Clock bar visible = clock pro- gram active (automatic). - Page 13 3.2 Manual mode thermostat (clock program not activated) Once the thermostat has been set to manual mode (3.1 refers) you can change the required temperature as follows: The standard screen will display the current room temperature. Press an arrow key once and the set required temperature will start flashing. actual room temperature Increase or decrease the set temperature using the arrow keys and the new required value you see displayed will be set...
-
Page 14: Clock Program Central Heating
4. Clock program central heating 4.1 Activating central heating’s clock program 4.2 Set the three required room temperatures 4.3 Select a pre-programmed weekly program 4.4 Amend the weekly program 4.5 Adjusting temperature temporarily 4.1 Activating clock program for CH Check whether the clock program has been activated: You can activate the clock program as follows: Clock bar visible = clock pro- gram active (automatic). - Page 15 4.2 Set the three desired room temperatures (low – medium – high) Three temperatures can be selected for the clock program con- trolling automatic temperatures, every half hour of the day you can select one of these three temperatures. In the example below the indicated temperatures represent factory settings.
- Page 16 Set the required (middle) temperature T2 using the arrow keys. When you press you will return to the previous screen (factory setting = 20,0°C) (T1); Made a mistake? Press the menu key for the starting screen. The set temperature flashes and is set immediately. Press (»);...
- Page 17 4.3 Select a pre-programmed weekly program To make settings easier 5 week programs have been pre- programmed. Se below (1 to 5 incl.). Here you can select a program best suited to the week program required in the end. Chapter 4.4. tells you how the selected program can be further adjusted.
- Page 18 Made a mistake? Press the menu key for the starting screen. Using the arrow key to select one program (no’s 1 to 5). Following selection press: (OK): Program has been adjusted (CANCEL): Program not adjusted. After this the program menu is displayed again. Continue with chapter 4.4 4.4 Adjusting the weekly program Below please find an example of further adjustment of a pre-...
- Page 19 This clock bar displays the following: - 03:00 - 07:00 hour: T1 (e.g. 17°C) - 07:00 - 16:00 hour: T2 (e.g. 20°C) - 16:00 - 23:00 hour: T3 (e.g. 21°C) - 23:00 - 03:00 hour: T1 (e.g. 17°C) You can adjust the day setting as follows: When you are in the program menu (as shown at *), continue at *). If you are not in the program menu; Press the menu key Press (»); Press (PRG); You are now in the program menu. Made a mistake? Press the menu key for the starting screen. MA = Monday.
- Page 20 Press ((NONE). Now, using the arrow keys, you can run through the time bar without the temperature changing. Use the arrow key to proceed to 8.00 hours; Press (SET); Press (T2); Use the key to run through the time bar until 16:00 hours appears on the screen. The small blocks which are no longer flashing have been set, i.e. for 7:00 to 16:00 hours inclusive T2 has been...
- Page 21 Run through the time bar using the arrow keys until 23:00 hours inclusive; Press (SET); Press (T3); Run through the time bar using the key up until 00:00 hours inclusive; The small blocks that are no longer flashing have been set. Consequently, for 16:00 to 00:00 hours inclusive (=24:00) T3 has now been set. Straightaway the change has now been implemented. Copy day program to the following day When the screen shows MA you can use the arrow keys in the time bar to proceed to the next or previous day.
- Page 22 Summary setting of week program The screen displayed in the PROGRAM MENU. Consecutively press (»), (PRG) and you will see the program menu; Press (SET) and here select ‘NONE’ if you wish to go to a certain time without changing anything. Run through the time bar with the arrow keys The clock’s time is running along just like the small flashing blocks in the time bar.
- Page 23 4.5 Temporary adjustment of the temp. (with activated clock program) You can temporarily adjust the temperature as follows: On the screen you se the current room temperature. Press once on an arrow key You now see the program- med temperature (required). Using the arrow keys you increase or decrease the programmed temperature (by 0.5°C). After 6 seconds the screen returns to its original situation (or after pressing the menu key (...
-
Page 24: User Settings
5. User settings This chapter explains how you can adjust certain settings. It gives recommendations with which you yourself can determine the best setting for your installa- tion. At the same time it explains how you can read information from the boiler, such as boiler pressure. 5.1 Summary of user menu 5.2 Comfort / Economy setting 5.3 Using central heating timer... - Page 25 5.2 Setting Comfort - / Economy setting (hot water) (with exception of Q-Series) When the boiler has that facility, the thermostat can be used to set the boiler’s hot water function to Comfort or Economy. Check the boiler’s manual for any settings required for this pur- pose. What does the Comfort/Economy setting imply? Most combination boilers have a function to supply hot water quickly, the so-called Comfort setting (with exception of the Q-series).
- Page 26 2 Continuous Economy: (Tap symbol not visible). (= Comfort off) (=Comfort OFF) Press Press (DHW); Press (OFF); 3 Automatic switching between Comfort/Economy settings in accordance with central heating’s clock program During the day the Comfort setting is on (during T2 and T3) and at night the Economy setting (during T1). Of course this only works when the central heating’s clock program has been activated: the time bar has to be visible at the top of the screen.
- Page 27 Press (AUT); You are now returning to the standard screen. 4 Automatic switching between Comfort/Economy settings in accordance with own hot water clock program Using this option you can determine when you want the boiler set to Comfort and when to Economy, automatically 7 days a week.
- Page 28 Press Press Press (PRG). If you do not see this screen, refer to previous section. Press (DHW); Press (PRE); Use arrow keys to select program 1 or 2. Refer to fol- lowing information. Then press You may select 2 pre- programmed day programs.
- Page 29 5.3 Use the central heating’s timer (party program) Only when the central heating’s clock program is active you can temporarily set a different temperature using the central heating’s timer. With a minimum of 30 minutes and maximum of 12 hours. Press Press (»); Press (TMR); Press (TIME); Using the arrow keys set the required duration of the period during which you wish to retain the temperature (e.g.
- Page 30 If you wish to end the set time earlier, just select the previous setting. Press Press (CH); a If you do use the clock program: Press (AUT) (clock bar is again visible on the screen). bIf you do not use the clock program: Press (ON);...
- Page 31 1. Outside temperature. If _ _ _°C appears on the screen, then there is no outside sensor connected or it is not working. previous next 2. Pressure of central heating installation. The correct pressure has to be between 1.4 and 1.7 bar. Also have a look at the boiler to read the water pressure allowing you a proper check and top up if required. You may also refer to...
- Page 32 5.5 Adjusting DHW and CH set point All ATAG boilers allow for adjustment of the hot water tem- perature setting (= tapwater setpoint) and maximum central heating temperature (= central heating setpoint). When the WiZe thermostat is connected to the boiler, these adjustments may be set on both the boiler and thermostat. The last setting is always the current setting, regardless of where (boiler or thermostat) the setting has been activated.
- Page 33 You can adjust the tapwater setpoint as follows: Press Press (»); Press (SET); Press a number of times on (») until you see DHW SETP. DHW SETP = DHW-setpoint (= control value for hot water temperature). Recommendation: Do not change the setpoint ATTENTION! This setting if it is not urgently required. is not the same as the hot water temperature coming out of the tap.
- Page 34 5.6 Overview of settings menu Settings for the room thermostat and boiler. Press Press (»); Press (SET); Using the arrow keys ( ) you can change the settings. ATTENTION! When the on-screen value changes, then it has been adjusted instantly. Standard Range ROOM T1 1st temperature for the clock pro- 15,0...
-
Page 35: Resetting The Exact Day And Time (E.g. Summer/Winter Time)
5.7 Resetting the exact day and time (e.g. summer/winter time) You can set the right time as follows: Press Press (»); Press (CLOCK); Press (DAY) and the day indicator starts flashing. Set the correct day using the arrow keys Press (HOUR) and the hour indicator starts flashing. Set the correct hour using the arrow keys Press (MIN) and the minute’s indicator starts... -
Page 36: User Recommendations / Holidays
5.8 User recommendations / holidays Keep radiators placed in the area with the room thermostat always open. The actual temperature and room temperature measured by the thermostat may differ slightly depending on the installation and position of the room thermostat . This may be the case, for instance, when the thermostat is mounted on an outside wall. - Page 37 Prevent freezing of your central heating installation When the thermostat has been switched off for both the Com- fort setting and the central heating (the (!) symbol is visible), the thermostat will keep room temperature at a minimum of 5°C (Frost prevention). This is the case when ‘UIT’ (OFF) has been selected in the central heating menu and the tapwater menu.
- Page 38 The boiler comes on earlier than the time set on the cen- tral heating’s clock program. • The thermostat will want to reach the required temperature at the time set. As a result the boiler will start heating up ear- lier, this is the so-called self-learning switch-on optimization (chapter 1 refers).
- Page 39 Display faults on the thermostat’s screen The thermostat can also relay boiler faults. Therefore, first check whether the fault is not caused by the connected boiler. Refer to the boiler’s manual for additional explanation regar- ding the boiler fault. If it reads “Err” instead of the temperature then there is so- mething wrong with the boiler’s thermostat.
- Page 40 Press (»); You can see the boiler’s error-history. When you press (») you will see a list of errors that occurred in the past. Press the menu key ( ) and you will return to the standard screen. Refer to the boiler’s manual to see a description of the codes.
-
Page 41: Dismantling And Loss Of Voltage
Dismantling and loss of voltage Loss of voltage The thermostat works without batteries and obtains its required energy via the boiler. When the thermostat is removed from its mounting plate, all settings are stored in the memory. Only after an interruption of approximately 4 hours do you have to reset the day and time. Dismantling Disconnect the boiler from the mains (pull the plug from its socket or use the on/off button). -
Page 42: Technical Specifications
7 Technical specifications Technical specifications dimensions (hxwxd): 77,5 x 155 x 28 mm weight: approx. 136 grams electrical supply: nominal approx. 5V (from connected boiler) communication protocol: Z-bus (OpenTherm) electrical connection: 2-wire, polarity insensitive IP-class: IP30 storage conditions: 0-40°C / 10-90% humidity (no condensation) clock function tolerance: ±10 minutes /year room temperature tolerance: ± 0.5°C This revised publication supersedes all previous installation instructions. You may download an actual digital version from www.ataghe- ating.co.uk... - Page 44 We reserve the right to make changes • Wijzigingen voorbehouden Sous réserve de modifications • Änderungen und Irrtümer vorbehalten www.atagheating.com...
Need help?
Do you have a question about the WIZE and is the answer not in the manual?
Questions and answers