ALC OBSERVER AWS3266 User Manual
Alc observer aws3266 7" connected touch screen wireless surveillance system
Hide thumbs
Also See for OBSERVER AWS3266:
- Quick start manual (4 pages) ,
- Quick start manual (3 pages)

Subscribe to Our Youtube Channel
Related Manuals for ALC OBSERVER AWS3266

Summary of Contents for ALC OBSERVER AWS3266
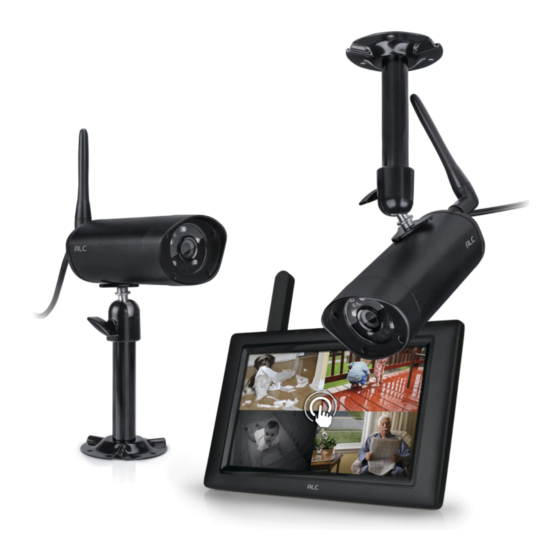
- Page 1 7" Connected Touch Screen Wireless Surveillance System Model AWS3266 User Guide Please read these instructions completely Wireless Made Simple. before operating this product.
-
Page 2: Table Of Contents
TABLE OF CONTENTS IMPORTANT SAFETY INSTRUCTIONS ................3 INTRODUCTION ........................6 System Contents .......................6 Getting to Know Your LCD Touch Screen Monitor .............7 Getting to Know Your Docking Station ................8 Getting to Know Your Camera ...................8 INSTALLATION ........................9 Installation Tips ......................... 9 Night Vision ........................9 Setting Up the Monitor .....................10 Installing the Camera(s) ....................12... -
Page 3: Important Safety Instructions
Connecting to the Intranet (Home Network) ..............54 (servicing) instructions in the literature accompanying the appliance. Downloading the ALC Observer App ................55 ALC Observer Android Setup Wizard ................56 WARNING: TO PREVENT FIRE OR SHOCK HAZARD, DO NOT EXPOSE THIS UNIT TO RAIN OR MOISTURE. - Page 4 IMPORTANT SAFETY INSTRUCTIONS IMPORTANT SAFETY INSTRUCTIONS Recycling and Disposal Information: Uninterruptible Power Supplies (UPS) - Because this product is designed for continuous, 24/7 operation, it is recommended that you connect the product to an uninterruptible power supply. An • Do not dispose of electronic devices or any of their components (especially uninterruptible power supply has an internal battery that will keep the product running in the event of a batteries and LCD displays) in your municipal trash collection.
-
Page 5: Introduction
INTRODUCTION INTRODUCTION System Contents Getting to Know Your LCD Touch Screen Monitor After unpacking, you will have the following items: FRONT Monitor Touch Screen Monitor x 1 Docking Station x 1 Docking Socket REAR Antenna Camera x 2 Antenna x 2 Camera Bracket x 2 Power Button SD Card Slot... -
Page 6: Getting To Know Your Docking Station
INTRODUCTION INSTALLATION Getting to Know Your Docking Station Installation Tips WARNING: Internet Jack Weatherproof, IP66 rated cameras are suitable for outdoor installation. However, if possible, it is recommended to install in a location that provides some shelter from the elements, such as beneath roof eaves. Monitor Dock Power Jack •... -
Page 7: Setting Up The Monitor
INSTALLATION INSTALLATION Setting Up the Monitor Setting Up the Monitor TIP: You can skip the AC adapter step if the unit Insert an SD Card (up to 32GB) into is charged and you want to use the unit using the the SD Card Slot. -
Page 8: Installing The Camera(S)
INSTALLATION INSTALLATION Installing the Camera(s) Installing the Camera(s) If not mounting, but just using on a flat Screw Antenna clockwise into rear of surface (desk, table, etc.), skip to step 4. camera. Secure the multi-position camera bracket to a stable surface, ceiling or wall using the three screws. -
Page 9: System Introduction
SYSTEM INTRODUCTION SYSTEM INTRODUCTION Live Screen and Menu Description of Icons Icon Icon Description Your monitor’s system software operates through a series of screens that let you choose groups of operations. For example, when you tap on the camera icon in the Pop-up menu, you Camera Mode Select how you want the Live screen to display camera can set how you want the main viewing screen (“Live screen”) to display images from the paired... - Page 10 SYSTEM INTRODUCTION SYSTEM INTRODUCTION Description of Icons Description of Icons Icon Icon Description Icon Icon Description Internet Status Motion Detection Status Appears in LIVE view. Indicates connection to the System indicates motion detection recording in progress. internet/intranet is in progress. See page 28 for more details.
-
Page 11: Live Screen Displays
SYSTEM INTRODUCTION SYSTEM INTRODUCTION Live Screen Displays Zoom Feature The Live screen displays in two views - Quad View or Full View. Quad View divides the screen’s image area into four quadrants and displays camera video in each quadrant. If less than four You cannot Zoom In or Out in cameras are connected and on, only those cameras’... -
Page 12: Recording Live Video
SYSTEM INTRODUCTION SYSTEM INTRODUCTION Recording Live Video Playing Back a Recorded Video To record live video: Make sure an SD card is Tap the Pop Up Menu tab to inserted into the SD Card Slot, access the Menu options. see page 11. TIP: You cannot record while in the Full view, you must be in the Quad view. -
Page 13: Deleting A Recorded Video
SYSTEM INTRODUCTION SYSTEM INTRODUCTION Playing Back a Recorded Video Deleting a Recorded Video Tap on any area of the screen 08-27-2014 10 : 22 AM that does not have control Tap the Pop Up Menu tab to icons to bring up the playback access the Menu options. -
Page 14: System Menu
SYSTEM MENU SYSTEM MENU System Menu Camera Pairing Your cameras are paired to the monitor at the factory to channels 1 and 2. When you add a new camera to your system, you have to “introduce” the camera and monitor to each other so Tap the Pop Up Menu tab to they can communicate. -
Page 15: Turning The Camera On Or Off
SYSTEM MENU SYSTEM MENU Turning the Camera On or Off Adjusting Brightness After adding a camera, it will automatically be active (On) in this setting. To turn the camera on To adjust a camera’s brightness, perform the following: or off, perform the following: Follow steps 1 through 3 on page Follow steps 1 through 3 on page 24 to access the System Setup. -
Page 16: Motion Detection
SYSTEM MENU SYSTEM MENU Motion Detection Email Alert This setting will allow you to set the Sensitivity options for motion detection. This system can notify you when it detects motion from any camera by sending you an email alert. The email alert contains information such as the time that motion was detected and by which camera. -
Page 17: Schedule Record
SYSTEM MENU SYSTEM MENU Email Alert Schedule Record Tap Enable to enable or Disable You can schedule up to five recording sessions. The total recording time available is limited to to disable Email alerts. the size of your SD card. A higher capacity SD card will provide more recording time. These recording sessions must begin and end within a single 24-hour period;... -
Page 18: Clearing A Scheduled Recording
SYSTEM MENU SYSTEM MENU Schedule Record Clearing a Scheduled Recording Set the recording start time. Follow steps 1 through 3 on page Tap the hour and number boxes 24 to access the System Setup. separately and use the UP and Tap Recorder Setup to access DOWN arrows to scroll through the Recorder Setup screen. -
Page 19: Network Setup
SYSTEM MENU SYSTEM MENU Network Setup Security Code Use the Network Setup to select the Internet Type, set the Security code and display System Set a security code to limit access to the system from remote locations. Default Configurations. To Setup an Internet connection and to use any features with Internet, connect the monitor to the Docking Station. -
Page 20: Network Information
SYSTEM MENU SYSTEM MENU Network Information Alarm Setup – Siren Period The Network Information page will display important information about your network Set the duration the alarm will sound as follows: connection. It is especially important to note the DID number in order to use with remote access. -
Page 21: Alarm Setup - Siren Melody
SYSTEM MENU SYSTEM MENU Alarm Setup – Siren Melody System Setup – Power Saving Set the siren melody as follows: Set the Power Saving Mode as follows: Follow steps 1 through 3 on page Follow steps 1 through 3 on page 24 to access the System Setup. -
Page 22: System Setup - Screen Auto Lock
SYSTEM MENU SYSTEM MENU System Setup – Screen Auto Lock System Setup – Setting the Time When you turn on Auto Lock mode, the monitor will automatically enter Screen Lock mode Set the time as follows: after it has been idle for two minutes. Auto Lock disables the touch screen and removes the icons from the display. -
Page 23: System Setup - Setting The Alarm
SYSTEM MENU SYSTEM MENU System Setup – Setting the Alarm System Setup – Setting the Alarm The alarm is independant of the system operation (recording, etc.) and will not affect it. Set the alarm as follows: Tap on the desired setting (Hour, Follow steps 1 through 3 on page Minutes or AM/PM) and set using 24 to access the System Setup. -
Page 24: System Setup - Setting The Time Zone
SYSTEM MENU SYSTEM MENU System Setup – Setting the Time Zone System Setup – Storage Management Set the time zone as follows: Storage Management lets you reformat your SD card (erasing all records) or allow new video records to copy over older records when the SD card is full. Overwrite erases the oldest record to free space for the new file. -
Page 25: System Setup - System Upgrade
SYSTEM MENU SYSTEM MENU System Setup – System Upgrade System Setup – Default Language It is important to make sure the firmware is up to date with the latest version. To upgrade the English is the default language. When you change languages, all system settings default to the firmware, do as follows: original factory settings. -
Page 26: System Setup - Frequency
SYSTEM MENU SYSTEM MENU System Setup – Frequency Quick Tips It is important to select the desired frequency of your electric outlet (50Hz or 60Hz) as follows: The Quick Tips screen provides additional details on important subjects of system operation. Tap on a subject to display the information. -
Page 27: Adjusting The Alarm And Overall Volume
ADJUSTING THE ALARM AND OVERALL VOLUME REMOTE ACCESS Overview Adjust the volume of alarms as well as the volume of the overall sound as follows: This camera system allows you view live video from an iPhone ® , iPad ® , iPod Touch ®... -
Page 28: Connecting To The Internet
REMOTE ACCESS REMOTE ACCESS Connecting to the Internet Connecting to the Internet The docking station charges your monitor as well as provides an internet connection. A screen asks if you want to connect to the internet or only IMPORTANT NOTES: charge the monitor. -
Page 29: Connecting To The Intranet (Home Network)
Ethernet cable into the back of the From your Android smartphone or tablet device, go docking station and the other end to to Google Play and search for ALC Observer. See the your primary router (from your internet following page. -
Page 30: Alc Observer Android Setup Wizard
Also make sure the camera and docking station are connected to the internet (see page 52) or intranet (see page 54). Launch the ALC Observer App and the Setup Wizard screen will appear. Tap “+” to start the Wizard. The Android Device will now search ALC Observer Apple Setup Wizard for the camera. -
Page 31: Alc Observer App Icons
REMOTE ACCESS REMOTE ACCESS ALC Observer Apple Setup Wizard ALC Observer App Icons The Apple Device will now search for the camera. MAIN SCREEN The following icons appear when on the Main screen. Tap the arrows to access the live video screen. - Page 32 REMOTE ACCESS REMOTE ACCESS ALC Observer App Icons ALC Observer App Icons Icon Icon Description Icon Icon Description Add System Capture Tap this icon to enter the set up wizard; see page 56 for Tap to capture screen images. The snapshots will be Android devices or page 57 for Apple devices.
-
Page 33: To Take Snapshots
REMOTE ACCESS REMOTE ACCESS To Take Snapshots To Take Snapshots Tap the Capture icon to take a From the main screen, tap to remote view your camera system. snapshot of the current image. To View Snapshots For Apple: Your snapshots will be named with the time stamp and saved into the Camera Roll >... -
Page 34: To View And/Or Take Videos
REMOTE ACCESS REMOTE ACCESS To View and/or Take Videos To View and/or Take Videos Tap the Record icon to start recording. From the main screen, tap to remote view your camera system. The App will record for 2 minutes. Select a camera by tapping the Camera pull down menu (Camera 1 - 4). -
Page 35: To Play Videos
REMOTE ACCESS REMOTE ACCESS To Play Videos To Play Videos From the main screen, tap the Select the desired Start Time/Date of Settings icon. the videos you want to view by tapping on the respective option (date or time) and then tapping “+” or “-” to adjust. When finished, tap Done. -
Page 36: To Delete Videos
REMOTE ACCESS REMOTE ACCESS To Play Videos To Delete Videos Tap the video name once to play the Access the Events List as shown on video clip. pages 66 and 67. When playing back a video, tap the Pause Tap the Edit Icon. icon to pause the video. -
Page 37: Information Screen Options
REMOTE ACCESS REMOTE ACCESS To Delete Videos Information Screen Options To Delete All Files, tap the Delete All From the main screen, tap the Information icon, a pop up will appear. icon. A pop-up box will appear asking you to confirm;... - Page 38 Launch Settings/System Preferences from your Home screen on the Apple device. Tap Notification Center; a list of Apps will appear. Scroll down to find “ALC Observer” App and click on it. The setting screen displays. Turn the notification ON or OFF as desired.
-
Page 39: Did Setting Screen
REMOTE ACCESS REMOTE ACCESS DID Setting Screen Information Screen Options From the main screen, tap the Settings icon. Using the keyboard, enter a four digit code. Then confirm this exact code. Now that the pin is set and enabled, whenever the App is opened you must enter this code. -
Page 40: Maintenance
REMOTE ACCESS MAINTENANCE DID Setting Screen Monitor As you use your touch-screen monitor, fingerprints, etc. will appear on the screen. Keep the screen clean by wiping it with a microfiber cloth. It is not recommended to use any chemicals or Simply tap on a field to change it. -
Page 41: Troubleshooting
TROUBLESHOOTING TROUBLESHOOTING If you have any trouble with your system, try these simple steps which should handle most common issues. Problem Possible Solution Problem Possible Solution Screen lock may be on. Tap the Power button to unlock Screen lock may be activated, tap the power button to Live screen has no icons. -
Page 42: Product Specifications
PRODUCT SPECIFICATIONS PRODUCT SPECIFICATIONS Camera Battery Communication Range ............500 ft (164 yards) in open space The LCD monitor contains a rechargeable battery pack. If the power supply adapter is kept connected to the monitor then the battery will begin recharging until fully charged. The monitor Camera Resolution Single Camera ................ -
Page 43: Warranty
PROCEDURE FOR OBTAINING PERFORMANCE OF WARRANTY: If, after following the instructions return it to you without charge for parts, service, or any other cost. ALC, at its option, may replace the unit with a new or sold by ALC, (C) improperly installed, (D) serviced or repaired by someone other than an authorized in the owner’s manual you are certain that the Product is defective, pack the Product carefully... - Page 44 Wireless Made Simple. ALCWireless.com Wireless Made Simple. ALCWireless.com 102914_v1.2...
Need help?
Do you have a question about the OBSERVER AWS3266 and is the answer not in the manual?
Questions and answers