Table of Contents
Advertisement
Available languages
Available languages
Quick Links
Advertisement
Table of Contents

Related Manuals for Atlantis DiskMaster NAS G502D


Summary of Contents for Atlantis DiskMaster NAS G502D
- Page 2 On-Center Garantie gedeckt. Für weitere Informationen, beziehen Sie sich bitte auf Web Site www.atlantis- land.com. ESPAÑOL Este producto està cubierto de garantía Atlantis On-Center por 2 años. Para una información más detallada, se refiera por favor al Web site www.atlantis- land.com.
-
Page 3: Table Of Contents
ITALIANO 1. Panoramica di Prodotto ..................10 1.1 Caratteristiche Principali ................10 1.2 Verifica Iniziale ..................11 1.3 Requisiti di sistema ..................11 1.4 Contenuto della confezione................. 12 1.5 Dove posizionare il Disk Master ..............12 1.6 Disk Master Applicazione ................13 1.7 I LED frontali e le porte posteriori ............... - Page 4 1.10 Mapping a Network Drive ................. 48 Mapping a Network Drive in Windows XP ............48 Mapping a Network Drive in Windows Vista/7 ............ 49 APPENDIX A: Troubleshooting ................50 A.1 Using LEDs to Diagnose Problems ............... 50 A.1.1 Power LED ..................50 A.1.2 LED Link ..................
- Page 5 Atlantis. Tutti i nomi di produttori e dei prodotti e qualsiasi marchio, registrato o meno, menzionati in questo manuale sono usati al solo scopo identificativo e rimangono proprietà...
- Page 6 Il software di backup, ove presente, è dato in licenza. Atlantis non offrirà supporto sull’utilizzo né potrà essere ritenuta responsabile per malfunzionamenti e/o perdita di dati da questo generati.
- Page 7 I gommini in gomma/plastica possono danneggiare la superficie con cui sono a contatto. Utilizzare solo i cavi specifici per le applicazioni. Utilizzare le porte indicate senza forzare. Verificare regolarmente che tutti i cavi di connessione non siano danneggiati. In caso lo fossero sostituirli immediatamente.
- Page 8 Atlantis, in qualità di produttore di questa apparecchiatura, è impegnato nel finanziamento e nella gestione di attività di trattamento e recupero dei rifiuti di apparecchiature elettriche ed elettroniche compatibili con l'ambiente e con la salute umana.
- Page 9 (Fast Swap, On Site e On Center) è opportuno provvedere alla registrazione dello stesso sul sito www.atlantis- land.com entro e non oltre 15 giorni dalla data di acquisto. La mancata registrazione entro il termine di sopra farà si che il prodotto sia coperto...
-
Page 10: Panoramica Di Prodotto
Grazie per aver acquistato DiskMaster G502D. Grazie alla velocità offerta, l’ampia capacità di stoccaggio, la facilità d’uso ed il supporto di numerose applicazioni, DiskMaster rappresenta la soluzione ideale per ogni necessità di immagazzinamento dati. 1. Panoramica di Prodotto 1.1 Caratteristiche Principali Condivisione dei dati nella rete Locale o attraverso Internet in tutta sicurezza DiskMaster è... -
Page 11: Verifica Iniziale
Il bottone USBCopy permette di effettuare con un solo clic un veloce backup dei dati da un dispositivo di archiviazione USB (come un dispositivo USB flash, un lettore schede USB o un disco USB esterno), verso DiskMaster. Apache/PHP/MySQL Con il supporto integrato di Apache/PHP/MySQL, il dispositivo può funzionare come un vero e proprio server WEB ospitando un sito di media complessità. -
Page 12: Contenuto Della Confezione
1.4 Contenuto della confezione Prima di utilizzare il prodotto verificare che la confezione contenga: Un DiskMasterG502D Dual Bay Network Storage Un cavo RJ45 CAT5 Una guida rapida multilingua (Italiano, Inglese) Un CD contenente driver, utilità, software,manuale dell’utente e SmartSync ... -
Page 13: Diskmaster Applicazione
1.6 DiskMaster Applicazione In figura un esempio tipico di applicazione. Il bottone USBCopy permette di effettuare con un solo clic un veloce backup dei dati da un dispositivo di archiviazione USB (come un dispositivo USB flash, un lettore schede USB o un disco USB esterno), verso DiskMaster. -
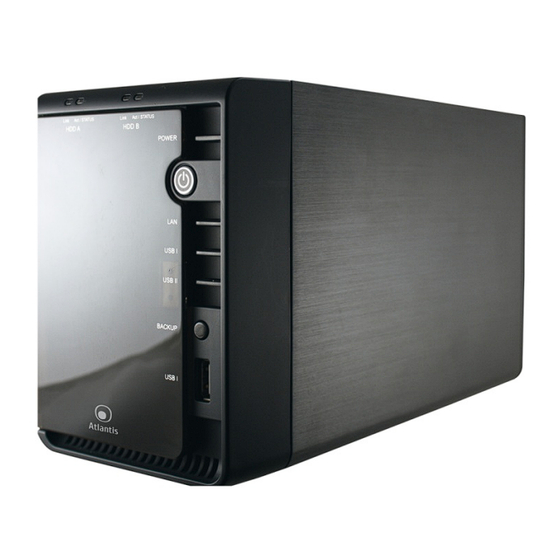
Page 14: I Led Frontali E Le Porte Posteriori
1.7 I LED frontali e le porte posteriori PORTE/Bottoni/LED UTILIZZO/INFORMAZIONE HDD A Led Indica, se acceso, la presenza del disco nell’apposito Slot. Se lampeggiante il disco sta trasferendo dati. HDD B Led Indica, se acceso, la presenza del disco nell’apposito Slot. -
Page 15: Led Display
USB 2 LED Indica, se acceso, che nella porta USB 2 è collegata una periferica. Backup Button Bottone per attivare il backup dalle porte USB 1 e 2. Porta USB I Porta USB Numero 1. Connettore Connettere l’alimentatore (DC, 12V@3A) a questo Alimentatore jack. -
Page 16: Settaggi Di Default
Prima di iniziare la configurazione del DiskMaster è necessario conoscere i settaggi di default. Utilizzando questi settaggi è possibile rendere operativo l’apparato in pochissimo tempo. Per una configurazione dettagliata fare riferimento al manuale presente sul CD. Le configurazioni di Default del DiskMaster NAS G502D sono: Username: sysadmin ... -
Page 17: Inserimento Dei Dischi
1.10 Inserimento dei dischi Seguire le istruzioni seguenti per l’inserimento dell’ Hard Disk nel DiskMaster. Aprire lo sportello anteriore ed estarre i 2 cassetti (schiacciare il bottone per far inclinare la leva di bloccaggio). Rimuovere le 4 viti fissate nella parte posteriore del cassetto (figura 1) ... -
Page 18: Formattazione Degli Hard Disk
1.11 Formattazione degli Hard Disk A questo punto è opportuno procedere alla formatazione del disco (o dei dischi) inserito nell’apparato. Per fare questo è opportuno accedere alla configurazione via Web del Diskmaster. Digitare pertanto l’indirizzo IP nel browser Per conoscere questo indirizzo IP è possibile seguire una delle seguenti 3 metodologie: Se sulla rete non è... - Page 19 Utilizzare sysadmin (come nome utente) e atlantis (come password). Cliccare su Login per continuare. Cliccare OK nel caso si desideri una configurazione RAID (devono essere presenti 2 dischi), oppure su Cancel per utilizzare una configurazione a singolo disco.
-
Page 20: Formattazione Di Un Hard Disk In Modalità Non Raid
Il dispositivo supporta le seguenti modalità RAID: RAID 0: Ideale per applicazioni in cui la velocità è il fattore più importante. Questa tipologia di RAID non è ridondante limita scrivere l’informazione segmentandola su entrambi i dischi (da ciò risulta una grande velocità... - Page 21 Cliccare su Format e poi confermare l’operazione rispondendo affermativamente alle finestre seguenti. Verrà mostrata una finestra con un indicatore di avanzamento. La formattazione include il processo di Disk Partition, Disk Formatting e System Build up. Il tempo dipende dalla dimensione dei dischi installati. Terminato il processo verrà...
-
Page 22: Formattazione Di 2 Hard Disk In Modalità Raid
Il processo di formattazione può durare anche sino a 60 minuti, durante tale lasso di tempo non fare nulla. Laddove siano presenti 2 dischi (in modalità non RAID) consultare il manuale per maggiori dettagli. La formattazione distruggerà tutti i dati presenti sull’Hard Disk. Accertarsi di aver effettuato il backup dei dati importanti prima di procedere. - Page 23 dipende dalla dimensione dei dischi installati. Terminato il processo, cliccare su OK nella finestra a video, per passare alla schermata di sotto. Saranno inoltre disponibili i menù GUI e Server. Cliccare su System->Hard Disk Management->Hard Disk Configuration per avere accesso ai dettagli del disco. Il sistema mostrerà...
-
Page 24: Connessione Di Rete
1.12 Connessione di rete DiskMaster crea un utente (sysadmin, atlantis) abilitato in tutte le cartelle comuni (se attivate) sia in FTP che Samba. La cartella public viene creata di default. Prima di creare una conessione di rete è opportuno verificare che il servizio File Server (Samba/CIFS). -
Page 25: Creazione Della Connessione Remota In Windows Vista
In caso di problemi è possibile forzare direttamente l’indirizzo IP dell’apparato per la mappatura di un’unità di rete usando la sintassi: \\Indirizzo IP\public nel campo Cartella. Cliccare su nome utente diverso ed immettere username e password (sysadmin, atlantis). Cliccare su OK. Cliccare poi su Fine. -
Page 26: Creazione Della Connessione Remota In Windows 7
Nella finestra successiva cliccare su Usa un altro account e immettere username e password (sysadmin, atlantis). Spuntare la voce Memoriza Credenziali e cliccare poi su OK. A questo punto è possibile accedere al disco inserito nel DiskMaster (utilizzando la cartella public) come fosse un disco del proprio PC. -
Page 27: Appendice A: Risoluzione Dei Problemi E Supporto
Accendere il dispositivo premendo il tasto ON/OFF dell’apparato per almeno 3 secondi o fino a che il LED Power è acceso. Se il problema dovesse persistere contattare l’assistenza tecnica Atlantis. A.1.2 LED Link Il LED LAN non si accende. Steps... -
Page 28: Interfaccia Web
Le configurazioni di Default del DiskMaster sono: Username: sysadmin Password: atlantis Indirizzo IP: Ottenuto via DHCP, (Qualora non sia disponibile in rete un server DHCP l’indirizzo IP sarà 192.168.1.251 e Subnet Mask 255.255.255.0). -
Page 29: Varie
Pur potendo pingare il dispositivo, non è possible accedere alla configurazione Web. Steps Azione correttiva Provare da un PC differente. Disattivare tutti i Firewall/Antivirus Se i problemi persistono effettuare un reset dell’apparato. A.4 Varie Il dispositivo sembra non memorizzare la configurazione impostata, ad ogni riavvio carica sempre le impostazioni di default? Steps Azione correttiva... -
Page 30: Supporto Offerto
La struttura dei dischi deve essere come quella in figura: A.5 Supporto Offerto Per qualunque altro problema o dubbio sul funzionamento del prodotto, è possibile contattare il servizio di assistenza tecnica Atlantis tramite l’apertura di un ticket on- line sul portale http://www.atlantis-land.com/ita/supporto.php Nel caso non fosse possibile l’accesso al portale di supporto, è... - Page 31 Declaration of Conformity ( Hereby, Atlantis SpA, declares that this Dual Bay NAS is in compliance with the essential requirements and other relevant provisions of Directive 2004/108/EC “Electromagnetic Compatibility”...
-
Page 32: Safety Information
Limited Warranty back up the Our warranties (for hardware and software) do not cover data loss – contents of your drive to a separate storage medium on a regular basis . Also, consequential damages; incidental damages; and costs related to data recovery, removal and installation are not recoverable under our warranties. - Page 33 PS.: The above mentioned information are reported herewith in compliance with Directive 2002/96/CE, which requires a separate collection system and specific treatment and disposal procedures for the waste of electric and electronic equipments (WEEE). For further and more detailed information, we invite you to visit our website at www.atlantis-land.com...
-
Page 34: Product Overview
Thank you for purchasing the DiskMaster storage solution. With speed, ease of use, high capacity, and support for numerous applications, DiskMaster is the ideal solution for all of your data storage needs. 1. 1. Product Overview 1.1 An Overview of the DiskMaster Securely access all of your multimedia, music and data files on your local LAN or through Internet Thanks to its Gigabit port(1000Mb/s) and its capacity for two Hard Disks, the... -
Page 35: System Requirements
USBCopy allows to quickly back up data from an USB storage device (USB flash, USB card reader or USB HD) to DiskMaster with just one single touch. Apache/PHP/MySQL With built-in support for Apache/PHP/MySQL, users can can simply point your browser to your DiskMaster’s name (or IP address) to view your website. Doing away with the need to have a computer connected to it, and allowing you to share it with the rest of the users in the office or at home. -
Page 36: Choosing A Place For Your Diskmaster
1.3 Choosing a place for your DiskMaster When selecting a place to set up your Disk Array, be sure to follow these guidelines: Place on a flat and stable surface capable of supporting at least 5Kg. Place the DiskMaster close enough to a network jack for the Ethernet cable ... -
Page 37: Diskmaster Application
1.4 DiskMaster Application When you have completed the steps in this Quick installation Guide, your connected network should look similar to this:... -
Page 38: The Front Leds And Rear Ports
1.5 The Front LEDs and Rear Ports PORT/Button/LED MEANING HDD A LEDs HDD A indicators. HDD B LEDs HDD B indicators. Power LED Power ON/OFF indicator. Power Button Power Button. Press the button and holds for 3 seconds to turn ON or turn OFF. Press the power switch to start/shutdown the DiskMaster. -
Page 39: Led Display
defaults. After the device has turned on (turn on the power and wait 3 minutes), press and hold reset button for 5/10 seconds, then release it to reset it (this is used when you can not login to the DiskMaster, e.g. forgot the password. Cool FAN PWM Cooling FAN. -
Page 40: Default Settings
MS Windows relative manuals. Before you configure this device you need to know the following default settings: Username: sysadmin Password: atlantis IP address: by DHCP, (If a DHCP server isn’t available in the network, DiskMaster will 192.168.1.251... -
Page 41: Building Diskmaster Hdd System
1.9 Building DiskMaster HDD System If the hard disks are being installed for the first time, you need to initialize the disks before you can use them. Follow the steps described below. To configure your DiskMaster, you will need to use the web browser, enter the IP address and then use the web configuration for further setup. - Page 42 192.168.1.5/255.255.255.0) that must be in the same subnet of the DiskMaster. Open the web browser, enter the local port IP address of this DiskMaster, which default at http//192.168.1.251:6666, and click Go to get the login page. The default username is sysadmin, password atlantis and click Login to continue.
- Page 43 When you first time login DiskMaster or System Disk hasn’t been created, you will be asking if you would like to do RAID configuration. Click Cancel, set HDDs as Normal with 2 distinctive storages. Click OK, set HDDs to RAID mode, RAID 0 or RAID 1.
-
Page 44: Formatting The 1St Hard Disk
There are 2 differents RAID mode: RAID 0: RAID 0, known as disk striping, has generally the best performance, but does not offer any redundancy. In this level, data is broken into small units called sectors, and sectors are distributed across all disks in the array. As it does not provide any data protection, if any disk in the array fails then all data in the array is lost. - Page 45 There will two more items, Server and GUI options show in the left side box. At the right side, besides the basic DiskMaster information, there are two messages show the status of File Server (running) and FTP server (stopped). Detail System Disk information can be checked by clicking: System ->Hard disk Management ->...
-
Page 46: Raid Mode
RAID Mode You need to install 2 HDDs to create RAID system on DiskMaster. When you first time login DiskMaster or System Disk hasn’t been created, you will be asking if you would like to do RAID configuration. Tap OK button on last dialogue box, the screen will display raid type selection as the picture below (or System ->Hard disk Management ->... - Page 47 There will two more items, Server and GUI options show in the left side box. At the right side, besides the basic DiskMaster information, there are two messages show the status of File Server (running) and FTP server (stopped). Detail System Disk information can be checked by clicking: System ->Hard disk...
-
Page 48: Mapping A Network Drive
Computer. This link will still be there even after rebooting your Operating System. In event of problem, please write directly the IP (instead of name) folder name. Please write: \\IP address\public. Click on different user name and digit username and password (sysadmin, atlantis). Then click OK, then Finish. -
Page 49: Mapping A Network Drive In Windows Vista/7
Computer. This link will still be there even after rebooting your Operating System. If event of problem , please write directly the IP (instead of name) in the folder name. Please write:\\IP Address\public. Click on different user name and digit username and password (sysadmin, atlantis). Then click OK, then Finish. -
Page 50: Appendix A: Troubleshooting
APPENDIX A: Troubleshooting This chapter covers potential problems and the corresponding remedies. A.1 Using LEDs to Diagnose Problems The LEDs are useful aides for finding possible problem causes. A.1.1 Power LED The PWR LED on the front panel does not light up. Steps Corrective Action Make sure that the DiskMaster’s power adaptor is connected to the... -
Page 51: Web Interface
Password: atlantis IP address: by DHCP, (If a DHCP server isn’t available in the network, the DiskMaster will use 192.168.1.251 and Subnet Mask 255.255.255.0). Server name: DiskMasterG502D It is highly recommended to change the default username and password. -
Page 52: Support
For technical questions and support, please contact our help-desk by ticket on http://www.atlantis-land.com/ita/supporto.php. For generic informations, please send an e-mail to info@atlantis-land.com For presales informations, please send an e-mail to prevendite@atlantis-land.com. Atlantis SpA Via S. Antonio, 8/10 20020 Lainate (MI) Fax: +39.02.78.62.64.39... -
Page 53: Technical Features
Technical Features Protocols IP, NBNS(“NetBios” Name Server), Microsoft Networks (CIFS/SMB), DHCP Server/Client, SNTP Client, NTP LAN port 1 x RJ45 10/100/1000 Base-T port USB A Port 2*USB V2.0 (External HD) LED Indicators (8) Power, USB1, USB2, HDD1, HDD2, LAN Hard Disk 2 x SATA I/II Supported System Format: Internal: EXT3 / External: EXT2, EXT3, FAT32, NTFS (read Only) - Page 54 version:2.0.0.4 or above) to view the web UI System Requirements for Windows 2000, XP, Vista, 7, Server 2003, SmartSync Pro Server 2008, and Server 2008 R2. Both x86 and x64 versions. Package Contents DiskMaster Dual BAY Network Storage RJ45 CAT 5 cable ...
-
Page 55: Compatibility List
Compatibility List Brand Model Western Digital WD5000AAKS Western Digital WD10EADS 1000 Western Digital WD10EARS 1000 Western Digital WD20EADS 2000 Western Digital WD20EARS 2000 Seagate ST3200820AS Seagate 1000 Seagate 2000 Hitachi HDS722020ALA330 2000 Hard drive not included. An internal SATA I/II Hard Disk is required to share or store data files. - Page 56 Atlantis SpA Via S. Antonio, 8/10 20020 Lainate (MI) info@atlantis-land.com...
Need help?
Do you have a question about the DiskMaster NAS G502D and is the answer not in the manual?
Questions and answers