
Related Manuals for AEG LAVATHERM T36840


Summary of Contents for AEG LAVATHERM T36840
- Page 1 125987670.qxp 2007-04-02 12:38 Page 1 LAVATHERM T36840 Exhaust air dryer Operating instructions PERFEKT IN FORM UND FUNKTION...
-
Page 2: Dear Customer
125987670.qxp 2007-04-02 12:38 Page 2 Dear customer, Please read these operating instructions carefully and pay particular attention to the safety notes indicated in the first pages. We recom- mend that you keep this instruction booklet for future reference and pass it on to any future owners. The warning triangle and/or the key words (Warning!, Caution!) emphasi- ze information that is particularly important for your safety or correct functioning of the appliance. -
Page 3: Table Of Contents
125987670.qxp 2007-04-02 12:38 Page 3 Contents Safety instructions..........4 General instructions . -
Page 4: Safety Instructions
Repairs carried out by inexperienced persons may cause injury or serious malfunctioning. Contact your local Service Force Centre or your AEG dealer. . Always insist on genuine AEG spare parts. • Before starting the appliance check that the rated voltage and the type of current indicated on the rating plate correspond to those which exist where the dryer is installed. -
Page 5: Child Safety
125987670.qxp 2007-04-02 12:38 Page 5 Safety instructions Child safety • Children are often not aware of how dangerous electrical appliances can be. When the machine is working, they should be carefully super- vised and not be allowed to play with the appliance - there is a risk that they could become trapped inside. -
Page 6: General Instructions
125987670.qxp 2007-04-02 12:38 Page 6 Safety instructions Proper use • For safety reasons, the appliance must not be modified. • This appliance is designed for domestic use only. If the dryer is used for any other purposes or is not used correctly, the manufacturer accepts no responsibility for any possible damage that might occur. -
Page 7: Discarding
125987670.qxp 2007-04-02 12:38 Page 7 Discarding Discarding Packaging materials Dispose of your tumble dryer’s packaging materials correctly. All materials are environmentally friendly and can be disposed of without any danger. The plastic parts can be reused: • The external plastic cover and the bags inside are made of polyethylene (>PE<). •... -
Page 8: Tips For Environmental Protection
125987670.qxp 2007-04-02 12:38 Page 8 Tips for environmental protection Tips for environmental protection • During washing, try not to use fabric softeners! If the laundry is machine dried, it will remain soft even without using fabric softeners. • Shake out your laundry! Shake out the laundry before putting it into the dryer in order to reduce the drying time and creasing. - Page 9 125987670.qxp 2007-04-02 12:38 Page 9 Tips for environmental protection Desired degree Duration in Energy consumpti- Type of laundry Load in kg of dryness minutes on in kWh Cotton STORE DRY 3,90 Cotton IRON DRY 3,05 Mixed fabrics STORE DRY 1,15 1) previously spun at 1000 rpm 2) previously spun at 1200 rpm.
-
Page 10: Structure Of The Appliance
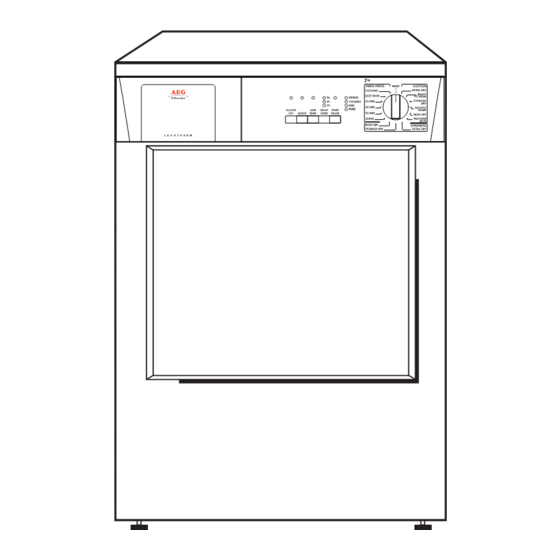
125987670.qxp 2007-04-02 12:38 Page 10 Structure of the appliance Structure of the appliance Front view Rear view... -
Page 11: Control Panel
125987670.qxp 2007-04-02 12:38 Page 11 Structure of the appliance Control panel 1 Programme/Time Selector Dial Allows you to select electronically controlled or time controlled drying. Turn the dial to the required programme or time. Sensor Dry The appliance runs these programmes with the help of probes which detect the degree of dampness of the laundry. - Page 12 125987670.qxp 2007-04-02 12:38 Page 12 Structure of the appliance gramme from the point at which it was interrupted. This button must also be depressed after a power failure. In both cases the light of the START/PAUSE button flashes to remind you that the start button needs to be pressed again.
- Page 13 125987670.qxp 2007-04-02 12:38 Page 13 Structure of the appliance • STORE DRY The corresponding pilot light comes on. This option cannot be selected with LOW TEMP. function. 6 BUZZER OFF button A buzzer sounds • when selecting the programme • when depressing the buttons •...
-
Page 14: Brief Operating Instructions
125987670.qxp 2007-04-02 12:38 Page 14 Structure of the appliance; Brief operating instructions Brief operating instructions • Spin the laundry as much as possible. • Sort out the laundry. • Put the laundry into the tumble dryer. • Switch the machine on by selecting the drying programme/time. •... -
Page 15: Drying
125987670.qxp 2007-04-02 12:38 Page 15 Drying Drying Before the first drying cycle Before using your tumble dryer for the first time, we recommend to place a few damp cloths inside the appliance and dry for 30 minutes. There may be dust inside a brand new tumble dryer. Sort out the laundry •... -
Page 16: Switch The Machine On, Select The Drying Programme/Time
125987670.qxp 2007-04-02 12:38 Page 16 Drying Switch the machine on - select the drying programme/time • Select the drying programme or time. The lights DRYING, COOLING and END come on. The light of the START/PAUSE button flashes and the display shows the duration of the programme. If required, press the LOW TEMP. -
Page 17: End Of Drying Cycle
125987670.qxp 2007-04-02 12:38 Page 17 Drying End of drying cycle If the laundry is not removed at the end of the cycle, the dryer per- forms an anti-creasing phase (duration: 30 minutes maximum). If you do not remove the laundry, the dryer will stop automatically at the end of the anti-creasing phase. -
Page 18: Adjusting The Level Of Conductivity
125987670.qxp 2007-04-02 12:38 Page 18 Adjusting the level of conductivity Adjusting the level of conductivity Water contains, a variable quantity of limestone and mineral salts of which quantities vary according to geographical locations thus vary- ing its conductivity values. Relevant variations of the conductivity of the water compared to those prefixed by the factory could slightly influence the residual humidity of the laundry at the end of the cycle. -
Page 19: Programme Chart
125987670.qxp 2007-04-02 12:38 Page 19 Programme Chart Programme Chart Automatic drying (sensor programs) Max-load Type of laundry Programme 7 kg EXTRA DRY 7 kg READY TO WEAR 7 kg (*) STORE DRY COTTON 7 kg SLIGHTY DAMP 7 kg (*) IRON DRY 7 kg MACHINE IRON... -
Page 20: Hints & Tips On Drying
125987670.qxp 2007-04-02 12:38 Page 20 Hints & Tips on drying Hints & Tips on Drying Care symbols Before placing articles of laundry in your tumble dryer, check the care labels to ensure they are recommended for tumble drying. Basically, this fabric can be tumble dried; however the manufacturer does not specify whether it can be dried with normal or low temperature. -
Page 21: Cleaning And Care
125987670.qxp 2007-04-02 12:38 Page 21 Cleaning and care Cleaning and care Warning! You must disconnect the appliance from the electricity supply, before you can carry out any cleaning or maintenance work. External cleaning Use only soap and water and then dry thoroughly. Important: do not use methylated spirit, dilutents or similar products. -
Page 22: Cleaning The Drum
125987670.qxp 2007-04-02 12:38 Page 22 Cleaning and care goes un-noticed in the air. In a tumble dryer it simply collects in the filter. If necessary the filters can be cleaned under running water using a brush. In this case, remove the filter in the door opening as per picture (it can be posi- tioned with the tongue facing to the left or to the right). -
Page 23: Something Not Working
125987670.qxp 2007-04-02 12:38 Page 23 Something not working? Something not working? If a problem occurs, you can try to solve it yourself following the instructions below. If you call out an engineer when one of the follo- wing problems occurs, or to repair a fault due to incorrect use, the call- out will be charged even if requested within the guarantee period. - Page 24 125987670.qxp 2007-04-02 12:38 Page 24 Something not working? Remedy Problem Possible cause Straighten N- air venting hose and/or The drying cycle Vented air transport disrupted clean air venting ducts exceptionally takes a long time Lint filter blocked Clean lint filter The loading door Lint filter not installed and/or filter Install lint filter and/or lock filter lid...
-
Page 25: Technical Specifications
125987670.qxp 2007-04-02 12:38 Page 25 Technical specifications Technical specifications Height x Width x Depth 85x60x57 cm Depth with the door open 107 cm Height adjustment 6 mm Empty weight ca. 32 kg Load (according to the programme) max. 7 kg (Different load sizes in some countries are due to different measuring methods) Domestic... -
Page 26: Permanent Connection
125987670.qxp 2007-04-02 12:38 Page 26 Electrical connection The wire coloured green and yellow must be con- nected to the terminal marked with the letter «E» or by the earth symbol or coloured green and yellow. The wire coloured blue must be connected to the terminal «N»... -
Page 27: Installation
125987670.qxp 2007-04-02 12:38 Page 27 Installation Installation Unpacking Slide out the polythene bag with the polystyrene stuffing before using the appliance Pull off adhesive strips from inside machine on top of drum. Positioning It is recommended that, for your convenience, the machine is positioned close to your washing machine. -
Page 28: Fitting The Vent Hose
125987670.qxp 2007-04-02 12:38 Page 28 Installation Fitting the vent hose To simplify the installation, there is a choice of vent outlets: one at the back, the others in the left and right-hand side. Connect the hose to whichever is the more convenient by pulling the ring nut (A) from the vent outlet at the back, screwing it on to the hose and pushing it firmly back into place. -
Page 29: Service
125987670.qxp 2007-04-02 12:38 Page 29 Service In the chapter “Something not working?” some problems that can be solved by yourself are listed. Read this section in the event of problems. If you are not able to find a solution, contact the Service centre. It is close by and, if necessary, an engineer will soon be with you. - Page 30 USD 14 billion in moret- han 150 countries around the world. AEG Hausgeräte GmbH Postfach 1036 D-90327 Nürnberg http://www.aeg-electrolux.de © Copyright by AEG 125987670-01-04022007...
Need help?
Do you have a question about the LAVATHERM T36840 and is the answer not in the manual?
Questions and answers