Subscribe to Our Youtube Channel
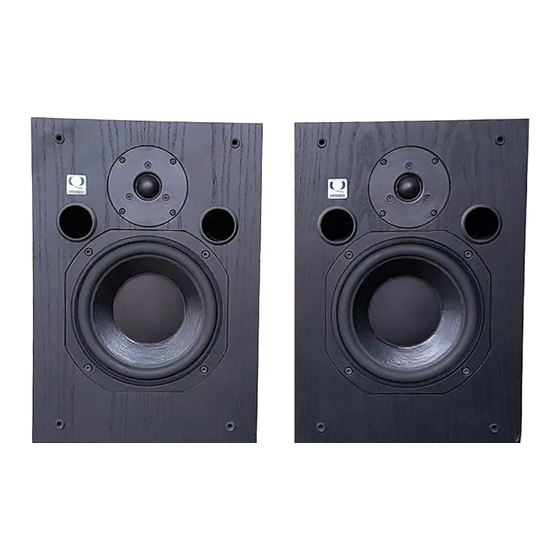
Summary of Contents for Quested S8
-
Page 1: User Manual
User Manual Quested Monitoring Systems Ltd., Units 6-8 Kingsgate, Heathpark Industrial Estate, HONITON, Devon EX14 1YG England Tel: ++(0)1404.41500 Fax: ++(0)1404.44660... -
Page 2: Table Of Contents
CONTENTS Introduction Class A-B Amplifiers Safety Considerations General Hearing damage Unpacking Installation Positioning Grill Aligning the speakers Wall mounting Electrical Connection 4.5.1 Safety Earthing 4.5.2 Voltage Setting 4.5.3 Fuse Setting Audio connections Operational Considerations Mains On-Off Switching Thermal Front panel indicators... -
Page 3: Introduction
20 Hz. 1.1 Class A-B amplifiers The S8 use’s class A-B amplification, as with a lot of class A-B amplifiers they will only reach there peak sonic performance after a given warm up period. We have taken this into consideration when designing the S8. -
Page 4: Hearing Damage
Also included in a separate bag will be the appropriate power cord for your country. Installation 4.1 Positio ni ng The S8 is designed to be mounted vertically and will also function if turned on its side. However it... -
Page 5: Grill
4.2 Gril l The S8 has the option of a cloth grill, which will offer some protection to the tweeter and bass driver. It is not designed to protect the speakers during transit and it is recommended that the original packing should be retained for this purpose. -
Page 6: Wall Mounting
4.4 Wal l Mounti ng/Stand Mounti ng The S8 has built in mounting points that are located on the base of the cabinet and are suitable for Omnimount ™ brackets (the S8 uses the 100 series:- 100 WB or 100 CB or ST) and also Quested... -
Page 7: Electrical Connection
SUFFICIENT STRENGTH. A STEEL MACHINE SCREW OF AT LEAST 25 mm IN LENGTH SH OULD BE USED FOR THIS PURPOSE. If the S8 is subsequently removed from the bracket, the mounting holes will need to be re-sealed using the nylon screws or some other suitable sealant. -
Page 8: Fuse Setting
continue to meet its specifications. (See power requirements on page 12 of his manual.) For the 230V setting this is 160V to 255V and for the 115V setting it is 80V to 127V. If the unit is connected to voltages in excess of its maximum, damage is likely to occur which may not be recoverable from without qualified service attention. - Page 9 for common mode interference signals and to give a professional connection to external equipment. It is essential for optimal use of these specifications that a professional grade, balanced two-core screened cable is used. Source Bala nced Pin 2 hot In accordance with international standards, 3-pin XLR style input connectors are used, with pin 2 being designated the ‘in-phase’...
-
Page 10: Operational Considerations
Source Unbalanced Pho no 2 Core cabl e OPERATIONAL CONSIDERATIONS Mains O n- Off Switchi ng and l evel On-Off switching is provided by a rocker switch on the rear panel. Intelligent circuitry ensures noiseless power-on and power off. Thermal The output devices of the internal power amplifiers are mounted onto an internal heatsink, which heats up and reaches temperatures well above that of ambient. -
Page 11: Signal Level
section 1.1 Class A-B amplifiers) the LED will be continuously green when the amplifier has warmed up and is ready for normal operation. The LED will flicker red with music peaks to indicate that the amplifier is 2db under clip. The clip indication should be used as a guide that the amplifier is approaching clip, which should be avoided for audible integrity. -
Page 12: Line Drawing
230V setting: min 160V; restricted output power: max 255V 115V setting: min 80V; restricted output power: max 127V C ONSUMPTION Quiescent: Typical use: 100W (average music) Max: 160W (average music) Note: 0 dBu = 775 mV into open circuit S8 LINE DRAWING... -
Page 13: Guarantee
3 4 .7 5 m m /4 .0 " Guarantee The S8 electronics are guaranteed for 5 years from date of purchase. All other parts are guaranteed for 24 months. If any part of the product is found to be defective because of faulty manufacture... -
Page 14: Spares
2 or 3 times). This can be obtained from your dealer/distributor or directly from Quested. It should be noted that ferrofluid is best added as shown in the diagram below and not from the syringe that it is dispensed in. - Page 15 Dip wire in ferrofluid, a small amount will be retained on the wire hold wire over the tweeter gap and the magnet will attract the fluid from the wire into the gap. Do this 3 or 4 times in different position on the tweeter, then check by inserting the new diaphragm to see the amount of fluid in the tweeter.


Need help?
Do you have a question about the S8 and is the answer not in the manual?
Questions and answers