Table of Contents
Advertisement
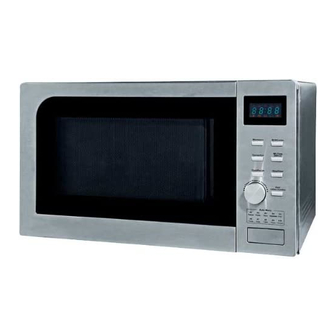
MICROWAVE OVEN
User Instructions -
User Instructions -
Model: AC925EFY
Read these instructions carefully before using your microwave oven. By following
these instructions carefully your oven will provide you with many years of excellent
service.
Specifications
Model:
Power Source:
Microwave Power Consumption:
Microwave Maximum Output:
Grill Power Consumption:
Convection Power Consumption:
Oven Capacity:
Turntable Diameter:
External Dimensions (L x W x H):
Net Weight:
IMPORTANT
• WARNING: if the door or door seals are damaged, the oven must not be
operated until it has been repaired by a competent person;
• WARNING: it is hazardous for anyone other than a competent person to
carry out any service or repair operation that involves the removal of a
cover which gives protection against exposure to microwave energy;
• WARNING: liquids and other food must not be heated in a sealed
container since they are liable to explode;
• WARNING: only allow children to use the oven without supervision when
adequate instruction have been given so that the child is able to use the
oven in a safe way and understands the hazards of improper use.
• WARNING: accessible parts may become hot during use. Young children
should be kept away
CAREFULLY RETAIN THESE INSTRUCTIONS
Please keep for future reference
Please keep for future reference
AC925EFY
230V~50Hz
1450 Watt
900 Watt
1100 Watt
2500 Watt
25 litres
Ø 315 mm
513mm x 498mm x 305mm
Approx. 19.0 Kg
900W
D
Advertisement
Table of Contents

Related Manuals for DeLonghi AC925EFY


Summary of Contents for DeLonghi AC925EFY
-
Page 1: Specifications
User Instructions - Please keep for future reference Please keep for future reference Model: AC925EFY Read these instructions carefully before using your microwave oven. By following these instructions carefully your oven will provide you with many years of excellent service. -
Page 2: Safety Instructions
SAFETY INSTRUCTIONS The oven must be placed on a level surface. The turntable and turntable ring assembly must always be used in the oven during cooking. Place the cookware gently on the turntable and handle it carefully to avoid possible breakage. Incorrect use of dish for browning food may cause turntable to break. -
Page 3: Table Of Contents
CONTENTS PAGE Specifications Safety Instructions Contents Materials You Can Use In Microwave Oven Materials T o Avoid Using In Microwave Oven Utensils Oven Components And Accessories Turntable Installation Installing Your Oven Microwave Cooking Principles Microwave Food Packaging Symbols Operating Your Microwave Oven Microwave Cooking Grill Cooking Convection Cooking... -
Page 4: Materials You Can Use In Microwave Oven
MATERIALS YOU CAN USE IN MICROWAVE OVEN Utensils Remarks Shielding only. Small smooth pieces can be used to cover thin parts of meat or poultry Aluminium foil to prevent overcooking. The foil should be a least 1 inch Arcing can occur if foil is (2.5cm) away from oven walls. -
Page 5: Oven Components And Accessories
SETTING UP YOUR OVEN OVEN COMPONENTS AND ACCESSORIES fig.1 2 in 1 grill stand TURNTABLE INSTALLATION fig. 2 2 IN 1 GRILL STAND, (A) Set up for high position cooking - use for grilling, convection and microwave heating. (B) Set up for low position cooking - use for convection and microwave heating... -
Page 6: Installation
INSTALLING YOUR OVEN Carefully remove all packing materials and accessories. Examine the oven for any damage such as dents or broken door. Do not install if oven is damaged in any way. cabinet: Remove any protective film found on the outer surface. Do not remove the light brown Mica cover that is attached to oven cavity to protect the magnetron. -
Page 7: Operating Your Microwave Oven
OPERATING YOUR MICROWAVE OVEN 1 . MICROWAVE COOKING 1) Press " " once to select the microwave cooking, then press " " or turn " " to select required microwave power until required power setting is reached. 2) Press " "... -
Page 8: Grill Cooking
2 . GRILL COOKING This function allows food to be cooked and grilled for browning at the same time. 1) Press " " once, the LED displays "G-1" 2) Press " " to confirm 3) Turn " " to set the cooking time. (The maximum setting time is 95 minutes.) 4) Press "... - Page 9 Temperature Level Temperature Display Minimum temperature 150°C 160°C 170°C 180°C 190°C 200°C 210°C 220°C 230°C Maximum temperature 240°C 3) Press the " " to confirm the temperature. 4) Press the " " to start preheating. When temperature reaches, it will beep two time to remind you and it will maintain at the selected temperature for 5 minutes.
-
Page 10: Combination Cooking
4 . COMBINATION COOKING Before using this function, it is highly recommend to carry out the pre-heat function in Convection Cooking section. The function Convection/Grill permits the setting of how long the food is subjected to hot air and microwave cooking. Microwave and temperature are set automatically according to combination setting. -
Page 11: Multi-Stage Cooking
5 . MULTI-STAGE COOKING This microwave can be set up to 3 stages cooking. Example: cook with 100% microwave power for 10 minutes + grill cooking for 5 minutes. The steps are as following: 1) Press " " once to choose 100% microwave power; 2) Press "... -
Page 12: Pre-Set Function
3) Press " ", the minute will flash. 4) Turn " " to adjust the minute. 5) Finally, press " " and the time will be set. For example: set the current time to 12:12. 1) Press " " to choose 24 hour format; 2) Turn "... -
Page 13: Defrost
9 . DEFROST The defrosting function is the gentle thawing of uncooked food. Flat foodstuff thaws better than bulky food. Distribute the food as evenly as possible on the turntable. A. Defrost by weight 1) Press " " button once, the oven will display "dEF1", at the same time, " "... -
Page 14: Microwave Auto Function
10 . MICROWAVE AUTO FUNCTION This auto function has ten pre-programmed cooking. You do not need to set either cooking times or the power level. The table below shows the time taken to cook weight of food. 1). In standby states, turn " "... - Page 15 WARMING UP, HEATING Times stated are approximate and can vary depending on the quality, size of the chopped pieces, storage temperature and moisture content of the foodstuff. It is advisable to set a shorter cooking time at first, and then if necessary continue the cooking process, until the food is cooked to your satisfaction.
-
Page 16: Checking Stage Of Cooking
11 . CHECKING STAGE OF COOKING (1) While cooking press " ", " " or " ", it will display the current power, i.e. P100, after three seconds, it will revert to the former time count down. (2) While in standby with pre-set cooking, press " ", it will display the start time for the pre-set cooking, i.e. -
Page 17: Cleaning Your Microwave Oven
CLEANING YOUR MICROWAVE OVEN Attention Your microwave oven should be cleaned regularly to prevent grease and food particles from building up on the inside surface. The accumulated grease / food particles may cause a fire hazard. It is important to clean the interior of your microwave oven after each use. To clean the oven interior, use a mild detergent solution, such as washing-up liquid, with warm water on a soft cloth. -
Page 18: Troubleshooting And Maintenance
TROUBLESHOOTING AND MAINTENANCE NORMAL CONDITION Microwave oven interfering with TV reception. Radio and TV reception may be interfered with when microwave oven is in operation. It is similar to the interference of small electrical appliances such as food mixers, vacuum cleaners and electric fans. This is normal. Oven light dim. -
Page 19: Questions And Answers
QUESTIONS AND ANSWERS Q: When the oven is plugged into a wall outlet for the first time, it does not work properly. What's wrong? A: The microcomputer used in the oven control may temporarily become scrambled and fail to function as programmed. Unplug the oven from the wall outlet and then plug it back in. -
Page 20: Earthing Installation
EARTHING INSTALLATION DANGER This appliance must be earthed. In the event of an electrical short circuit, grounding reduces the risk of electric shock by providing an escape wire for Electric Shock Hazard the electric current. This appliance is equipped with a cord having a Touching some of the internal components grounding wire with a earthing plug. -
Page 21: Guarantee
PRODUCT GUARANTEE This product is guaranteed against manufacturing defects for a period of Year This product is guaranteed for twelve months from the date of original purchase. Any defect that arises due to faulty materials or workmanship will either be replaced, refunded or repaired free of charge where possible during this period by the dealer from whom you purchased the unit.
Need help?
Do you have a question about the AC925EFY and is the answer not in the manual?
Questions and answers
How can I get a replacement glass turntable for AC925EFY?
You can obtain a replacement glass turntable for the DeLonghi AC925EFY microwave from online marketplaces such as Amazon or eBay.
1. Amazon: The "Spares2go 315mm/12½\" Diameter Glass Turntable Plate" is listed for DeLonghi AC925EFY, but there are no featured offers currently available. You can check the "See All Buying Options" section for available sellers.
2. eBay: A listing for a "DELONGHI Glass Turntable Microwave Plate 3 Lug Pip Dish AC925EFY 315mm" is available. The item is brand new and includes a 315mm glass plate compatible with the DeLonghi AC925EFY.
You can visit these platforms and search for the compatible model to check availability and purchase options.
This answer is automatically generated