Table of Contents
Advertisement
Advertisement
Table of Contents

Related Manuals for Mankati Fullscale XT

Summary of Contents for Mankati Fullscale XT
- Page 1 Fullscale XT a Fast, High Resolution, Huge Printing Volume 3D Printer User Manual...
-
Page 2: Table Of Contents
Leveling Build Plate SETUP Unpacking Feed the Filament Accessory Print from SD Card Tool Box Unload the Filament Setting Up Mankati Fullscale XT MAINTENANCE Fullscale XT Outlook Maintenance LCD INSTRUCTION TROUBLESHOOTING LCD Menu Structure Setting and Calibration Problems LCD Menu... -
Page 3: Welcome
MANKATI FULLSCALE XT To get perfect prints, your may need to experiment and tinker at the beginning. This User Manual will guide you to start your journey with the Mankati Fullscale XT easily and quickly. Forget your existing knowledge of other 3D printers, take the time to learn about your Mankati Fullscale XT, it will show you a completely new experience. -
Page 4: Safty
HEAT and HIT WARNING: Mankati Fullscale XT 3D Printer generates high temperatures and includes moving parts that can cause injury. Please Never Touch the nozzle, the heated aluminum block or the build plate after preheating or printing to avoid scalding. -
Page 5: Specifications
Controller Arduino ATmega2560 R3Micro Controller Forming Tech. Fused deposition modeling (FDM) Mother Board Mankati Stable Main Board V3.x Extruder Number 1 or 2 (Dual extruders Perfect supported) Stepper Motor X, Y axis 42*48, 1.3A; Z axis 42*63, 1.5A Build Size... -
Page 6: How It Works
Your 3D designed files are translated into instructions for the Mankati Fullscale XT and read by the machine via SD card. The Mankati Fullscale XT then heats the filament and squeezes it out through a nozzle onto a heated surface to build a solid object, layer by layer. -
Page 7: Setup
SETUP Your Mankati 3D Printer was built and packaged very carefully at the Mankati factory. Please take your time and carefully unpacking it and getting set up. -
Page 8: Unpacking
Unpacking Place the Mankati Fullscale XT on the floor. Leave Your Mankati Fullscale XT is packed multiply by Remove the first cardboard layer. Open the plastic enough available space for unpacking carton, cardboard, foam and sealed bag to ensure the bag. machine to your hands in perfect status. NOTE: You can download a PDF copy of this User manual under manual at the support page: http://www. - Page 9 Unpacking Now it’s time to take out your Mankati Fullscale Place it on a stable surface, and leave enough space Remove the stretch film around the 3D printer. You XT from the box. Lift it out by grasping the frame surrounding it to check accessories. can see all the accessories, tools and filaments. firmly but gently at the left ① and right ② of the Mankati Fullscale XT.
- Page 10 Unpacking Take all the accessories out. Taking out the filaments: 2) Turn on the printer. For the ease of transport, the filaments are fixed tightly 3) Go to the LCD menu: "Prepare > Autohome", and by build plate supporter. Let’s take them out, following the two holders will go to the top of Z axis. the next 3 steps: 4) Take out the two spools of PLA filament and the two feeding devices. 1) Connect power wire to printer.
-
Page 11: Accessory
Accessory 3) 1 tool box: including the necessary tools for installation and other accessories. 4) 2 feeding devices: constituted by gear motor and feeder with the advantages of high accuracy and easy to operate. 5) 3 enclosure covers: installed on 3 sides(front, left, right) to keep the temperature constant inside printing space. Taking out accessories, tool box and filament and check if below things are included: 1) 2 spools of PLA filament, diameter 3mm, 1kg/spool; 2) 1 Build platform: It is packed in the white EPE. www.mankati.com... -
Page 12: Tool Box
Checking if you find that anything described in the manual is missing, email us at 16) 1* Scraper: To take out the model and clean the build plate. support@mankati.com. 17) 1* Screwdriver: Installation tool. 1) 1*USB cable: Connect computer and printer when printing or renewing 18) 1* Tweezer: Clean the platform after printing, or clean the nozzle and printer. -
Page 13: Setting Up Mankati Fullscale Xt
Setting Up Mankati Fullscale XT 1. Install the Holders 1). The four holes are 3). Use the screwdriver to holders installation fix the two holders on left position. and right of the printer top side. Please confirm Note: you have tightened the screw to avoid accident of getting loose when moving the printer. - Page 14 Setting Up Mankati Fullscale XT 2. Install the Build Platform 1) Turn on your Fullscale XT, enter “Prepare 3) Take out the nuts ⑥ and screwdriver 4) Connect the power wire and data cable > Move axis > Move 1mm> Move Z”, from the tool box to fix the platform and of platform with the connectors.
- Page 15 Setting Up Mankati Fullscale XT 3. Feeding Device Installation 1) Feeding motor: 3) Connect the data cable using small wrench with feeding devices. to fix No. 1 feeding motor on position 1. 2) Insert the end 4) Feeding device of feeding tube installation done. into the socket of feeding motor and tighten firmly.
- Page 16 Setting Up Mankati Fullscale XT 4. Filament Spool Holder Installation 1) Take the two spool 2). Install filament spool’s holders out of the tool holder. box. 5. Lubricate the Guide Rails We clean the guide 2). Lubricate the four rails before sending guide rails around the the printer out, so printer framework.
-
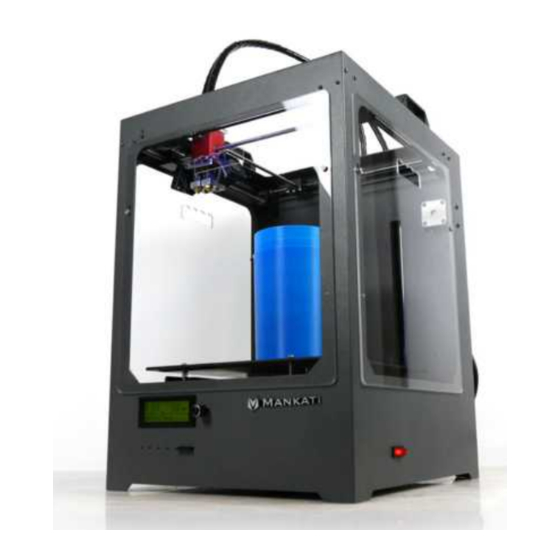
Page 17: Fullscale Xt Outlook
Fullscale XT Outlook 1. SD-card slot 6. Print head 10. Power Socket 2. Push and rotate button 7. Filament guide tube 11. Name plate 3. Display 8. Printer holder 12. Spool holder 4. Build plate screws 9. Power switch 13. Material feeder 5. -
Page 18: Lcd Instruction
LCD INSTRUCTION In this chapter you will learn about detailed introductions of the LCD menus. -
Page 19: Lcd Menu Structure
1.4.3 - Preheat ALL 1.4.4 - Preheat PLA Bed 1.5.1 - Preheat ABS 1 1.5.2 - Preheat ABS 2 1.5 - Preheat ABS 1.5.3 - Preheat ALL 1.5.4 - Preheat ABS Bed 1.6 - Leveling Bed 1.7 - Cool Down www.mankati.com... -
Page 20: Lcd Menu
LCD Menu Move X: The extruder will move 10mm each step in X direction Info Screen Move Y: The extruder will move 10mm each step in Y direction Move Z: The build plate will move 10mm each step in Y direction Extruder: The feeding motor of left nozzle will extrude the filament in each step of 1mm 1. - Page 21 To stop the printing, but it will record the printing stop position to continue the printing. Amax z: Max accelerated speed in Z direction 4. Stop Print: To finish the printing job Amax e: Max accelerated speed of feeding motor www.mankati.com...
-
Page 22: Software
SOFTWARE This chapter will guide you how to download and install the software. And show you detailed introduction of parameters in the software. -
Page 23: Download And Install
Download and Install Enter Mankati official download website: www.mankati.com/download.html Choose the appropriate version of Mankati UM according to your computer operation system. Our software apply to Windows, MacOS, Ubuntu operating system. Right click the software installation program, select "run as administrator" and install it following the prompts. www.mankati.com... -
Page 24: Interface
5.3 X-Ray: X-ray vision - Center on platform this in modeling software) - Delete object 5.4 Layers: Layer by layer to simulate the printing process - Delete all objects - Multiply object www.mankati.com... -
Page 25: Parameter Definition
Means the extruder’s moving speed. Printing speed Layer height: Printing Speed: within certain limits decides the quality of printing model quality. Mankati Fullscale XT’s default speed is 30mm/s. High speed printing can be set as 50- Super accuracy printing: Recommended set as 0.1mm 70mm/s. High accuracy printing: Recommended set as 0.2mm... - Page 26 Parameter Definition Advanced Setting Support Retraction For the model has parts hanging in the air, support Enable filament retraction function Support type: Enable retraction: structure is a must when printing to ensure the parts hanging in the Retract the filament when the nozzle is moving over a non- printed air will not collapse. area to avoid dropping and brushed. Details about the retraction can -None: No support, if you print model with parts hanging in the be configured in the advanced tab.
- Page 27 Speed at which outer shell is printed. If set to Outer shell speed: 0 then the print speed is used. Printing the outer shell at a lower speed improves the final skin quality. However, having a large difference between the inner shell speed and the outer shell speed will effect quality in a negative way. www.mankati.com...
- Page 28 Mankati Fullscale XT’s default nozzle diameter is 0.4mm. The minimal Minimal extrusion before retracting: So in Mankati UM the nozzle size’s default is 0.4. If you extrusion that needs to be done before retracting again. choose 0.3mm, 0.5mm or 0.8mm diameter nozzle, If a retraction needs to happen before this minimal is please fill the corresponding right feature.
-
Page 29: Fix Horrible
This expert option keeps all the open bits of the model intact. layer. This helps to prime your extruder, and to see if the object influences print quality. Normally Mankati Tries to stitch up small holes and remove fits on your platform. Recommended setting as 1 with best everything with big holes, but this option keeps bits that are performance. - Page 30 Parameter Definition Plugins We supply 3 plugins for you. These 3 plugins will help to give stronger control feature. You can set different parameter with different print heights to have more accurate model. Double-click certain plugin name to start using. After starting using you can set parameter in below setting interface.
-
Page 31: First Run
FIRST RUN This chapter guides you through the steps and the first run of the Mankati Fullscale XT. -
Page 32: Stick The Kapton Tape
Stick the Kapton tape Uncover one side of the Stick the kapton tape(15) to tape, and then try to stick it the build plate. on the plate. Please ensure It is the high temperature the tape is smooth enough resistance doubleside tape, without any bubbles. it contains three layers. - Page 33 Stick the Kapton tape Cut off the parts on the Cut the tape off at the screws when sticking the same width of the plate. third line. Stick the second line in the same way. www.mankati.com...
- Page 34 Stick the Kapton tape When appear some After sticking the tape big bubbles, just use on the plate, please needle(21) stick into uncover the other side them. Then smooth of the tape. them with yellow After several Note: board. printing, the stickiness is not strong enough, please change the...
-
Page 35: Leveling Build Plate
Tightening the four black screws as tight Frequent build plate leveling can keep Mankati as it can to reduce the build plate height to Fullscale XT best performance. Re-leveling cannot hurt avoid collision between nozzle and plate. the printer but without leveling will decrease your success rate of printing. - Page 36 Leveling Build Plate Now, begin to adjust the four corners. Adjust next three corners in anti-clockwise direction by Do adjust all four corners repeatedly at least 3-4 times to same method. ensure the best gap you get. Use a name card between the extruder and the hot bed, move it back and forth.
-
Page 37: Feed The Filament
1. Ensure the clamp is not too tight or too loose, otherwise, filament feeding will have problem causing failure prints. 2. After feeding successfully, check if filament has twining and knotting to ensure filament feeding smoothly. 3. Lubricate the XY axis and sliding blocks to avoid motion stuck. www.mankati.com... -
Page 38: Print From Sd Card
It is better to use the default settings for the first run. Insert the SD card into When your 3D print Mankati Fullscale XT. finished, the build plate will move down and be heated to 50℃ automatically so as to take out the model more easily. -
Page 39: Unload The Filament
2. If the printer stops working for a long time, please switch off the printer to avoid the filament carbonized, which will cause the nozzle clogged. Clean the dust on the build plate. It can extend the lifetime of the kapton tape. www.mankati.com... -
Page 40: Maintenance
MAINTENANCE To keep your Mankati Fullscale XT in perfect performance, some basic periodical maintenance is a must. This chapter shows you some practical tips which will help you to take care of your printer well. -
Page 41: Maintenance
After a lot of printing, the wheel in the filament feeder might accumulate small plastic particles. You can clean this with a simple brush. Remove the black screw on the feeder motor totally. Select “Prepare”> “move axis” > “move 1mm”> “move Clean small plastic particles with a simple brush. extuder”. The feeder gear will start to work. www.mankati.com... - Page 42 Maintenance Lubricating the guide rails Clean the X-Y axis and guides rails. Lubricate the X-Y axis and rail guides periodically, no overflow is appropriate.
-
Page 43: Troubleshooting
TROUBLESHOOTING In case something goes wrong with your Mankati Fullscale XT, the following chapter will help you. From diagnosing and fixing the problem yourself to contacting support. -
Page 44: Setting And Calibration Problems
2. Material is not adhering to the build plate. Please stick the kapton tap to your build plate. PVA: Nozzle temperature: 190-220℃ Bed temperature:45℃ Only one fan is working when Mankati Fullscale XT in standby model. What are the relationships among the layer thickness, print speed and nozzle temperature? This is not a breakdown. -
Page 45: Hardware Problems
1. The clamp of the feeding device is too tight.. Loosen the screw of the clamp.. MAXTEMP/ MINTEMP 2. Nozzle clogging, causing the filament not to be fed smoothly. 1. Nozzle temperature is too high. Please clean the nozzle with drill and needle.. www.mankati.com... - Page 46 Hardware Problems Build Plate Problems Even the screws under build plate have been loose totally, the build plate still is far away from the nozzle (the gap between build plate and nozzle is too big to be adjusted). A: Adjust Z axis limit switch on the back the printer, raise it a little bit; after adjusting, if problem still exist, the main cause is deformation is not enough of the hot bed’...
-
Page 47: Printing Problems
Please keep the build plate heated continuously; Change a new Kapton device’ s fixing screw is too loose; Or wrong choice of filament diameter; Or filament quality is poor; Or the filament gets stuck and could not be fed smoothly. Q: Model has flow line www.mankati.com... - Page 48 The solution is to print 3-4 pieces of the small model together. If so, the extruder will move among different models, leaving time for heat dissipation. Q: Mankati Fullscale XT stops suddenly sometimes A: 1. Gcode file saved incompletely. 2. USB connection cable has problem while choosing online printing or computer is in standby model.
- Page 49 For Sales, Service and Support Call DNK Systems on 1300 309 529...
Need help?
Do you have a question about the Fullscale XT and is the answer not in the manual?
Questions and answers