Table of Contents
Advertisement
Advertisement
Table of Contents

Related Manuals for Mankati FULLSCALE XT PLUS

Summary of Contents for Mankati FULLSCALE XT PLUS
- Page 1 Desktop 3D Printer User Manual...
-
Page 2: Table Of Contents
Leveling Build Plate SETUP Unpacking Feed the Filament Accessory Print from SD Card Tool Box Unload the Filament Setting Up Mankati Fullscale XT Plus MAINTENANCE Fullscale XT Plus Outlook Maintenance LCD INSTRUCTION TROUBLESHOOTING LCD Menu Structure Setting and Calibration Problems... -
Page 3: Welcome
WELCOME TO THE MANKATI FULLSCALE XT PLUS This User Manual will guide you to quick start with the Mankati Fullscale XT Plus easily. Being a thrilling reform to the next level, Mankati Fullscale XT PLUS will provide you with higher resolution, bigger printing volume and more user friendly functions. -
Page 4: Safty
HEAT and HIT WARNING: Mankati Fullscale XT Plus 3D Printer generates high temperatures and moving parts contained may cause injury. To avoid scalding, please never touch the extruder or the heated aluminum block during preheating the nozzle or printing. CAUTION: Do not leave your machine unattended for a long time during the printing. -
Page 5: Specifications
Arduino ATmega 2560 R3 Micro Controller Forming Tech. Fused deposition modeling Mother Board Mankati Stable Main Board V1.0 Extruder Number 1 or 2 (Dual extruders Perfect supported) Stepper Motor X, Y axis 42*48, 1.3 A; Z axis 42*40, 1.3 A Build Size 260*260*300 mm / 10.2*10.2*11.8 inch... -
Page 6: How It Works
The Mankati Fullscale XT Plus 3D Printer makes solid, three-dimensional objects out of melted Filament. Your 3D designed files are read from SD card and translated into instructions by Mankati Fullscale XT Plus. The machine then heats the filament and through a nozzle squeezes it out onto heat bed to build a solid object, layer by layer. -
Page 7: Setup
SETUP Every Mankati product has been passed stringent tests before leaving factory, and packaged very carefully to deliver. Hope you would take your time reading this chapter and get your machine set up. -
Page 8: Unpacking
You can download a PDF copy of this User Be careful NOT to grip the belts or shaft of the NOTE: Caution: manual at the support page: http://www.mankati.com/ motion system. download.html www.mankati.com... - Page 9 Unpacking “Hello, Mankati Fullscale XT Plus! “ Removing the stretch film off, you can see all the Take all the accessories out. Place your machine on a stable surface, and leave accessories, tools and filaments. enough space surrounding it to check accessories. When taking your 3D printer out of the Caution: box, please be careful NOT to grip the belt or shaft of the motion system.
- Page 10 Unpacking Taking out the filaments: For easy and safe transport, spools of filament are 1) Connect power wire to your machine; 3) Enter into LCD panel’s menu: ”Prepare > Autohome”, Then the two build plate supporters fixed tightly between the build plate supporters. 2) Turn it on; will lift to the top of Z axis; Take them out and follow the 3 steps below: 4) Tacking out the spools of PLA filament and feeding devices. www.mankati.com...
-
Page 11: Accessory
Accessory 3) 1 tool box: including the necessary tools for installation and other accessories. 4) 2 feeding devices: constituted by gear motor and feeder, with the advantages of high accuracy and easy operation. 5) 3 PC cover boards: installed on 3 sides(front, left, right) to keep the temperature of inside printing space constant. Taking out accessories, tool box and filament and check if below things are included: 1) 2 spools of PLA filament, diameter 3mm, 1kg/spool; 2) 1 Build plate. www.mankati.com... -
Page 12: Tool Box
Check if the following tools are complete. If anything described is missing, please contact: 18) 1*USB cable: connecting the computer and your printer when printing or upgrading firmware. support@mankati.com. 1) 1*diagonal pliers: to dismantle the support underneath your printing model or to prune filament. 2) 4* Spanners: installation tools. -
Page 13: Setting Up Mankati Fullscale Xt Plus
Setting Up Mankati Fullscale XT Plus 1. Install the Build Plate 4) After installing the plate, please tighten 1) Turn on your Fullscale XT Plus, enter 5) Connect the power wire and data cable the 4 screws under it properly to lower it “Prepare > Move axis > Move 1mm>... - Page 14 Setting Up Mankati Fullscale XT Plus 3. Feeding Device Installation 1) Feeding motor: 3) Connect the data cable using the small to the feeding devices. spanner to install No. 1 feeding motor on position 1. 2) Insert the end 4) Feeding device of feeding tube installation done. into the socket of feeding motor and tighten it firmly.
- Page 15 Setting Up Mankati Fullscale XT Plus 4. Filament Spool Holder Installation 1) Take the two spool holders out of the tool box. 2). Install filament spool’s holder. www.mankati.com...
-
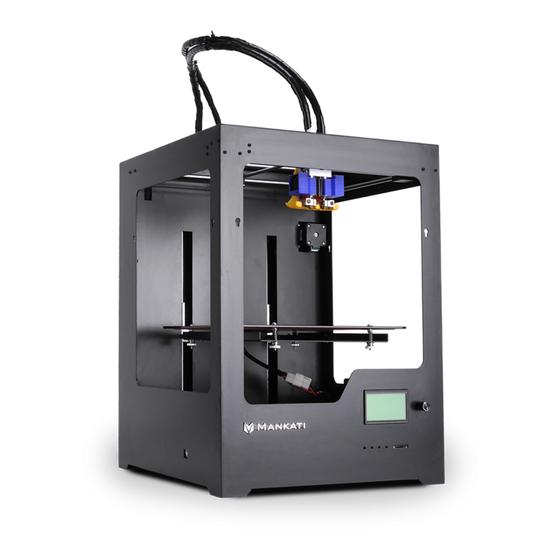
Page 16: Fullscale Xt Plus Outlook
Fullscale XT Plus Outlook 1. SD-card slot 6. Print head 10. Power Socket 2. Push and rotate knob 7. Filament guide tube 11. Machine label 3. LCD screen 8. Printer holder 12. Spool holder 4. Build plate screws 9. Power switch button 13. -
Page 17: Lcd Instruction
LCD INSTRUCTIONS In this chapter you can learn about detailed instructions of the LCD menus. -
Page 18: Lcd Menu Structure
1.4.3 - Preheat ALL 1.4.4 - Preheat PLA Bed 1.5.1 - Preheat ABS 1 1.5.2 - Preheat ABS 2 1.5 - Preheat ABS 1.5.3 - Preheat ALL 1.5.4 - Preheat ABS Bed 1.6 - Leveling Bed 1.7 - Cool Down www.mankati.com... -
Page 19: Lcd Menu
Move X: Move 10mm each step in X direction required ( Default: Extruder, 235℃; Build plate, 70℃) Move Y: Move 10mm each step in Y direction Preheat ABS All: Preheat two extruders both and build plate to the working temperature of Move 1mm: Move 1mm each step www.mankati.com... - Page 20 To stop the printing, but it will record the printing stop position to continue the printing. Amax z: Max accelerated speed in Z direction 4. Stop Print: To finish the printing job Amax e: Max accelerated speed of feeding motor www.mankati.com...
-
Page 21: Software
SOFTWARE This chapter guide you how to download and install the software, and show you detailed introductions of parameters in MankatiUM. -
Page 22: Download And Install
Download and Install Enter Mankati official download website: www.mankati.com/download Choose the appropriate version of Mankati UM according to your computer operation system. Our software apply to Windows, MacOS, Ubuntu operating system. Right click the software installation program, select "run as administrator" and install it following the prompts. www.mankati.com... -
Page 23: Interface
5.1 Normal: Default state 5.2 Overhang: Measure the angle of overhang, and judge if it is necessary to generate the support structure Five options for choice: - Split object into parts (It will take too much time, so it is better to do 5.3 X-Ray: X-ray vision - Center on platform this in modeling software) - Delete object 5.4 Layers: Layer by layer to simulate the printing process - Delete all objects - Multiply object www.mankati.com... -
Page 24: Parameter Definition
Speed and Temperature The lower layer height, the higher printing accuracy Means the extruder’s moving speed. Printing speed Layer height: Printing Speed: within certain limits decides the quality of printing model quality. Mankati Fullscale XT Plus’s default speed is 30mm/s. High speed printing can be set as Super accuracy printing: Recommended set as 0.1mm 50-70mm/s. High accuracy printing: Recommended set as 0.2mm Giving consideration to both printing speed and accuracy printing: Higher speed printing needs a balance by increasing nozzle recommended 0.2mm... - Page 25 Enabling the brim or raft disables the skirt. other parts easily. Which extruder to use for support material. Adding a certain amount of overlapping Support dual extrusion: -Dual extrusion overlap: For easy break-away support you can use either extruder. extrusion on dual-extrusion prints. Note: Function prompt will be shown when You can choose main extruder(left extruder) to print main structure, you point the cursor on the tab. 2nd extruder(right extruder) to print soluble support material. www.mankati.com...
- Page 26 Parameter Definition Speed enable cooling fan during printing to help -Enable cooling fan: cool filament down. Moving speed without printing. Usually setting -Travel Speed: at 70 is the best choice, Fullscale XT Plus can reach speeds of 250mm/s at most. But this may cause the motor missing steps problem. The bottom print speed. Recommended -Bottom layer speed: 20, set as 0 means the same as other layer. Reducing the bottom layer speed can help model stick more closely to platform. Speed at which infill parts are printed. -Infill speed: Recommended 40 with best performance. 0 means same print...
- Page 27 If a retraction needs to happen before this minimal is each layer. Recommended setting is 10 with best reached the retraction is ignored. This avoids retraction performance. Too slow will result in nozzle oozing. a lot on the same piece of filament which flattens the filament and causes grinding issues. Recommended lifting the head, if the minimal layer -Cool head lift: 0.02 at best performance, 0 means unlimited retraction time is not enough, to extend the cooling time for frequency. model cooling. See function prompt in the -Z hop when retracting: software. www.mankati.com...
-
Page 28: Fix Horrible
See function prompt in the software. This expert option keeps all the open bits of the model intact. Support print density. Birm -Fill amount: Normally Mankati Tries to stitch up small holes and remove Recommended setting as 15 with best performance. More everything with big holes, but this option keeps bits that are Default as 5, more lines, more firmly the -Birm line amount: density makes the support not easy to remove. Less density not properly part of anything and just goes with whatever it is model sticking to platform. - Page 29 You can pause printing at a certain height of Pause at height: the print, and you can percisely locate the print head position. You can reset the printing parameters at a certain Tweak At Z: height of the print, this is a powerful option for experts. You can reset printing speed, flow, bed temperature, nozzle temperature and fan speed. www.mankati.com...
-
Page 30: First Run
FIRST RUN This chapter guides you through steps to start your first run of the Mankati Fullscale XT Plus. -
Page 31: Stick The Kapton Tape
Clean the heat bed glass You can use the yellow carefully to ensure it’s clean shovel in tool box to push and tidy. About 3 lines of and press it while sticking. tape is needed to cover the glass completely. Take the tape out(15). If covering the plate completely, it will need 3 lines of the tape. www.mankati.com... - Page 32 Note: After several printing, the stickiness is not strong enough, please change the tape. Cut off the parts on the screws when sticking the third line. If some big bubbles appear, just use a needle to stick into them. Then smooth them with yellow board. www.mankati.com...
-
Page 33: Leveling Build Plate
Important? plate. Frequent build plate leveling can keep Mankati Note: Twisting screws too tight may cause Fullscale XT Plus best performance. Re-leveling cannot the glass cracking! hurt the printer but without leveling will decrease your success rate of printing. • If the build plate is too far from the extruder nozzle,... - Page 34 Insert a business card gap distance. into the gap between the extruder and the hot bed, then move it back and forth. You should feel some friction on the card but still able to easily move the card between the gap without tearing or damaging the card. www.mankati.com...
-
Page 35: Feed The Filament
1. Ensure the clamp is not too tight or too loose, otherwise, filament feeding will have problem causing failure prints. 2. After feeding successfully, check if filament has twining and knotting to ensure filament feeding smoothly. 3. Lubricate the XY axis and sliding blocks to avoid motion stuck. www.mankati.com... -
Page 36: Print From Sd Card
Print from SD Card Import the .stl format Choose “Print from SD model files in our slicing card”, then select your software (Mankati UM), and Gcode file. output the Gcode files in the SD card. It is better to use the Note: default settings for the first run. Insert the SD card into When your printing Mankati Fullscale XT Plus. finished, the build plate will move down and be heated to 50℃... -
Page 37: Unload The Filament
2. If your machine stops working for a long time, please switch off the printer to avoid the filament carbonized, which will cause the nozzle clogged. Clean the dust on the build plate, that will extend the lifetime of the kapton tape. www.mankati.com... -
Page 38: Maintenance
MAINTENANCE To keep your Mankati Fullscale XT Plus in perfect performance, some basic periodical maintenance is a must. This chapter shows you some practical tips which will help you to take care of your printer well. -
Page 39: Maintenance
Ensure that the plate is clean. Bubbles, scratches, dust, and oil from your hands are avoided. 1. Use tweezer to remove filament residue. 2. Do not touch the platform glass with sharp things. 3. If not using the printer for a long time, please clean up the tape, clean the glass and fully release the four black screws under the build plate. Cleaning the filament feeder After a lot of printing, the wheel in the filament feeder might accumulate small plastic particles. You can clean this with a brush. Remove the black screw on the feeder motor totally. Select “Prepare”> “move axis” > “move 1mm”> “move Clean small plastic particles with a brush. extuder”. The feeder gear will start to work. www.mankati.com... - Page 40 Maintenance Lubricating the guide rails Clean the X-Y axis and guides rails. Lubricate the X-Y axis and rail guides periodically, no overflow is appropriate. www.mankati.com...
-
Page 41: Troubleshooting
TROUBLESHOOTING AND SUPPORT In case something goes wrong with your Mankati Fullscale XT Plus, the following chapter will help you. From diagnosing and fixing the problem yourself to contacting Mankati support. -
Page 42: Setting And Calibration Problems
2. The maximum temperature of the nozzle is 300℃ , and the build plate is 110℃ . The parameters of materials from different manufacturers could be different, so it is better to consult the relevant material manufacturers about the temperature setting. www.mankati.com... -
Page 43: Hardware Problems
1. The clamp of the feeding device is too tight.. Loosen the screw of the clamp.. MAXTEMP/ MINTEMP 2. Nozzle clogging, causing the filament not to be fed smoothly. 1. Nozzle temperature is too high. Please clean the nozzle with drill and needle.. www.mankati.com... - Page 44 1. The top of the Z-axis screw is loose. Please reinforced screw at the top of the Z-axis screw. 2. Z-axis motor loose connections. Please open the base to re-plug the motor cables. 3. Z-axis screw need lubrication. Please add oil to the Z-axis screw. www.mankati.com...
-
Page 45: Printing Problems
Please keep the build plate heated continuously; Change a new Kapton motor’ s fixing screw is too loose; Or wrong choice of filament diameter; Or filament quality is poor; Or the filament gets stuck and could not be fed smoothly. Q: Model has flow line www.mankati.com... - Page 46 A: Turn the direction of model properly in MankatiUM; The support density should not be set too high; Divide the model into different parts to print if necessary. If still cannot solve the problem, please contact with our technical support team at support@mankati.com Q: Failed prototyping of small model Q: Model surface is unsmooth A: If printing a small model, the extruder will always move in a small space, so the heat will be concentrated in the model, and hard to be distributed.
-
Page 47: How To
How To How to deal with filament stuck in the feeder motor? Sometimes the filament 3. Take the filament off stucks at the feeder motor with a tweezer. because the slow filament unloading operation. First: loose the black screw totally. Cut off the thicker part. www.mankati.com... - Page 48 Heat the nozzle to 210 Tweak the nozzle to degrees, making residual the point as picture shows filament inside the nozzle automatically flow out. Afterwards, lower the temperature below 50 degrees, then wait until the nozzle is totally cooled down. Loosen the screw with a L-shape wrench. www.mankati.com...
- Page 49 Use 2 spanners: one Heat the nozzle to for fixing at the upper 210 degrees, making residual filament in the location, the other for nozzle automatically loosen the nozzle under, flow out. then take it off. After heating and filament extruding, clean nozzle with the drill in tool box. Pay attention not to break off it into the nozzle. www.mankati.com...
- Page 50 How To How to change the fuse? Find the new Remove the broken fuse(9) in the tool fuse, put in the new box. one. Disconnect the Reinstall the power, turn the power jack into the machine on the machine. Done. base, remove the power jack. www.mankati.com...
- Page 51 (thermostat: T1,T2; heating tube:HE1, HE2) on the motherboard. Slot: HE1, HE2 Push the Replace the faulty one with the spare one in your thermostat /heating tool box. Thermostat tube out. The black&red Note: wire is thermostat, the red wire is heating tube. Heating tube www.mankati.com...
- Page 52 L-shape belt you want to tighten. wrench, then use a clamp to tighten the belt properly. Finally, lock the screws back on sliding block and synchromesh gear. Hold the belt’s end reaching out from the black sliding block with a clamp. www.mankati.com...
- Page 53 “build plate "Dual extrusion merge" still inclines or faulty distance between nozzle&plate after plate leveling”? Loosen the screws and raise the Z limit stopper on rear side a little higher.. Then you can set parameters for the main nozzle and vice nozzle. www.mankati.com...
- Page 54 Tel: +8621-67618178 (9:30-18:00 Beijing Time, Monday - Friday) Further more, feel free to share your 3D printing experience and discuss with makers all over the world on Mankati Forum: Forum: http://forum.mankati.com For more videos of printing operation tutorials and sharings,...
Need help?
Do you have a question about the FULLSCALE XT PLUS and is the answer not in the manual?
Questions and answers