Advertisement
Quick Links
Advertisement

Related Manuals for APART PMR4000RMKII


Summary of Contents for APART PMR4000RMKII
- Page 1 PMR4000RMKII Instruction manual...
- Page 3 PMR4000RMKII Instruction manual PMR4000RMKII manual...
-
Page 4: Important Safety Instructions
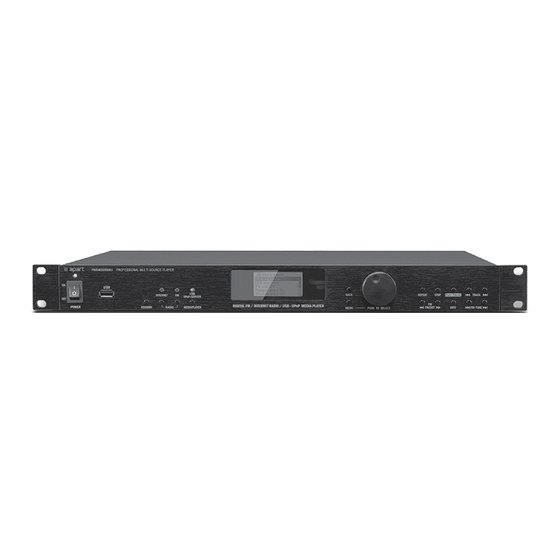
TUNER & MEDIA PLAYER Features The Apart PMR4000RMKII is a professional multi-source player with integrated FM RDS tuner, internet radio, UPnP and USB media player, compatible with MP3, WMA, FLAC and WAV audio files. The unit is equipped with analog outputs, optical digital output for the digital media player, wired Ethernet and Wifi 2.4G / 5G. - Page 5 PMR4000RMKII Instruction manual • Do not use the unit if the electrical power cord is damaged. • Always operate the unit with the AC ground wire connected to the electrical system ground. • If there are high signal levels at the inputs, then please have gain controls on amplifiers turned down during power-up to prevent speaker damage.
-
Page 6: Front Panel
TUNER & MEDIA PLAYER Front panel 3 4 5 6 Power button. Push to power on or off. This button powers off the unit entirely in the off position. The power led will not light up when in the off position. During normal operation, the power led lights up blue, in standby, the led is red. - Page 7 PMR4000RMKII Instruction manual both options: shared media = UPnP, USB playback = USB. Use the rotary selector “9” to highlight “Shared media” or “USB playback”, and push selector “9” to confirm your selection. LCD display with led backlight: white text on blue background.
- Page 8 TUNER & MEDIA PLAYER Repeat button: push to enable repeat mode. This will work when playing back from USB or UPnP servers. Repeat mode will repeat all selected tracks. It is not possible to repeat a single track. Stop button: push to stop playback. Play/Pause button: push to start or resume playback or to pause playback.
-
Page 9: Rear Panel
PMR4000RMKII Instruction manual Rear panel ® Optical digital output: standard Toslink optical digital output. This output carries the digital signal from USB/UPnP media playback and internet radio only. Output level adjustment: turn this potmeter to set the analog output to a certain level. This feature comes in handy when more sources are in use in the same system. -
Page 10: Getting Started
TUNER & MEDIA PLAYER because this may lead to unpredictable behavior and even system damage. Mains fuse: replace only with a fuse of the same voltage and current rating: T500 mAL / 250 V Mains inlet. Connect to a standard mains receptacle 230VAC/50-60Hz. - Page 11 PMR4000RMKII Instruction manual Network: Connect a standard RJ45 cable from your network router to the unit. W-Lan: For wireless operation, attach the antenna to the „Wi-Fi 2.4G / 5G antenna“ connector at the back of the unit. Your Wifi protection password may be required to access the wireless network.
- Page 12 TUNER & MEDIA PLAYER MP3, WMA, FLAC and WAV files. may not be displayed correctly in the scroll list. Remote control: The handheld infrared remote control requires two „AAA” batteries for operation. Inserting/changing batteries: Remove the battery compartment lid carefully. Insert new batteries and ensure correct polarity, as graphically displayed inside the compartment.
- Page 13 PMR4000RMKII Instruction manual Power supply: Plug in the power cable and connect it to a power receptacle 230V/50-60Hz. Now turn on the unit and wait until the system has started up. This will take only a few seconds. Now the unit will start with the setup wizard. Choose “YES” shown in the display by turning the rotary selector, highlight “Yes”...
- Page 14 Make sure the computer and PMR4000RMKII are connected to the same local area network and check the settings of the router and media server. In Windows 7: Control Panel\All Control Panel Items\Network and Sharing Center\Advanced sharing settings: Network discovery must be on.
- Page 15 Make sure your PC is connected to the network and set it up as a UPnP server. Ensure that the PMR4000RMKII has been turned on and is connected successfully to the same network. Add supported audio files (MP3/WMA/FLAC or WAV) and/or folders you want to share with your PMR4000RMKII to your Windows Media Player’s media library.
- Page 16 TUNER & MEDIA PLAYER Music player PMR4000RMKII: Select USB/UPnP-server. Select Shared media: a list of connected UPnP servers will show up on the display. If no servers are visible, check the settings on the computer or media sharing device. Select a server and click the rotary knob to confirm the selection.
- Page 17 PMR4000RMKII Instruction manual Network sharing settings. This example shows the settings from a Windows 7 computer and may be different from your specific system: Control Panel\All Control Panel Items\Network and Sharing Center\Advanced sharing settings:...
- Page 18 Control Panel\All Control Panel Items\Network and Sharing Center\ Media streaming options In this screenshot we see the Apart PMR4000RMKII showing up in the network! You have to allow the unit to access the UPnP server’s media files! Click “Customize”...
- Page 19 PMR4000RMKII Instruction manual Select “Make all of the media in my library available to this device” instead of “Use default settings”. Normally this is optional, but when your media files have been redirected to a server location, or a network connected hard disk (NAS), it may be necessary to select this option.
- Page 20 Wifi, make sure the unit is set up close to the wireless transmitter. Weak Wifi reception usually results in limited connectivity and insufficient bandwidth. By default, the PMR4000RMKII may not detect weak Wifi access points. Consider using wired Ethernet in case of doubt. Connecting PMR4000RMKII to a network: You need a network connection via a wired or wireless router for “Internet radio“...
- Page 21 If your wireless router has a feature called “push button configuration”, you can access the “PBC Wlan setup” menu on PMR4000RMKII. Follow the instructions shown on the display to proceed and finish automatic wireless setup. Please note that this feature requires a PBC compatible Wlan router. Consult the manual of your Wlan router if necessary.
- Page 22 TUNER & MEDIA PLAYER • IP settings: set the IP address and the subnet mask. • Gateway address: set the gateway address. • DNS: set the primary and secondary DNS address. • SSID: set the wireless network identification. • Authentication: set the preferred method of authentication: Open, Pre-shared key (PSK), Wifi protected access (WPA) or WPA2.
-
Page 23: Internet Radio
PMR4000RMKII Instruction manual Internet radio: The internet radio allows you to listen to numerous internet radio stations worldwide. Broadband internet access and a wired or wireless network connection are necessary to use this feature. You can store presets for easy access without the need to go through all possible selection parameters. - Page 24 The portal is free of charge. To register your unit on this portal, you need an access code: Search for the access code on your PMR4000RMKII: in internet radio operation mode, press the menu button, select “Station List”, scroll down to “Help” and select “Get Access code”.
-
Page 25: General Functions
All previously added stations will be lost and replaced by the last login you created for the specific unit. The PMR4000RMKII will automatically generate a new access code. On the website, you can edit your login preferences, add another internet radio unit to your account or synchronize your favourites with another internet radio unit. - Page 26 The maximum analog output level can be preset using the volume knob at the back of the unit. Set the volume knob to adjust the analog output level of the PMR4000RMKII to be equal to the level of other sound sources in your system.
- Page 27 PMR4000RMKII Instruction manual FM radio operation: Press the FM button or select “FM“ in the main menu for FM radio operation. Tuning to available radio stations: Press the “FM TUNE>>|“ or “|<<FM TUNE” to start an automatic station search. The search function will stop, once a station has been found.
- Page 28 In all cases, it is mandatory to use an FM separation transformer (available in specialized shops) to galvanically separate the PMR4000RMKII and all other units in the audio chain from the external antenna or cable network. Failure to do so will result...
- Page 29 You now have to type the unit’s net remote PIN code to allow the app to access and control the PMR4000RMKII. Standard PIN code is 1234. You can change this code on the PMR4000RMKII: “menu”, “system settings”,” network”, “net remote PIN setup”.
- Page 30 In this text field, type a new “friendly name” for your unit and click the “Apply” button. Your PMR4000RMKII will show up in the app with this name! You can look up the friendly name on the unit: “menu”, “system settings”, scroll down to “info” and scroll down to “friendly name”.The web server will also show the current...
- Page 31 PMR4000RMKII Instruction manual Technical specifications USB/UPnP Supported audio codecs MP3 32-320 kbps and variable bitrate, WMA, FLAC, WAV, ID3 tags support USB memory file system FAT, FAT32 USB memory capacity up to 128 GB S/N ratio >90 dB <0.05% Frequency range...
- Page 32 TUNER & MEDIA PLAYER Wifi 2.4 GHz / 5 GHz 802.11 g Authentication Open, Pre-shared key (PSK), Wifi protected access (WPA) or WPA2 Channels selectable per country Ethernet Connector standard RJ45 network port General Power supply 230 VAC / 50 Hz Power consumption max 30 W Power consumption standby...
- Page 33 This function also needs to be set inactive. To be sure there is no problem in the PMR4000RMKII, you can always test the device on a dedicated network with a very cheap...
- Page 34 TUNER & MEDIA PLAYER...
- Page 36 Audioprof nv Industriepark Brechtsebaan 8 bus 1 2900 Schoten - Belgium Company names, product names and trademarks are property of their respective owners. Apart-Audio specifications are subject to change without notice.
Need help?
Do you have a question about the PMR4000RMKII and is the answer not in the manual?
Questions and answers