Table of Contents
Advertisement
Available languages
Available languages
User & Care Guide
Guide d'utilisation et d'entretien
Guía de uso y cuidado
Design may vary by model number.
This user manual is to be only use for
electronic control 5,100 BTU, 6,000
BTU, 8,000 BTU 10,000 BTU and 12,000
BTU Models. - Some models may have
an additional letter after the model
number.
La configuration peut varier selon le
numéro de modèle.
Ce guide d'utilisation doit être utilisé
strictement avec les modèles à
commande électronique de 5,100 BTU,
6,000 BTU, 8,000 BTU, 10,000 BTU et
12,000 BTU. - Sur certains modèles, le
numéro de modèle peut être suivi d'une
lettre.
Room Air Conditioner
Climatiseur individuel
Aire acondicionado
de uso doméstico
ESA405P
ESA406P
ESA406N
El diseño puede variar conforme al
número de modelo
Este manual del usuario es únicamente
para utilizar los controles electrónicos
modelos 5,100 BTU, 6,000 BTU,
8,000 BTU, 10,000 BTU y 12,000 BTU.
Algunos de los modelos pueden tener
una letra adicional después del número
de modelo.
ESA408N
ESA410N
ESA412N
Advertisement
Chapters
Table of Contents

Related Manuals for Haier ESA405P


Summary of Contents for Haier ESA405P
- Page 1 Room Air Conditioner Climatiseur individuel Aire acondicionado de uso doméstico User & Care Guide ESA405P ESA408N Guide d'utilisation et d'entretien ESA406P ESA410N ESA406N ESA412N Guía de uso y cuidado Design may vary by model number. La configuration peut varier selon le El diseño puede variar conforme al...
-
Page 3: Table Of Contents
Normal Sounds of an Air Conditioner ..................23 TROUBLESHOOTING ......................24 LIMITED WARRANTY .......................25 PRODUCT REGISTRATION Thank you for purchasing our Haier product. This easy-to-use manual will guide Model number you in getting the best use of your product. Remember to record the model and serial Serial number numbers. -
Page 4: Safety Information
IMPORTANT SAFETY PRECAUTIONS WARNING THE INFORMATION IN THIS USE & CARE GUIDE MUST BE FOLLOWED TO MINIMIZE THE RISK OF PERSONAL INJURY, FIRE, ELECTRIC SHOCK OR OTHER UNSAFE CONDITIONS. THE INSTRUCTIONS IN THIS USE & CARE GUIDE ARE NOT MEANT TO INCLUDE EVERY POSSIBLE CONDITION OR SITUATION THAT MAY OCCUR. - Page 5 IMPORTANT SAFETY PRECAUTIONS 8. This air conditioner contains R410a refrigerant and requires certified technicians to use the proper equipment, tools and safety standards that are approved for this refrigerant. Use only equipment certified for R410a refrigerant. In addition, under federal law, all refrigerant must be properly removed from the air conditioner prior to its disposal.
-
Page 6: Operational Safety & Warnings
1. This air conditioner contains no consumer serviceable parts. If you have problems or questions regarding the operation of your air conditioner always call Haier Customer Service: 1-877-337-3639. 2. Be sure that the air conditioner is properly and securely installed in the window according to the installation instructions included in this Use &... -
Page 7: Installation Requirements
Drill and 1/8” bit Scissors Tape measure Pencil PARTS SUPPLIED: Check that all parts for your specific air conditioner are included in the parts package. NOTE: If parts are missing, call Haier Customer Service: 1-877-337-3639. ESA405P, ESA408N, ESA410N, IMAGE PART ESA406P,... -
Page 8: Location Requirements
• A grounded electrical outlet within 6 ft. (183 cm) of where the power supply cord exits the air conditioner, for models: ESA405P, ESA406P, ESA406N, ESA408N • A grounded electrical outlet within 4 ft. (122 cm) of where the power supply cord exits the air conditioner, for models: ESA410N, ESA412N NOTE: Do not use an extension cord, plug adapter, surge protector or multi-outlet adapter. -
Page 9: Electrical Requirements
ELECTRICAL REQUIREMENTS WARNING ELECTRICAL SAFETY and WARNINGS 1. DO NOT cut or remove the grounding prong on the attached power supply cord. Doing so may cause sparks or fire, and voids all warranties. For safety purposes the air conditioner must be properly grounded. - Page 10 If this power supply cord is damaged, it cannot be repaired and must be replaced with a cord from the product manufacturer. If the power supply cord is damaged call Haier Customer Service: 1-877-337-3639. PAGE 8...
- Page 11 It cannot be purchased at a retail store and must not be repaired by the user. If the power supply cord is damaged please call Haier Customer Service: 1-877-337-3639. • The power supply cord contains no user-serviceable parts.
-
Page 12: How To Install
2. Using 3/8" self-tapping screws, attach the top channel to the top Fig. 8 of the air conditioner. (See Fig.8) Use three (3) 3/8" self-tapping screws for models: ESA405P, ESA406P, ESA406N Use four (4) 3/8" self-tapping screws for models: ESA408N, ESA410N & ESA412N PAGE 10... - Page 13 PREPARING THE AIR CONDITIONER cont. INSTALL SIDE CURTAINS NOTE: Attach side curtains to the air conditioner before placing the unit in the window. 1. Place the tabbed side of the side curtain in the track on the right-hand side of the air conditioner cabinet. (See Fig.9) Fig.
-
Page 14: Preparing The Window
PREPARING THE WINDOW 1. Measure the width of the window opening. (See Fig.13) 2. Mark the center line on the inside of the windowsill with a pencil. (See Fig.14) WIDTH OF CENTER LINE WINDOW OPENING Fig. 13 Fig. 14 HEIGHT WIDTH WIDTH WIDTH... -
Page 15: Completing The Installation
COMPLETING THE INSTALLATION ATTACH SIDE CURTAINS TO WINDOW Fig. 17 1. Pull the right-hand curtain and frame out until it fits flush to the side of the window frame. (See Fig.17) 2. Use a 1/8” drill bit to drill a starter hole through the top hole in the side curtain and into the window sash. -
Page 16: Using Your Air Conditioner
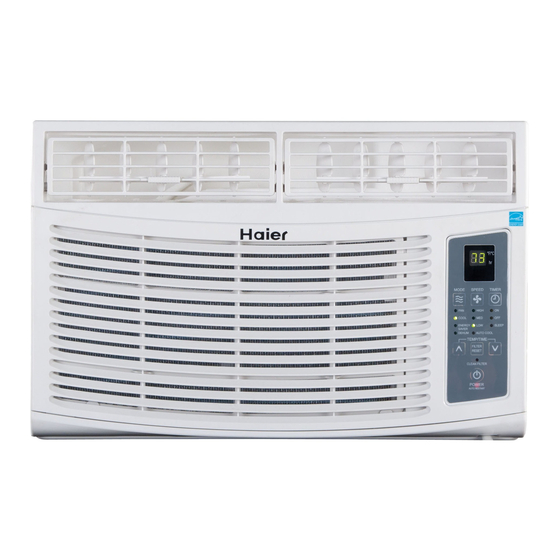
STARTING THE AIR CONDITIONER ˚F/˚C MODE SPEED TIMER TIMER MODE SPEED HIGH ENERGY SAVE COOL SLEEP DEHUM AUTO COOL TEMP/TIME FILTER RESET TEMPERATURE / TIME FILTER RESET CLEAN FILTER CLEAN FILTER INDICATOR POWER POWER AUTO RESTART Operating your air conditioner properly helps you to obtain the best possible results. This section explains how to operate this air conditioner. - Page 17 STARTING THE AIR CONDITIONER cont. 1. Carefully remove the clear plastic film from the control panel. 2. Press POWER once to turn on the air conditioner. NOTE: When the air conditioner is first plugged in, the LED display will show “88” for 3 seconds. After the air conditioner is turned on for the first time, the display will show the temperature 72 F and the fan is automatically set to Low speed and the Mode indicator will show ENERGY SAVE.
- Page 18 STARTING THE AIR CONDITIONER cont. SPEED 1. Press FAN SPEED until; you see the indicator light come on next to the desired setting. ˚F/˚C 2. Choose High, Med, Low or Auto Cool HIGH—For maximum cooling MED—For normal cooling MODE SPEED TIMER LOW—For minimum cooling AUTO COOL –...
- Page 19 STARTING THE AIR CONDITIONER cont. TO CLEAR TIMER PROGRAM: NOTE: Air conditioner can be either on or off. Press TIMER until Timer indicator light turns off. TO VIEW OR CHANGE THE REMAINING TIME (IN HOURS): TIMER OFF 1. Press the TEMP/TIME up or down arrow button to increase or decrease the time. 2.
-
Page 20: Using The Remote Control
STARTING THE AIR CONDITIONER cont. FILTER RESET This feature automatically notifies you that the air filter must be cleaned. The indicator light will come on after 240 hours of operation. Clean the air filter (refer to Care and Cleaning), place it back in the front panel, and press the Filter Reset button. - Page 21 USING THE REMOTE CONTROL cont. TO CLEAR TIMER DELAY PROGRAM: NOTE: Air conditioner can be either on or off. Press TIMER until Timer indicator light turns off. TO SEE OR CHANGE THE REMAINING TIME (IN HOURS): TIMER OFF: 1. Press the TEMP/TIME up or down arrow button to increase or decrease the time. 2.
-
Page 22: Changing The Air Direction
CHANGING THE AIR DIRECTION ESA405P 2-Way Air Flow: The air directional louvers let you control the direction of the airflow. The airflow can be directed left to right.(See Fig.23) ESA406P, ESA408N, ESA410N, ESA412N 4-Way Air Flow: The air directional louvers let you control the direction of the airflow. The airflow can be directed up-down and left to right. -
Page 23: Cleaning The Air Filter
CLEANING THE AIR FILTER The air filter is removable for easy cleaning. A clean air filter helps remove dust, lint, and particles from the air for optimal cooling and operating efficiency. The Filter Reset light will turn on to notify you that the air filter must be cleaned. The light goes on after the air conditioner has been operating for 240 hours. -
Page 24: Cleaning The Front Panel
3. Air-dry the front panel completely. 4. Plug the power supply cord in the outlet and turn on the air conditioner. In the event that the filter is damaged and needs replacing, call Haier Customer Service: 1-877-337-3639 CUSTOMER SERVICE... -
Page 25: Normal Sounds Of An Air Conditioner
NORMAL SOUNDS OF AN AIR CONDITIONER NORMAL SOUNDS Your new air conditioner is designed to give you many years of dependable service. This section tells you how to clean and care for your air conditioner properly. While your air conditioner is operating, it is normal to hear the following sounds: SOUNDS REASON Air movement... -
Page 26: Troubleshooting
TROUBLESHOOTING POSSIBLE POSSIBLE CAUSE REMEDY PROBLEM Air Conditioner Power supply cord is not plugged Plug unit into a mating grounded outlet. does not start or into an outlet. operate Power supply cord has tripped. Press and release RESET button on the power supply cord. -
Page 27: Limited Warranty
THIS LIMITED WARRANTY IS GIVEN IN LIEU WHAT WILL BE DONE OF ALL OTHER WARRANTIES, EXPRESS OR Haier America will repair or replace any mechanical, IMPLIED, INCLUDING THE WARRANTIES OF electrical part or the compressor, which proves MERCHANTABILITY AND FITNESS FOR A defective in normal household use for a period of PARTICULAR PURPOSE. - Page 29 Bruits normaux produits par un climatiseur ................23 DÉPANNAGE ..........................24 GARANTIE LIMITÉE .........................25 ENREGISTREMENT DU PRODUIT Merci d'avoir acheté un produit Haier. Ce guide convivial vous aidera à utiliser votre climatiseur Numéro de modèle de façon optimale. Rappelez-vous de prendre en note les numéros Numéro de série...
-
Page 30: Renseignements Sur La Sécurité
CONSIGNES DE SÉCURITÉ IMPORTANTES AVERTISSEMENT L'INFORMATION FIGURANT DANS CE GUIDE D'UTILISATION ET D'ENTRETIEN DOIT ÊTRE SUIVIE À LA LETTRE POUR MINIMISER LES RISQUES DE BLESSURE, D'INCENDIE, D'ÉLECTROCUTION OU DE TOUTE AUTRE CONDITION DANGEREUSE. LES DIRECTIVES FIGURANT CE GUIDE NE SAURAIENT ENGLOBER L'ENSEMBLE DES CONDITIONS OU SITUATIONS POUVANT SURVENIR. AGIR AVEC SOIN ET PR…CAUTION LORS DE L'INSTALLATION, DE L'UTILISATION ET DU NETTOYAGE DU CLIMATISEUR. - Page 31 CONSIGNES DE SÉCURITÉ IMPORTANTES 8. Ce climatiseur contient un fluide frigorigène de type R410a. Par conséquent, les électriciens devront être certifiés et utiliser l'équipement et les outils appropriés, en plus de suivre les normes de sécurité appropriées à ce fluide frigorigène.
-
Page 32: Utilisation Sécuritaire Et Avertissements
1. L'appareil ne comporte aucune pièce pouvant être entretenue ou réparée. En cas de problème, ou pour toute question relative au fonctionnement du climatiseur, toujours appeler le service à la clientèle de Haier : 1-877-337-3639. 2. S'assurer que le climatiseur est installé de façon sécuritaire et appropriée dans sa fenêtre, et que ce soit fait conformément aux directives... -
Page 33: Exigences Relatives À L'installation
PIÈCES FOURNIES : Vérifier si toutes les pièces de votre modèle de climatiseur sont comprises dans le sac de pièces. REMARQUE : En cas de pièce manquante, téléphoner au service à la clientèle de Haier : 1-877-337-3639. ESA405P, ESA408N, ESA410N, IMAGE PIÈCE... -
Page 34: Exigences Relatives À L'emplacement
• Une prise électrique mise à la terre située à moins de 183 cm (6 pi) de la sortie du cordon d'alimentation du climatiseur, pour les modèles: ESA405P, ESA406P, ESA406N, ESA408N • Une prise électrique mise à la terre située à moins de 122 cm (4 pi) de la sortie du cordon d'alimentation du climatiseur d'air, pour les modèles: ESA410N, ESA412N... -
Page 35: Exigences En Matière D'électricité
EXIGENCES EN MATIÈRE D'ÉLECTRICITÉ AVERTISSEMENT SÉCURITÉ ÉLECTRIQUE et AVERTISSEMENTS 1. NE PAS couper ou enlever la broche de mise à la terre de la fiche d'alimentation. Cela pourrait provoquer des étincelles ou un incendie, et annulera toutes les garanties. Pour des raisons de sécurité, le climatiseur doit être correctement mis à... - Page 36 Si ce cordon d'alimentation est endommagé, il ne doit pas être réparé. Il doit être remplacé par un cordon du fabricant. Dans un tel contexte, appeler le service à la clientèle de Haier, au 1-877-337-3639. PAGE 8 EXIGENCES RELATIVES À L'INSTALLATION...
- Page 37 Ces cordons doivent ni être achetés en magasin, ni être réparés par l'utilisateur. Dans le cas d'un cordon endommagé, appeler le service à la clientèle de Haier, au 1-877-337-3639.
-
Page 38: Comment Installer Le Climatiseur
(voir la figure 8) Fig. 8 Utiliser trois (3) vis à métaux de 3/8 po pour les modèles suivants : ESA405P, ESA406P, ESA406N Utiliser quatre (4) vis à métaux de 3/8 po pour les modèles suivants : ESA408N, ESA410N & ESA412N... - Page 39 PRÉPARATION DU CLIMATISEUR (suite) INSTALLATION DES PANNEAUX LATÉRAUX REMARQUE : Fixer les panneaux latéraux au climatiseur avant de placer celui-ci dans la fenêtre. 1. Insérer le côté à onglets du panneau latéral dans la glissière, à la droite du caisson du climatiseur. (voir figure 9) Fig.
-
Page 40: Préparation De La Fenêtre
PRÉPARATION DE LA FENÊTRE 1. Mesurer la largeur de l'ouverture de la fenêtre. (voir la figure 13) 2. Tracer une ligne de démarcation du centre sur l'appui de fenêtre intérieur à l’aide d’un crayon. (voir la figure 14) LARGEUR LIGNE DE D’OUVERTURE DÉMARCATION DE FENÊTRE... -
Page 41: Achèvement De L'installation
ACHÈVEMENT DE L'INSTALLATION FIXATION DES PANNEAUX LATÉRAUX À LA FENÊTRE Fig. 17 1. Déployer le panneau droit et son châssis jusqu'à ce qu'il soit affleurant au cadre de fenêtre. (voir la figure 17) 2. Utiliser une mèche de ⅛ po pour percer un avant-trou par le trou supérieur du panneau latéral dans le vantail de la fenêtre. -
Page 42: Utilisation De Votre Climatiseur
DÉMARRAGE DU CLIMATISEUR ˚F/˚C MODE SPEED TIMER MINUTERIE MODE VITESSE HIGH ENERGY SAVE COOL SLEEP DEHUM AUTO COOL TEMP/TIME FILTER RESET RÉINITIALISATION TEMPÉRATURE / DURÉE DU FILTRE INDICATEUR CLEAN FILTER DE FILTRE SALE ALIMENTATION POWER AUTO RESTART Le fait d'utiliser votre climatiseur de manière appropriée vous procurera les meilleurs résultats possibles. La partie suivante explique comment faire fonctionner ce climatiseur. - Page 43 DÉMARRAGE DU CLIMATISEUR (suite) 1 . Ôter la pellicule de plastique recouvrant le panneau de commande. 2 . Appuyer une fois sur le bouton de mise en marche (POWER) pour mettre en marche l'appareil. Le voyant indicateur de mise en marche s'illuminera. REMARQUE : La Première Fois Que Le Climatiseur Est Branché, L'écran Del Affichera Les Chiffres «...
- Page 44 DÉMARRAGE DU CLIMATISEUR (suite) VITESSE 1. Appuyer sur FAN SPEED (vitesse du ventilateur) jusqu'à ce que le voyant indicateur s'illumine au réglage désiré. ˚F/˚C 2. Sélectionner High (élevé), Med (moyen), Low (bas), ou Auto Cool (rafraîchissement automatique). HIGH—Pour un rafraîchissement maximal MODE SPEED TIMER...
- Page 45 DÉMARRAGE DU CLIMATISEUR (suite) POUR EFFACER LES RÉGLAGES PROGRAMMÉS DE LA MINUTERIE : REMARQUE : Le climatiseur peut être soit en marche, soit à l'arrêt. Appuyer sur TIMER jusqu’à ce que l’indicateur lumineux s’éteigne. POUR VISUALISER OU MODIFIER LE TEMPS RESTANT (EN HEURES) : MINUTERIE D'ARRÊT 1.
-
Page 46: Utilisation De La Télécommande
DÉMARRAGE DU CLIMATISEUR (suite) RÉINITIALISATION DU FILTRE Cette option vous avertit automatiquement que le filtre à air a besoin d'être nettoyé. Le témoin lumineux s'illuminera après 240 heures de fonctionnement. Nettoyer le filtre à air (se rapporter à la section « Soin et entretien »), le replacer dans le panneau avant, et appuyer sur Filter reset (réinitialisation du filtre). - Page 47 UTILISATION DE LA TÉLÉCOMMANDE (suite) POUR EFFACER LES RÉGLAGES PROGRAMMÉS DU MODE MINUTERIE : REMARQUE : Le climatiseur peut être soit en marche, soit à l'arrêt. Appuyer sur TIMER (MINUTERIE) jusqu'à ce que l'indicateur de la minuterie s'éteigne. POUR VISUALISER OU MODIFIER LE TEMPS RESTANT (EN HEURES) : MINUTERIE D'ARRÊT : 1.
-
Page 48: Changement Du Sens De Circulation De L'air
CHANGEMENT DU SENS DE CIRCULATION DE L'AIR ESA405P 2 Balayage d’ Air: Les pales orientables de circulation d'air vous permettent de contrôler le sens de la circulation de l'air. La circulation de l'air peut être dirigée latéralement (gauche/droite) . (Voir Fig.23 ) -
Page 49: Nettoyage Du Filtre À Air
NETTOYAGE DU FILTRE À AIR 1. Éteindre le climatiseur et débrancher le cordon d'alimentation de la prise. 2. Ouvrir le panneau avant et retirer le filtre à air. Certains modèles peuvent comporter un filtre coulissant qui ne nécessitent pas que le panneau avant soit ouvert. (voir les figures 25 et 26) 3. -
Page 50: Nettoyage Du Panneau Avant
3. Sécher complètement le panneau avant à l'air. 4. Brancher le cordon d'alimentation dans la prise et allumer le climatiseur. Si le filtre est endommagé et nécessite d'être remplacé, appeler le service à la clientèle de Haier au numéro suivant : 1-877-337-3639. - Page 51 SONS NORMAUX DU CLIMATISEUR Le filtre à air est amovible, ce qui en facilite le nettoyage. La propreté du filtre aide à réduire la teneur de l'air en poussières, mousses, et autres particules, et est importante pour un rendement de refroidissement et un fonctionnement optimaux. Le voyant lumineux de réinitialisation du filtre s'illuminera pour vous avertir que le filtre a besoin d'être nettoyé.
-
Page 52: Dépannage
DÉPANNAGE PROBLÈME CAUSES POSSIBLES SOLUTION POSSIBLE Le climatiseur Le cordon d'alimentation n'est Brancher l'appareil à une fiche tripolaire mise refuse de pas branché à une prise murale. à la terre. démarrer ou Le cordon d'alimentation Appuyer sur le bouton de réinitialisation de fonctionner s'est déclenché. -
Page 53: Garantie Limitée
Communiquer avec le centre de service autorisé de Le recours fourni par la présente garantie est exclusif et Haier le plus près de chez soi. Pour connaitre le centre accordé en remplacement de tout autre recours. Cette de service autorisé le plus près, communiquer avec garantie ne couvre pas les dommages indirects ou Haier America au 1-877-337-3639. - Page 55 Sonidos normales de un aire acondicionado ................23 SOLUCIÓN DE PROBLEMAS ....................24 GARANTÍA LIMITADA ......................25 REGISTRO DEL PRODUCTO Gracias por adquirir nuestro producto Haier. Este manual de fácil uso lo guiará para que Número de modelo aproveche al máximo su producto.
-
Page 56: Información De Seguridad
PRECAUCIONES IMPORTANTES DE SEGURIDAD ADVERTENCIA SE DEBE SEGUIR LA INFORMACIÓN DE ESTA GUÍA DE USO Y CUIDADO PARA REDUCIR AL MÍNIMO EL RIESGO DE LESIONES PERSONALES, INCENDIO, DESCARGA ELÉCTRICA U OTRAS CONDICIONES PELIGROSAS. LAS INSTRUCCIONES EN ESTA GUÍA DE USO Y CUIDADO NO PRETENDEN ABARCAR TODAS LAS POSIBLES CONDICIONES O SITUACIONES QUE PUDIERAN OCURRIR. - Page 57 PRECAUCIONES IMPORTANTES DE SEGURIDAD 8. Este aire acondicionado contiene refrigerante R410a y requiere que técnicos certificados utilicen el equipo, herramientas y estándares de seguridad adecuados aprobados para este refrigerante. Utilice únicamente equipo certificado para el refrigerante R410a. Además, según las leyes federales, todo refrigerante debe retirarse del aire acondicionado de manera adecuada antes de que se le deseche.
-
Page 58: Seguridad En El Funcionamientoy Advertencias
1. Este aire acondicionado no contiene partes a las que el cliente pueda dar mantenimiento. Si tiene problemas o dudas sobre el funcionamiento del aire acondicionado llame siempre al centro de servicio al cliente de Haier: 1-877-337-3639. 2. Asegúrese de que el aire acondicionado está instalado correctamente y de manera segura en la ventana, según las instrucciones de instalación que... -
Page 59: Requisitos De Instalación
Tijeras Cinta métrica Lápiz PARTES INCLUIDAS: Revise que el paquete incluya todas las partes mencionadas para su aire acondicionado específico. NOTA: Si faltan partes, llame al centro de servicio al cliente de Haier: 1-877-337-3639. ESA405P, ESA408N, ESA410N, IMAGEN PARTE ESA406P,... -
Page 60: Requisitos De Ubicación
LA UBICACIÓN DEBE CONTAR CON LO SIGUIENTE: • Tomacorriente eléctrico con conexión a tierra a una distancia de 6 pies (183 cm) a partir del lugar de donde sale el cable de suministro eléctrico del aire acondicionado para modelos: ESA405P, ESA406P, ESA408N •... -
Page 61: Requisitos Eléctricos
REQUISITOS ELÉCTRICOS ADVERTENCIA SEGURIDAD ELÉCTRICA y ADVERTENCIAS 1. NO corte ni quite la clavija de conexión a tierra en el cable de suministro eléctrico colocado. Si lo hace pueden salir chispas o fuego y se invalidarían todas las garantías. Por motivos de seguridad, el aire acondicionado debe conectarse a tierra de manera apropiada. - Page 62 Si el cable de suministro eléctrico está dañado, llame al centro de servicio al cliente de Haier: 1-877-337-3639. PÁGINA 8...
- Page 63 No debe comprarse en una tienda ni debe repararlo el usuario. Si el cable de suministro eléctrico está dañado, llame al centro de servicio al cliente de Haier: 1-877-337-3639. • El cable de suministro eléctrico no contiene partes que el usuario pueda reparar.
-
Page 64: Cómo Instalar
(véase la Figura 8). Utilice tres (3) tornillos autorroscantes de 3/8 de pulgada para los modelos: ESA405P, ESA406P, ESA406N Utilice cuatro (4) tornillos autorroscantes de 3/8 de pulgada para los modelos: ESA408N, ESA410N & ESA412N PÁGINA 10... - Page 65 CÓMO PREPARAR EL AIRE ACONDICIONADO, continuación INSTALACIÓN DE LOS SEGUROS PARA CORTINA NOTA: Fije las cortinas laterales al aire acondicionado antes de colocar la unidad en la ventana. 1. Coloque el lado con aleta de la cortina lateral en la guía del lado derecho del gabinete del aire acondicionado (véase la Figura 9).
-
Page 66: Cómo Preparar La Ventana
CÓMO PREPARAR LA VENTANA 1. Mida el ancho de la abertura de la ventana (véase la Figura 13). 2. Marque con un lápiz una línea central en la parte interior de la base de la ventana (véase la Figura 14). ANCHO DE LA ABERTURA LÍNEA CENTRAL... -
Page 67: Cómo Finalizar La Instalación
CÓMO FINALIZAR LA INSTALACIÓN CÓMO FIJAR LAS CORTINAS LATERALES A LA VENTANA Fig. 17 1. Jale hacia afuera la cortina derecha y el marco hasta que encajen al ras de la parte lateral del marco de la ventana (véase la Figura 17). 2. -
Page 68: Cómo Utilizar El Aire Acondicionado
CÓMO ENCENDER EL AIRE ACONDICIONADO ˚F/˚C MODE SPEED TIMER TIMER (temporizador) MODE (modo) SPEED (velocidad) HIGH ENERGY SAVE COOL SLEEP DEHUM AUTO COOL TEMP/TIME FILTER TEMPERATURE/TIME RESET RESTABLECIMIENTO (temperatura/tiempo) DEL FILTRO INDICADOR DE CLEAN FILTER LIMPIEZA DEL FILTRO POWER (encendido) POWER AUTO RESTART Poner en funcionamiento de manera correcta el aire acondicionado le permite obtener los mejores... - Page 69 CÓMO ENCENDER EL AIRE ACONDICIONADO, continuación 1. Quite con cuidado la película de plástico transparente del panel de control. 2. Oprima POWER (encendido) una vez para encender el aire acondicionado. Se encenderá la luz indicadora POWER. NOTA: Cuando el aire acondicionado se conecte por primera vez, la pantalla LED mostrará “88” durante 3 segundos.
- Page 70 CÓMO ENCENDER EL AIRE ACONDICIONADO, continuación SPEED 1. Oprima FAN SPEED hasta que vea que la luz indicadora se enciende para la configuración deseada. ˚F/˚C 2. Elija High, Med, Low o Auto Cool.l HIGH: Para enfriar al máximo. MED: Para enfriamiento normal. MODE SPEED TIMER...
- Page 71 CÓMO ENCENDER EL AIRE ACONDICIONADO, continuación PARA BORRAR LA PROGRAMACIÓN DEL TEMPORIZADOR: NOTA: El aire acondicionado puede estar encendido o apagado. Presione TIMER (TEMPORIZADOR) hasta que la luz del indicador de temporizador se apague. PARA VER O CAMBIAR EL TIEMPO RESTANTE (EN HORAS): TIMER OFF 1.
-
Page 72: Uso Del Control Remoto
CÓMO ENCENDER EL AIRE ACONDICIONADO, continuación RESTABLECIMIENTO DEL FILTRO Esta función notifica automáticamente que se debe limpiar el filtro de aire. La luz indicadora se encenderá después de 240 horas de funcionamiento. Limpie el filtro de aire (consulte Cuidado USO DEL CONTROL REMOTO y limpieza), vuelva a colocarlo en el panel frontal y oprima el botón Filter Reset. - Page 73 USO DEL CONTROL REMOTO, continuación PARA BORRAR LA PROGRAMACIÓN DE DEMORA DEL TEMPORIZADOR: NOTA: El aire acondicionado puede estar encendido o apagado. Oprima TIMER hasta que la luz indicadora del temporizador se apague. PARA VER O CAMBIAR EL TIEMPO RESTANTE (EN HORAS): TIMER OFF: 1.
-
Page 74: Cómo Cambiar La Dirección Del Aire
CAMBIO DE LA DIRECCIÓN DEL AIRE ESA405P Flujo de Aire en 2 Direcciones: Les pales orientables de circulation d'air vous permettent de contrôler le sens de la circulation de l'air. La circulation de l'air peut être dirigée latéralement (gauche/droite) . (voir la figure 23) ESA406P, ESA408N, ESA410N, ESA412N Flujo de Aire en 4 Direcciones: Las rejillas direccionales de aire permiten controlar la dirección... -
Page 75: Cómo Cuidar El Aire Acondicionado
LIMPIEZA DEL FILTRO DE AIRE 1. Apague el aire acondicionado y desenchufe el cable de suministro eléctrico del tomacorriente. 2. Para quitar el filtro de aire, abra el panel frontal y saque el filtro de aire. Algunos modelos pueden tener un filtro que en cambio se desliza y no requiere que se abra el panel frontal (véase las Figuras 25 y 26). -
Page 76: Limpieza Del Panel Frontal
4. Conecte el cable de suministro eléctrico en el tomacorriente y encienda el aire acondicionado. En caso de que el filtro esté dañado y sea necesario remplazarlo, llame al centro de servicio al cliente de Haier: 1-877-337-3639 SERVICIO AL CLIENTE... -
Page 77: Sonidos Normales De Un Aire Acondicionado
SONIDOS NORMALES DE UN AIRE ACONDICIONADO El filtro de aire se puede quitar para facilitar la limpieza. Un filtro de aire limpio contribuye a eliminar el polvo, las pelusas y partículas del aire para optimizar el enfriamiento y para que el aparato funcione eficazmente. -
Page 78: Solución De Problemas
SOLUCIÓN DE PROBLEMAS POSIBLE POSIBLE CAUSA SOLUCIÓN PROBLEMA El aire El cable de suministro Enchufe la unidad en un tomacorriente acondicionado eléctrico no está conectado apropiado con conexión a tierra. no enciende en un tomacorriente. ni funciona El cable de suministro eléctrico Oprima y suelte el botón RESET en el cable se activó. -
Page 79: Garantía Limitada
ESTA GARANTÍA LIMITADA SE OTORGA QUÉ SE HARÁ EN LUGAR DE CUALQUIER OTRA GARANTÍA, Haier America reparará o reemplazará cualquier parte EXPRESA O IMPLÍCITA, INCLUSO LAS GARANTÍAS mecánica, eléctrica o del compresor que resulté DE COMERCIALIZACIÓN E IDONEIDAD PARA defectuosa por uso doméstico normal, durante un... - Page 80 Model # ESA405P, ESA406P, ESA406N, Haier America ESA408N, ESA410N, ESA412N Wayne, NJ 07470 Issued Date: October 2014 ©2015 Haier America Trading, LLC.
Need help?
Do you have a question about the ESA405P and is the answer not in the manual?
Questions and answers