
Related Manuals for Goodmans GCRUSB03


Summary of Contents for Goodmans GCRUSB03
- Page 1 PRISM Hyper-link ALL text to MODEL: GCRUSB03 FM ALARM CLOCK RADIO WITH USB CHARGING USER MANUAL...
-
Page 2: Table Of Contents
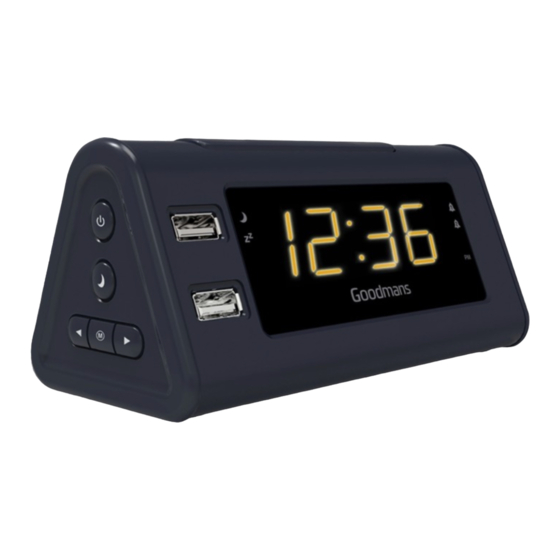
Welcome Your FM ALARM CLOCK RADIO 2.1 In The Box 2.2 Left View 2.3 Right View Front View Rear View Quick Setup Power on or install the batteries Setting the clock Tuning the Radio 3.4 Adjusting the Volume To set Alarm 1 Features 4.1 Tune the radio 4.2 Preset the station... -
Page 3: In The Box
Welcome Thank you for choosing this Goodmans product. We’ve been making electronics for the British people for 70 years. Each of our projects has been carefully designed to be great at what it does and this one is no exception. We hope you enjoy your new FM Alarm Clock Radio with USB Charging. -
Page 4: Left View
Left View Snooze/Dimmer Button Standby Memorization Tune down/Previous Tune up/Next Right View Alarm 1/ Volume up Alarm 2/ Volume down Setting the clock Minutes setting Hour setting 2.4 Front View NAP LED Indicator USB charger 1 USB charger 2 Sleep LED indicator Alarm1 LED Indicator Alarm 2 LED Indicator PM LED indicator... -
Page 5: Setting The Clock
3 Quick Setting up 3.1 Power on and install the back up batteries 1. Insert the plug of power cord into a standard wall outlet. 2. Install the backup batteries in their compartment. Use only the size and type of batteries specified (2x AAA). Respect the polarity indicated in the compartment. -
Page 6: To Set Alarm
3.5 TO SET ALARM 1 1. Press and hold the until the numbers flash. 2. Press the HR. and MIN to set the hours and minutes. 3. Press the then press the to select whether the alarm will use the buzzer (bb) or the FM radio (frequency shown). 4. - Page 7 Note: - To turn off alarm, or change alarm type at any time, use steps 3 & 4 - Same procedure applies for alarm 2 with button. - If you wake up with the radio, select your desired station, then long press Button to turn off the radio .
-
Page 8: Troubleshooting
Alarm not sounding If you have set FM presets to wake you, check that the alarm volume is set loud enough. Technical Specification Model Number GCRUSB03 230V AC ~ 50 Hz Power Supply Adapter: DC 5V, 1500mA Speaker Output Power Frequency Range FM :87.5-108 MHz...
Need help?
Do you have a question about the GCRUSB03 and is the answer not in the manual?
Questions and answers