Table of Contents
Advertisement
Advertisement
Table of Contents

Related Manuals for b'Twin B'ebike 9


Summary of Contents for b'Twin B'ebike 9
- Page 1 B’ebike 9 User Manual...
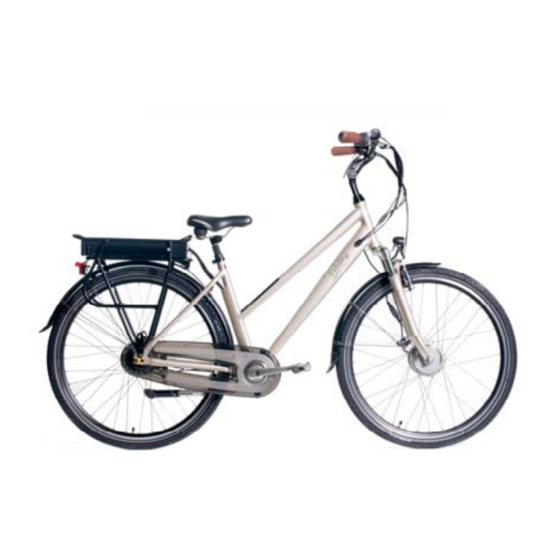
- Page 2 Congratulations! You are now the proud owner of a B’ebike electric bike. This bike is fitted with electrically assisted pedals that offer a brand new cycling experience. The assisted pedalling makes riding a bike easier and more comfortable than ever. Whether you use the bike to get to work, carry home heavy shopping, or just for fun, the wind will always be at your back.
-
Page 3: Table Of Contents
Contents 1. Control panel Information on the screen Menus Pedalling assistance settings Powerlaunch function Screen lighting Powering down 2. Battery Precautions Disconnecting and removing the battery Charging the battery Information about the battery 3. Assisted pedalling What is assisted pedalling? All you need to know about assisted pedalling 4. -
Page 4: Control Panel
Control panel 1.1 Information on the screen The screen only works when the battery is fitted to the bike. Turn the control panel on by pressing the “ON” button (button 1). Fig. 1.1 START /STOP + Screen lighting Battery level indicator Speed Assistance programme (1 - 6) Down... -
Page 5: Pedalling Assistance Settings
Distance travelled Distance travelled (km) since last reset. Reset: Press and hold “down” button for 2 seconds. Max speed Maximum speed reached Random mode The four above options displayed in order Tyre size Press and hold “SET” for 10 seconds, and then adjust the desired tyre size using “... -
Page 6: Powering Down
Press on the “START/STOP” button to light up the screen. Press “START/STOP” again to turn the light off. 1.6 Powering down Press and hold the “START/STOP” button for 2 seconds to power down the system. PLEASE NOTE: You can only use the control panel when the battery is connected to the bike. - Page 7 For indoors use only. Dispose of the charger properly . Danger of electrocution. Do not dismantle the charger. Precautions with the battery: Do not burn the battery. Do not expose the battery to temperatures over 50 °C. Do not allow the battery to get wet. Do not submerge the battery in water. Dispose of the battery properly.
-
Page 8: Charging The Battery
2.3 Charging the battery The electric bike comes with a Lithium-ion battery that powers the motor. Unlike other batteries, Lithium-ion batteries do not have any memory effect and can be charged even when not completely empty. The battery reaches its full capacity after being charged and emptied several times. - Page 9 Avoid letting the battery drain completely (full drain), or you may damage the battery (rendering the warranty void) To prolong the battery’s life, it is important to avoid storing the battery for long periods when empty, and it must be charged every 3 months and stored in a cool, dry place away from direct sunlight.
-
Page 10: Assisted Pedalling
Assisted pedalling 3.1 What is assisted pedalling? This bike is fitted with electrically assisted pedals. The motor supports your own physical effort. You absolutely must pedal to launch the assistance. If you do not pedal, then the motor remains inactive. You may adjust the level of assistance by choosing the desired level on the handlebar console. -
Page 11: Desired Seat Height
4 Adjusting the seat 4.1 Desired seat height When using the term “seat height”, we mean the distance between the seat and the pedal in the bottom position. The seat is set at the correct height when the knee is slightly bent when your foot is resting on the pedal in the bottom position (Fig.1). -
Page 12: Lights
Lights 5.1 Turning the lights on and off B’ebike bikes are fitted with headlights connected directly to the battery. To turn them on, use the control found on the handlebar console. Use the same control to turn the lights off. 6 Brakes 6.1 Information about adjusting the brakes The brakes must be set so that when you squeeze the brake to the half-way point... -
Page 13: Tyres
The brake pads need to be replaced when the tread is worn down (Fig.4) Fig.3 Fig.4 To replace the brake pads, you first must turn the cable adjustment screw inwards to relax the brake cable. Now, use your thumb and index finger to squeeze the brakes, and detach the brake cable (Fig5). -
Page 14: Tyre Pressure
7.1 Tyre pressure Tyre pressure affects the range and the comfort of your bike. We recommend that your tyres always be properly inflated. You are advised to regularly check tyre pressure. Recommended pressure: 4.5 Bar front and rear Maintenance 8.1 Servicing your bike We advise you to take your bike to the vendor for regular inspections. -
Page 15: Regular Inspections
8.5 Servicing your bike Your bike is ready for its first service after three months. Inspect the tyres and wheels. (Buckling, tension of spokes, tyre pressure and condition) Check all screws on the bike. Brakes: Inspect wear on brake pads - Adjust cable tension -Check braking effectiveness. -
Page 16: Warnings
• Do the gears work as they should? • Does my bike need to be cleaned? • Have I recently taken my bike to be serviced? Warnings Before using the bike, carefully read the user guide and the instructions it contains. - Page 17 Note the number down, as it may be of use to you in the future. Serial number Groupe OXYLANE 4 bd de Mons 59665 Villeneuve d’Ascq...
Need help?
Do you have a question about the B'ebike 9 and is the answer not in the manual?
Questions and answers