EverFocus ECOR Series Instruction Manual
Hide thumbs
Also See for ECOR Series:
- Instruction manual (107 pages) ,
- Instruction manual (105 pages) ,
- Instruction manual (105 pages)
Table of Contents
Advertisement
Quick Links
Download this manual
See also:
Instruction Manual
Advertisement
Table of Contents

Related Manuals for EverFocus ECOR Series


Summary of Contents for EverFocus ECOR Series
- Page 1 Instruction Manual...
-
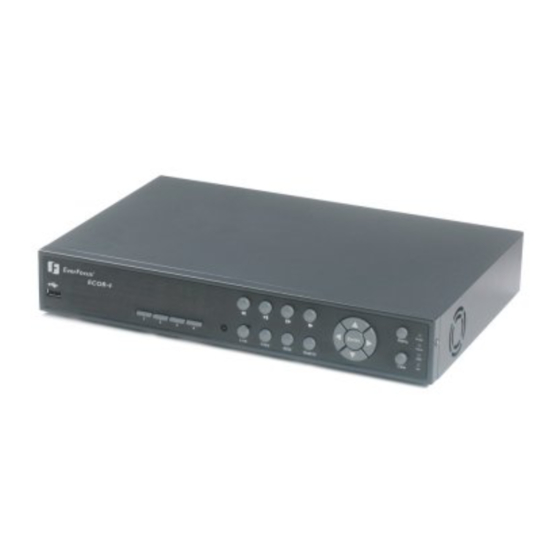
Page 2: Front Panel
1.4 Front Panel Your primary interaction with your new DVR will be through the Front Panel buttons and their corresponding buttons on the included Remote Control. Take a moment to learn where the keys are as the remainder of the manual will refer to them often. 1. - Page 3 6. SEQ Press this key to enter the auto sequential switching mode. The sequence dwell time can be set in “Display Setting” tab of the Menu. For more detail about SEQ, please see “5.8.2 Display Setting- Main M/T SEQ”. 7. Search Press this key to enter Search Menu.
-
Page 4: Mouse And Front Panel Operation
Chapter 3 Mouse and Front Panel Operation ECOR series DVR supports multiple sources to control the DVR. It can be controlled with a mouse, the front panel, an EKB500, the handheld remote control, or serial command from RS232 port. This chapter will cover the basic operation using mouse and front panel. -
Page 5: Operation In Configuration Menu
3.1.2 Operation in Configuration Menu The Main menu (shown in Figure 3.2) is divided into 3 main sections. Figure 3.2 (OSD Menu) 1 In section 1, there are twelve setup options available. Move the mouse over an icon to select it. 2 In section 2, the main options for the selected icon will be displayed. - Page 6 Check box: Click on the box to check or uncheck it. Checked will enable the function, unchecked will disable the function. Button: Click the button to execute the function. Selection box: Click Up/Down arrow to increase or decrease the value. Bar: Click and hold on the bar to adjust the cursor Left or Right.
-
Page 7: General Front Panel Operation
3.2 General Front Panel Operation 3.2.1 Front Panel Key Review The basic principle of front panel operation is to use navigation keys (up, down, left and right) to navigate among the menu items. Use “Enter” key to confirm a selection or enter the next level menu. Press “Menu” key to enter the Main Menu or exit from the current level of the menu. - Page 8 3 In section 3, all the details for the selected option will be available here. Use the arrow keys to move between items and press “Enter” to make changes. Note: press “Menu” button to go back to the previous menu section. 3.2.3 Component Options Textbox: Press Enter key and an on-screen keyboard will appear below.
-
Page 9: General Dvr Operations
This chapter introduces the operations on major functions including playback, layout change, sequence, triplex operations, archive, and search. 4.1 Record By default, the ECOR series DVR will always be in record mode. When the DVR is turned on, it will start to record. The exceptions are: 1. - Page 10 3. If an invalid user name or password is used 5 times, the DVR will give an error message and automatically lockdown. No access will be granted for 10 minutes without the backdoor password. To obtain the backdoor password, you will need to contact EverFocus Technical Support and give the provided access code.
-
Page 11: Playback Operation
4.3 Playback Operation 4.3.1 Playback Mouse: Right-click while viewing cameras to bring up menu bar and click to start playback. Front panel: Press button while viewing cameras to directly start playback. 4.3.2 Reverse playback Mouse: Right-click while viewing cameras to bring up menu bar and click to start rewind. -
Page 12: Start Sequence
4.3.5 Fast backw ard Mouse: While in playback mode, right-click to bring up menu bar and click to start fast rewind. Click the button again to increase speed to higher level (2x, 4x, 8x, 16x, 32x, or max). Front panel: While in playback mode, press key to start fast rewind. -
Page 13: Layout Change
4.5 Layout Change 4.5.1 Layout Change The 4 CH ECOR DVR has a total of three display modes available, and the 8 CH ECOR has four. The different available layouts are shown below: (9 screens) (4 screens) (PIP) (Full) To change layout, follow the steps below: By mouse: Right-click to bring up the menu bar and click to switch between 9, 4, PIP and full displays. -
Page 14: Quick Menu
4.6 Quick Menu In 9/4 displays mode, use arrow keys to move between select different screens. Press the “Enter” key while selecting a screen to bring up a small quick menu (see Figure 4.3). Note: This menu can only be accessed using the front panel. Figure 4.3 4.6.1 Triplex Operation... -
Page 15: Standard Copy
4.7 Copy To bring up Copy menu: By mouse: Right-click to bring up the menu bar and click on to enter Copy Setup Menu. By front panel: Press key to enter Copy Setup Menu. Figure 4.4 (Copy Menu – Standard Copy) 4.7.1 Standard Copy Camera: Select which cameras will be copied. -
Page 16: Quick Copy
4.7.2 Quick Copy Figure 4.5 (Copy Menu – Quick Copy) Select Auto Copy Logic: Copy Content: Select content to be copied. “Alarm only” will copy only Alarm events within the selected time. “All” will copy all video within the selected time. Copy Time From: Select how far back you wish to copy from the drop-down list. -
Page 17: Time Search
Figure 4.6 (Search Menu – Time Search) 4.8.1 Time Search Play From: Select the time period to be searched by choosing the Date and Time. Click on the “Search” button to start search. The DVR will automatically play the video being searched. 4.8.2 Event Search Figure 4.7 (Search Menu –... -
Page 18: Smart Motion Search
From: Select starting date and time To: Select ending date and time. Camera: Select which cameras to search for. Event: Select which event type(s) to search for. Choose from Alarm, Motion, Video Loss, or System Event. Click on the “Search” button to start searching. The search results will be shown as a list of events, explained in section 4.8.4. -
Page 19: Search Result
Figure 4.9 (Search Menu – Set Grid) Set Grid: Choose which areas of the motion grid will be included in the search. The areas you set in motion search must also be active in the motion settings of the Camera Setting Menu. Press “Edit” button to start editing motion grid. - Page 20 Figure 4.10 (Search Menu – Event List) : Go to the first page of event list. : Go to the previous page of event list. : Go to the next page of event list. : Go to the last page of event list. Click on any event to highlight it.
- Page 21 4.9 Logout Figure 4.11 is a screen shot of the LOGOUT SETTING MENU. Figure 4.11 (Logout Menu) Press “Logout” button when you are ready to logout from the system. You will need to login again before accessing any other options.
- Page 22 2-4. Opcode Byte & Data bytes 2-4-1. OPcode 0x4B : A remote key pressed 2-4-2. Code functions for “Remote key pressed” 0x00 0x1c >>> 0x01 0x1d >>> 0x02 0x1e (reserve) 0x03 0x1f (reserve) 0x04 VIEW 0x20 0x05 ZOOM 0x21 0x06 0x22 0x07 MENU...
Need help?
Do you have a question about the ECOR Series and is the answer not in the manual?
Questions and answers