Lenovo ThinkVision L220x User Manual
Lenovo thinkvision wide flat panel monitor user's guide
Hide thumbs
Also See for ThinkVision L220x:
- Technical specifications (11 pages) ,
- User manual (42 pages)
Table of Contents
Advertisement
Advertisement
Table of Contents

Related Manuals for Lenovo ThinkVision L220x


Summary of Contents for Lenovo ThinkVision L220x
- Page 1 L220x Wide Flat Panel Monitor User's Guide...
-
Page 2: Product Numbers
© Copyright Lenovo 2007. All rights reserved. LENOVO products, data, computer software, and services have been developed exclusively at private expense and are sold to governmental entities as commercial items as defined by 48 C.F.R. 2.101 with limited and restricted rights to use, reproduction and disclosure. -
Page 3: Table Of Contents
Customer responsibilities ... 3-10 Service parts ... 3-11 Appendix A. Service and Support ... A-1 Online technical support ... A-1 Telephone technical support ... A-1 Worldwide telephone list ... Appendix B. Notices ... B-1 Trademarks ... B-2 © Copyright Lenovo 2007. -
Page 4: Safety Information
Safety information © Copyright Lenovo 2007. -
Page 5: Chapter 1. Getting Started
The product package should include the following items: · Setup Poster · Monitor Safety, Troubleshooting, and Warranty Guide · Reference and Driver CD · ThinkVision L220x Wide Flat Panel Monitor · Power Cord · Digital Cable - Attached to monitor · Analog Signal Cable ·... -
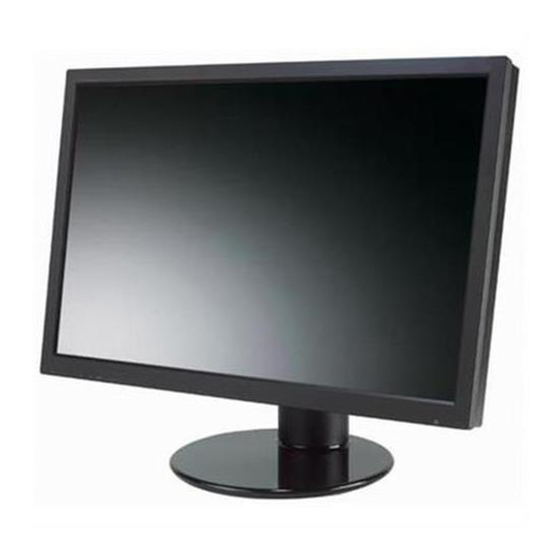
Page 6: Product Overview
Product overview This section will provide information on adjusting monitor positions, setting user controls, and using the cable lock slot. Types of adjustments Tilt Please see the illustration below for an example of the tilt range. Swivel With the built-in pedestal, you can tilt and swivel the monitor for the most comfortable viewing angle. -
Page 7: Height Adjustment
Height Adjustment After pressing the top of the monitor, remove the fixed pin and adjust the height of the monitor. 110mm Monitor Pivot - Adjust height to the top position before rotation the monitor. - Rotate clockwise until the monitor stops at 90° User controls Your monitor has controls on the front which are used to adjust the display. -
Page 8: Cable Lock Slot
Cable lock slot Your monitor is equipped with a cable lock slot located on the rear of your monitor (in the lower right corner). Please follow the instructions that came with the cable lock to attach it. Setting up your monitor This section provides information to help you set up your monitor. - Page 9 Connect the analog signal cable to the D-SUB connector of the monitor and the other end on the back of the computer. Connect one end of the USB hub cable to the USB connector on the back of the computer, and the other end to the upstream USB connector on the monitor. Chapter 1.
- Page 10 Plug the monitor power cord and the computer cord into grounded electrical outlets. Note : An approved power cord H05VV-F, 3G, 0.75mm2 must be used. Remove the Cable Cover from the back of the stand. L220x Wide Flat Panel Monitor User’s Guide...
- Page 11 Remove the Hook from the back of the stand. Rotate the head of the monitor into portrait view. Chapter 1. Getting started...
- Page 12 Place the cables through the Main Clip. Then fasten the clip. Wrap the Cable Wapper around the cables. L220x Wide Flat Panel Monitor User’s Guide...
- Page 13 Replace the Hook. Replace the Cable Cover. Chapter 1. Getting started...
- Page 14 Power on the monitor and the computer. To install the monitor driver, insert the Reference and Driver CD, click Install driver, and follow the on-screen instructions. To optimize your monitor image, if using the analog cable, press the Automatic Image Setup key. Automatic image setup requires that the monitor is warmed up for at least 15 minutes.
-
Page 15: Registering Your Option
Thank you for purchasing this Lenovo™ product. Please take a few moments to register your product and provide us with information that will help Lenovo to better serve you in the future. Your feedback is valuable to us in developing products and services that are important to you, as well as in developing better ways to communicate with you. -
Page 16: Chapter 2. Adjusting And Using Your Monitor
Positioning and viewing your monitor Position and adjust your computer monitor for comfortable viewing by considering the following items: · Viewing distance: Optimal viewing distances for monitors range from approximately 510mm to 760mm (20 in to 30 in) and can vary depending on ambient light and time of day. -
Page 17: Quick Tips For Healthy Work Habits
· Tilt: Adjust the tilt of your monitor to optimize the appearance of the screen content and to accommodate your preferred head and neck posture. · General location: Position your monitor to avoid glare or reflections on the screen from overhead lighting or nearby windows. The following are some other tips for comfortable viewing of your monitor: ·... -
Page 18: Accessibility Information
Accessibility information Lenovo is committed to providing greater access to information and technology to people with disabilities. With assistive technologies, users can access information in the way most appropriate to their disability. Some of these technologies are already provided in your operating system; others can be purchased through vendors or accessed at: http://www.ibm.com/able/... - Page 19 To use the controls: 1. Press to open the main OSD menu. 2. Use to move among the icons. Select an icon and press function. If there is a sub-menu, you can move between options using then press to select that function. Use save.
-
Page 20: Osd Functions
Table 2-2. OSD functions OSD Icon Submenu on Main Menu Brightness Brightness- /Contrast Contrast Image Horizontal Position Position Vertical Position Image Automatic Setup Manual Image Color Properties Preset mode Custom Input Signal Options Information Menu Language * Note: Brightness and Contrast can not be adjusted in sRGB mode. L220x Wide Flat Panel Monitor User’s Guide Description Adjusts overall brightness... -
Page 21: Selecting A Supported Display Mode
Table 2-2. OSD functions (continued) OSD Icon on Submenu Main Menu Options Menu Position Default Custom Factory Default Accessibility Exit Selecting a supported display mode The display mode the monitor uses is controlled by the computer. Therefore, refer to your computer documentation for details on how to change display modes. The image size, position and shape might change when the display mode changes. -
Page 22: Image Rotation
The display modes shown below have been optimized at the factory. Table 2-3. Factory set display modes Addressability 640 x 350 640 x 480 720 x 400 800 x 600 1024 x 768 1152 x 864 1280 x 1024 1440 x 900 1600 x 1200 1680 x 1050 1920 x 1200... -
Page 23: Caring For Your Monitor
For optimal performance, switch off your monitor at the end of each working day, or whenever you expect to leave it unused for long periods during the day. Table 2-4. Power indicator State Standby/Suspend Caring for your monitor Be sure to turn off the power before you perform any maintenance on the monitor. Do not: ·... -
Page 24: Detaching The Monitor Stand
Detaching the monitor stand After placing the monitor face down on a clean surface or soft cloth, remove the four screws from the stand to remove it from the monitor. L220x Wide Flat Panel Monitor User’s Guide... -
Page 25: Chapter 3. Reference Information
Power input Power consumption Note: Power consumption figures are for the monitor and the power supply combined. Video input (Analog) Video input (Digital) © Copyright Lenovo 2007. 4433-HB2 Height 377.3 mm (14.85 in.) Depth 273.7 mm (10.78 in.) Width 509.5 mm (20.06 in.) - Page 26 Table 3-1. Monitor specifications for type-model Communications Supported Display Modes (VESA Standard modes between noted ranges) Temperature Humidity L220x Wide Flat Panel Monitor User’s Guide 4433-HB2 VESA DDC Horizontal frequency VGA: 30 kHz - 94 kHz DVI: 30 kHz - 75 kHz Vertical frequency 50 Hz - 75 Hz Native Resolution...
-
Page 27: Troubleshooting
Troubleshooting If you have a problem setting up or using your monitor, you might be able to solve it yourself. Before calling your dealer or Lenovo, try the suggested actions that are appropriate to your problem. Table 3-2. Troubleshooting Problem The words "Out... -
Page 28: Manual Image Setup
"Connecting and turning on your monitor" on Page 1-4 "Adjusting your monitor image" on page 2-3 Appendix A, "Service and Support," on page Lenovo "Adjusting your monitor image" on page 2-3 1920 "Manual image setup" "Selecting a supported display mode" on page... -
Page 29: Manually Installing The Monitor Driver
(where X is the drive letter designator for the CD-ROM drive). Select the "L220x.inf" file and click the Open button. Click the OK button. Select Lenovo L220x and click Next. The files will be copied from the CD to your hard disk drive. -
Page 30: Installing The Monitor Driver In Windows Xp
(where X is the drive letter designator for the CD-ROM drive). Select the "L220x.inf" file and click the Open button. Click on the OK button. Select Lenovo L220x and click Next. The files will be copied from the CD to your hard disk drive. -
Page 31: Installing The Monitor Driver In Windows 2000
(where X is the drive letter designator for the CD-ROM drive). Select the "L220x.inf" file and click the Open button. Click on the OK button. Select Lenovo L220x and click Next. The files will be copied from the CD to your hard disk drive. -
Page 32: Manually Installing The Soft Osm
Manually installing the Soft OSM Below are steps for manually installing the Soft OSM. Insert Lenovo Monitor CD into the CD drive. The CD menu displays. Select “Install Soft OSM” and follow the on-screen instructions. Or you can navigate to the following directory to find Soft OSM setup program: X:\Soft OSM Drivers (where X is the drive letter designator for the CD-ROM drive). - Page 33 It will take several seconds When the View Readme File dialog box Restart your computer. After the computer has started up, you can see a monitor icon in the lower right hand corner of the desktop. to do adjusting right now. to copy the files to your computer.
-
Page 34: Getting Further Help
Getting further help If you still can’t solve your problem, please contact the Lenovo Support Center. For more information on contacting the Customer Support Center, please see Appendix “Service and Support,” on page A-1. Service information Product numbers The product number for your monitor is located on the side of the display bezel as shown below. -
Page 35: Service Parts
Service parts The following parts are for use by Lenovo service, or Lenovo authorized dealers, to support the customer warranty. Parts are for service use only. The table below shows information for model 4433-HB2. Table 3-3. List of service parts... -
Page 36: Appendix A. Service And Support
Telephone technical support Installation and configuration support through the Customer Support Center will be withdrawn or made available for a fee, at Lenovo’s discretion, 90 days after the option has been withdrawn from marketing. Additional support offerings, including step-by-step installation assistance, are available for a nominal fee. - Page 37 Country or Region Telephone Number Africa Africa: +44 (0)1475-555-055 South Africa: +27-11-3028888 and 0800110756 Central Africa: Contact the neares Lenovo Business Partner Argentina 0800-666-0011 (Spanish) Australia 131-426 (English) Austria Up and running support: 01-24592-5901 Warranty service and support: 01-211-454-610 (German)
- Page 38 Country or Region Telephone Number Ecuador 1-800-426911 (Spanish) El Salvador 250-5696 (Spanish) Estonia +386-61-1796-699 Finland Up and running support: 09-459-6960 Warranty service and support: +358-800-1-4260 (Finnish) France Up and running support: 0238-557-450 Warranty service and support (hardware): 0810-631-213 Warranty service and support (software): 0810-631-020 (French) Germany Up and running support: 07032-15-49201...
- Page 39 Country or Region Telephone Number Japan Both of the above numbers will be answered with a Japanese language voice prompt. For telephone support in English, please wait for the Japanese voice prompt to end, and an operator will answer. Please ask for ¡ ² English support please,¡ ² and your call will be transferred to an English speaking operator.
- Page 40 Country or Region Telephone Number Slovenia +386-1-4796-699 Spain 91-714-7983 91-397-6503 (Spanish) Sri Lanka +94-11-2448-442 (English) Sweden Up and running support: 08-477-4420 Warranty service and support: 077-117-1040 (Swedish) Switzerland Up and running support: 058-333-0900 Warranty service and support: 0800-55-54-54 (German, French, Italian) Taiwan 886-2-8723-9799 (Mandarin) Thailand...
-
Page 41: Appendix B. Notices
The result obtained in other operating environments may vary. Lenovo may use or distribute any of the information you supply in any way it believes appropriate without incurring any obligation to you. -
Page 42: Trademarks
Web sites. The materials at those Web sites are not part of the materials for this Lenovo product, and use of those Web sites is at your own risk.
Need help?
Do you have a question about the ThinkVision L220x and is the answer not in the manual?
Questions and answers