Advertisement
WT 180 - Radio controlled alarm clock
Instructions manual
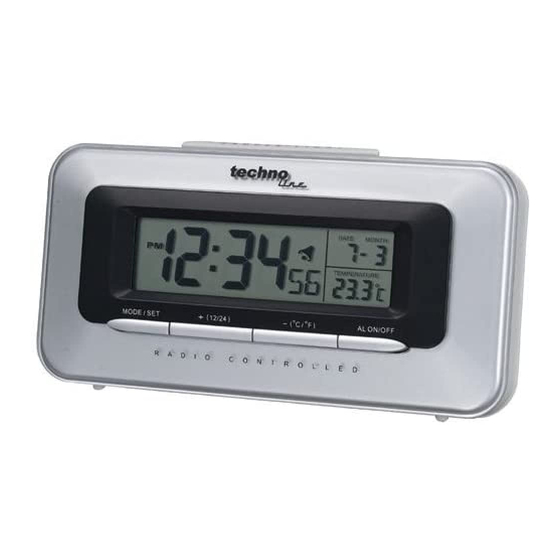
Part A - LCD
A1: DCF icon
A2 : Radio controlled time
A3: Alarm icon
A4: Month and date
A5: Temperature
Set up and radio controlled time
•
Insert 2 x AA batteries (not included) by observing the correct polarity signs (+/-) inside the battery compartment.
•
The clock automatically starts scanning the RF 433MHz signal to register new thermo sensor unit after new
batteries inserted. After registered the thermo sensor or press "CHANNEL" button to stop scanning, the clock
will then automatically starts scanning the DCF time signal ("
"
" flashes indicate now is receiving the DCF signal.
"
" turns on indicate signal received successfully.
"DST" show on the LCD if it is in Daylight Saving Time Mode.
Front view
Back view
Part B - Buttons
B1: "SNOOZE/LIGHT" button
B2: "MODE/SET" button
B3: "+(12/24)" button
B4: "-(°C/°F)" buttton
B5: "AL ON/OFF" button
B6: "RESET" button
Part C - Structure
C1: Battery Compartment
" flashes on the LCD).
Advertisement
Table of Contents

Subscribe to Our Youtube Channel
Related Manuals for Technoline WT 180


Summary of Contents for Technoline WT 180
- Page 1 WT 180 - Radio controlled alarm clock Instructions manual Front view Back view Part A - LCD Part B - Buttons Part C - Structure A1: DCF icon B1: “SNOOZE/LIGHT” button C1: Battery Compartment A2 : Radio controlled time B2: “MODE/SET” button A3: Alarm icon B3: “+(12/24)”...
- Page 2 • The clock automatically scans the time signal at 3:00a.m. everyday to maintain accurate timing. For failed reception, scanning stops (“ ” on LCD disappear) and repeats again at 4:00a.m, 5:00a.m, and 6:00a.m. • The clock manually scans the time signal by holding buttons “+” (B3) and “- “(B4). For failed reception, scanning stops (“...
- Page 3 Backlight • Press “SNOOZE/ LIGHT” (B1) button, back light states for 5 seconds Precautions • This main unit is intended to be used only indoors. • Do not subject the unit to excessive force or shock. • Do not expose the unit to ex treme temperatures, direct sunlight, dust or humidity.
Need help?
Do you have a question about the WT 180 and is the answer not in the manual?
Questions and answers