
Related Manuals for E-FLITE Apprentice


Summary of Contents for E-FLITE Apprentice
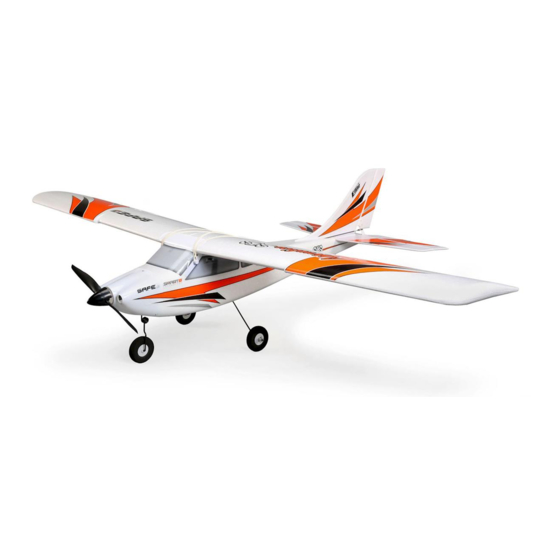
- Page 1 Apprentice RTF Assembly Manual Specifications Wingspan: 58 in (1475mm) Length: 37 in (940mm) Wing Area: 525 sq in (33.7 sq dm) Weight w/o Battery: 32–35 oz (910–1000 g) Weight w/Battery: 40–45 oz (1135–1275 g)
-
Page 2: Table Of Contents
Tail Installation ..............6 landing gear and go flying. Landing Gear Installation ............. 9 The Apprentice is powered with a 15-size brushless motor that Checking the Receiver ............10 provides excellent power and performance. This trainer has a flat- Wing Installation ............... 11 bottom wing that produces gentle flight characteristics. -
Page 3: Contents Of Kit/Parts Layout
Page – before building this product. If you as the Purchaser or user are not prepared to accept the liability associated with the use of this Product, you are advised to return this Product immediately in new and unused condition to the place of purchase. E-flite Apprentice Assembly Manual... -
Page 4: Charging The Flight Battery
Connect the red lead to the positive (+) terminal of the power supply or battery. Connect the Your Apprentice can be ready to fly in as little time as it takes black lead to the negative (-) terminal of the power to charge the flight battery. - Page 5 4. Locate the balance charge lead on the battery pack. charging. Your Apprentice includes a 3-cell flight pack, The charge lead of a 3-cell LiPo battery will plug into so set the charger to 3 cells. the larger 4-pin port on the bottom right of the charger.
-
Page 6: Tail Installation
Apprentice), then it will be permanently damaged and cannot be restored. The electronic speed control in the Apprentice is pre-set to a cutoff voltage that will not allow the battery to drain less than this amount. E-flite Apprentice Assembly Manual... - Page 7 Tighten the screws until they horizontal stab. You might need to push the fin down stop. Do not overtighten as you may crack the plastic. with some slight pressure to fully seat it. E-flite Apprentice Assembly Manual...
- Page 8 Note: For new pilots, we recommend installing the clevis for both the elevator and rudder pushrods in the outer- most hole on the control horn. E-flite Apprentice Assembly Manual...
-
Page 9: Landing Gear Installation
Note: You may need to push the cowling out of the way slightly to access the screw. The cowl material is flexible enough to bend a little during this step without damage. E-flite Apprentice Assembly Manual... -
Page 10: Checking The Receiver
The speed control is plugged into the slot marked "THRO", the smaller servo in the slot marked "ELEV", the larger servo in "RUDD" and the connector that has the two leads for the ailerons into the slot marked "AILE." E-flite Apprentice Assembly Manual... -
Page 11: Wing Installation
The adhesive will stick as soon as it touches the wing surface. 3. Remove the backing from the adhesive tape on the front wing cover. E-flite Apprentice Assembly Manual... - Page 12 Press the cover down to secure its position on the wing. 6. Install the included Y-harness by plugging it into the Aile port of the receiver. E-flite Apprentice Assembly Manual...
- Page 13 10. The next two rubber bands will go directly from the front to the rear of the fuselage, over the wing. 8. Connect the wires from the aileron servos to the Y-harness coming from the receiver. E-flite Apprentice Assembly Manual...
-
Page 14: Battery Installation
(as in step 9) and then two in line (as in step 10), Assembled airframe and so on until there are no more rubber bands. 3200 3S 11.1 V LiPo battery (charged) 1. Turn the battery hatch keeper 90 degrees to release the hatch. E-flite Apprentice Assembly Manual... - Page 15 3. Slide the battery into the battery compartment. The connector will face the back of the airplane. 5. Close the hatch from the rear of the fuselage. Turn the battery hatch keeper 90 degrees to secure the hatch. E-flite Apprentice Assembly Manual...
-
Page 16: Installing The Transmitter Batteries
1. Check to make sure the transmitter power switch is in the "OFF" position. 4. Install the four AA batteries. Note the polarity of the batteries during their installation. 2. Slide the cover from the battery compartment. E-flite Apprentice Assembly Manual... -
Page 17: Removing The Propeller
Note: The installation of the batteries is also covered in your radio manual. Please read through the radio manual to familiarize yourself with the operation of your radio system. E-flite Apprentice Assembly Manual... - Page 18 3. Remove the washer and set it aside with the nut and propeller adapter. Set the nut aside so it does not get lost. spinner cone. 4. Remove the spinner backplate and set it with the nut, spinner cone and washer. E-flite Apprentice Assembly Manual...
-
Page 19: Control Functions
Make sure the nut is tightened properly so the propeller does not depart from your model during flight. Transmitter The following images to identify the controls for both the Mode 1 and Mode 2 versions of your Apprentice. HI/LO Throttle/Aileron Stick Rate Switch Elevator/Rudder Stick... -
Page 20: Centering The Control Surfaces And Checking Control Direction
Reversing Switches of the transmitter and check that the throttle stick is at its Mix Switch (not used for Apprentice) lowest position. The throttle stick needs to be in the idle/ off position, otherwise the speed control will not arm Mode 2 Transmitter in the next step. - Page 21 For more information on your Up—Thread clevis out speed control, refer to the included instructions. Centered Down—Thread clevis in E-flite Apprentice Assembly Manual...
- Page 22 Pulling the elevator/aileron stick (right stick on system. Pushing the elevator/aileron stick forward will the Mode 2 transmitter) back will make the airplane make the airplane elevator move down on the Mode 2 elevator move up. transmitter. E-flite Apprentice Assembly Manual...
- Page 23 This will enable you to open the clevis up and remove it from the control horn. Once removed, screw the clevis in or out to get the elevator to line up with the stab. E-flite Apprentice Assembly Manual...
- Page 24 Mode 2 (Rudder/Throttle on left stick): Confirm the rudder stick is in the down/throttle off position. Thread the clevis in or out on the rudder pushrod until the rudder is aligned with the fin as shown. Right—Thread clevis out Centered Left—Thread clevis in E-flite Apprentice Assembly Manual...
- Page 25 Important: When operating a Mode 2 transmitter (rudder/throttle on left stick), be very careful that the left stick is not moved forward when checking the rudder. Moving the rudder stick forward will result in the propeller spinning. E-flite Apprentice Assembly Manual...
- Page 26 9. Once the rudder has been trimmed for straight flight, you can now adjust the steering trim of your Apprentice. Taxi the aircraft to determine if it turns left or right when the rudder stick is centered. Do not change the rudder trim at the transmitter.
- Page 27 Up—Thread clevis in Centered Down—Thread clevis out E-flite Apprentice Assembly Manual...
- Page 28 Locate the appropriate switch, slide it to the new position, and check to see if the surface in question is now moving in the right direction. E-flite Apprentice Assembly Manual...
-
Page 29: Center Of Gravity
Mark the location for the Center of Gravity on the bottom of the top wing in the center as shown. When balancing your Apprentice, support the plane upright at the marks made on the bottom of the wing with your fingers or a commercially available balancing stand. -
Page 30: Range Test Your Radio
Apprentice Balanced - No Correction Needed 1. With the model resting on the ground, stand 30 paces ... -
Page 31: Flying Your Apprentice
Radio Controlled flight. You can find this guidance at your local hobby dealer’s store. Your Apprentice is capable of flying in winds up to 15 mph but, for flight training, it is recommended to fly in the lightest wind possible. -
Page 32: Setting The Control Throws
These are general guidelines measured from our own flight tests. You can experiment with different rates to match your preferred style of flying. Adjusting of the control throws on the Apprentice 15e is not as critical as it is on other models. The measurements... - Page 33 High Rate: 3/4-inch (19mm) (Up/Down) It is always best to stay behind the propeller and keep it away from loose objects when the battery and speed control are connected. E-flite Apprentice Assembly Manual...
- Page 34 Low Rate: 1/2-inch (14mm) (Right/Left) Low Rate: 3/8-inch (9mm) (Up/Down) High Rate: 1 inch (25mm) (Up/Down) High Rate: 5/8-inch (16mm) (Up/Down) E-flite Apprentice Assembly Manual...
-
Page 35: Installing The Propeller
7. For your reference the nose wheel steering pushrod is set up in the following holes: The fixed position hole on the nose wheel steering arm and the outside hole on the rudder servo arm. E-flite Apprentice Assembly Manual... - Page 36 4. Thread the nut on the propeller adapter. Use an adjustable wrench to tighten the nut. Make sure the nut is tightened properly so the propeller does not depart from your model during flight. 3. Install the washer on the propeller shaft. E-flite Apprentice Assembly Manual...
-
Page 37: Warning
For more information about where you can drop off your waste equipment for recycling, please contact your local city office, your household waste disposal service or where you purchased the product. E-flite Apprentice Assembly Manual... -
Page 38: Optional Items For Your Apprentice
RC experience, we thought it would be good to show you some optional equipment that will help you grow and enjoy the world of electric flight. The equipment included with your Apprentice works very well and will serve your needs without hesitation. All of the items shown in this section are available from your local hobby dealer. -
Page 39: Lipo Battery Pack Information
Units 1-4 Ployters Rd Otto Hahn Str. 9a Staple Tye 25337 Elmshorn Southern WayHarlow Germany Essex CM18 7NS United Kingdom Please call +44 0 1279 641 097 or sales@horizonhobby.co.uk with any questions or concerns regarding this product or warranty. E-flite Apprentice Assembly Manual... - Page 40 Additional Information & Guidelines • Shorting the wire leads can cause fire. If you accidentally 1. Battery temperature the best indicator for safety. The E-flite LiPo short the wires, the battery must be placed in a safe area for battery’s temperature should never drop below 32 degrees observation for at least 15 minutes.
-
Page 41: Warranty Information
Damaged batteries should be Return of any goods by Purchaser must be approved in writing by rendered as safe as possible and stored in a vented fireproof Horizon before shipment. container until recycled. E-flite Apprentice Assembly Manual... -
Page 42: Damage Limits
For questions or assistance, as Visa, MasterCard, American Express, and Discover cards. please direct your email to productsupport@horizonhobby.com, or call 877.504.0233 toll free to speak to a service technician. E-flite Apprentice Assembly Manual... -
Page 43: Safety, Precautions, And Warnings
Please call 1 877 504 0233 or visit horizonhobby.com to find • M oisture causes damage to electronics. Avoid water exposure our distributor for your country for support with any questions to all equipment not specifically designed and protected for or concerns regarding this product or warranty. this purpose. E-flite Apprentice Assembly Manual... -
Page 44: 2008 Official Ama National Model Aircraft Safety Code
Only personnel involved with flying the aircraft are allowed at or in front of the flight line. Intentional flying behind the flight line is prohibited. E-flite Apprentice Assembly Manual... -
Page 45: Building And Flying Notes
Building and Flying Notes E-flite Apprentice Assembly Manual... - Page 46 Building and Flying Notes E-flite Apprentice Assembly Manual...
- Page 47 Building and Flying Notes E-flite Apprentice Assembly Manual...
- Page 48 © 2008 Horizon Hobby, Inc. 4105 Fieldstone Road Champaign, Illinois 61822 1 877 504 0233 horizonhobby.com E-fliteRC.com 13464.1...
Need help?
Do you have a question about the Apprentice and is the answer not in the manual?
Questions and answers