Advertisement
Table of Contents
- 1 Table of Contents
- 2 Safety Guide
- 3 Appliance Specific Safety Instruction
- 4 Appliance Components Parts
- 5 Using Your Hand Blender
- 6 Using the Chopper Attachments
- 7 How to Operate Your Balloon Whisk
- 8 Cleaning and Maintenance
- 9 Disposal of the Appliance
- 10 Electrical Information
- 11 UK and EU Guarantee
- Download this manual
Advertisement
Table of Contents

Summary of Contents for Andrew James Hand Blender
- Page 1 Hand Blender Please read the manual fully before using the appliance and keep the manual safe for future reference.
-
Page 2: Table Of Contents
Contents page Safety guide Page 3 Appliance specific safety instruction Page 4 Appliance components parts Page 5 Using your Hand blender Page 7 Using the Chopper attachments Page 8 How to operate your Balloon whisk Page 9 Cleaning and Maintenance... -
Page 3: Safety Guide
Safety guide When using any electrical appliance, basic safety precautions should always be followed including: This appliance can be used by children aged from 8 years and above and persons with reduced physical, sensory or mental capabilities or lack of experience and knowledge if they have been given supervision or instruction concerning use of the appliance in a safe way and understand the hazards involved. -
Page 4: Appliance Specific Safety Instruction
accidentally. Do not allow the cord to touch hot surfaces and do not place the cord near hot gas, electric burners or in a heated oven. Use of an extension cord with this appliance is not recommended. However if it is necessary to use an extension cord, ensure that the extension cord is equal to or greater than the power consumption of the appliance to avoid overheating of the appliance and extension cord. -
Page 5: Appliance Components Parts
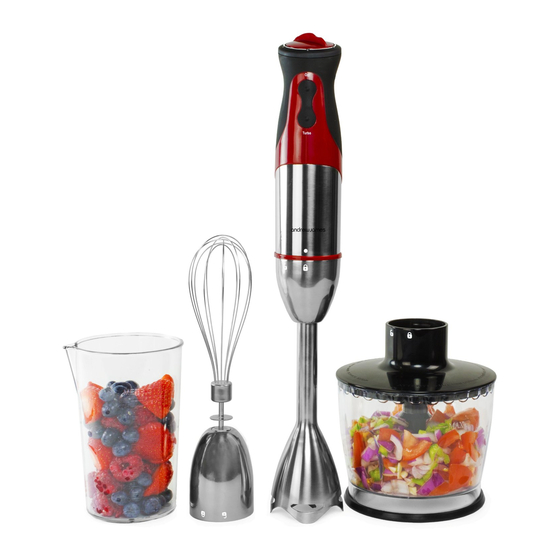
Appliance components diagram 1. Variable speed regulator 7. Whisk gear box 2. On/off switch for variable speed 8. Blender shaft 3. On/off switch for turbo speed 9. Chopper attachment 4. Motor 10. Rubber base 5. Balloon whisk 11. Chopper lid and blade 6. - Page 6 Introduction Your new hand blender purees, chops, whisks, beats, grinds and blends food quickly and easily . Although the blender is designed for use with its mixing beaker, it can also be used in a saucepan, bowl or other containers.
-
Page 7: Using Your Hand Blender
Set the variable speed regulator on the top of the blender (1) to the appropriate speed setting. Place blender shaft (8) in to the desired container, then plug hand blender into the wall outlet. Hold the unit firmly, then press the on/off switch (2). Move the blender slowly up, down and from side to side to mix the food thoroughly. -
Page 8: Using The Chopper Attachments
Using the Chopper attachment The chopper attachment is ideal for meat, cheese, onions, garlic, vegetables etc. the turbo switch (3) should be used when processing hard cheeses. To use the chopper attachment: Turn the blender shaft (8) clockwise to detach it from the motor (4). Attach the chopper blade and lid (11) to the chopper attachment (9). -
Page 9: How To Operate Your Balloon Whisk
How to operate the Balloon Whisk Use the Balloon whisk attachment for large quantities, e.g. for whipping cream, beating egg whites and mixing sponges and ready-mix desserts. To use Insert the balloon whisk (5) into the whisk gear box (7). Attach the whisk gear box (7) to the motor (4) by lining up the arrows then turning counter-clockwise. -
Page 10: Cleaning And Maintenance
Disposal of the appliance Please note that this Andrew James product is marked with symbol: This means that this product must not be disposed of together with ordinary household waste, as electrical and electronic waste must be disposed of separately. -
Page 11: Electrical Information
Electrical information Please note: It is extremely important that the wires or cores in the flex are connected to the correct terminals in the plug. If the colour of the mains lead of the appliance does not correspond with the coloured markings identifying the terminals in your plug proceed as follows: ... -
Page 12: Uk And Eu Guarantee
UK and EU Guarantee Your new Andrew James product comes with a 24 month guarantee and a 2 year fixed warranty, effective from receipt confirmation. Your receipt or order number is required as proof of purchase date so it is imperative that you keep it safe. This guarantee only applies if the item has been used solely for the use intended, and all instructions have been followed accordingly. - Page 13 The guarantee does not cover any defect arising from improper use, damage, build- up of lime scale or repair attempts made by third-parties. Also, the guarantee does not cover normal wear and tear of individual parts. Copyright Andrew James...


Need help?
Do you have a question about the Hand Blender and is the answer not in the manual?
Questions and answers
How do I take the balloon whisk off, so that I can insert the frother on?
To remove the balloon whisk from the Andrew James Hand Blender, first detach the balloon whisk (5) from the whisk gear box (7). Once removed, you can insert the frother attachment in its place.
This answer is automatically generated