Table of Contents
Advertisement
Quick Links
Download this manual
See also:
Technical Manual
Advertisement
Table of Contents

Subscribe to Our Youtube Channel
Related Manuals for Melco EP 1B


Summary of Contents for Melco EP 1B
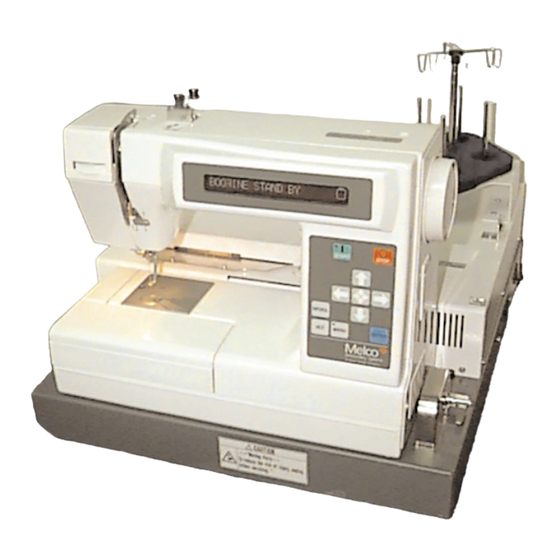
- Page 1 Installation, Operation, and Maintenance manual for the EP 1B embroidery peripheral • Single head, single needle • Easy to operate • Low power consumption • High-quality results Part Number 12404 Revision B...
- Page 2 Melco Embroidery Systems. Melco reserves the right to revise this publication and to make changes in it at any time without obligation of Melco to notify any person or organization of such revisions or changes.
-
Page 3: Table Of Contents
Table of Contents Table of Contents 1. Setup 2. Configuration Unit Name 2 - 1 Key Click Volume 2 - 1 Error Beep Volume 2 - 1 Measuring System 2 - 2 Updating the Application Software (APL) 2 - 2 3. - Page 4 Table of Contents Spool Key 5 - 1 Menu Key 5 - 1 Enter Key 5 - 1 Alt Key 5 - 2 The Light Emitting Diodes (LED) 5 - 2 The Operation Menus 5 - 2 Design Menu 5 - 2 Run Design 5 - 2 Frame Menu...
- Page 5 46cm W x 36cm H x 52cm D 18" W x 14" H x 20.5" D The EP 1B is designed to embroider on textile products which are placed easily in a Melco embroidery hoop. The machine should not be...
- Page 6 Table of Contents Explanation of Symbols Caution! Indicates a machine component will move. Keep clear! Shock hazard. No user replaceable parts behind this label. Do not open! Pinch point, Keep clear! Pinch point, Keep clear! Pinch points, Keep clear! Needle pinch point, Keep clear!
- Page 7 1. Setup The setup procedure for the EP 1B Embroidery Peripheral is easy and will only take a few minutes. 1. Carefully remove the machine from the shipping container, using care not to drop or damage any other items packed around it. The machine is heavy, so be careful. Place the machine on a sturdy table or work bench.
- Page 8 Do not attempt to change bobbin thread during operation. Do not place hands or other objects in the rotary hook area during operation. Do not operate the machine without the hook guards in place. EP 1B Operation Manual Melco Embroidery Systems...
- Page 9 Dangers de service Attention! Ci-dessous vous trouverez les descriptions de diverses zones de risque ou points dangereux lors du service de la machine. Il faut tou- jours porter des lunettes protectrices pendant le service de la machine afin d'éviter des blessures en cas d'une casse d'aiguille. Oscillation du releveur de fil Ne pas toucher les releveurs de fil pendant le service.
- Page 10 Betrieb ist. Die Hände vom Umlaufgreifer fernhalten oder andere Gegenstände nicht in den Bereich des Umlaufgreifers bringen, wenn die Maschine läuft. Die Maschine nicht bedi- enen, wenn der Greiferschutz nicht an seinem Platz ist. EP 1B Operation Manual Melco Embroidery Systems...
- Page 11 Pericoli nel funzionamento Attenzione! Di sotto vengono descrite le zone di rischio o i punti peri- colosi che potreste incontrare durante il funzionamento. Portate sempre degli occhiali prottetivi mentre comandate la macchina, per pervenire il ferimento in caso di rottura di ago. Oscillazione delle leve d'avvolgimento Non toccate le leve durante il funzionamento Aghi esposti durante il funzionamento...
- Page 12 Não tente mudar fios das bobinas durante o funcionamento. Não ponha as mãos ou outros objectos na área do gancho rota- tivo durante o funcionamento. Não trabalhe com a máquina sem os resguardos dos ganchos estarem instalados. EP 1B Operation Manual Melco Embroidery Systems...
- Page 13 Peligros durante el funcionamiento ¡Atención! A continuación se mencionan las zonas de riesgo o los puntos de peligro con los que se podrían encontrar Vds. durante la maniobra. Utilicen siempre gafas protectoras cuando operen la máquina a fin de pre- venir heridas en caso de rotura de la aguja.
- Page 14 EP 1B Operation Manual Melco Embroidery Systems...
-
Page 15: Configuration
4. Press [ENTER] to save the unit name. Key Click Volume Each time you press one of the keys on the EP 1B control panel, the machine responds with a “click” sound. You can adjust the volume of this click to suit your needs. -
Page 16: Measuring System
2. On the EDS host computer, copy the edsappb3.rsa file to the RSA subdirectory in the EDS application. 3. Turn the EP 1B off for 3 seconds, then back on. the new version number of the Master CPU will be displayed. -
Page 17: Threads, Bobbins, And Needles
This chapter covers how to thread your machine, wind the bobbin reels, select and install needles, and properly set the upper and lower thread tensions. Threading the EP 1B The thread path on the EP 1B uses Thread numbered arrows to show the steps and direction of the thread. -
Page 18: Drawing Out The Bobbin Thread
You may do this now by threading it as you would the eye of a needle or in the following procedure while drawing out the bobbin thread. Figure 2-10 EP 1B Operation Manual Melco Embroidery Systems... -
Page 19: The Bobbin Case
The Bobbin Case Removal 1. After turning off the power switch, lift the needle above the throat plate by rotating the handwheel. 2. Remove the auxiliary table by lifting slightly at its left front and sliding it off to the left. Figure 2-11 3. -
Page 20: Winding Thread Onto The Bobbin Reel
7. If the thread was cut or if thread Figure 2-13 cannot be wound on the bobbin reel normally during thread winding, the thread winding can be stopped by pressing the [SPOOL] key again. EP 1B Operation Manual Melco Embroidery Systems... -
Page 21: Setting The Bobbin
Setting the Bobbin After thread has been wound onto the bobbin reel, follow the directions below to set the bobbin. NOTE: Turn the power switch OFF when putting the bobbin case into the hook body. 1. Hold the bobbin case in your left hand so the open side is facing you. 2. -
Page 22: Setting Thread Tensions
Experimentation with different threads and fabrics will give you experience on how to set the upper thread tension to best suit your needs. EP 1B Operation Manual Melco Embroidery Systems... -
Page 23: Bobbin Thread Tension
How to Select a Needle The EP 1B embroidery machine uses a Class 15 household sewing machine needle. The following needle types are given to help guide you in selecting the proper needle for your various embroi- dering situations. -
Page 24: Needle Replacement
5. Insert the new needle fully into the needle clamp until it touches the pin. 6. Tighten the needle clamp screw securely. EP 1B Operation Manual Melco Embroidery Systems... - Page 25 12404 Rev. A 3. Needles, Bobbins, and Threads...
-
Page 26: Quick Start
4. Quick Start Loading Garments Do not load garments or fabrics while the hoop is attached to the EP 1B. Doing so may damage the machine. Hooping is best accomplished on a clean, sturdy table. Round Hoops 1. Place the outer frame on a flat surface with the label on the mounting plate facing up. -
Page 27: Attach The Hoop
NOTE: When removing a fabric from a rectangular hoop, press the fabric holder from the rear side (lower face) of the hoop, and the fabric can be removed easily. EP 1B Operation Manual Melco Embroidery Systems... -
Page 28: Embroider The Design
9. Press [ALT] + [ENTER] until the display reads RUN DESIGN. 10. Press [START] two times. The EP 1B will embroider the selected design. 11. When the design is finished embroidering, the display reads END OF DESIGN. Press [START] three times to embroider this design again, select a new design from the DESIGN MENU, or press [MENU] until the display reads RESET MENU to clear the design from memory. - Page 29 EP 1B Operation Manual Melco Embroidery Systems...
-
Page 30: Detailed Operation
5. Detailed Operation This chapter explains all the control panel keys and the various operation menus of the EP 1B embroidery peripheral. The Control Panel The Vacuum Fluorescent Display (VFD) Displays the different menus and choices, as well as embroidering and design information (see Figure 5-1). -
Page 31: Enter Key
+ [ ], then press [ ] for “yes” or [ ] for “no”. If the design is sent from the controller computer using the Auto Delete feature, it will automatically be deleted at the end of embroidering. NOTE: A design entered in the queue cannot be deleted if the display reads: DELETE FAILED. EP 1B Operation Manual Melco Embroidery Systems... -
Page 32: Run Design
If you have a file name on the VFD screen, you can check the size of the design (in the units you have configured your EP 1B to use) based on the design origin. 1. Press [ALT] + [ ] to show the size of the design in the X direction. -
Page 33: Frame Menu
Press [ ] or [ ] to select a hoop type and size, then press [ENTER]. Press the [INITIALIZE] key to center the selected hoop.The chosen hoop will remain selected even after the power has been turned off. NOTE: Hoop sizes cannot be changed during embroidering. EP 1B Operation Manual Melco Embroidery Systems... -
Page 34: Move Menu
Auto Load When the EP 1B is turned on, the EP 1B asks the host EDS system for the last design that was embroidered. When the computer is connected and the design is present on the hard drive, the design is automatically sent to the EP 1B. -
Page 35: Error Messages
If the bobbin thread runs low, the alarm will sound and the display will read BOBBIN THREAD. COLOR CHANGE The EP 1B will stop with this display if color change data is read in the design. DELETE FAILED Cannot delete a design because a design that is queue’d cannot be deleted. Clear the queue on the System Reset submenu. -
Page 36: Machine Running
JOB NOT COMPLETE Hoop Selection menu was selected before embroidery was done. Change hoop selection after the machine has finished. MACHINE RUNNING The Frame, Move, or Reset menu was selected during embroidery. Select the menu when the machine has finished. MEMORY ERROR Defective part. -
Page 37: Thread Broken
• Trace menu was selected during embroidery THREAD BROKEN If the upper thread should break while embroidering, the EP 1B will stop embroidering, the alarm buzzer will sound, and the display will read THREAD BROKEN. UP NEEDLE BAR If the needle is lowered during the various operations to move the hoop only (e.g., trace) the hoop move is interrupted for safety. -
Page 38: Operator Maintenance
6. Operator Maintenance This section explains how to clean and correctly lubricate your EP 1B Cleaning A clean hook area is essential for proper operation. The hook area should be checked at the start of each day and each time bobbin thread is added. -
Page 39: General Cleaning
2. Wipe the inside of the hook race body and the outside of the rotary hook body with an oil cloth. To avoid excessive lubrication, use an oil cloth only. 3. Reassemble the hook assembly. EP 1B Operation Manual Melco Embroidery Systems... -
Page 40: General Lubrication
To keep from contaminating garment, sew on some scrap fabric for a short while before continu- ing with real garments. Never use any oil other than the sewing machien oil recommended by Melco (1 container of the recommended oil is included with the machine). -
Page 41: Replacement Parts
Figure 6-7 to change the light bulb. Figure 6-7 Tool Kit The tool kit contains the following items and is included in the operator’s kit: Operator Kit Following is a list of all items found in the kit: EP 1B Operation Manual Melco Embroidery Systems... -
Page 42: Troubleshooting Guide
5. Troubleshooting Guide Thread breakage PROBLEM POSSIBLE CAUSES SOLUTIONS Design Stitches are too short and/or too Check the design for short and/or dense dense stitches, and edit the design to remove them Needles Incorrect needle for thread size Replace with a compatible needle being used Needle is bent, damaged, or dull Replace needle... -
Page 43: Skipped Stitches
Needle is too small for the fabric Replace with compatible needle Needle strikes the needle plate Adjust position of the needle case (refer to the technical manual) Needle strikes the UTC Reposition the UTC (refer to the technical manual) EP 1B Operation Manual Melco Embroidery Systems... -
Page 44: Loose Stitches
Loose stitches POSSIBLE CAUSES SOLUTIONS Upper thread tension too low Adjust the upper thread tensions (see tension section) Bobbin tension too low Adjust the bobbin case set screw Uneven thread size Replace with quality thread Upper tension inconsistent Clean tensioner parts Rotary hook timing is incorrect Adjust hook timing (refer to the technical manual) - Page 45 EP 1B Operation Manual Melco Embroidery Systems...
- Page 46 INDEX Hook 6-1 Hook, lubrication 6-2 Alt Key 5-2 Hoop Selection 5-3 APL 2-4 Hoops, attaching 4-2 Application Software 2-4 Arrow Keys 5-1 AutoLoad 5-4 Initialization Key 5-1 Bobbin 3-5 JOB NOT COMPLETE 5-5 Bobbin Case 3-3 BOBBIN THREAD 5-5 Bobbin Thread Tension 3-7 Bobbin winder 3-4 Key Click Volume 2-2...
- Page 47 INDEX REMOVE THE LOCK! 5-6 Replacement Parts 6-4 Reset Menu 5-4 Round Hoops 4-1 Run Design 5-3 RUN BUFFER FULL 5-6 RUN JOB ERROR 5-7 Select a Needle 3-7 Setup 1-1 Specifications iii Spool Key 5-1 Start Key 5-1 Stop Key 5-1 Symbols iv System Defaults 2-3 System Reset 5-4...
- Page 48 Quick Reference Guide for the EP 1B 12404 Revision B...
- Page 49 EDS application. 5. Press [START] to return to the design ori- 2. Press [ENTER]; display shows RESET. 2. Turn on the EP 1B peripheral. gin. 3. Press [ENTER] to reset the machine. 3. Transmit the design from the EDS to the 4.
Need help?
Do you have a question about the EP 1B and is the answer not in the manual?
Questions and answers