
Related Manuals for Pioneer DVD Recorder


Summary of Contents for Pioneer DVD Recorder
-
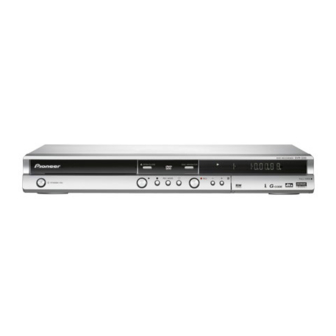
Page 1: Dvd Recorder
DVD Recorder DVR-330-S Operating Instructions Downloaded From Disc-Player.com Pioneer Manuals... - Page 2 To avoid fire hazard, the power cord should also be unplugged from the AC outlet when left unused for a long period of time (for example, when on vacation). D3-4-2-2-2a_A_En Downloaded From Disc-Player.com Pioneer Manuals...
-
Page 3: Operating Environment
A damaged power cord can cause a fire or give you an electrical shock. Check the power cord once in a while. When you find it damaged, ask your nearest PIONEER authorized service center or your dealer for a replacement. S002_En... -
Page 4: Table Of Contents
Recording from a DV camcorder ....42 Playing your recordings on other DVD players ..44 Initializing a recordable DVD disc ....45 Downloaded From Disc-Player.com Pioneer Manuals... - Page 5 Glossary........85 Specifications ......88 Index Downloaded From Disc-Player.com Pioneer Manuals...
-
Page 6: Before You Start
In addition to six preset recording quality modes, the start and end times of the recording. That’s it! manual recording mode allows you to access 33 different recording quality/time settings, giving you precise control over the recording. Downloaded From Disc-Player.com Pioneer Manuals... - Page 7 ‘DVD-Video format’ recording: The use of the DVD- Video format for recording on DVD-R and DVD-RW discs is referred to as recording in ‘Video mode’ on Pioneer’s DVD recorders. Supporting playback of DVD-R / DVD- RW discs is optional for manufacturers of DVD...
-
Page 8: What's In The Box
• You can control this recorder using the remote sensor of another Pioneer component using the CONTROL IN jack on the rear panel. See Rear panel connections on page 12 for more information. -
Page 9: Disc / Content Format Playback Compatibility
Ver. 1.1 discs. General disc compatibility The following table shows older Pioneer DVD recorders’ limited compatibility with DVD-RW Ver. 1.2 discs. This recorder is compatible with a wide range of disc types (media) and formats. - Page 10 Recording format). However, for discs recorded with a record-only-once encrypted program, playback can only be achieved using a CPRM compatible device. Note that Pioneer cannot guarantee that discs recorded using this recorder will play on other players. Downloaded From Disc-Player.com Pioneer Manuals...
- Page 11 ‘DVD-Video format’ recording: The use of the DVD- Video format for recording on DVD-R and DVD-RW discs is referred to as recording in ‘Video mode’ on Pioneer’s DVD recorders. Supporting playback of DVD-R / DVD- RW discs is optional for manufacturers of DVD...
-
Page 12: Connecting Up
Dolby Digital/DTS decoder or other equipment with optical digital input. CONTROL IN Use to control this recorder from the remote sensor of another Pioneer component with a CONTROL OUT terminal and bearing the Pioneer mark. Connect the CONTROL OUT of the other component to the CONTROL IN of this recorder using a mini-plug cord. -
Page 13: Easy Connections
Use an RF antenna cable to connect the antenna • See the following page if you want to use S-video or output on your VCR to the antenna input on your TV. component video cables for the video connection. Downloaded From Disc-Player.com Pioneer Manuals... -
Page 14: Using Other Types Of Video Output
S-VIDEO OUTPUT (1 or 2) to an S-video input on your • Use a component video cable (not supplied) to TV, monitor (or other equipment). connect the COMPONENT VIDEO OUT jacks to a component video input on your TV, monitor (or other equipment). Downloaded From Disc-Player.com Pioneer Manuals... -
Page 15: Connecting To A Cable Box Or Satellite Receiver (1)
A/V cables. This enables you to record scrambled TV channels. Note 1. The diagram shows standard video connections, but you can alternatively use the S-video or component video connections if they’re available. Downloaded From Disc-Player.com Pioneer Manuals... -
Page 16: Connecting To A Cable Box Or Satellite Receiver (2)
1. • The setup on this page does not allow you to watch one channel and record another. • The diagram shows standard video connections, but you can alternatively use the S-video or component video connections if they’re avail- able. Downloaded From Disc-Player.com Pioneer Manuals... -
Page 17: Connecting To An Av Amplifier Or Receiver
TV. Note 1. If your AV amp/receiver doesn’t have an optical digital input, but has a coaxial type, converter boxes that convert from optical to coaxial are available at specialist audio dealers. Downloaded From Disc-Player.com Pioneer Manuals... -
Page 18: Connecting Other Av Sources
This enables you to record tapes from your VCR or recorder to a power outlet. camcorder. • You can use standard video or S-video cables for the video connection. • The front panel connections make convenient connections for a camcorder input. Downloaded From Disc-Player.com Pioneer Manuals... -
Page 19: Controls And Displays
Pull the cover down where indicated to access the front Press to stop playback. panel input jacks (audio, video and DV). Especially convenient for connecting camcorders and other portable equipment. Press to start or restart playback. Downloaded From Disc-Player.com Pioneer Manuals... -
Page 20: Remote Control
Press to open/close the disc tray. Press to display the Home Menu, from which you can navigate all the functions of the recorder. 13 RETURN Press to go back one level in the on-screen menu or display. Downloaded From Disc-Player.com Pioneer Manuals... - Page 21 Press repeatedly to change the recording mode (picture quality). TIMER REC (page 34) Press to start setting a timer recording. 18 TV CONTROL (page 75) After setting up, use these controls to control your TV. Downloaded From Disc-Player.com Pioneer Manuals...
-
Page 22: Display
Lights when a VR mode disc is loaded and the recorder is in Play List mode. 2 3 (page 73) Shows the remote control mode (if nothing is displayed, the remote control mode is 1). Lights when an unfinalized Video mode disc is loaded. Downloaded From Disc-Player.com Pioneer Manuals... -
Page 23: Getting Started
Navigator doesn’t appear, you can also access it from the Basic Clock Country Selection Basic Initial Setup menu; see page 68). Tuner Input Line System Video In/Out Power Save Country Singapore Audio In Help Audio Out Setup Navigator Setup Navigator Language Recording Playback Downloaded From Disc-Player.com Pioneer Manuals... -
Page 24: Manual Clock Setting
Setup Navigator Setup Navigator Clock Set CH Pr 1 Language S tart Recording Next Playback If the time could not be set automatically, press RETURN to go back to the previous screen and select Manual. Downloaded From Disc-Player.com Pioneer Manuals... -
Page 25: Other Settings You Can Make
Other settings you can make ‘Standard (4:3)’. After setting up using the Setup Navigator, you should be ready to start enjoying your DVD recorder. It’s possible, however, that you may want to make a couple of Initial Setup additional settings, depending on how the recorder is set... -
Page 26: Using The Built-In Tv Tuner
• If the NICAM audio setting (see Nicam Select on page 69) is set to NICAM and you are watching a NICAM broadcast, you can switch between NICAM and Regular (non-NICAM) audio. NICAM Regular Note 1. Channel presets are numbered 1–99. Downloaded From Disc-Player.com Pioneer Manuals... -
Page 27: Basic Playback
• To open/close the disc tray, press OPEN/CLOSE. Remove the disc before putting the recorder into standby. • Press STANDBY/ON to switch the recorder into standby. Downloaded From Disc-Player.com Pioneer Manuals... - Page 28 1. If you want to play a DTS audio CD, make sure the recorder is connected to a DTS-compatible amp/receiver with a digital connection. Noise will be output through the analog outputs. Also make sure that STEREO is selected using the AUDIO button (see Switching audio channels on page 53). Downloaded From Disc-Player.com Pioneer Manuals...
-
Page 29: Using The Home Menu
1. When playing in PBC mode, some playback features, such as search, repeat and program play are not available. You can play a PBC Video PLAY. CD/Super VCD in non-PBC mode by pressing to start playback instead of Downloaded From Disc-Player.com Pioneer Manuals... -
Page 30: Displaying Disc Information On-Screen
Shows the approximate recording time left on the disc in Angle indicator the current recording mode. Lights during multi-angle scenes. Preset name and number Shows the preset name and preset number for the currently selected channels. Downloaded From Disc-Player.com Pioneer Manuals... - Page 31 Shows the current recording mode (XP, SP, LP, etc.), and the total recording time of the disc. Note 1.Data transfer rate shows the amount of video and audio information recorded on the disc. It is not an indication of picture/audio quality. Downloaded From Disc-Player.com Pioneer Manuals...
-
Page 32: Recording
9 for detailed disc compatibility information. Note 1.Some DVD players, such as some Pioneer models, are compatible with VR mode discs. Check the operating instructions for your player for VR mode compatibility information. 2.All recording times (both in this manual and those shown by the recorder) are approximate. This is because of the way that the video is re- corded;... -
Page 33: Recorded Audio
Note 1.Audio is recorded in 16-bit Linear PCM format, video is recorded at XP quality. When recording a bilingual broadcast, select which audio chan- nel to record (see Bilingual Recording on page 70). Downloaded From Disc-Player.com Pioneer Manuals... -
Page 34: Basic Recording From The Tv
You can set the recording quality for your timer recording in the same way as for a regular recording, but with the added option of an AUTO mode, which maximizes the recording quality for the space available on the disc. Downloaded From Disc-Player.com Pioneer Manuals... - Page 35 LP, EP, SLP, SEP and AUTO (and MN if manual recording mode is on). • The AUTO option automatically sets the best recording quality for the space available on the disc loaded at the time of recording. Downloaded From Disc-Player.com Pioneer Manuals...
-
Page 36: Programming System
Enter from the main timer recording screen (see Setting a manual timer recording on page 37). • Use the number buttons to enter the G-Code programming number. (To clear the last digit entered, press CLEAR.) Downloaded From Disc-Player.com Pioneer Manuals... - Page 37 Use the number buttons to enter the number. • Each row is for one timer recording program, with the date and time information, channel, recording mode, and recording status. • To clear the last digit entered, press CLEAR. Downloaded From Disc-Player.com Pioneer Manuals...
- Page 38 ‘Store Program’ and press ENTER. The timer recording list screen is displayed again. The timer program you just input appears in the list. The rightmost column shows various timer recording status messages: • OK – Can be recorded. Downloaded From Disc-Player.com Pioneer Manuals...
- Page 39 You can also edit the Extend time parameter. • You can also just press when the timer program is highlighted. Select ‘Store Program’ then press ENTER. To exit the timer recording screen, press HOME MENU. Downloaded From Disc-Player.com Pioneer Manuals...
-
Page 40: Timer Recording Faq
In fact, you’re not just limited to watching the recording in progress; you can watch anything else already on the DVD by selecting it from the Disc Navigator screen (see Using the Disc Navigator with recordable discs on page 47). Downloaded From Disc-Player.com Pioneer Manuals... -
Page 41: Recording From An External Component
TV before recording. Note 1.You can’t start playback immediately after recording starts. 2.When scanning a DVD, no sound is output if the recorder is also recording (see Scanning discs on page 48). Downloaded From Disc-Player.com Pioneer Manuals... -
Page 42: Automatic Recording From A Satellite Tuner
– the recorder is recording or in timer recording standby. – there is no recordable disc loaded. – the disc loaded is locked. – the disc loaded already contains the maximum number of titles (99). Downloaded From Disc-Player.com Pioneer Manuals... - Page 43 DV IN jack. Load a recordable disc into the recorder. From the Initial Settings menu, check that the DV audio input is setup as you require. See DV Input on page 70 for more on this. Downloaded From Disc-Player.com Pioneer Manuals...
-
Page 44: Playing Your Recordings On Other Dvd Players
Finalizing a disc VR mode Video mode • Discs recorded partially or fully on the Pioneer Finalizing ‘fixes’ the recordings in place so that the disc DVR-7000 DVD recorder do not support this feature. can be played on a regular DVD player or computer These discs will have only a text title menu when equipped with a suitable DVD-ROM drive. -
Page 45: Initializing A Recordable Dvd Disc
VR Mode Start Initialize Initialize Video Mode Start Finalize Note 1.If a disc was previously finalized on an older DVD recorder, you may not be able to re-initialize and/or initialize it for Video mode recording. Downloaded From Disc-Player.com Pioneer Manuals... -
Page 46: Playback
• For discs that contain JPEG picture files, see The then 4. PhotoViewer on page 61. • To clear and start again, press CLEAR. Optionally: Press ENTER. • Alternatively, just wait a few seconds and playback will jump to the new title. Downloaded From Disc-Player.com Pioneer Manuals... -
Page 47: Using The Disc Navigator To Browse The Contents Of A Disc
23:00 FRI 3/12 23:00 Fri 3/12 Pr 9 Cancel • • • Original 23:00 Fri 3/12 Pr 9 • • • Original 1h00m( 2.0G) Original 1h00m( 2.0G) VR Mode VR Mode Remain Remain 0h30m 0h30m Downloaded From Disc-Player.com Pioneer Manuals... -
Page 48: Scanning Discs
Except during chase playback and simultaneous recording/playback) No sound is output when using other scan speeds. • Depending on the disc, normal playback may automatically resume when a new chapter is reached on a DVD disc. 3.Depending on the disc, reverse playback may not be smooth. Downloaded From Disc-Player.com Pioneer Manuals... -
Page 49: Playing In Slow Motion
2.• The picture quality when using frame reverse is not as good as frame advance. • Depending on the disc, normal playback may automatically resume when a new chapter is reached on a DVD disc. Downloaded From Disc-Player.com Pioneer Manuals... -
Page 50: Search Mode
2.• If you switch camera angles during A-B repeat play, A-B repeat is canceled. • You can’t use A-B Repeat with WMA/MP3 or Super VCD discs. 3.If you switch the camera angle during repeat play of a DVD-Video disc, repeat play is canceled. Downloaded From Disc-Player.com Pioneer Manuals... -
Page 51: Program Play
A program list can contain up to 24 titles/chapters/ • To add a title, select the title. folders/tracks. Note 1.When playing a program list of DVD-Video chapters, chapters not included in the program list may be sometimes be played, depending on the disc. Downloaded From Disc-Player.com Pioneer Manuals... -
Page 52: Displaying And Switching Subtitles
• To set subtitle preferences, see Subtitle Language on page 71. 2.• Some discs only allow you to change audio language from the disc menu. Press TOP MENU or MENU to access. • To set audio language preferences, see Audio Language on page 71. Downloaded From Disc-Player.com Pioneer Manuals... -
Page 53: Switching Audio Channels
1.When playing a Bilingual recording on a VR mode disc, if you are listening to the Dolby Digital soundtrack via the digital output, you cannot switch the audio channel. Set Dolby Digital Out to Dolby Digital PCM (see Dolby Digital Out on page 70) or listen via the analog outputs if you need to switch the audio channel. Downloaded From Disc-Player.com Pioneer Manuals... -
Page 54: Editing
) buttons to display the previous/next page if there are more titles than can be displayed. • Press DISPLAY to change the title information displayed in the title list. Note 1.It isn’t possible to edit video on DVD-RAM discs using this recorder. Downloaded From Disc-Player.com Pioneer Manuals... -
Page 55: Command Menu Panel Options
Remain 0h30m Undo Select a title to add to the Play List. VR Mode Use the buttons to highlight an Original title then Remain 0h30m press ENTER to add it and display the Play List. Downloaded From Disc-Player.com Pioneer Manuals... - Page 56 ENTER. key shortcuts, see Using the remote key shortcuts to input a name below. Title Name • For discs formatted on a different DVD recorder, you will see only a limited character set. Video mode VR mode Highlight ‘OK’ then press ENTER to enter the You can give titles new names of up to 64 characters long name and return to the main Disc Navigator screen.
- Page 57 Select ‘Yes’ to confirm, or ‘No’ to cancel, then press ENTER. In the thumbnail viewer you can see a few seconds of video either side of the marked section to see how the edit will look. Downloaded From Disc-Player.com Pioneer Manuals...
- Page 58 3.It may not always be possible to combine two chapters, even though they are adjacent. If a chapter has been divided into three, then the middle chapter erased, it is not possible to combine the two remaining chapters into one. Downloaded From Disc-Player.com Pioneer Manuals...
- Page 59 Fri 3/12 Pr 4 4 Titles 0h30m( 1.0G) 23:00 FRI 3/12 23:00 Fri 3/12 Pr 9 • • • Play List 1h00m( 2.0G) VR Mode Remain 0h30m After pressing ENTER, the new, updated Play List is displayed. Downloaded From Disc-Player.com Pioneer Manuals...
- Page 60 VR mode DVD-R disc, editing is no longer possible. This is because information about your edits requires a certain amount of disc space. As you edit, this information builds up, eventually preventing you from editing further. Downloaded From Disc-Player.com Pioneer Manuals...
-
Page 61: The Photoviewer
1.Up to 999 files or 99 folders are viewable, but if there are more files/folders than this on the disc it is still possible to view them all using the Reload function (see the following page). Downloaded From Disc-Player.com Pioneer Manuals... - Page 62 Press ANGLE repeatedly to continue rotating the picture in increments of 90º. Note 1.You can press HOME MENU to exit the PhotoViewer screen while the recorder is reloading images. (If you enter the PhotoViewer again, it will resume reloading.) Downloaded From Disc-Player.com Pioneer Manuals...
-
Page 63: The Disc Setup Menu
For other remote control key shortcuts, see Using the remote key shortcuts to input a name on page 56. Basic settings • For discs formatted on a different DVD recorder, you will see only a limited character set. Input Disc Name Lock Disc... -
Page 64: Initialize Settings
1.You cannot finalize a disc or use the Undo Finalize command if the TV line system of the disc is different to the current setting of the recorder. See Additional information about the TV system settings on page 74 for how to change the recorder’s setting. Downloaded From Disc-Player.com Pioneer Manuals... -
Page 65: The Video/Audio Adjust Menu
(Tuner, VCR or LDP). Note 1.When the DV input is selected, only Prog. Motion and PureCinema settings can be adjusted. 2.When White AGC is On, the White Level setting can’t be adjusted. Downloaded From Disc-Player.com Pioneer Manuals... -
Page 66: Setting The Picture Quality For Disc Playback
• Memory2 – user preset 2 • Memory3 – user preset 3 You can press DISPLAY to see the individual settings for the current preset (TV(CRT), PDP or Professional). Press ENTER to select the preset. Downloaded From Disc-Player.com Pioneer Manuals... -
Page 67: Audio Drc
• Audio DRC is not effective when listening to a disc via the digital output when Dolby Digital Out is set to Dolby Digital. In this case adjust the dynamic range from your AV amplifier/receiver. Downloaded From Disc-Player.com Pioneer Manuals... -
Page 68: The Initial Setup Menu
Next Screen Proceed to the next screen, select select your country, then wait for automatic tuning to complete. The channel mapping screen should appear when the recorder is set up. Press ENTER to exit this screen. Downloaded From Disc-Player.com Pioneer Manuals... - Page 69 Record the non-NICAM audio in a NICAM broadcast. (You can still switch the audio to record using the AUDIO button before recording.) Tuner Level Normal • Standard setting. Compression Use if the audio level from the built-in tuner is excessive, causing dis- tortion. Downloaded From Disc-Player.com Pioneer Manuals...
- Page 70 Convert sources with MPEG audio to Linear PCM output. Use if your connected equipment doesn’t have an MPEG audio decoder. Language Settings OSD Language English • Sets the language of the on-screen displays to English. available languages Choose from the languages displayed for the on-screen displays. Downloaded From Disc-Player.com Pioneer Manuals...
- Page 71 Select to have discs display subtitles according to your Subtitle Lan- guage and Auto Language preferences. Select to switch off subtitle display. Assist Subtitle Select to display special additional assistive subtitles, where available. Some discs may override these settings. Downloaded From Disc-Player.com Pioneer Manuals...
- Page 72 Seamless Playback Playback is smooth, but with a trade-off against the accuracy of the edit points. Off • You may notice momentary interruption at edited points during play- back of a VR mode Play List. Downloaded From Disc-Player.com Pioneer Manuals...
- Page 73 IDs. This setting sets the recorder ID; to change the remote controller ID, press and hold RETURN then press 1, 2 or 3 to set. The remote will only control a recorder with the same ID. Downloaded From Disc-Player.com Pioneer Manuals...
- Page 74 TV set compatibility with this model, on the same disc. please contact our customer service center. This recorder is compatible with the following Pioneer displays • When you change this setting, the Input Colour and monitors System setting also changes (see below).
-
Page 75: Additional Information
What it does Telefunken Press to switch the TV on/off (standby) Thomson INPUT SELECT Press to change the TV’s video input Toshiba TV VOLUME Use to adjust the TV volume TV CHANNEL Use to change TV channels Downloaded From Disc-Player.com Pioneer Manuals... -
Page 76: Screen Sizes And Disc Formats
When viewing on a widescreen TV or monitor Screen format of disc Setting Appearance 16:9 16:9 The program is presented in widescreen. 16:9 Your TV will determine how the picture is presented—check the manual that came with the TV for details. Downloaded From Disc-Player.com Pioneer Manuals... -
Page 77: Troubleshooting
Sometimes the trouble may lie in another component. Investigate the other components and electrical appliances being used. If the trouble cannot be rectified even after checking the points below, ask your nearest Pioneer authorized service center or your dealer to carry out repair work. General... - Page 78 five years from factory shipping. Reset the clock and other recorder settings to use the recorder again. To have the battery replaced, contact your dealer or a Pioneer Service Center. Front panel display shows ‘LOCK’ • The Child Lock is on; turn off in order to use the recorder (page 40).
-
Page 79: Frequently Asked Questions
In this section you can find answers to frequently player to see if it will play VR mode DVD-RW discs. If asked questions on how to use your DVD recorder the player does not recognize the disc when you load and what it can do.. -
Page 80: About Dv
– Recording stopped because DV camcorder playback was stopped or the camcorder was disconnected. • The DV camcorder is not set for playback. Please select playback mode on the DV camcorder. – The camcorder is in camera mode. Downloaded From Disc-Player.com Pioneer Manuals... -
Page 81: Manual Recording Modes
61 mins. MN 32 61 mins. LPCM 61 mins. LPCM 61 mins. * The first figure refers to when the Input Line System is set to 525 System; the second when set to 625 System. Downloaded From Disc-Player.com Pioneer Manuals... -
Page 82: Language Code List
Chile, 0312, cl Italy, 0920, it Philippines, 1608, ph United Kingdom, 0702, gb China, 0314, cn Japan, 1016, jp Portugal, 1620, pt USA, 2119, us Denmark, 0411, dk Korea, Republic of, 1118, kr Russian Federation, 1821, ru Downloaded From Disc-Player.com Pioneer Manuals... -
Page 83: On-Screen Displays And Recorder Displays
• Cannot add any more chapter marks. chapters or combine chapters. • This disc cannot be recorded. Undo the final- The disc was finalized on a non-Pioneer DVD recorder. Undo the ization. finalization in order to recording/editing. • Cannot play this disc. -
Page 84: Handling Discs
CD/DVD cleaning kit to clean a Cleaning the pickup lens disc more thoroughly. Never use benzine, thinner or The DVD recorder’s lens should not become dirty in other cleaning agents, including products designed for normal use, but if for some reason it should malfunction cleaning vinyl records. -
Page 85: Hints On Installation
DVD. DVDs created using Dolby Digital Recording will play back on all DVD-Video players. Manufactured under license from Dolby Laboratories. “Dolby” and the double-d symbol are trademarks of Dolby Laboratories. Downloaded From Disc-Player.com Pioneer Manuals... - Page 86 Files are recognized by their file extension “.mp3” or “.MP3”. You can see whether video on a DVD disc is film or video material by displaying the transfer rate. If a ‘#’ appears above the transfer rate display, it is film material. Downloaded From Disc-Player.com Pioneer Manuals...
- Page 87 Media Player for Windows XP. Files are recognized by their file extension “.wma” or “.WMA”. Microsoft, Windows Media, and the Windows logo are trademarks, or registered trademarks of Microsoft Corporation in the United States and/or other countries. Downloaded From Disc-Player.com Pioneer Manuals...
-
Page 88: Specifications
Super Extended Play (SEP) ... . Approx. 10 hours Manual Mode (MN) ....Approx. 1–13 hours Downloaded From Disc-Player.com Pioneer Manuals... -
Page 89: Supplied Accessories
Power cable........1 Operating Instructions Note: The specifications and design of this product are subject to change without notice, due to improvement. Downloaded From Disc-Player.com Pioneer Manuals... -
Page 90: Index
– aspect ratios on-screen displays compatibility parental lock for DVD-Video DVD-R vs DVD-RW picture quality settings for finalizing settings initializing Progressive scan video – playback controls for selecting for playback/recording Video mode vs VR mode Downloaded From Disc-Player.com Pioneer Manuals... - Page 91 Timer recording – Title defined maximum number recordable thumbnails TV channels automatic tuning changing manual setting numbering Video CD compatibility playback control (PBC) – playback controls for WMA audio files Downloaded From Disc-Player.com Pioneer Manuals...
- Page 92 253 Alexandra Road, #04-01, Singapore 159936 TEL: 656-472-1111 PIONEER ELECTRONICS AUSTRALIA PTY. LTD. 178-184 Boundary Road, Braeside, Victoria 3195, Australia, TEL: (03) 9586-6300 PIONEER ELECTRONICS DE MEXICO S.A. DE C.V. Blvd.Manuel Avila Camacho 138 10 piso Col.Lomas de Chapultepec, Mexico,D.F. 11000 TEL: 55-9178-4270 K002E Printed in China <VRB1377-A>...
Need help?
Do you have a question about the DVD Recorder and is the answer not in the manual?
Questions and answers