Table of Contents
Advertisement
Quick Links
Advertisement
Table of Contents

Related Manuals for Rosco X24

Summary of Contents for Rosco X24
- Page 1 X24 Projector Original Instructions www.rosco.com (Revision: Feb2015)
-
Page 2: Table Of Contents
Manual Mode ..............................19 DMX Mode ..............................20 Troubleshooting ........................22 Specifications ........................24 Mechanical Specifications ........................24 Electrical Specifications ...........................24 Wheel Module Specifications ........................24 Lamp Specifications ..........................24 Lens Module Specification ........................24 Warranty ..........................25 Certificate of Conformity ....................26 X24 PROJECTOR ORIGINAL INSTRUCTIONS... -
Page 3: Introduction
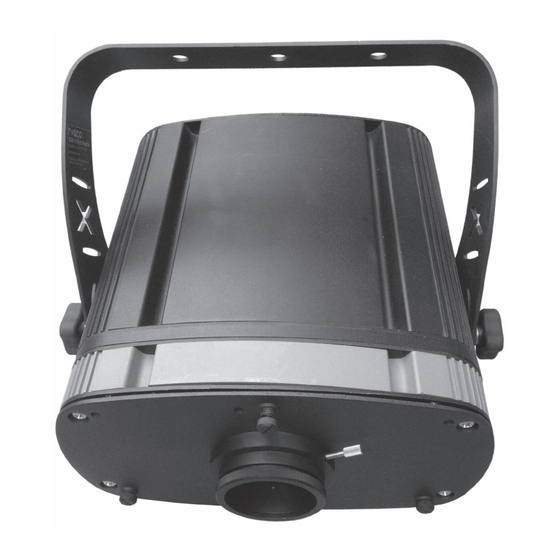
INTRODUCTION TO YOUR X24 PROJECTOR Congratulations on your purchase of the Rosco Laboratories X-24 Projector. (Also known as the X-Effects). This modular projector is intended to provide a range of unique lighting effects with high brightness in a compact package. -
Page 4: Warnings
Children shall be supervised to ensure that they do not play with the appliance. X24 PROJECTOR ORIGINAL INSTRUCTIONS... - Page 5 Children shall not play with the appliance. Cleaning and user maintenance shall not be made by children without supervision. Disconnect The X24 from power before maintenance, servicing or replacing parts. Units in outdoor settings may need to be shielded from the elements and/ or heated.
-
Page 6: Modules
It also has a slot for special optical filters. Note: In older versions of the X24 an aspherical lens was fitted behind the front plate. If this lens is fitted please note when handling the base unit alone, be aware that it extends slightly beyond the front plate, and is subject to being scratched. - Page 7 TOP VIEW Lamp Clip Lamp Lamp Mount Special Optics Slot www.rosco.com...
-
Page 8: Wheel Module
It also has four shutters and a slot for placing an E-size gobo. Note: In older versions of the X24 the glass discs were made to a thinner specification. These should not be used in the latest version of the unit as this may result in damage to the drive pulley. - Page 9 FRONT VIEW Drive Pulley Top Shutter (Not in View) Damper Bottom Shutter Side Shutter Side Shutter (Not in View) FRONT VIEW (with wheels fitted) Glass Pattern Idler Wheel (Standard Water) Pull Tab www.rosco.com...
-
Page 10: Lens Module
It provides screw focusing and a lock-down knob. The lens barrels themselves also have a slot for inserting a dichroic filter. (See page 14). FRONT VIEW # 20 Screw Thumb Screw Locking Knob Lens Mount Ring X24 PROJECTOR ORIGINAL INSTRUCTIONS... -
Page 11: Analog Control Panel
Analog Control Panel The analog control panel has all of the panel controls and electronics for controlling the electronic dimming of the lamp. (For DMX see page 17) Control Power Indicator Speed Adjustment Speed Mode Switch Brightness Adjuster www.rosco.com... -
Page 12: Preparing For Use
4. Release the lamp spring clip to lock the rear of the lamp in place. 5. Attach the connector from the lamp to the connector in the unit. It is a polarized connector and will only connect in one position. Cutout Wire Lamp Clip X24 PROJECTOR ORIGINAL INSTRUCTIONS... -
Page 13: Installing A Glass Pattern (Wheel Module)
6. Replace the lens module plate on the unit by lining up the mounting pins, then tightening the three thumb screws. 7. Tighten the thumb screw by hand to hold the lens barrel in position. Drive Pulley with Damper Fitted Pull Tab Idler Wheel Metal Ring www.rosco.com... -
Page 14: Installing A Lens Barrel (Lens Accessory)
8. Replace the lens mount plate on the unit by lining up the mounting pins, then tightening the three knobs. 9. Tighten the thumb screw by hand to hold the lens barrel in position. Thumb Screw Lens Barrel Locking Knob Dichroic Glass LENS BARREL Dichroic Filter Glass Ring X24 PROJECTOR ORIGINAL INSTRUCTIONS... -
Page 15: Unit Operation (Analog, Wheel, Lens)
If the control panel lights and the lamp indicator comes on, then the unit is operating properly, but it will take a couple of minutes for the lamp to warm up. Once the lamp is warmed up the unit can be adjusted to suit your needs. • www.rosco.com... -
Page 16: Adjusting Brightness
Open the top and bottom hinged lids on the wheel accessory. • The top lid gives access to the top shutter. • The bottom lid gives access to the bottom and side shutters. • Close the top and bottom lids. • X24 PROJECTOR ORIGINAL INSTRUCTIONS... -
Page 17: Dmx Control Module
The DMX Control Module allows basic manual and full DMX control of the X-24 projector and its accessories. While some of the panel controls (Power, Dimmer, and DMX OK) are common to both manual and DMX modes, most are used only in a single mode. www.rosco.com... -
Page 18: Dowser
It allows for reduction of the light output, fades and blackout by use of one DMX channel. (See page 21). When the unit is powered up the dowser will reset itself. Dowser Shown in Open Position X24 PROJECTOR ORIGINAL INSTRUCTIONS... -
Page 19: Manual Mode
(full CCW is 200W, full CW is 160W). Note: the DMX OK indicator will light if DMX is connected to the unit, even if the unit is not in DMX Mode. www.rosco.com... -
Page 20: Dmx Mode
We recommend the use of a 120 ohm termination at the end of the DMX cable run for highest reliability and best performance. The starting address of the unit can be set by the three rotary switches in the middle of the module. X24 PROJECTOR ORIGINAL INSTRUCTIONS... - Page 21 When the unit powers up in DMX mode, the lamp will be off and the shutter will be in the closed position. If no DMX signal is detected, the system will stay in that state. If a valid DMX signal is detected and the unit has finished homing, it will be fully controllable as described above. www.rosco.com...
-
Page 22: Troubleshooting
If all else fails, the module can be slid partially out of the unit so that the connections • can be checked. The diagram below shows the location of key connections. • 6. Fan does not operate. Check the lamp has not failed. The fan will not run without the lamp. • X24 PROJECTOR ORIGINAL INSTRUCTIONS... - Page 23 For the most part, connectors can be matched up to headers on the PCB. The only exception is the relay and power headers, which are identical. The relay cable uses two blue wires while the power cable uses a red/black combination. www.rosco.com...
-
Page 24: Specifications
Maximum electronic dimming is to 160W. Lens Module Specification 70º Lens Barrel - Focal Length: 18mm 50º Lens Barrel - Focal Length: 27mm 30º Lens Barrel - Focal Length: 46.7mm 19º Lens Barrel - Focal Length: 80mm X24 PROJECTOR ORIGINAL INSTRUCTIONS... - Page 25 Rosco products are covered by a limited liability warranty from defects in material and work- manship. This warranty does not apply if, in the judgement of Rosco, the product fails due to damage from shipment, handling, storage, accident, abuse or misuse, or if it has been used or maintained in a manner not conforming to product’s instructions, has been modified in any...
-
Page 26: Certificate Of Conformity
52 Harbor View Ave Stamford CT 06902 In accordance with the following Directive(s):- 2004/108/EEC The Electromagnetic Compatibility Directive Hereby declare that: Professional Lighting Control Products/X24 Projector Is in conformity with the applicable requirements of the following documents:- Ref. No. Title Edition/date... - Page 27 www.rosco.com...
Need help?
Do you have a question about the X24 and is the answer not in the manual?
Questions and answers