Table of Contents
Advertisement
Advertisement
Table of Contents

Related Manuals for Access Motor BR400 4WD


Summary of Contents for Access Motor BR400 4WD
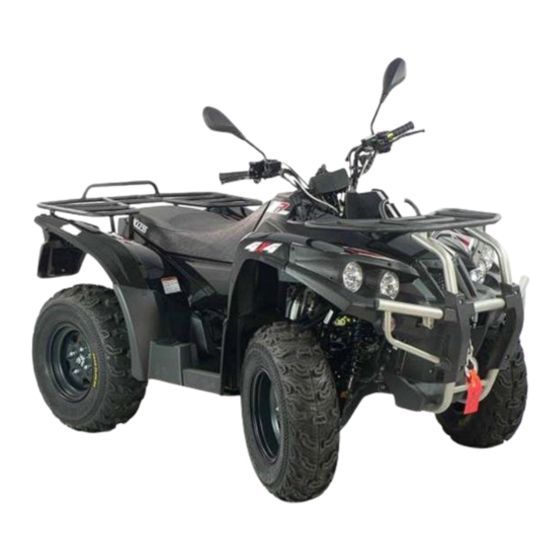
- Page 1 Owner’s Manual BR400 4WD...
- Page 2 Dear Customers, Thank you for purchasing BR400 4WD. You will find it easier to start your engine with actuation of the manual choke for 20-30 seconds after you receive your new ATV. That is because we have drained out the fuel in the carburetor when we finished assembling the ATV.
-
Page 3: Table Of Contents
When parking the ATV .............. 35 Important Message..............1 When transporting the ATV ............35 1. Riding Precautions ..............3 6. Checks Before Riding ............... 36 Attire; Check before Riding............4 Pre -riding Check; Oil Check and Refilling ........ 36 Particular Attention on Parts That May Cause Burn; Load Recommended Oil Specification and Grade ...... -
Page 4: Important Message
Important Message Negligence of the following signs and warnings may cause serious damage and even death. Warning sticker location... -
Page 6: Riding Precautions
1. Riding Precautions Notes: A. You should familiarize yourself with basic BR400 4WD ATV is a special multipurpose four-wheel operations of this ATV before you try more motorbike with entertainment features. In this section, we will difficult operational techniques. describe important notes and techniques in order for you to B. - Page 7 Attire Check Before Riding * Conduct a pre-riding check in accordance with “Check before To ensure safety, the rider shall wear a safety helmet, goggles, riding” in user’s manual on Page 32 before riding to ensure gloves, boots and protective clothing when riding this ATV. safety and the service life of this ATV.
-
Page 8: Particular Attention On Parts That May Cause Burn; Load
Particular Attention on Parts That May Cause Load Weight Limit Burn Maximum allowable weight for this ATV is 150 kg (two riders) * The exhaust pipe and the engine become very hot when or * When you carry loads on the ATV, slow down your speed to after the ATV runs for a period of time. -
Page 9: Looking At The Terrain
Looking At The Terrain * Watch your speed and control technique when you ride on * When riding with poor visibility, e.g. riding at night, turn on the excessively flat, loose and rough surface, and keep an eye on headlight and slow down your speed to ensure safety. any potential hazards such as pits, water puddles, rocks, root * When riding in the area where your viewing angle is limited, e.g. - Page 10 Making Turns Going Uphill Note: When going uphill, move your gravity as forward as When you approach a turn, first slow down and smoothly turn the possible. Also, sit in the front part of the seat and bend handlebars to the direction you are going. Also, move your gravity your upper body forward.
- Page 11 Going Downhill Riding Through Water Note: Place your gravity as backward as possible and straighten Watch the speed of water current and its depth if riding through both of your arms. Keep the ATV in balance and apply the water is necessary. If water flows very fast or is deep, the rear brake to slow down your speed.
- Page 12 take it to the nearest service center for inspection and servicing.
- Page 13 * Smoking is strictly prohibited when refueling the ATV. * Functionality of the ATV is dependant upon its structure. Any modification without our permission may cause performance Turn off your engine when refueling the ATV. degradation and in turn affect the service life of the ATV and riding safety.
-
Page 14: Naming Of Each Component
2. Naming of Each Component (01) Headlight / position light (02) Front brake handle lever (03) Right front turn signal light (04) Left front turn signal light... - Page 15 (05) Right rear turn signal light (06) Rear light / brake light (07) Ignition switch (08) Left rear turn signal light (09) Exhaust pipe (10) License plate light (11) Battery (12) Accompanying tools (13) Accelerator lever...
- Page 16 (14) Shift stick (15) Front brake reservoir (16) Seat (17) Aux liquid bottle (18) Right footrest (19) Left footrest (20) Foot brake (1 for 4 wheel)
- Page 17 (21) LCD instrument panel (22) Rear brake handle lever (23) High/low beam switch Startup rocker switch Warning light switch Turn signal light switch Horn switch (24) Fuel tank cap (25) Throttle Bottom Clamp (26) parking lever (27) Manual Choke (28) Power Supplier-12V...
-
Page 18: Operation Of Each Component; Ignition Switch
3. Operation of Each Component 1. Reverse Indicator Light: The reverse indicator light comes on (red light) when you turn Ignition switch OFF : At this position, power supply to the ATV is on the ignition switch, when the transmission is at the reverse completely cut off. - Page 19 3. High Beam Indicator Light: 5. Left/Right signal indicator: When this light comes on, the headlight is using high beam When operating the Left/right turn signal light switch, this light. indicator will come on. 4. Temperature Indicator Light: 6. Fuel level indicator: When this light comes on, it means the engine temperature is When the pointer of the fuel level indicator rests near the last too high.
- Page 20 7. Four-wheel drive switch “2WD”/“4WD”:...
- Page 21 Startup Rocker Switch Headlight Switch When the engine is started electrically, be sure to pull : At this position, the headlight comes on and the light tight the front or rear brake handle lever to energize the is beaming at a short distance. (The headlight will not system.
- Page 22 Accelerator Lever Accelerator Limiting Device The speed of the ATV is controlled via the accelerator To protect a new rider who is not familiar with this ATV from an accident, this ATV is fitted with an accelerator lever. The ATV speed increases when pressing the limiting device that can adjust the travel of the throttle accelerator lever using your thumb.
- Page 23 Manual Choke Rocker Switch Shift Stick To make the ATV to stop, move forward, or reverse, use . When the engine starts too cool, the engine can be the shift stick to shift gears. (With pulling and releasing the rear brake handle lever) easier to start up with the choke switch being pushed leftward.
-
Page 24: Parking Lever(Rear Brake); Flagpole Holder
Parking Lever (Rear Brake) Flagpole Holder How to use it: This allows you to position the desired flags in the holder. Turn the rear brake lever to the left side tightly. How to release it: Pull parking lever to the right side,it will return automaticto it’s position,the rear brake will be relieved at the same time. -
Page 25: Seat Lock
Seat lock The seat can be removed. The battery, fuses are How to mount the seat: located under the seat. Push the retaining tab under the front seat into the holder on the frame. Then push downward the rear part of the How to remove the seat: seat, and the seat can be attached on the frame. -
Page 26: Lcd Instrument Panel Adjustment
LCD Instrument Panel Adjustment... -
Page 28: Starting The Engine Electrically
4. Starting the Engine Electrically (1) Before starting the engine, first check oil and fuel levels. . Turn the ignition switch to the “ON” position. (1) Key hole (2) Key Note: *When the ignition switch is turned on, check that the neutral indicator light comes on. - Page 29 (2) Pull tight the front or the rear brake handle lever, or step on the brake pedal. Note: When starting the engine, the ignition circuit for the electric startup can only be energized with actuation of the startup switch in combination with the front or the rear brake handle lever being pulled tight or the brake pedal being depressed.
- Page 30 When Starting The Engine . Press the startup rocker switch, and the engine can be started. . If the engine starts too cool, let the engine warm up for 2-3 . If the ATV has been stored for a long time or when the fuel tank minutes.
-
Page 31: Normal Usage
5. Normal Usage When riding: The rear brake handle lever is kept at the braking position, and then put the shift stick to the “H” or “R” position. Note: *When the engine is idling, do not push the accelerator to rev the engine. - Page 32 * The rider shall put both of his feet on floor panel and keep his body upright with two hands holding the handlebars. Do not make haste, relax, carefully heed surrounding conditions and ride safely. Note: *Before riding, the rear brake handle levers should be kept at braking positions.
- Page 33 Placing the parking lever back to its original position (OFF) is in Release the rear brake handle lever, and slowly push the the brake releasing (unlocking) status. accelerator lever, the ATV will start to run smoothly. Note: Note: *After releasing the parking brake on the rear wheels, do not push *Do not push the accelerator with force to avoid dash-out of the or press the accelerator lever to avoid jerking ahead and causing ATV.
-
Page 34: Normal Riding
Normal Riding The speed of the ATV is controlled via the accelerator lever. Make sure that the surroundings are safe before setting out on the trip. (See Riding Precautions) Pushing the accelerator lever..the speed increases The accelerator lever should be pushed slowly. -
Page 35: On Command Four-Wheel Drive Switch"2Wd"/"4Wd
On Command Four-wheel drive switch “2WD”/“4WD” ! ! ! ! Warning This ATV is equipped with a switch to change from two-wheel drive to four-wheel drive. What can happen Select the appropriate drive according to the terrain and the The ATV handles differently in two-wheel drive than in conditions. -
Page 36: On Command Differential Gear Lock Switch"4Wd"/"Lock
On Command differential gear lock switch “4WD”/“LOCK” This ATV is equipped with a switch allowing you to lock the differential gear when in four-wheel drive. Select the appropriate switch position according to the terrain and the conditions. “4WD”(four-wheel drive) : Power is supplied to the rear and front wheel. - Page 37 ! ! ! ! ! ! ! ! Warning Warning What can happen Potential hazard The ATV handles differently in four-wheel drive than in Riding to fast while the ATV is in four-wheel-drive differential gear lock in some circumstances. Changing from differential gear lock four-wheel drive to differential gear lock while moving may What can happen...
-
Page 38: Prolonged Engine Life Depends Upon Correct Riding
Prolonged Engine Life Depends Upon Correct Riding When Applying Brakes, Simultaneously Apply Both Keep the ATV speed no more than 40 km/h during the first Front and Rear Brake Handle Levers. month when new ATV starts to operate. (Engine running in * After returning the accelerator lever back to its OFF period). -
Page 39: Do Not Apply Emergency Brake And Have A Quick Turn
Do Not Apply Emergency Brake and Have a Quick Turn Riding with Particular Attention in Raining Days Using emergency brakes and quickly turning are two major * In raining days the condition of road surface differs from causes to lead to skidding and turning over, which is very that in clear days. - Page 40 How to Stop the ATV When the ATV Comes to a Full Stop When approaching the parking space: Put the shift stick at the “N” position and turn the ignition * Check that the surroundings are in safe condition and switch to the “OFF”...
-
Page 41: When Parking The Atv
When parking the ATV: When transporting the ATV: * To prevent the ATV from moving, pull tight the brake handle * First drain fuel in the tank and the carburetor. lever and push the parking lever to the ON position (leftward) to * Loosen the draining screw of the carburetor. -
Page 42: Checks Before Riding
6. Check Before Riding Pre-riding Check Oil Check and Refilling Make it a habit to check the ATV before riding. * Oil level check 1. Start the engine and let it warm up for 2-3 minutes. For safety reason and to prevent malfunction and an Then turn off the ignition switch for 2-3 minutes. -
Page 43: Changing Oil
Changing Oil * 1. Place the ATV on a level surface. Oil filling cap 2.Start the engine and let it warm up for 2-3 minutes, and then turn off the ignition switch and remove the oil filling cap. 3. Remove the oil pan drain plug at the bottom of the engine. Turning clockwise the plug to tighten it, and turn counterclockwise to loosen it. -
Page 44: Recommended Oil Specification And Grade
Differential gear oil 4. Install the drain bolt, and then tighten it to the specified torque. The differential gear oil changed as follows at the intervals Tightening torque : differential gear oil drain bolt: specified in the periodic maintenance. 1.5kg-m Change the differential gear oil 5. -
Page 45: Recommended Oil Specification And Grade
Final gear oil 4. Install the drain bolt, and then tighten it to the specified torque. The final gear oil changed as follows at the intervals specified in Tightening torque : final gear oil drain bolt the periodic maintenance. 1.5kg-m 5. -
Page 46: Fuel Check And Refueling
Fuel Check and Refueling * Refuel Unleaded # 95 as early as possible * How to use the fuel cap: 1. First stop the engine 2. Turning the cap clockwise you can open the cap, while turning counterclockwise you can tighten the cap. 3. - Page 47 ■ Front and Rear Brake Fluid Level Check and * Brake fluid refilling Refilling 1. Position the handlebars in the middle. Remove two fixing * Brake fluid level check screws on the cover of the brake fluid reservoir, and then take 1.
- Page 48 Is Brake Performance Good? Brake Light Check Ride slowly to verify that the front and rear brake performance is * Turn the ignition switch to the “ON” position. good. * Pull both the front and rear brake handle levers to make sure that the brake light illuminates.
- Page 49 Headlight Beaming Distance Adjustment ■ ■ Headlight Check Headlight’s beaming distance is adjustable. How to adjust it: * Turn the ignition switch to “ “position. Turn on the ignition switch and also turn on the headlight switch. * Operate the headlight switch and check that the high beam or Then screw in or out the adjusting screw to adjust the beaming low beam illuminates.
-
Page 50: Tire Check
Tire Check * Is tire pressure OK? * If metal chips or small stones are found in tire grooves, remove * See the following table when checking tire pressure. them before riding. * If tire crack is found or tire wear exceeds the prescribed limit, immediately change the tire. -
Page 51: Front And Rear Shock Absorber Check
Front & Rear Shock Absorber Check ■ Front & Rear Shock Absorber Adjustment Put your weight on the handlebars and rear hand rest and shake them upward/downward to check that the shock absorbers are To ensure riding comfort, the spring pre-compression of rear shock absorber is adjustable. - Page 52 To refill coolant, normally do not open the radiator cap when the engine is still hot. 1. Park the ATV on a flat surface with stand. 2. Open the Aux Liquid Bottle and refill coolant until the level reaches the upper limit. FULL * If the coolant level drops significantly, it usually represents a problem in the system.
-
Page 53: Changing Coolant
Changing Coolant Notes: * Care should be taken when opening the radiator cap, as coolant may be very hot with high pressure. Steam may cause burn and hazards. Wait until the radiator cools down. Use a piece of cloth to cover the cap and slowly open it. Cover, Right Storage Box * In case that coolant drips on the painted surface, immediately rinse it with clean water. -
Page 54: Filling Coolant
Filling Coolant 1. Position the draining bolt and Aux Liquid Bottle in place. 2. First fill up the radiator and then the Aux Liquid Bottle until the coolant level reaches the upper limit. 3. Ensure that the radiator cap and Aux Liquid Bottle cap are firmly closed 4. -
Page 55: How To Replace The Air Cleaner
How to Replace the Air Cleaner ■ A dirty air cleaner is the major causes of engine power drop and Fixing clips high fuel consumption. The air cleaner for this model is a wet sponge type. Check and replace the air cleaner every three months. Air cleaner cover (How to replace it) 1. -
Page 56: Spark Plug Check
Spark Plug Check ■ Dirty pole or too wide a gap will cause incomplete sparking. <How to clean it> * Ideally, use a spark plug cleaner to clean it. * Or, use a needle brush to clean it. <Adjustment> NGK CR8E * The gap between two poles normally is 0.6-0.7 mm as shown in Figure A. -
Page 57: Checking The Wheel Bearings
■ Checking the wheel bearings ■ Lubricating the steering shaft The front and rear wheel bearings must be checked at the intervals specified in the periodic maintenance and lubrication The steering shafts must be lubricated at the intervals specified chart. If there is play in a wheel hub or if a wheel dose not turns in the periodic maintenance and lubrication chart. - Page 58 ■ Lubricating the knuckle shafts The knuckle shafts must be lubricated at the intervals specified in the periodic maintenance and lubrication chart. Lubricating Each Part of the ATV Axle boots Visually check that all parts that need lubrication are sufficiently The axle boots must be checked for damage at the intervals lubricated.
-
Page 59: Simple Maintenance
Notes: Ensure safety when serving the ATV: * Use suitable tools. Rear axle boots * Make preparation while the engine stops. * When the engine stops, the engine and exhaust pipe are still very hot. Care should be taken to avoid getting burnt. ■... -
Page 60: Regular Maintenance Table
Regular Maintenance Table ■ Emission control system, checklist for serving items and timetable: For riding safety, keeping performance, prolonging ATV life, and reducing exhaust emission, you should inspect those service items for routine maintenance. I: Inspect, and clean, lubricate, refill, adjust or replace if required A: Adjust C: Clean R: Replace T: Tighten Month 500 1000 1500... -
Page 61: Battery Electrolyte Check
Battery Electrolyte Check Battery stud terminal ■ 1. The battery for this model is a servicing-free type without need Remove the seat before cleaning the battery stud terminals. of refilling battery electrolyte. * If the stud terminal becomes corroded, remove the battery and clean it thoroughly. -
Page 62: Replacing The Fuse
Replacing the Fuse * To replace the battery (lamps), use only the original components Turn off the ignition switch and check if the fuse is blown. of the prescribed specification. When replacing the fuse, always get a fuse of the * If components are not original or out of specification, the fuse specified rating. -
Page 63: Consumer Information
Consumer information SERIAL NUMBER Location of Engine Serial Number Location of Frame Serial Number (Vehicle Identification Number) -
Page 64: When Failure Occurs
■ When Failure Occurs If The Engine Stops If ATV experiences a malfunction during use, please take it to a If the engine stops during riding, first check the following; * Is fuel available? dealer or service center for inspection. * The way to start the engine is correct * Any failure occurs on other part... -
Page 65: Specifications
Specifications MODEL DIMENSIONS BR400 4WD NAME BEAR 400 4WD Overall length 2060 mm(81.1 in) ENGINE Overall width 1215 mm(47.8 in) Type Liquid-cooled, 4 stroke, 4 valve Overall height 1210 mm(47.6 in) Cylinder Arrangement Single cylinder, vertical Displacement 359.3 c.c. Seat height 910 mm(35.8 in)
Need help?
Do you have a question about the BR400 4WD and is the answer not in the manual?
Questions and answers